Youpk 脱壳机脱壳原理分析
Youpk 是一个针对整体加固和Dex抽取加固壳的脱壳机
主要是基于虚拟机的,也就是基于VA的脱壳机, 相对FART出来的更晚一些, 厂商针对少一些, 脱壳位置相对更底层一些,还提供了Dex修复的工具,简直棒棒
1. 先分析整体脱壳的原理
在ActivityThread 的 handleBindApplication 中增加了代码
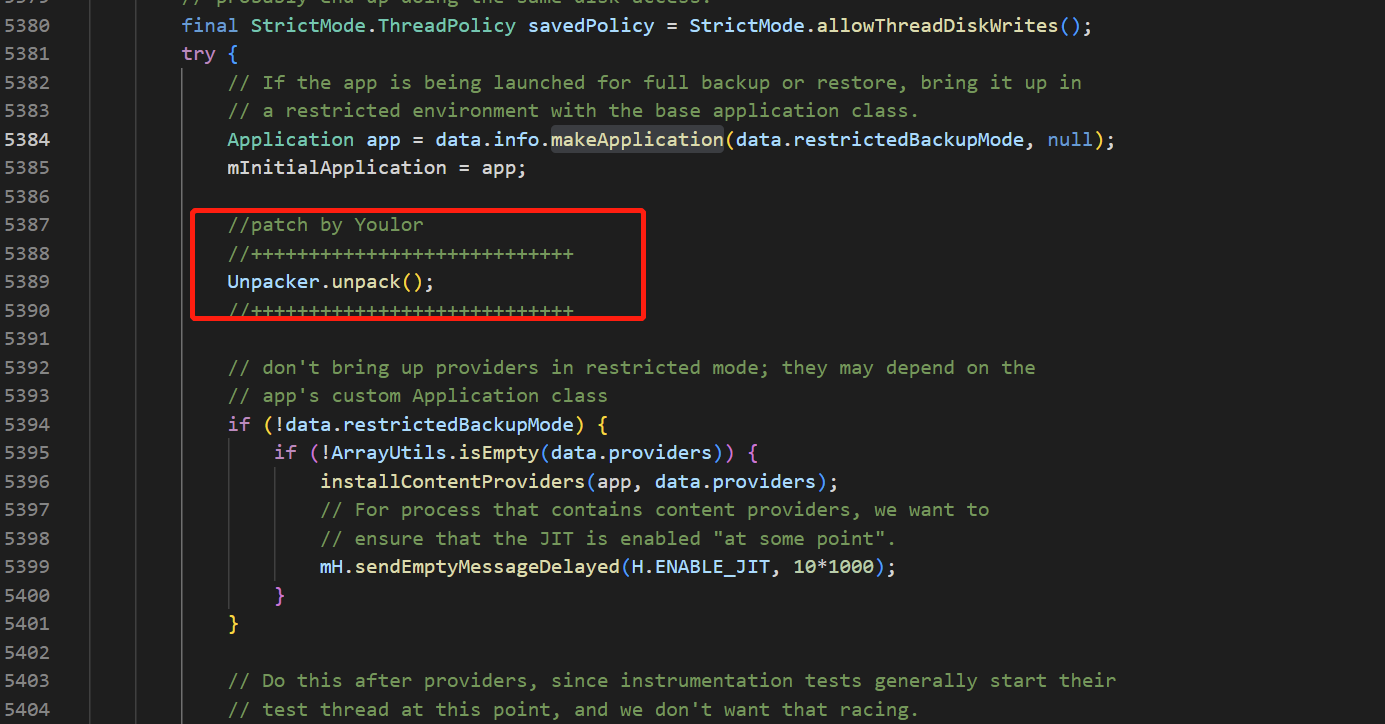
也就是说,在应用的启动流程中,在makeApplication后,就开始干活
Unpacker.java -> unpack
 public static void unpack() {

        if (Unpacker.unpackerThread != null) {

            return;

        }

        if (!shouldUnpack()) {

            return;

        }

        //开启线程调用

        Unpacker.unpackerThread = new Thread() {

            @Override public void run() {

                while (true) {

                    try {

                        Thread.sleep(UNPACK_INTERVAL);

                    }

                    catch (InterruptedException e) {

                        e.printStackTrace();

                    }

                    Unpacker.unpackNative();

                }

            }

        };

        Unpacker.unpackerThread.start();

    }
这里开启一个线程,每一段时间就执行一下native的unpackNative
对应的是unpacker.cc
//注册native方法

static void Unpacker_unpackNative(JNIEnv*, jclass) {

  Unpacker::unpack();

}

....

void Unpacker::unpack() {

  ScopedObjectAccess soa(Thread::Current());

  ULOGI("%s", "unpack begin!");

  //1. 初始化

  init();

  //2. dump所有dex

  dumpAllDexes();

  //3. 主动调用所有方法

  invokeAllMethods();

  //4. 还原

  fini();

  ULOGI("%s", "unpack end!");

}
init() 主要是初始化工作,比如建立dump的目录,寻找需要dump的dex
void Unpacker::init() {

  Unpacker_fake_invoke_ = false;

  Unpacker_self_ = Thread::Current();

  Unpacker_dump_dir_ = getDumpDir();

  mkdir(Unpacker_dump_dir_.c_str(), 0777);

  Unpacker_dex_dir_ = getDumpDir() + "/dex";

  mkdir(Unpacker_dex_dir_.c_str(), 0777);

  Unpacker_method_dir_ = getDumpDir() + "/method";

  mkdir(Unpacker_method_dir_.c_str(), 0777);

  Unpacker_json_path_ = getDumpDir() + "/unpacker.json";

  Unpacker_json_fd_ = -1;

  Unpacker_json_fd_ = open(Unpacker_json_path_.c_str(), O_RDWR | O_CREAT, 0777);

  if (Unpacker_json_fd_ == -1) {

    ULOGE("open %s error: %s", Unpacker_json_path_.c_str(), strerror(errno));

  }

  Unpacker_json_ = parseJson();

  if (Unpacker_json_ == nullptr) {

    Unpacker_json_ = createJson();

  }

  CHECK(Unpacker_json_ != nullptr);

  Unpacker_dex_files_ = getDexFiles();

  Unpacker_class_loader_ = getAppClassLoader();

}
Unpacker_dex_files_ 在这里进行了寻找和赋值的操作
std::list<const DexFile*> Unpacker::getDexFiles() {

  std::list<const DexFile*> dex_files;

  Thread* const self = Thread::Current();

  ClassLinker* class_linker = Runtime::Current()->GetClassLinker();

  ReaderMutexLock mu(self, *class_linker->DexLock());

  const std::list<ClassLinker::DexCacheData>& dex_caches = class_linker->GetDexCachesData();

  for (auto it = dex_caches.begin(); it != dex_caches.end(); ++it) {

    ClassLinker::DexCacheData data = *it;

    const DexFile* dex_file = data.dex_file;

    const std::string& dex_location = dex_file->GetLocation();

    if (dex_location.rfind("/system/", 0) == 0) {

      continue;

    }

    dex_files.push_back(dex_file);

  }

  return dex_files;

}
这里通过RunTime 拿到class_linker,然后通过classLinker来获得所有的Dex的指针(看得出作者对虚拟机有比较深的研究)
dumpAllDexes();就是我们整体dump的逻辑所在
void Unpacker::dumpAllDexes() {

  for (const DexFile* dex_file : Unpacker_dex_files_) {

    std::string dump_path = getDexDumpPath(dex_file);

    if (access(dump_path.c_str(), F_OK) != -1) {

      ULOGI("%s already dumped, ignored", dump_path.c_str());

      continue;

    }

    const uint8_t* begin = dex_file->Begin();

    size_t size = dex_file->Size();

    int fd = open(dump_path.c_str(), O_RDWR | O_CREAT, 0777);

    if (fd == -1) {

      ULOGE("open %s error: %s", dump_path.c_str(), strerror(errno));

      continue;

    }

    std::vector<uint8_t> data(size);

    memcpy(data.data(), "dex\n035", 8);

    memcpy(data.data() + 8, begin + 8, size - 8);

    size_t written_size = write(fd, data.data(), size);

    if (written_size < size) {

      ULOGW("fwrite %s %zu/%zu error: %s", dump_path.c_str(), written_size, size, strerror(errno));

    }

    close(fd);

    ULOGI("dump dex %s to %s successful!", dex_file->GetLocation().c_str(), dump_path.c_str());

  }

}
整体dump最终把数据写入到了.dex文件中(还做了一个dex文件前缀魔数修复)
2. 再看对抽取壳的处理
首先是构建主动调用链,来欺骗壳,使壳进行函数指令填充
对应的就是 unpack方法中的第三步
//3. 主动调用所有方法
invokeAllMethods();
注意标志的六种状态

  //dump类的六种status:

  //Ready: 该类准备dump

  //Resolved: ResolveClass成功

  //ResolveClassFailed: ResolveClass失败

  //Inited: EnsureInitialized成功

  //EnsureInitializedFailed: EnsureInitialized失败

  //Dumped: dump所有method成功
整体来说分两步,
一: 往unpacker.json里写每个方法的关键元数据
...

    if (dex == nullptr) {

      dex = cJSON_CreateObject();

      cJSON_AddStringToObject(dex, "location", dex_file->GetLocation().c_str());

      cJSON_AddStringToObject(dex, "dump_path", getDexDumpPath(dex_file).c_str());

      cJSON_AddNumberToObject(dex, "class_size", dex_file->NumClassDefs());

      current = cJSON_AddObjectToObject(dex, "current");

      cJSON_AddNumberToObject(current, "index", class_idx);

      cJSON_AddStringToObject(current, "descriptor", dex_file->GetClassDescriptor(dex_file->GetClassDef(class_idx)));

      cJSON_AddStringToObject(current, "status", "Ready");

      failures = cJSON_AddArrayToObject(dex, "failures");

      cJSON_AddItemToArray(dexes, dex);

    }

...
记录着dex的位置,dex整体dump下来的位置,有多少个class,class的id等等数据.方便后续codeitem.bin和整体dump的dex进行融合的操作
二: 构造参数发起主动调用
std::string Unpacker::getMethodDumpPath(ArtMethod* method) {

  CHECK(method->GetDeclaringClass() != nullptr) << method;

  const DexFile& dex_file = method->GetDeclaringClass()->GetDexFile();

  std::string dex_location = dex_file.GetLocation();

  size_t size = dex_file.Size();

  //替换windows文件不支持的字符

  for (size_t i = 0; i < dex_location.length(); i++) {

    if (dex_location[i] == '/' || dex_location[i] == ':') {

      dex_location[i] = '_';

    }

  }

  std::string dump_path = Unpacker_method_dir_ + "/" + dex_location;

  dump_path += StringPrintf("_%zu_codeitem.bin", size);

  return dump_path;

}
从这里可以看出,函数的元数据写入到unpacker.json,而函数的codeItem(即指令数据),写入到了xxx_codeitem.bin的文件中,方便后续函数修复使用
三 获得 classDef后发起对class所有方法的主动调用()
// 前面还有一步主动初始化,

...

      size_t pointer_size = class_linker->GetImagePointerSize();

      auto methods = klass->GetDeclaredMethods(pointer_size);

      Unpacker::enableFakeInvoke();

      for (auto& m : methods) {

        ArtMethod* method = &m;

        if (!method->IsProxyMethod() && method->IsInvokable()) {

          uint32_t args_size = (uint32_t)ArtMethod::NumArgRegisters(method->GetShorty());

          if (!method->IsStatic()) {

            args_size += 1;

          }

          JValue result;

          std::vector<uint32_t> args(args_size, 0);

          if (!method->IsStatic()) {

            mirror::Object* thiz = klass->AllocObject(self);

            args[0] = StackReference<mirror::Object>::FromMirrorPtr(thiz).AsVRegValue();

          }

		  // 重点这里

          method->Invoke(self, args.data(), args_size, &result, method->GetShorty());

        }

      }

      Unpacker::disableFakeInvoke();

      cJSON_ReplaceItemInObject(current, "status", cJSON_CreateString("Dumped"));

      writeJson();

...
四 发起invoke后,会走到java解释器中(youpk 强制走switch解释器), youpk修改了其中的一个宏
interpreter_switch_impl.cc
#define PREAMBLE()                                                                              \

  do {                                                                                          \

    inst_count++;                                                                               \

    bool dumped = Unpacker::beforeInstructionExecute(self, shadow_frame.GetMethod(),            \

                                                     dex_pc, inst_count);                       \

    if (dumped) {                                                                               \

      return JValue();                                                                          \

    }                                                                                           \

    if (UNLIKELY(instrumentation->HasDexPcListeners())) {                                       \

      instrumentation->DexPcMovedEvent(self, shadow_frame.GetThisObject(code_item->ins_size_),  \

                                       shadow_frame.GetMethod(), dex_pc);                       \

    }                                                                                           \

  } while (false)
这个宏在每个指令执行前都会调用,那么就一定会执行到 Unpacker::beforeInstructionExecute,在这里发起了对method的codeitem的dump操作
bool Unpacker::beforeInstructionExecute(Thread *self, ArtMethod *method, uint32_t dex_pc, int inst_count) {

  if (Unpacker::isFakeInvoke(self, method)) {

    const uint16_t* const insns = method->GetCodeItem()->insns_;

    const Instruction* inst = Instruction::At(insns + dex_pc);

    uint16_t inst_data = inst->Fetch16(0);

    Instruction::Code opcode = inst->Opcode(inst_data);

    //对于一般的方法抽取(非ijiami, najia), 直接在第一条指令处dump即可

    if (inst_count == 0 && opcode != Instruction::GOTO && opcode != Instruction::GOTO_16 && opcode != Instruction::GOTO_32) {

      Unpacker::dumpMethod(method);

      return true;

    }

    //ijiami, najia的特征为: goto: goto_decrypt; nop; ... ; return; const vx, n; invoke-static xxx; goto: goto_origin;

    else if (inst_count == 0 && opcode >= Instruction::GOTO && opcode <= Instruction::GOTO_32) {

      return false;

    } else if (inst_count == 1 && opcode >= Instruction::CONST_4 && opcode <= Instruction::CONST_WIDE_HIGH16) {

      return false;

    } else if (inst_count == 2 && (opcode == Instruction::INVOKE_STATIC || opcode == Instruction::INVOKE_STATIC_RANGE)) {

      //让这条指令真正的执行

      Unpacker::disableFakeInvoke();

      Unpacker::enableRealInvoke();

      return false;

    } else if (inst_count == 3) {

      if (opcode >= Instruction::GOTO && opcode <= Instruction::GOTO_32) {

        //写入时将第一条GOTO用nop填充

        const Instruction* inst_first = Instruction::At(insns);

        Instruction::Code first_opcode = inst_first->Opcode(inst->Fetch16(0));

        CHECK(first_opcode >= Instruction::GOTO && first_opcode <= Instruction::GOTO_32);

        ULOGD("found najia/ijiami %s", PrettyMethod(method).c_str());

        switch (first_opcode)

        {

        case Instruction::GOTO:

          Unpacker::dumpMethod(method, 2);

          break;

        case Instruction::GOTO_16:

          Unpacker::dumpMethod(method, 4);

          break;

        case Instruction::GOTO_32:

          Unpacker::dumpMethod(method, 8);

          break;

        default:

          break;

        }

      } else {

        Unpacker::dumpMethod(method);

      }

      return true;

    }

    Unpacker::dumpMethod(method);

    return true;

  }

  return false;

}
从这里可以看到,它即可一脱一般的抽取壳,也可以脱那种goto类型(ijiami, najia)的抽取壳,最终会走到
dumpMethod
void Unpacker::dumpMethod(ArtMethod *method, int nop_size) {

  std::string dump_path = Unpacker::getMethodDumpPath(method);

  int fd = -1;

  if (Unpacker_method_fds_.find(dump_path) != Unpacker_method_fds_.end()) {

    fd = Unpacker_method_fds_[dump_path];

  }

  else {

    fd = open(dump_path.c_str(), O_RDWR | O_CREAT | O_APPEND, 0777);

    if (fd == -1) {

      ULOGE("open %s error: %s", dump_path.c_str(), strerror(errno));

      return;

    }

    Unpacker_method_fds_[dump_path] = fd;

  }

  uint32_t index = method->GetDexMethodIndex();

  std::string str_name = PrettyMethod(method);

  const char* name = str_name.c_str();

  const DexFile::CodeItem* code_item = method->GetCodeItem();

  uint32_t code_item_size = (uint32_t)Unpacker::getCodeItemSize(method);

  size_t total_size = 4 + strlen(name) + 1 + 4 + code_item_size;

  std::vector<uint8_t> data(total_size);

  uint8_t* buf = data.data();

  memcpy(buf, &index, 4);

  buf += 4;

  memcpy(buf, name, strlen(name) + 1);

  buf += strlen(name) + 1;

  memcpy(buf, &code_item_size, 4);

  buf += 4;

  memcpy(buf, code_item, code_item_size);

  if (nop_size != 0) {

    memset(buf + offsetof(DexFile::CodeItem, insns_), 0, nop_size);

  }

  ssize_t written_size = write(fd, data.data(), total_size);

  if (written_size > (ssize_t)total_size) {

    ULOGW("write %s in %s %zd/%zu error: %s", PrettyMethod(method).c_str(), dump_path.c_str(), written_size, total_size, strerror(errno));

  }

}
这里就是把数据按照固定的格式把数据写入到.bin文件中
脱壳完成
3. dex修复
一 adb pull出dump文件, dump文件路径为 /data/data/包名/unpacker
adb pull /data/data/xxx.xxx.myxxxdemo/unpacker
二 调用修复工具 dexfixer.jar, 两个参数, 第一个为dump文件目录(必须为有效路径), 第二个为重组后的DEX目录(不存在将会创建)
youpk 比较爽的就是这里提供了修复的jar(还有源码),而fart的只是一个修复对比文件,未真正修复到dex中
java -jar dexfixer.jar /path/to/unpacker /path/to/output
完成dex的修复
Youpk 脱壳机脱壳原理分析的更多相关文章
- android脱壳之DexExtractor原理分析[zhuan]
http://www.cnblogs.com/jiaoxiake/p/6818786.html内容如下 导语: 上一篇我们分析android脱壳使用对dvmDexFileOpenPartial下断点的 ...
- android脱壳之DexExtractor原理分析
导语: 上一篇我们分析android脱壳使用对dvmDexFileOpenPartial下断点的原理,使用这种方法脱壳的有2个缺点: 1. 需要动态调试 2. 对抗反调试方案 为了提高工作效率, ...
- android黑科技系列——修改锁屏密码和恶意锁机样本原理分析
一.Android中加密算法 上一篇文章已经介绍了Android中系统锁屏密码算法原理,这里在来总结说一下: 第一种:输入密码算法 将输入的明文密码+设备的salt值,然后操作MD5和SHA1之后在转 ...
- DexHunter在Dalvik虚拟机模式下的脱壳原理分析
本文博客地址:http://blog.csdn.net/qq1084283172/article/details/78494671 在前面的博客<DexHunter的原理分析和使用说明(一)&g ...
- drizzleDumper的原理分析和使用说明
https://blog.csdn.net/qq1084283172/article/details/53561622 版权声明:本文为博主原创文章,未经博主允许不得转载. https://blog. ...
- android 脱壳 之 dvmDexFileOpenPartial断点脱壳原理分析
android 脱壳 之 dvmDexFileOpenPartial断点脱壳原理分析 导语: 笔者主要研究方向是网络通信协议的加密解密, 对应用程序加固脱壳技术很少研究, 脱壳壳经历更是经历少之甚少. ...
- Android FART脱壳机流程分析
本文首发于安全客 链接:https://www.anquanke.com/post/id/219094 0x1 前言 在Android平台上,程序员编写的Java代码最终将被编译成字节码在Androi ...
- DexHunter在ART虚拟机模式下的脱壳原理分析
本文博客地址: http://blog.csdn.net/qq1084283172/article/details/78494620 DexHunter脱壳工具在Dalvik虚拟机模式下的脱壳原理分析 ...
- APK加固之静态脱壳机编写入门
目录: 0x00APK加固简介与静态脱壳机的编写思路 1.大家都知道Android中的程序反编译比较简单,辛苦开发出一个APK轻易被人反编译了,所以现在就有很多APK加固的第三方平台,比如爱加密和梆梆 ...
- 菜鸟脱壳之脱壳的基础知识(二) ——DUMP的原理
菜鸟脱壳之脱壳的基础知识(二)——DUMP的原理当外壳的执行完毕后,会跳到原来的程序的入口点,即Entry Point,也可以称作OEP!当一般加密强度不是很大的壳,会在壳的末尾有一个大的跨段,跳向O ...
随机推荐
- [转帖]Linux cut命令
https://www.runoob.com/linux/linux-comm-cut.html#:~:text=Linux%20cut%E5%91%BD%E4%BB%A4%201%20-b%20%E ...
- [转帖]TiDB 整体架构
https://docs.pingcap.com/zh/tidb/stable/tidb-architecture 与传统的单机数据库相比,TiDB 具有以下优势: 纯分布式架构,拥有良好的扩展性,支 ...
- [转帖]TiDB 5.1 Write Stalls 应急文档
https://tidb.net/blog/ac7174dd#4.%E5%88%A4%E6%96%AD%E6%98%AF%E5%90%A6%E5%87%BA%E7%8E%B0%E4%BA%86%20w ...
- [转帖]一文读懂 K8s 持久化存储流程
https://zhuanlan.zhihu.com/p/128552232 作者 | 孙志恒(惠志) 阿里巴巴开发工程师 导读:众所周知,K8s 的持久化存储(Persistent Storage) ...
- [转帖]Jmeter学习笔记(二十一)——Concurrency Thread Group阶梯式加压测试
https://www.cnblogs.com/pachongshangdexuebi/p/11739064.html 一.先安装jmeter的插件管理工具 1.下载地址:jmeter-plugins ...
- [转帖]Windows自带硬盘测试工具使用教程
本教程主要讲解Windows自带的硬盘测试工具的使用,不用再安装第三方软件了.到底准不准就不知道啦,下面我们来看看如何使用吧~ 1. 进入cmd 快速进入cmd 主要如果进入后,使用命令直接闪退,就是 ...
- [转帖]03-rsync传输模式(本地传输、远程方式传输、守护进程模式传输)
https://developer.aliyun.com/article/885801?spm=a2c6h.24874632.expert-profile.282.7c46cfe9h5DxWK 简介: ...
- [转帖]UseG1GC垃圾回收技术解析
https://www.cnblogs.com/yuanzipeng/p/13374690.html 介绍 G1 GC,全称Garbage-First Garbage Collector,通过-XX: ...
- add_argument()方法基本参数使用
selenium做web自动化时我们想要通过get打开一个页面之前就设置好一些基本参数,需要 通过add_argument()方法来设置,下面以一个简单的不展示窗口为例. option = webdr ...
- 解锁前端新潜能:如何使用 Rust 锈化前端工具链
前言 近年来,Rust的受欢迎程度不断上升.首先,在操作系统领域,Rust 已成为 Linux 内核官方认可的开发语言之一,Windows 也宣布将使用 Rust 来重写内核,并重写部分驱动程序. ...