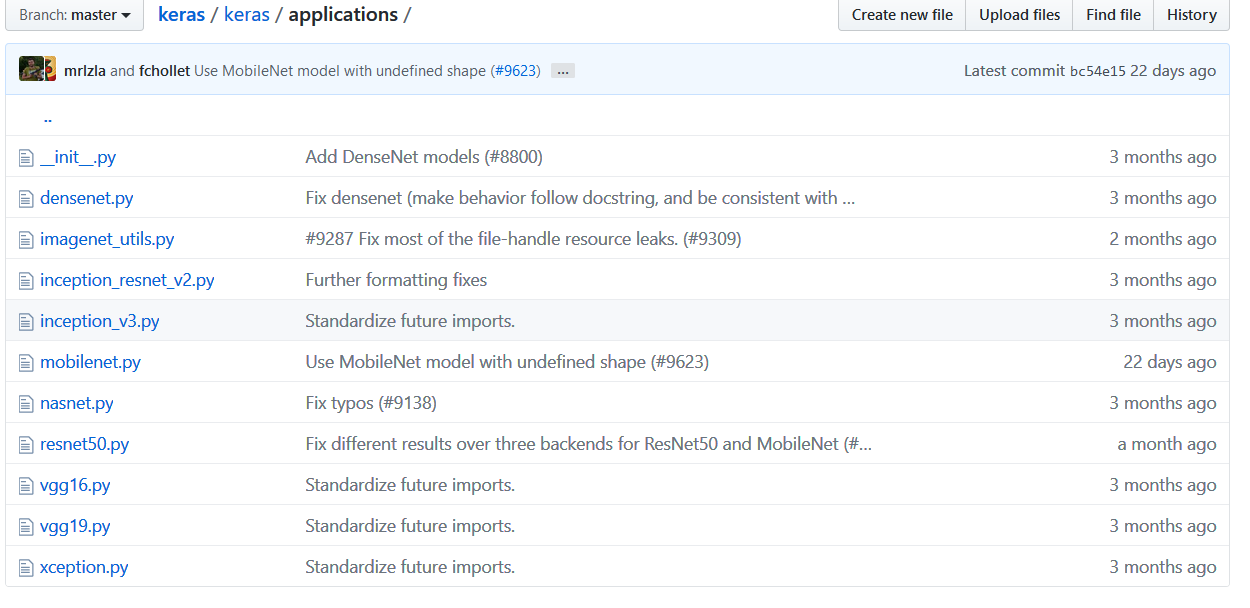
(5keras自带的模型之间的关系)自己动手,编写神经网络程序,解决Mnist问题,并网络化部署


from keras.applications.resnet50 import ResNet50
from keras.preprocessing import image
from keras.applications.resnet50 import preprocess_input, decode_predictions
import numpy as np
from keras.utils.data_utils import get_file
model = ResNet50(weights='imagenet')
path='1.jpg'
img_path = get_file(path,origin='http://pic.qiantucdn.com/58pic/26/23/18/58c959d01a57d_1024.jpg')
print(img_path)
img = image.load_img(img_path, target_size=(224, 224))
x = image.img_to_array(img)
x = np.expand_dims(x, axis=0)
x = preprocess_input(x)

preds = model.predict(x)
print('Predicted:', decode_predictions(preds, top=3)[0])
# Predicted: [(u'n02504013', u'Indian_elephant', 0.82658225), (u'n01871265', u'tusker', 0.1122357), (u'n02504458', u'African_elephant', 0.061040461)]

6、迁移学习

import numpy as np
from keras.datasets import mnist
import gc

from keras.models import Sequential, Model
from keras.layers import Input, Dense, Dropout, Flatten
from keras.layers.convolutional import Conv2D, MaxPooling2D
from keras.applications.vgg16 import VGG16
from keras.optimizers import SGD

import cv2
import h5py as h5py
import numpy as np
def tran_y(y):
    y_ohe = np.zeros(10)
    y_ohe[y] = 1
    return y_ohe

# 如果硬件配置较高,比如主机具备32GB以上内存,GPU具备8GB以上显存,可以适当增大这个值。VGG要求至少48像素
ishape=48
(X_train, y_train), (X_test, y_test) = mnist.load_data()

X_train = [cv2.cvtColor(cv2.resize(i, (ishape, ishape)), cv2.COLOR_GRAY2BGR) for i in X_train]
X_train = np.concatenate([arr[np.newaxis] for arr in X_train]).astype('float32')
X_train /= 255.0

X_test = [cv2.cvtColor(cv2.resize(i, (ishape, ishape)), cv2.COLOR_GRAY2BGR) for i in X_test]
X_test = np.concatenate([arr[np.newaxis] for arr in X_test]).astype('float32')
X_test /= 255.0

y_train_ohe = np.array([tran_y(y_train[i]) for i in range(len(y_train))])
y_test_ohe = np.array([tran_y(y_test[i]) for i in range(len(y_test))])
y_train_ohe = y_train_ohe.astype('float32')
y_test_ohe = y_test_ohe.astype('float32')

model_vgg = VGG16(include_top = False, weights = 'imagenet', input_shape = (ishape, ishape, 3))
#for i, layer in enumerate(model_vgg.layers):
#    if i<20:
for layer in model_vgg.layers:
        layer.trainable = False
model = Flatten()(model_vgg.output)
model = Dense(4096, activation='relu', name='fc1')(model)
model = Dense(4096, activation='relu', name='fc2')(model)
model = Dropout(0.5)(model)
model = Dense(10, activation = 'softmax', name='prediction')(model)
model_vgg_mnist_pretrain = Model(model_vgg.input, model, name = 'vgg16_pretrain')
model_vgg_mnist_pretrain.summary()
sgd = SGD(lr = 0.05, decay = 1e-5)
model_vgg_mnist_pretrain.compile(loss = 'categorical_crossentropy', optimizer = sgd, metrics = ['accuracy'])
model_vgg_mnist_pretrain.fit(X_train, y_train_ohe, validation_data = (X_test, y_test_ohe), epochs = 10, batch_size = 64)
#del(model_vgg_mnist_pretrain, model_vgg, model)
for i in range(100):
    gc.collect()_________________________________________________________________
from keras.datasets import mnist
import gc

from keras.models import Sequential, Model
from keras.layers import Input, Dense, Dropout, Flatten
from keras.layers.convolutional import Conv2D, MaxPooling2D
from keras.applications.vgg16 import VGG16
from keras.optimizers import SGD
import matplotlib.pyplot as plt
import os

import cv2
import h5py as h5py
import numpy as np
def tran_y(y):
    y_ohe = np.zeros(10)
    y_ohe[y] = 1
    return y_ohe

# 如果硬件配置较高,比如主机具备32GB以上内存,GPU具备8GB以上显存,可以适当增大这个值。VGG要求至少48像素
ishape=48
(X_train, y_train), (X_test, y_test) = mnist.load_data()

X_train = [cv2.cvtColor(cv2.resize(i, (ishape, ishape)), cv2.COLOR_GRAY2BGR) for i in X_train]
X_train = np.concatenate([arr[np.newaxis] for arr in X_train]).astype('float32')
X_train /= 255.0

X_test = [cv2.cvtColor(cv2.resize(i, (ishape, ishape)), cv2.COLOR_GRAY2BGR) for i in X_test]
X_test = np.concatenate([arr[np.newaxis] for arr in X_test]).astype('float32')
X_test /= 255.0

y_train_ohe = np.array([tran_y(y_train[i]) for i in range(len(y_train))])
y_test_ohe = np.array([tran_y(y_test[i]) for i in range(len(y_test))])
y_train_ohe = y_train_ohe.astype('float32')
y_test_ohe = y_test_ohe.astype('float32')

model_vgg = VGG16(include_top = False, weights = 'imagenet', input_shape = (ishape, ishape, 3))
for layer in model_vgg.layers:
        layer.trainable = False
model = Flatten()(model_vgg.output)
model = Dense(4096, activation='relu', name='fc1')(model)
model = Dense(4096, activation='relu', name='fc2')(model)
model = Dropout(0.5)(model)
model = Dense(10, activation = 'softmax', name='prediction')(model)
model_vgg_mnist_pretrain = Model(model_vgg.input, model, name = 'vgg16_pretrain')
model_vgg_mnist_pretrain.summary()
sgd = SGD(lr = 0.05, decay = 1e-5)
model_vgg_mnist_pretrain.compile(loss = 'categorical_crossentropy', optimizer = sgd, metrics = ['accuracy'])
log  = model_vgg_mnist_pretrain.fit(X_train, y_train_ohe, validation_data = (X_test, y_test_ohe), epochs = 10, batch_size = 64)

score = model_vgg_mnist_pretrain.evaluate(x_test, y_test, verbose=0)
print('Test loss:', score[0])
print('Test accuracy:', score[1])

plt.figure('acc')
plt.subplot(2, 1, 1)
plt.plot(log.history['acc'],'r--',label='Training Accuracy')
plt.plot(log.history['val_acc'],'r-',label='Validation Accuracy')
plt.legend(loc='best')
plt.xlabel('Epochs')
plt.axis([0, epochs, 0.9, 1])
plt.figure('loss')
plt.subplot(2, 1, 2)
plt.plot(log.history['loss'],'b--',label='Training Loss')
plt.plot(log.history['val_loss'],'b-',label='Validation Loss')
plt.legend(loc='best')
plt.xlabel('Epochs')
plt.axis([0, epochs, 0, 1])

plt.show()
os.system("pause")


(5keras自带的模型之间的关系)自己动手,编写神经网络程序,解决Mnist问题,并网络化部署的更多相关文章
- jeecms系统使用介绍——jeecms中的内容、栏目、模型之间的关系
转载:https://blog.csdn.net/dongdong9223/article/details/76578120 jeecms是一款很不错的cms产品,之前在文章<基于Java的门户 ...
- mysql中相关,无关子查询,表与表之间的关系以及编码和乱码的解决
※MySQL中的字符编码(注意,utf8中没有'-',跟Java中不一样)SHOW VARIABLES; //查看系统变量//查询字符编码相关的系统变量SHOW VARIABLES WHERE var ...
- flask 模型之间的关系 操作注意点
在创建模型时使用 # 关联表与表 添加以下参数 lazy='dynamic' 在两个表之间使用关联字段可以再次进行操作,筛选,分页 具体操作请看 https://www.bilibili.com/ ...
- Window系统、主函数和窗体函数这三者之间的关系
理解Window系统.主窗体.窗体函数这三者之间的关系,对于编写Windows程序十分重要. 主函数和窗体函数都是由Windows系统来调用的函数.仅仅只是主函数是程序启动之后.系统首先调用的函数: ...
- atitit.基于组件的事件为基础的编程模型--服务器端控件(1)---------服务器端控件和标签之间的关系
atitit.基于组件的事件为基础的编程模型--服务器端控件(1)---------服务器端控件和标签之间的关系 1. server控件是要server了解了标签.种类型的server控件: 1 1. ...
- 举例说明EF CORE中模型之间的一对多、多对多关系的实现
该例子是我临时想出来的,不具有任何的实际意义.类图如图1所示. 图1 类代码: [Table("student")] public class Student { public i ...
- java内存模型及内存与cpu之间的关系
主内存和cpu之间的关系,因为cpu是在是处理速度太快了.所以一般cpu都有一个cpu缓存,上图的意思是主内存--->cpu缓存--->cpu寄存器--->cpu执行处理,写的时候反 ...
- 类与类之间的关系UML模型图
关联.依赖.聚合.组合.泛化.实现 类之间可能存在以下几种关系:关联(association).依赖(dependency).聚合(Aggregation,也有的称聚集).组合(Composition ...
- UML类图及类与类之间的关系
原文地址:http://www.uml.org.cn/oobject/201211231.asp 类图用于描述系统中所包含的类以及它们之间的相互关系,帮助人们简化对系统的理解,它是系统分析和设计阶段的 ...
随机推荐
- 题外话:Lua脚本语言存在的意义
纯属个人见解. 大致来说:c/c++执行效率高,游戏中一些性能敏感的复杂计算需要用c/c++来实现,防止游戏卡顿和低帧率.这些复杂计算包括战斗逻辑,复杂AI,骨骼动画蒙皮骨骼点的坐标计算等等.但c++ ...
- sqli-labs(八)——修改密码处sql注入+http头sql注入
第17关: 这是一个重置密码的功能存在sqk注入,尝试账号密码都输入'",发现只会显示登陆失败,没有报错信息. 这个时候先推测一下后台的sql形式大概应该是: update users se ...
- mysql----------阿里云RDS导入导出
1.这是阿里云rds如何将导出的物理备份文件,导入到自建库里面: https://help.aliyun.com/knowledge_detail/5973700.html?spm=5176.7766 ...
- ReentrantLock源码(一)
一.简介. ReentrantLock 是一个互斥锁,在基本行为和机制上与synchonized一样,只不过synchonized用方法和声明访问了隐式的锁监视器,但是ReentrantLock 做了 ...
- <<attention is all you need>>速读笔记
背景 在seq2seq中,一般是有一个encoder 一个decoder ,一般是rnn/cnn 但是rnn 计算缓慢,所以提出了纯用注意力机制来实现编码解码. 模型结构 大部分神经序列转导模型都有一 ...
- IE浏览器解决无法识别js中getElementsByClassName问题
关于ie浏览器无法识别js中getElementsByClassName问题,现通过以下方法,引用如下js /** *打印js对象详细信息 */ function alertObj(obj) { va ...
- Python全栈-day10-函数2
函数高级篇 1.函数嵌套 1)嵌套定义 在函数内定义另外一个函数 def func(): print('嵌套定义') def func1(): print('这是一个嵌套函数') def func2( ...
- python -- 判断给定的参数是否是地理位置的经度和纬度
例子: coordinates = "2.3,-8ui" 无效地理位置 coordinates = "2.3,-8i" 有效地理位置 方法一:使用try...e ...
- Gambler Bo (高斯消元求特解)
对于图中的每一个点假设点击Xi * m + j 然后每个点都有那么对于每一个点可以列举出一个方程式,n*m个点解n*m个未知数.利用高斯消元就可以解决. 问题就在这个题目可能不止有一个特,所以我们需要 ...
- mysql的指令
mysql有一下几方面的特性: 1:多语言支持 2:可以移植性好 3:免费开源 4:高效(支持多线程,充分利用cpu资源,运行速度非常) 5:支持大量数据查询和储存 6:操作简单易于学习 其实数据库就 ...