windows下搭建svn服务器
转自:http://www.cnblogs.com/cloud2rain/archive/2013/04/11/3015080.html
这篇文档非常好,转来学习,有一点就是把subversion创建成服务的时候在等号和值之间要有空格,如:
sc create svnserve binPath= "D:\Program Files\Subversion\bin\svnserve.exe --service -r E:\svnroot" DisplayName= "Subversion" depend= Tcpip start= auto
还有就是编辑svnserve.conf这个配置文件,把前面的“#”号去掉时不要在配置前面留有空格
1、从官网下载svn服务端和客户端;
服务端:http://sourceforge.net/projects/win32svn/files/latest/download
客户端:http://tortoisesvn.net/downloads.html
2、安装服务端和客户端,安装客户端后要求重启;
3、建立版本库(repository)
方法一:命令行方式
首先,在E盘下建立svnroot文件夹,
然后,打开命令窗口,键入
svnadmin create E:\svnroot\repository
这样就会在E:\svnroot目录下创建repository文件夹,并在repository文件夹下生成相应文件。(注意不能递归创建,E:\svnroot必须事先建立好)
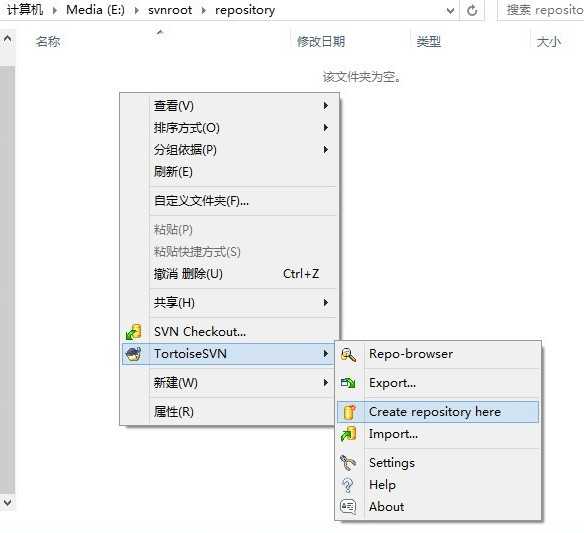
方法二:图形化方式
仍然新建E:\svnroot\repository文件夹,这里repository文件夹必须是空的。
进入repository文件夹,右键选择TortoiseSVN->Create repository here,如下图
两种方式都可以创建版本库,结果像下面这样:
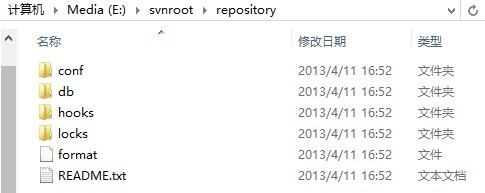
4、修改配置文件
在E:\svnroot\repository\conf下,会看到有authz、passwd和svnserve.conf三个文件,这里我们会修改svnserve.conf和passwd这两个配置文件。
对svnserve.conf修改如下:

### This file controls the configuration of the svnserve daemon, if you

### use it to allow access to this repository.  (If you only allow

### access through http: and/or file: URLs, then this file is

### irrelevant.)

### Visit http://subversion.apache.org/ for more information.

[general]

### The anon-access and auth-access options control access to the

### repository for unauthenticated (a.k.a. anonymous) users and

### authenticated users, respectively.

### Valid values are "write", "read", and "none".

### Setting the value to "none" prohibits both reading and writing;

### "read" allows read-only access, and "write" allows complete

### read/write access to the repository.

### The sample settings below are the defaults and specify that anonymous

### users have read-only access to the repository, while authenticated

### users have read and write access to the repository.

anon-access = read

auth-access = write

### The password-db option controls the location of the password

### database file.  Unless you specify a path starting with a /,

### the file's location is relative to the directory containing

### this configuration file.

### If SASL is enabled (see below), this file will NOT be used.

### Uncomment the line below to use the default password file.

password-db = passwd

### The authz-db option controls the location of the authorization

### rules for path-based access control.  Unless you specify a path

### starting with a /, the file's location is relative to the the

### directory containing this file.  If you don't specify an

### authz-db, no path-based access control is done.

### Uncomment the line below to use the default authorization file.

# authz-db = authz

### This option specifies the authentication realm of the repository.

### If two repositories have the same authentication realm, they should

### have the same password database, and vice versa.  The default realm

### is repository's uuid.

# realm = My First Repository

### The force-username-case option causes svnserve to case-normalize

### usernames before comparing them against the authorization rules in the

### authz-db file configured above.  Valid values are "upper" (to upper-

### case the usernames), "lower" (to lowercase the usernames), and

### "none" (to compare usernames as-is without case conversion, which

### is the default behavior).

# force-username-case = none

[sasl]

### This option specifies whether you want to use the Cyrus SASL

### library for authentication. Default is false.

### This section will be ignored if svnserve is not built with Cyrus

### SASL support; to check, run 'svnserve --version' and look for a line

### reading 'Cyrus SASL authentication is available.'

# use-sasl = true

### These options specify the desired strength of the security layer

### that you want SASL to provide. 0 means no encryption, 1 means

### integrity-checking only, values larger than 1 are correlated

### to the effective key length for encryption (e.g. 128 means 128-bit

### encryption). The values below are the defaults.

# min-encryption = 0

# max-encryption = 256
即使anon-access = read、auth-access = write和password-db = passwd生效,注意不要取消authz-db = authz的注释,否则后面会认证失败。
各字段的含义注释里面有详细说明。
对passwd修改如下:
### This file is an example password file for svnserve.

### Its format is similar to that of svnserve.conf. As shown in the

### example below it contains one section labelled [users].

### The name and password for each user follow, one account per line.

[users]

# harry = harryssecret

# sally = sallyssecret

jack = jack
这里我们添加了一个用户jack,密码是jack。格式是user = passwd,每个账号一行。
5、启动subversion服务
方法一、命令行启动
在命令行键入
svnserve -d -r E:\svnroot\repository
-d/--daemon:以守护进程的方式运行
-r/--root:设置svn://localhost,这里svn://localhost为E:\svnroot\repository
默认端口是3690,如果这个端口号已经被占用,则可以通过选项 --listen-port=端口号来设置。
方法二、windows服务启动
安装程序还不能把自己安装成windows服务,需要自己进行手动安装,方法如下: 打开命令窗口,执行如下命令:
sc create svnserve binPath="F:\Develop\Subversion\bin\svnserve.exe --service -r e:\svnroot\repository" displayname="Subversion" depend=Tcpip start=auto
执行成功的话,会显示
[SC] CreateService 成功
命令中各参数的解释:
- sc是windows自带的服务配置程序,
- 参数binPath表示svnserve可执行文件的安装路径,如果安装路径含有空格,请进行转义,如
binPath="\"F:\Program Files\Subversion\bin\svnserve.exe\" --service -r d:\svnroot\repository"
- --service参数表示以windows服务的形式运行,
- -r/--root指明svn repository的位置,service参数与root参数都作为binPath的一部分,因此与svnserve.exe的路径一起被包含在一对双引号当中,而这对双引号不需要进行转义。
- displayname表示在windows服务列表中显示的名字
- depend=Tcpip 表示svnserve服务的运行需要tcpip服务
- start=auto表示开机后自动运行
- 若要卸载svn服务,则执行 sc delete svnserve 即可
Win+R,键入services.msc回车,会看到刚刚创建的服务Subversion:
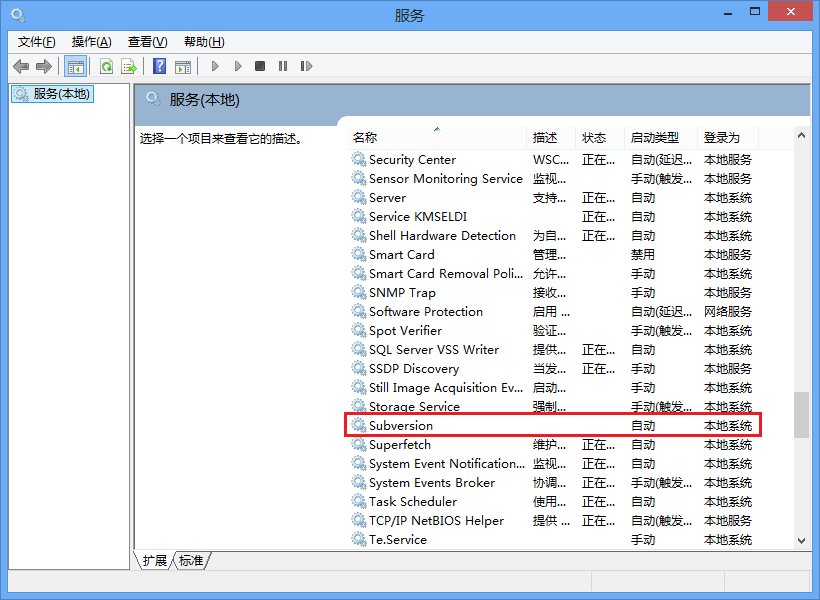
安装服务后,svnserve要等下次开机时才会自动运行,当然我们也可以现在手动启动此服务。
6、初始化导入项目
(1)选择需要导入的项目
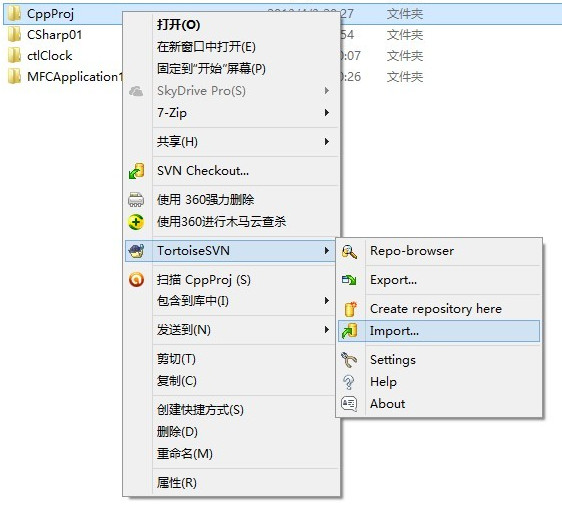
(2)插入URL和message
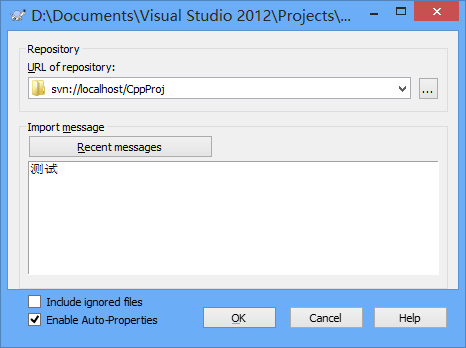
需要注意的是,这一步操作可以完全在另一台安装了TortoiseSVN的主机上进行。例如运行svnserve的主机的IP是133.96.121.22,则URL部分输入的内容就是“svn://133.96.121.22/”。
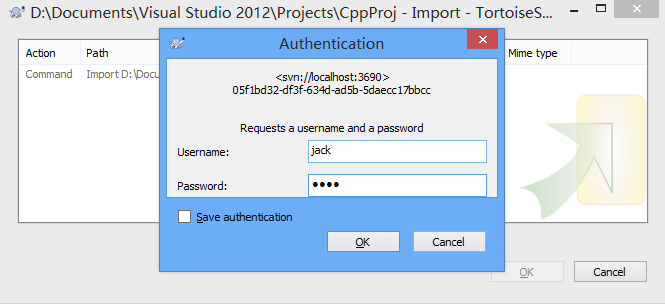
(3)键入用户名和密码
(4)成功导入文件
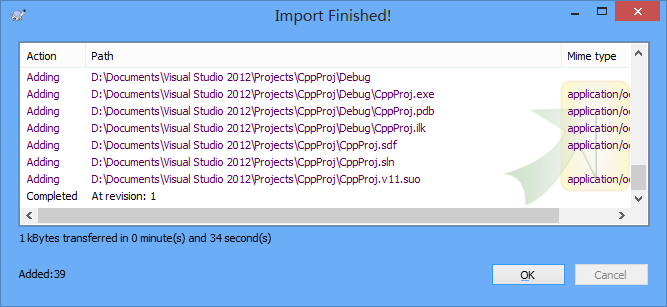
至此我们基本完成了svn服务端的安装、配置、启、导入项目等一系列操作。下面介绍一些基本操作。
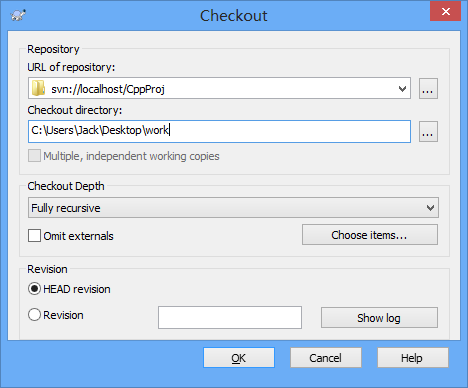
1、取出(check out)
取出版本库到一个工作拷贝:
任意建立一个空文件夹如work,右键->SVN Checkout,在“URL of repository”中输入“svn://localhost/CppProj”,这样我们就得到了一份 CppProj中内容的工作拷贝。
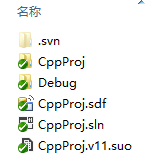
现在work文件夹图标如下,可以发现左下角多了个对勾。

work文件夹内容如下,可以发现是CppProj工程的内容。
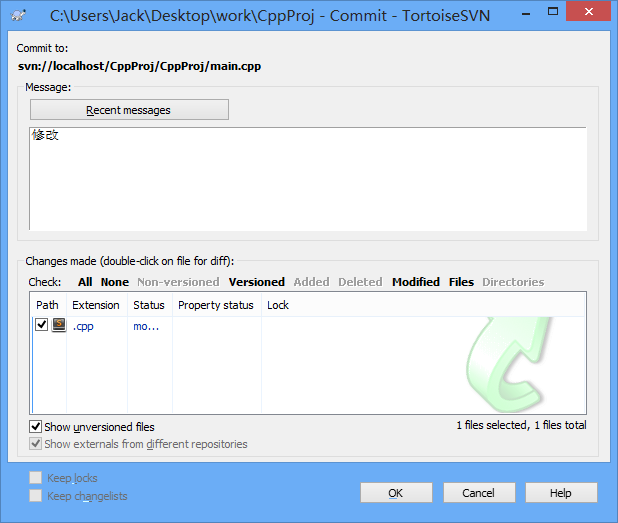
2、存入(check in)/提交(commit)
在工作拷贝中作出修改并提交:
文件一旦被修改,则在图标左下角会有一个修改标志,如下途中main.cpp:
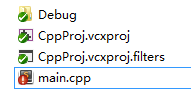
此时“右键 -> SVN Commit... ”,我们就把修改提交到了版本库,版本库根据情况存储我们提交的数据。
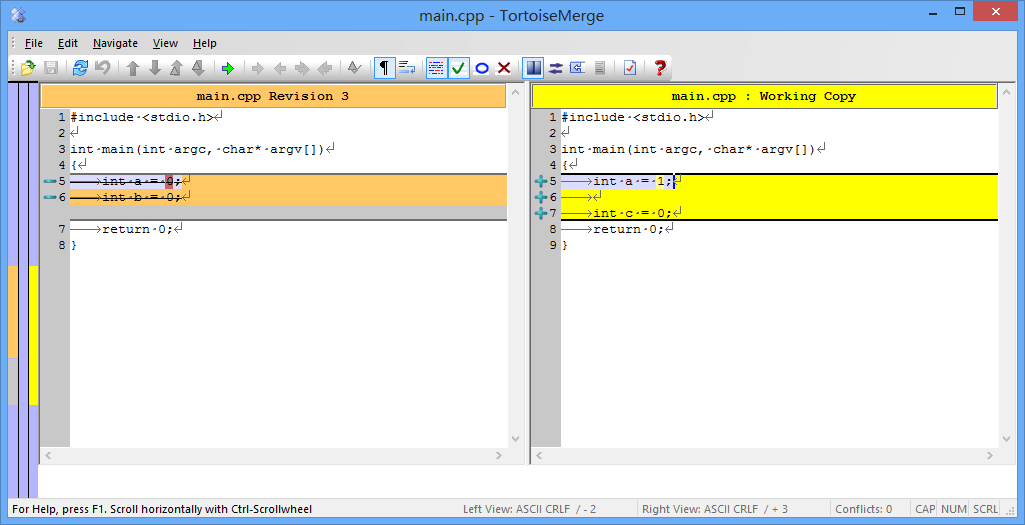
在修改过的文件上“右键 -> TortoiseSVN -> Show Log” ,可以看到对这个文件所有的提交。
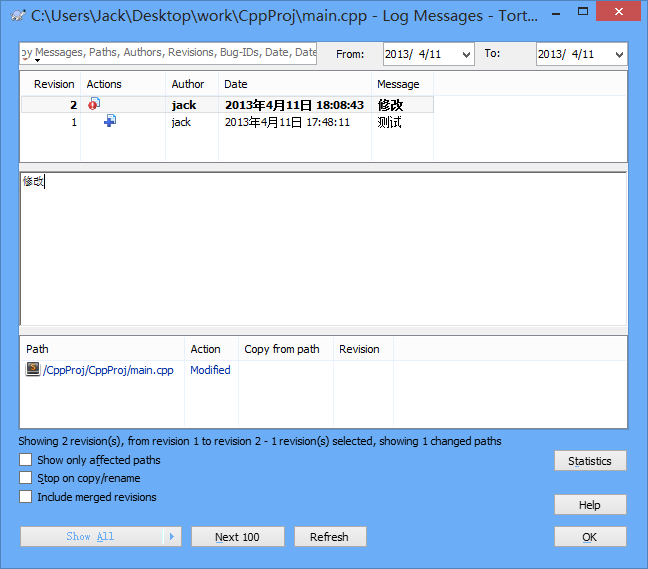
在不同的 revision 条目上“右键 -> Compare with working copy”,我们可以比较工作拷贝的文件和所选 revision 版本的区别。
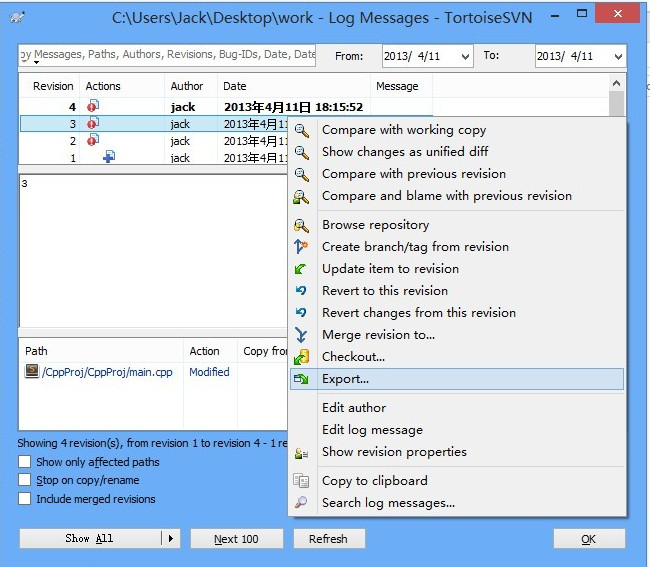
此时,我们在work文件夹上“右键 -> TortoiseSVN -> Show Log”,选择一个revision,就可以导出之前的版本
ref:
http://sjsky.iteye.com/blog/850804
windows下搭建svn服务器的更多相关文章
- [源码管理] Windows下搭建SVN服务器
前文所述SVN客户端使用的时候,用的SVN服务器通常为外部,例如Google Code的服务器,不过,做为一个程序开发人员,就算自己一个人写程序,也应该有一个SVN版本控制系统,以便对开发代码进行有效 ...
- Windows 下搭建 SVN服务器及使用
目录 一 .安装Visual SVN 二.配置SVN 三.安装TortoiseSVN 四.上传项目到远程仓库 五.从远程仓库下载项目 六.检出项目 七.版本回退 参考链接 http://blog.cs ...
- Windows 下搭建 SVN服务器
目录 一 .安装Visual SVN 二.配置SVN 三.安装TortoiseSVN 四.上传项目到远程仓库 五.从远程仓库下载项目 六.检出项目 七.版本回退 参考链接 https://blog ...
- windows下搭建svn服务器及权限配置
服务器端VISUALSVN SERVER 3.3.1 下载地址 https://www.visualsvn.com/server/download/ 客户端TortoiseSVN 1.8.13下载地址 ...
- 详解虚拟机(windows)下搭建SVN服务器
安装前的准备 1.虚拟机的用户名最好是英文 2.严格按照步骤做,否则有可能不成功 3.如果安装失败,在虚拟机下的控制板完全下载VisualSVN-Server-2.7.7,重新安装 软件下载地址: h ...
- Windows和Linux环境下搭建SVN服务器
--------------------------Windows下搭建SVN服务器----------------------------- 一.安装SVN服务端 软件包Setup-Subversi ...
- Ubuntu 14.04 下搭建SVN服务器 svn://
Ubuntu 14.04 下搭建SVN服务器 svn:// 安装软件包: sudo apt-get install subversion 之后选择SVN服务文件及配置文件的放置位置.我放在了/srv下 ...
- Winxp下搭建SVN服务器
本文介绍一种在winxp下搭建SVN服务器的方法. (1) 需要下载Slik-Subversion和TortoiseSVN两个软件.我使用的版本是Slik-Subversion-1.8.3-1-win ...
- windows下搭建nginx-rtmp服务器
windows下搭建nginx-rtmp服务器 windows下搭建nginx-rtmp服务器 准备工作 安装MinGW 安装Mercurial 安装strawberryperl 安装nasm 下载n ...
随机推荐
- linux常见的编码转换
1.如何界定是utf-8编码还是其他如 ANSI 或者gb2312编码 以“浙”这个汉字为例,用16进制编码查看时,显示 D5 E3 为2个字节,则为 ansi或者gb2312编码 "苏&q ...
- js动态生成下拉列表
经常需要用到js动态生成下拉列表的功能,记录下来备用. 示例需求:通过ajax请求,从后台获取用户姓名列表,并添加到下拉列表中.js代码如下: function getNameList(){ //如果 ...
- php + ajax实现 帖子点赞功能
知识: 一.首先页面需要加载jquery框架 二.ajax常用参数解释: ①.type:传输数据方式,get或者post ②.url:处理数据的PHP脚本 ③.data:传输的数据索引及值,值用js获 ...
- node.js开发hello world
在你的 D 盘下面创建一个 server.js,写入以下内容 ---------------------------------------------------- var http = requi ...
- BZOJ 1036 [ZJOI2008]树的统计Count | 树链剖分模板
原题链接 树链剖分的模板题:在点带权树树上维护路径和,最大值和单点修改 这里给出几个定义 以任意点为根,然后记 size (u ) 为以 u 为根的子树的结点个数,令 v 为 u 所有儿子中 size ...
- sass mixin 持续更新
控制多行显示省略号... //文字溢出省略号@mixin coveText($num:1){ @if $num == 1{ white-space: normal; overflow: hidden; ...
- Eclipse 日文乱码怎么解决Shift_JIS
https://jingyan.baidu.com/article/870c6fc325a691b03fe4beac.html Eclipse设置编码的地方主要有三处,这三处的设置都会影响中文的显示. ...
- Codeforces Round #356 (Div. 2) C
C. Bear and Prime 100 time limit per test 1 second memory limit per test 256 megabytes input standar ...
- spring in action 学习笔记四:bean的生命周期
bean 的生命周期分为:一个是ApplicationContext的容器的bean的生命周期,另一个是BeanFactory容器的生命周期. 首先介绍一下:ApplicationContext的容器 ...
- xmlSerializer属性的使用
学习了XmlAttribute,XmlElement属性的定义和使用. Order类定义 using System; using System.Collections.Generic; using S ...