(二)Redis在Mac下的安装与SpringBoot中的配置
1 下载Redis
- 官网下载,下载 stable 版本,稳定版本。
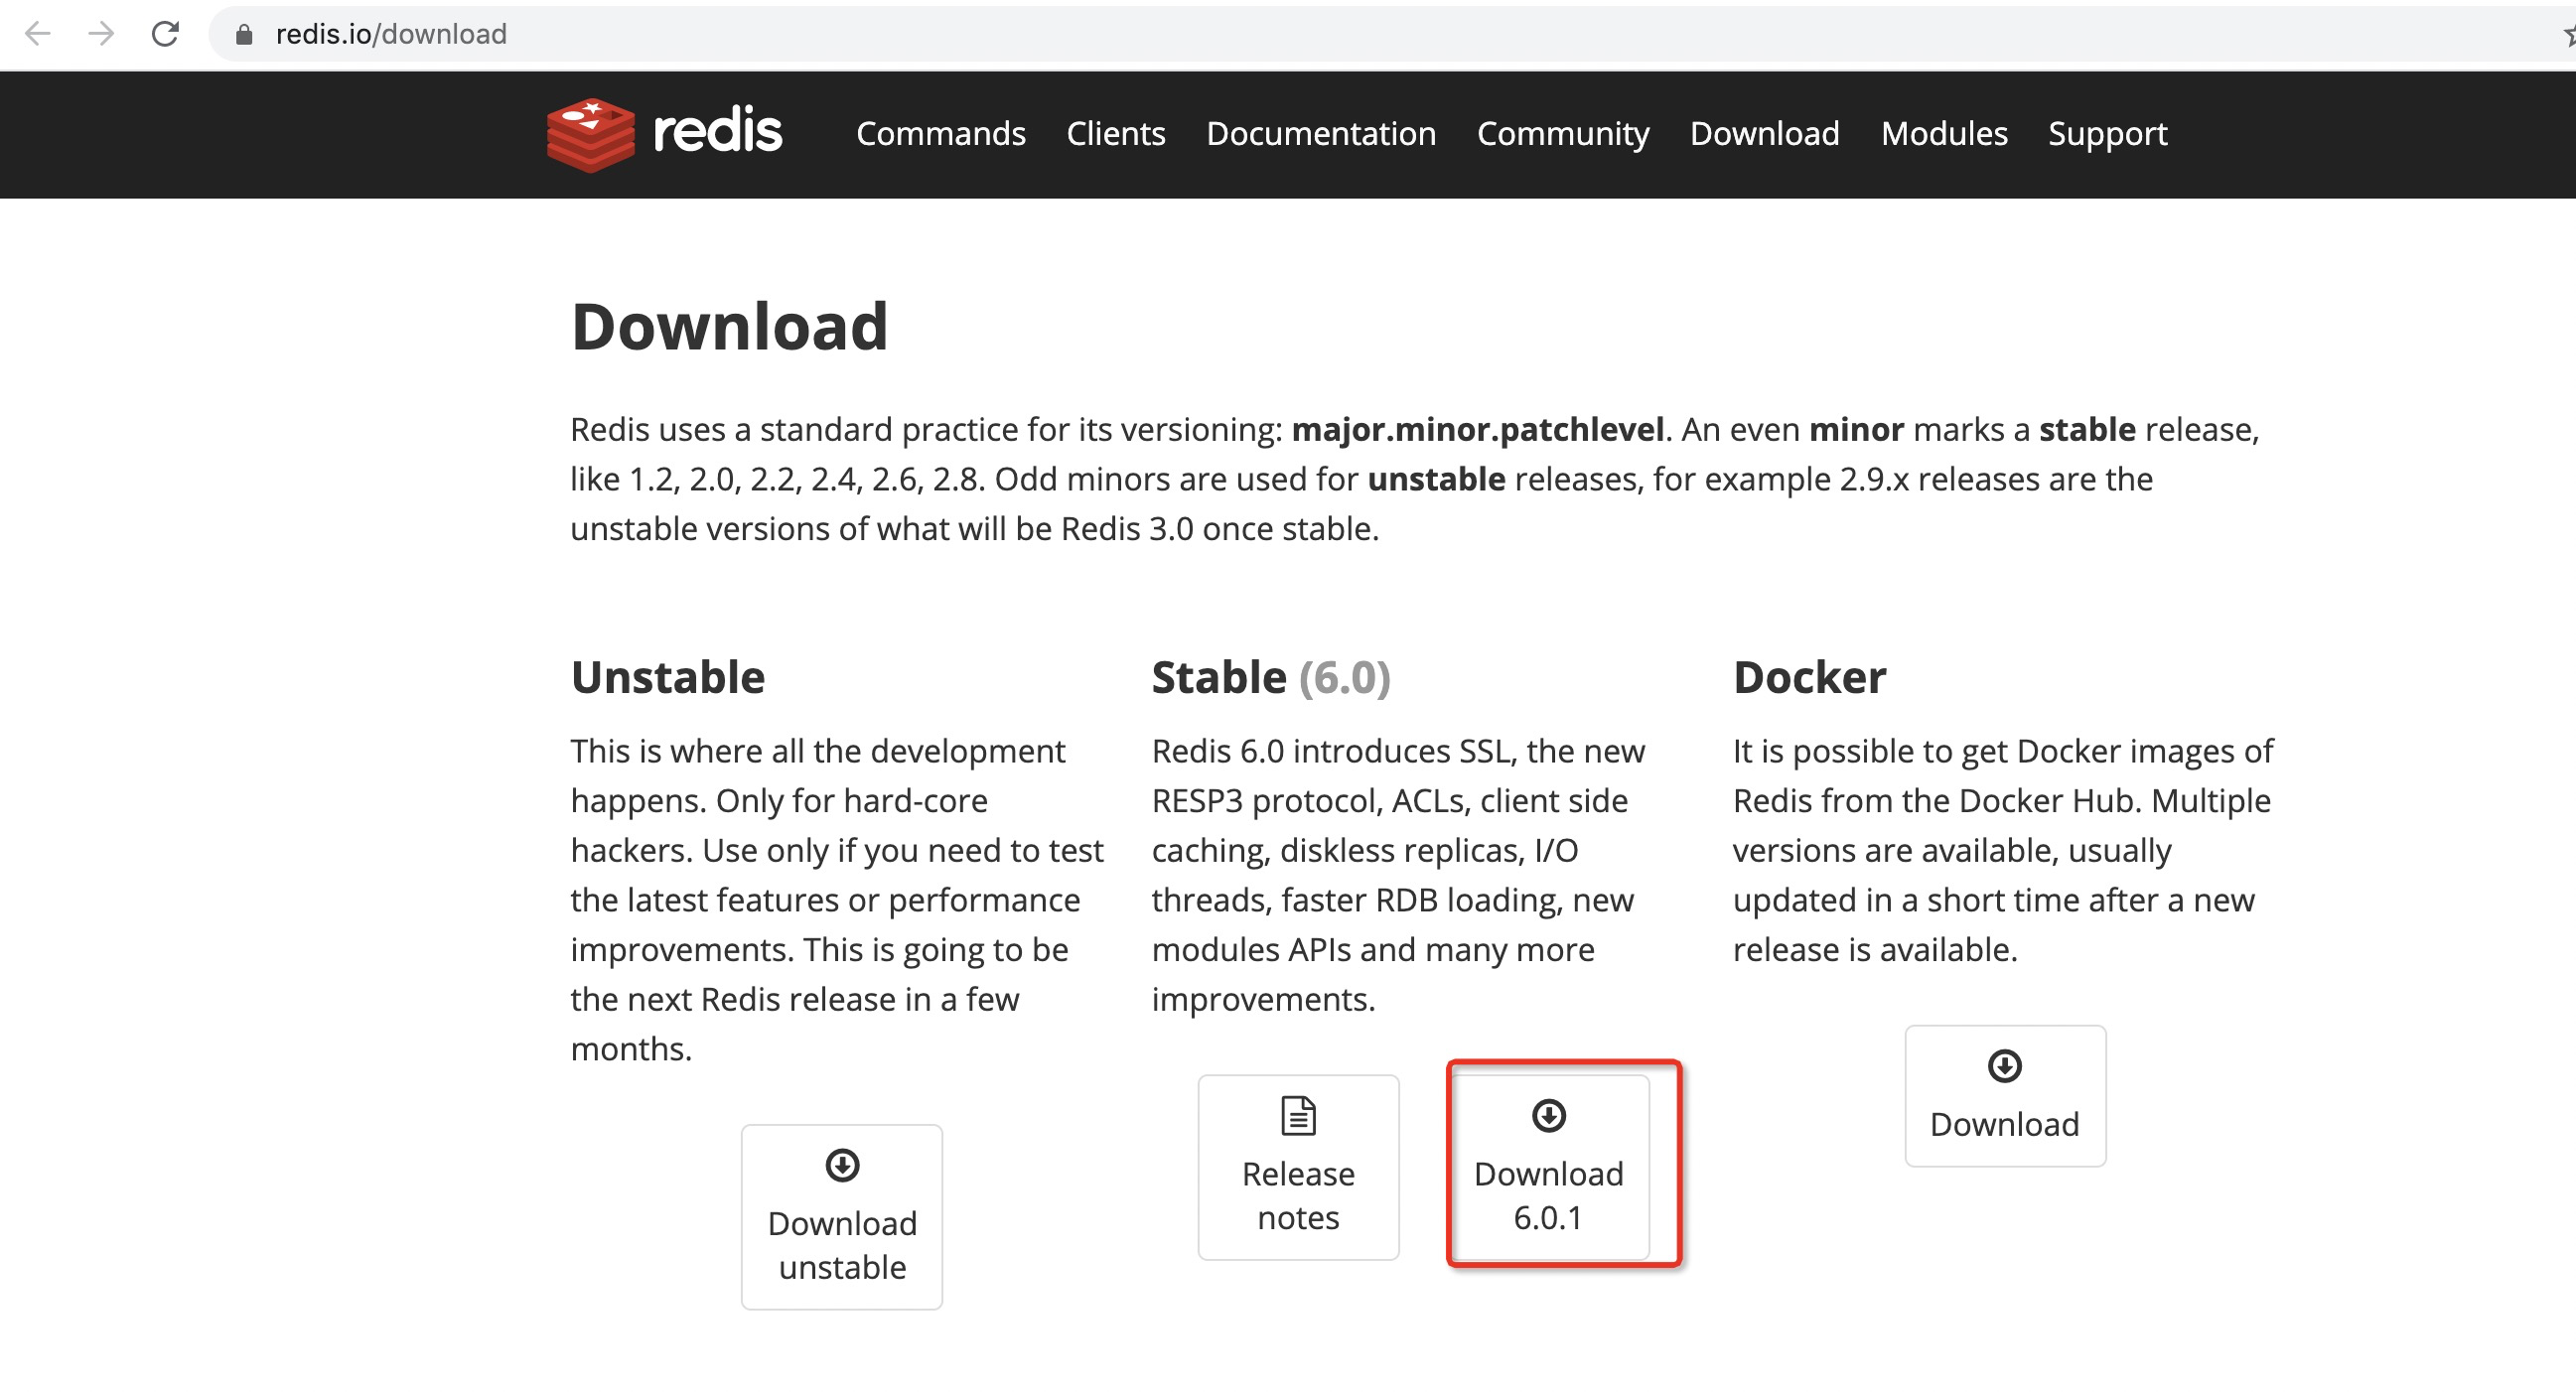
建议下载5.0.8版本的Redis
2 本地安装
- 解压:
tar zxvf redis-5.0.8.tar.gz - 移动到: sudo
mv redis-5.0.8 /usr/local/ - 切换到:
cd /usr/local/redis-5.0.8/ - 编译测试
sudo make test - 编译安装
sudo make install
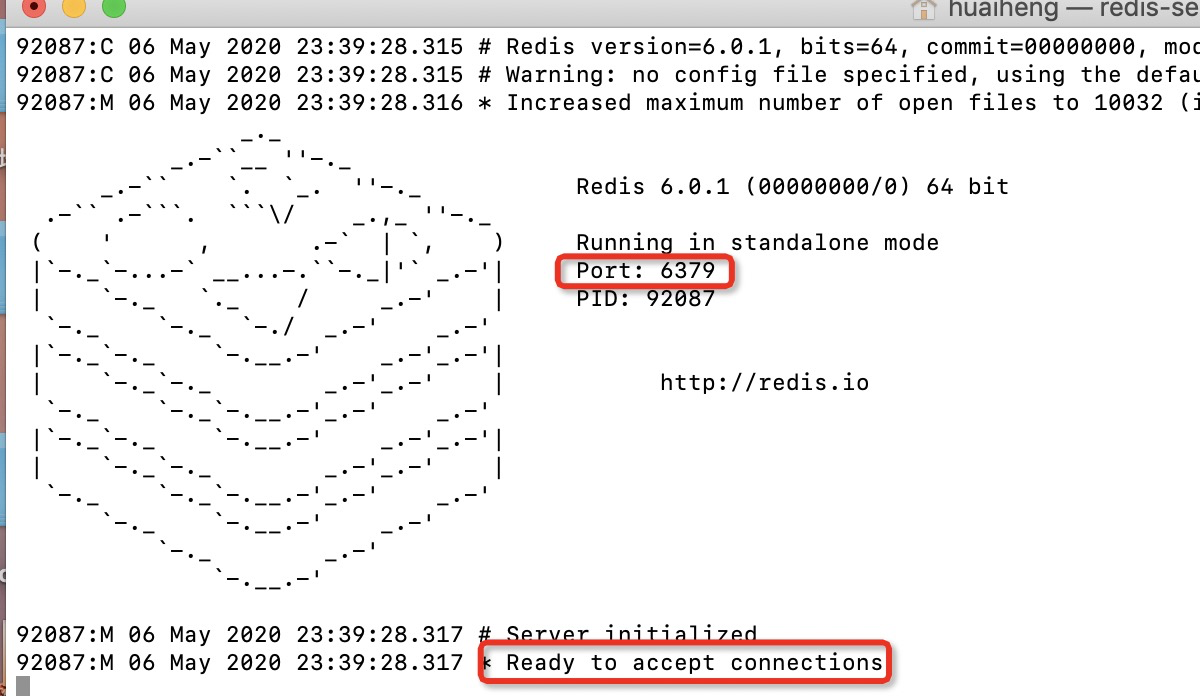
3 Redis 的启动与停止
启动方式:直接启动 Redis: redis-server ,成功后会看到下图:
关闭方式:登陆客户端,在客户端执行 SHUTDOWN 可关闭 redis 服务,如果关闭不了就加一个参数,执行SHUTDOWN NOSAVE可关闭redis 服务,其中:
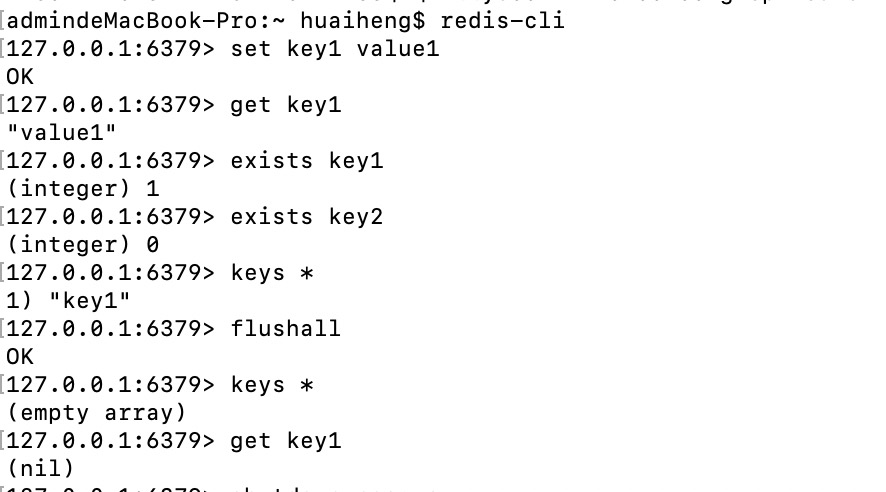
登陆客户端方式:redis-cli
设置为后台启动:https://blog.csdn.net/ksdb0468473/article/details/52126009
设置完毕后启动命令为:redis-server redis.conf
查看是否启动成功:ps -ef | grep redis
4 客户端常用命令
| 命令 | 用途 |
|---|---|
| set key value | 设置 key 的值 |
| get key | 获取 key 的值 |
| exists key | 查看此 key 是否存在,存在返回1,不存在返回0 |
| keys * | 查看所有的 key |
| del key | 删除指定key,若成功则返回1,否则返回0 |
| flushall | 消除所有的 key |
用法如下:
5 SpringBoot整合Redis
pom依赖:
<dependency>

    <groupId>org.springframework.boot</groupId>

     <artifactId>spring-boot-starter-redis</artifactId>

     <version>1.4..RELEASE</version>

</dependency>
在配置文件application.properities中加入Redis的连接配置:
spring.redis.host=127.0.0.1

spring.redis.port=
Redis自定义注入Bean组件配置:
package com.practice.demo.config;

import org.springframework.beans.factory.annotation.Autowired;

import org.springframework.context.annotation.Bean;

import org.springframework.context.annotation.Configuration;

import org.springframework.data.redis.connection.RedisConnectionFactory;

import org.springframework.data.redis.core.RedisTemplate;

import org.springframework.data.redis.core.StringRedisTemplate;

import org.springframework.data.redis.serializer.JdkSerializationRedisSerializer;

import org.springframework.data.redis.serializer.StringRedisSerializer;

/**

 * 配置Redis的两个操作组件:RedisTemplate & StringRedisTemplate

 * */

@Configuration

public class CommonConfig {

    @Autowired

    private RedisConnectionFactory redisConnectionFactory;

    @Bean

    public RedisTemplate<String, Object> redisTemplate(){

        RedisTemplate<String, Object> redisTemplate = new RedisTemplate<>();

        redisTemplate.setConnectionFactory(redisConnectionFactory);

        redisTemplate.setKeySerializer(new StringRedisSerializer());

        redisTemplate.setValueSerializer(new JdkSerializationRedisSerializer());

        redisTemplate.setHashKeySerializer(new StringRedisSerializer());

        return redisTemplate;

    }

    @Bean

    public StringRedisTemplate stringRedisTemplate(){

        StringRedisTemplate stringRedisTemplate = new StringRedisTemplate();

        stringRedisTemplate.setConnectionFactory(redisConnectionFactory);

        return stringRedisTemplate;

    }

}
Redis读写字符串测试Demo如下,需要注意的是,Redis除了支持字符串外,还支持列表、集合、有序集合、哈希存储等多种数据结构。
package com.practice.demo.config;

import com.alibaba.fastjson.JSON;

import com.alibaba.fastjson.JSONObject;

import org.assertj.core.util.Lists;

import org.junit.jupiter.api.Test;

import org.junit.runner.RunWith;

import org.springframework.beans.factory.annotation.Autowired;

import org.springframework.boot.test.context.SpringBootTest;

import org.springframework.data.redis.core.ListOperations;

import org.springframework.data.redis.core.RedisTemplate;

import org.springframework.data.redis.core.SetOperations;

import org.springframework.data.redis.core.ValueOperations;

import org.springframework.test.context.junit4.SpringJUnit4ClassRunner;

import java.util.*;

import java.util.concurrent.TimeUnit;

@RunWith(SpringJUnit4ClassRunner.class)

@SpringBootTest

public class RedisTest {

    @Autowired

    private RedisTemplate redisTemplate;

    /********************字符串类型********************/

    /**

     * 读写变量

     */

    @Test

    public void writeAndRead() {

        String key = "redisKey";

        String value = "redisValue";

        ValueOperations valueOperations = redisTemplate.opsForValue();

        // 设置数据存在的时间

        valueOperations.set(key, value, , TimeUnit.SECONDS);

        Object result = valueOperations.get(key);

        System.out.println("读取的内容:" + result);

    }

}
注意在启动前需要先将Redis启动,如果运行上述Demo后的结果与下面一致,说明Redis在SpringBoot中的配置正确。

(二)Redis在Mac下的安装与SpringBoot中的配置的更多相关文章
- Redis在Mac下的安装与使用方法
首先从Redis官网http://www.redis.io去下载最新版本的Redis安装文件(此处以Redis版本为例进行说明). Redis 2.6.16版本的下载地址:http://downl ...
- nginx详解(代理服务器的解释+nginx 在linux 下的安装+nginx.conf 中的配置解释)
一.概论 1.什么是代理服务器 代理服务器,客户机在发送请求时,不会直接发送给目的主机,而是先发送给代理服务器,代理服务接受客户机请求之后,再向主机发出,并接收目的主机返回的数据,存放在代理服务器的硬 ...
- Mac下Tomcat安装与Intellij IDEA配置Tomcat
Mac下Tomcat安装与Intellij IDEA配置Tomcat 一 安装 1 下载地址:https://tomcat.apache.org/download-90.cgi 2 将压缩包解压后移至 ...
- Mac下新安装的MySQL无法登陆root用户解决方法
一 设置MySQL命令行搜索路径 0.苹果->系统偏好设置->最下边点mysql 在弹出页面中 启动mysql服务 1.打开终端,输入: sudo vi ~/.bash_profile ...
- Mac 下 docker安装
http://www.th7.cn/system/mac/201405/56653.shtml Mac 下 docker安装 以及 处理错误Cannot connect to the Docker d ...
- Mac下Jekyll安装
之前一直用Wordpress,虽然功能强大,各种插件各种bug,如果想弄个主题,折腾得要命.最近改用jekyll+gitHub免费空间.记录一下. 我用的是Mac,所以只讲述Mac下如何安装,Wind ...
- redis 在Linux下的安装与配置
redis在Linux下的安装与配置 by:授客 QQ:1033553122 测试环境 redis-3.0.7.tar.gz 下载地址: http://redis.io/download http: ...
- Mac下Maven安装与配置
Mac下Maven安装与配置 下载maven http://maven.apache.org/download.cgi main->download菜单下的Files 下载后解压在Documen ...
- Mac下删除安装的pkg
Mac下的安装和删除都比windows更加简单清晰,这点在dmg方式下非常明显,但很多时候我们会使用pkg来进行安装,这样的安装想删除就有点麻烦了. 比如,我安装了Golang这个pkg用于g ...
随机推荐
- Thinking in Java,Fourth Edition(Java 编程思想,第四版)学习笔记(八)之Polymorphism
Polymorphism is the third essential feature of an object-oriented programming language,after data ab ...
- python干货:5种反扒机制的解决方法
前言 反爬虫是网站为了维护自己的核心安全而采取的抑制爬虫的手段,反爬虫的手段有很多种,一般情况下除了百度等网站,反扒机制会常常更新以外.为了保持网站运行的高效,网站采取的反扒机制并不是太多,今天分享几 ...
- 实验一 熟悉IDLE和在线编程平台
实验目的 1.掌握python IDLE集成开发环境的安装与使用 2.熟悉在线编程平台 3.掌握基本的python程序编写.编译与运行程序的方法 实验内容 1.按照实验指导安装IDLE,尝试交互式运行 ...
- idea ------- 源码调试运行
1.创建一个 想学 的 ,使用单步调试进行一步步学习 调整系统资源 单步调试 (F7) ,进入不了源码,调整idea 让我们可以进入底层学习 想要在源码里面添加注释,要将引用的源文件指向,我们刚才复制 ...
- Java SE —— 专栏总集篇
前言: Java 语言,是相对于其他语言而言,门槛低,而且功能还强大的一门编程语言,本人十分看好这一门语言,但是,它也是有深度的,看过本人的<数据结构与算法>专栏的同学们有福了,因为本人在 ...
- Linux工程师必备的系统监控工具
WGCLOUD基于java语言开发,是微服务架构构建监控系统,支持高并发高性能高可用,核心模块包括:服务器集群监控,ES集群状态监控,CPU监控,内存监控,数据监控(mysql,postgresql, ...
- 面试官:你对Redis缓存了解吗?面对这11道面试题你是否有很多问号?
前言 关于Redis的知识,总结了一个脑图分享给大家 1.在项目中缓存是如何使用的?为什么要用缓存?缓存使用不当会造成什么后果? 面试官心理分析 这个问题,互联网公司必问,要是一个人连缓存都不太清楚, ...
- UDO、TCP、HTTP、websocket
如图:
- webug3.0靶场渗透基础Day_2(完)
第八关: 管理员每天晚上十点上线 这题我没看懂什么意思,网上搜索到就是用bp生成一个poc让管理员点击,最简单的CSRF,这里就不多讲了,网上的教程很多. 第九关: 能不能从我到百度那边去? 构造下面 ...
- ansible的模块使用
转载于 https://www.cnblogs.com/franknihao/p/8631302.html [Ansible 模块] 就如python库一样,ansible的模块也分成了基本模块和 ...