Android之TabHost实现Tab切换
TabHost是整个Tab的容器,包含TabWidget和FrameLayout两个部分,TabWidget是每个Tab的表情,FrameLayout是Tab内容。
实现方式有两种:
1、继承TabActivity
2、继承Activity类
方法一:继承TabActivity
从TabActivity中用getTabHost()方法获取TabHost,然后设置标签内容
布局:
1、TabHost 必须设置android:id为@android:id/tabhost
2、TabWidget 必须设置android:id为@android:id/tabs
3、FrameLayout 必须设置android:id为@android:id/tabcontent
否则将出现类似报错:

<?xml version="1.0" encoding="utf-8"?>

<TabHost xmlns:android="http://schemas.android.com/apk/res/android"

    android:layout_width="match_parent"

    android:layout_height="match_parent"

    android:id="@android:id/tabhost"

     >

<LinearLayout

    android:layout_width="match_parent"

    android:layout_height="match_parent"

    android:orientation="vertical"

    >

    <TabWidget

        android:layout_width="match_parent"

        android:layout_height="wrap_content"

        android:id="@android:id/tabs"

        ></TabWidget>

    <FrameLayout

        android:layout_width="match_parent"

        android:layout_height="0dp"

        android:layout_weight="1"

        android:id="@android:id/tabcontent"

        >

        <LinearLayout

            android:layout_width="match_parent"

            android:layout_height="match_parent"

            android:id="@+id/widget_layout_red"

            android:background="#ff0000"

            android:orientation="vertical"

            ></LinearLayout>

         <LinearLayout

            android:layout_width="match_parent"

            android:layout_height="match_parent"

            android:id="@+id/widget_layout_yellow"

            android:background="#FCD209"

            android:orientation="vertical"

            ></LinearLayout>

    </FrameLayout>

</LinearLayout>

</TabHost>
继承TabActivity
public class MainActivity extends TabActivity {

private TabHost tabhost;

    @Override

    protected void onCreate(Bundle savedInstanceState) {

        super.onCreate(savedInstanceState);

        setContentView(R.layout.demo);

        //从TabActivity上面获取放置Tab的TabHost

        tabhost = getTabHost();

        tabhost.addTab(tabhost

                 //创建新标签one

                .newTabSpec("one")

                //设置标签标题

                .setIndicator("红色")

                //设置该标签的布局内容

                .setContent(R.id.widget_layout_red));

        tabhost.addTab(tabhost.newTabSpec("two").setIndicator("黄色").setContent(R.id.widget_layout_yellow));

    }

}
其中创建标签的方法:
tabhost.addTab(tabhost

.newTabSpec("one")

.setIndicator("红色")

.setContent(R.id.widget_layout_red));
也可以拆分写成:
TabHost.TabSpec tab1 = tabhost.newTabSpec("one");

tab1.setIndicator("红色");

tab1.setContent(R.id.widget_layout_red);

tabhost.addTab(tab1);
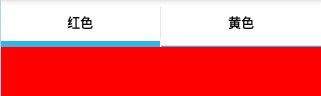
预览:
点击"黄色"标签
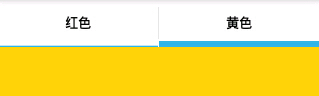
点击"红色"标签
方法二:继承Activity类
布局:
1、TabHost 可自定义id
2、TabWidget 必须设置android:id为@android:id/tabs
3、FrameLayout 必须设置android:id为@android:id/tabcontent
public class MainActivity extends Activity{

private TabHost tabhost;

    @Override

    protected void onCreate(Bundle savedInstanceState) {

        super.onCreate(savedInstanceState);

        setContentView(R.layout.demo);

        //得到TabHost对象实例

        tabhost =(TabHost) findViewById(R.id.mytab);

        //调用 TabHost.setup()

        tabhost.setup();

        //创建Tab标签

        tabhost.addTab(tabhost.newTabSpec("one").setIndicator("红色").setContent(R.id.widget_layout_red));

        tabhost.addTab(tabhost.newTabSpec("two").setIndicator("黄色").setContent(R.id.widget_layout_yellow));

    }

}
TabHost切换Tab字体的颜色背景颜色改变
private TabHost tabHost;
private TabWidget tabWidget;

//得到TabHost对象实例

tabHost =(TabHost) findViewById(R.id.taskdescribe_buildingmeter_tabhost);

//调用 TabHost.setup()

tabHost.setup();

tabWidget = tabHost.getTabWidget();

//创建Tab标签

tabHost.addTab(tabHost.newTabSpec("one").setIndicator("按单元名").setContent(R.id.buildingmeter_layout_unitname));

tabHost.addTab(tabHost.newTabSpec("two").setIndicator("按安装状态").setContent(R.id.buildingmeter_layout_installstatus));

tabHost.addTab(tabHost.newTabSpec("three").setIndicator("按楼层").setContent(R.id.buildingmeter_layout_storey));

//注意这个就是改变Tabhost默认样式的地方,一定将这部分代码放在上面这段代码的下面,不然样式改变不了

for (int i =0; i < tabWidget.getChildCount(); i++)

{

    tabWidget.getChildAt(i).getLayoutParams().height = 65;

    //tabWidget.getChildAt(i).getLayoutParams().width = 65;

    TextView tv = (TextView) tabWidget.getChildAt(i).findViewById(android.R.id.title);

    tv.setTextSize(15);

    tv.setTextColor(this.getResources().getColorStateList(android.R.color.white));

}

//设置第一次打开时默认显示的标签

tabHost.setCurrentTab(0);

//初始化Tab的颜色,和字体的颜色

updateTab(tabHost);

//选择监听器

tabHost.setOnTabChangedListener(new tabChangedListener());
/**

     * 更新Tab标签的颜色,和字体的颜色

     * @param tabHost

     */

    private void updateTab(final TabHost tabHost)

    {

        for (int i = 0; i < tabHost.getTabWidget().getChildCount(); i++)

        {

            View view = tabHost.getTabWidget().getChildAt(i);

            TextView tv = (TextView) tabHost.getTabWidget().getChildAt(i).findViewById(android.R.id.title);

            tv.setTextSize(16);

            tv.setTypeface(Typeface.SERIF, 2); // 设置字体和风格

            if (tabHost.getCurrentTab() == i)

            {

                //选中

                view.setBackground(getResources().getDrawable(R.drawable.tabhost_current));//选中后的背景

                tv.setTextColor(this.getResources().getColorStateList(android.R.color.white));

            }

            else

            {

                //不选中

                view.setBackground(getResources().getDrawable(R.drawable.tabhost_default));//非选择的背景

                tv.setTextColor(this.getResources().getColorStateList(android.R.color.black));

            }

        }

    }

    /**

     * TabHost选择监听器

     * @author

     *

     */

    private class tabChangedListener implements OnTabChangeListener {

          @Override

          public void onTabChanged(String tabId)

          {

              tabHost.setCurrentTabByTag(tabId);

              updateTab(tabHost);

          }

    }
布局文件
<?xml version="1.0" encoding="utf-8"?>

<TabHost xmlns:android="http://schemas.android.com/apk/res/android"

    android:id="@+id/taskdescribe_buildingmeter_tabhost"

    android:layout_width="match_parent"

    android:layout_height="match_parent"

    android:background="@color/white" >

    <LinearLayout

        android:layout_width="match_parent"

        android:layout_height="match_parent"

        android:orientation="vertical">

        <TabWidget

            android:id="@android:id/tabs"

            android:layout_width="match_parent"

            android:layout_height="wrap_content">

        </TabWidget>

        <FrameLayout

            android:id="@android:id/tabcontent"

            android:layout_width="match_parent"

            android:layout_height="0dp"

            android:layout_weight="1">

            <LinearLayout

                android:id="@+id/buildingmeter_layout_unitname"

                android:layout_width="match_parent"

                android:layout_height="match_parent"

                android:orientation="vertical"

                android:background="@color/white">

            </LinearLayout>

            <LinearLayout

                android:id="@+id/buildingmeter_layout_installstatus"

                android:layout_width="match_parent"

                android:layout_height="match_parent"

                android:orientation="vertical"

                android:background="@color/white">

            </LinearLayout>

            <LinearLayout

                android:id="@+id/buildingmeter_layout_storey"

                android:layout_width="match_parent"

                android:layout_height="match_parent"

                android:orientation="vertical"

                android:background="@color/white">

            </LinearLayout>

        </FrameLayout>

    </LinearLayout>

</TabHost>
TabHost切换Tab页面使用Intent
切换效果

先是layout文件夹中的布局文件,代码如下:
<TabHost xmlns:android="http://schemas.android.com/apk/res/android"

    android:id="@android:id/tabhost"

    android:layout_width="fill_parent"

    android:layout_height="fill_parent"

    >

    <LinearLayout

        android:layout_width="fill_parent"

        android:layout_height="fill_parent"

        android:orientation="vertical"

        android:background="@drawable/category_bg"

        android:padding="0dp" >

        <TabWidget

            android:id="@android:id/tabs"

            android:layout_width="wrap_content"

            android:layout_height="40dp"/>

        <FrameLayout

            android:id="@android:id/tabcontent"

            android:layout_width="fill_parent"

            android:layout_height="fill_parent"

            android:background="@drawable/context_bg"

            android:padding="0dp" />

    </LinearLayout>

</TabHost>
java文件
import android.app.TabActivity;

import android.content.Intent;

import android.graphics.Typeface;

import android.os.Bundle;

import android.view.KeyEvent;

import android.view.View;

import android.view.Window;

import android.view.WindowManager;

import android.widget.TabHost;

import android.widget.TabHost.OnTabChangeListener;

import android.widget.TextView;

import com.dzdc.R;

@SuppressWarnings("deprecation")

public class IndexActivity extends TabActivity {

    private String[] tabMenu = { "热菜", "冷菜", "海鲜", "川菜", "酒饮", "招牌菜" };

    private Intent intent0, intent1, intent2, intent3, intent4, intent5;

    private Intent[] intents = { intent0, intent1, intent2, intent3, intent4,

            intent5 };

    private TabHost.TabSpec tabSpec0, tabSpec1, tabSpec2, tabSpec3, tabSpec4,

            tabSpec5;

    private TabHost.TabSpec[] tabSpecs = { tabSpec0, tabSpec1, tabSpec2,

            tabSpec3, tabSpec4, tabSpec5 };

    private TabHost tabHost = null;

    @Override

    protected void onCreate(Bundle savedInstanceState) {

        super.onCreate(savedInstanceState);

        requestWindowFeature(Window.FEATURE_NO_TITLE);// 去掉标题栏

        getWindow().setFlags(WindowManager.LayoutParams.FLAG_FULLSCREEN,

                WindowManager.LayoutParams.FLAG_FULLSCREEN);

        setContentView(R.layout.index);

        tabHost = getTabHost();

        for (int i = 0; i < tabMenu.length; i++) {

            intents[i] = new Intent();

            intents[i].setClass(this, IndexContentActivity.class);

            tabSpecs[i] = tabHost.newTabSpec(tabMenu[i]);

            tabSpecs[i].setIndicator(tabMenu[i]);// 设置文字

            tabSpecs[i].setContent(intents[i]);// 设置该页的内容

            tabHost.addTab(tabSpecs[i]);// 将该页的内容添加到Tabhost

        }

        tabHost.setCurrentTabByTag(tabMenu[0]); // 设置第一次打开时默认显示的标签,

        updateTab(tabHost);//初始化Tab的颜色,和字体的颜色

        tabHost.setOnTabChangedListener(new OnTabChangedListener()); // 选择监听器

    }

    class OnTabChangedListener implements OnTabChangeListener {

        @Override

        public void onTabChanged(String tabId) {

            tabHost.setCurrentTabByTag(tabId);

            updateTab(tabHost);

        }

    }

    @Override

    public boolean onKeyDown(int keyCode, KeyEvent event) {

        if (keyCode == KeyEvent.KEYCODE_BACK && event.getRepeatCount() == 0) {

            System.exit(0);

            return false;

        } else if (keyCode == KeyEvent.KEYCODE_MENU

                && event.getRepeatCount() == 0) {

            return true; // 返回true就不会弹出默认的setting菜单

        }

        return false;

    }

    /**

     * 更新Tab标签的颜色,和字体的颜色

     * @param tabHost

     */

    private void updateTab(final TabHost tabHost) {

        for (int i = 0; i < tabHost.getTabWidget().getChildCount(); i++) {

            View view = tabHost.getTabWidget().getChildAt(i);

            TextView tv = (TextView) tabHost.getTabWidget().getChildAt(i).findViewById(android.R.id.title);

            tv.setTextSize(16);

            tv.setTypeface(Typeface.SERIF, 2); // 设置字体和风格

            if (tabHost.getCurrentTab() == i) {//选中

                view.setBackgroundDrawable(getResources().getDrawable(R.drawable.category_current));//选中后的背景

                tv.setTextColor(this.getResources().getColorStateList(

                        android.R.color.black));

            } else {//不选中

                view.setBackgroundDrawable(getResources().getDrawable(R.drawable.category_bg));//非选择的背景

                tv.setTextColor(this.getResources().getColorStateList(

                        android.R.color.white));

            }

        }

    }

}
Android之TabHost实现Tab切换的更多相关文章
- Android:TabHost实现Tab切换
TabHost是整个Tab的容器,包含TabWidget和FrameLayout两个部分,TabWidget是每个Tab的表情,FrameLayout是Tab内容. 实现方式有两种: 1.继承TabA ...
- Android典型界面设计——FragmentTabHost+Fragment实现底部tab切换
一.问题描述 在上次博文中,我们使用RadioGroup+ViewPage+Fragmen实现了顶部滑动导航(查看文章:http://www.cnblogs.com/jerehedu/p/460759 ...
- Android 常用UI控件之TabHost(5)Tab栏在底部且在最上层也不盖tab页
tab栏在底部 <TabHost android:id="@android:id/tabhost" android:layout_width="match_pare ...
- Android Studio精彩案例(二)《仿微信动态点击底部tab切换Fragment》
转载本专栏文章,请注明出处,尊重原创 .文章博客地址:道龙的博客 现在很多的App要么顶部带有tab,要么就底部带有tab.用户通过点击tab从而切换不同的页面(大部分情况时去切换fragment). ...
- Android典型界面设计(3)——访网易新闻实现双导航tab切换
一.问题描述 双导航tab切换(底部区块+区域内头部导航),实现方案底部区域使用FragmentTabHost+Fragment, 区域内头部导航使用ViewPager+Fragment,可在之前博客 ...
- Android典型界面设计-访网易新闻实现双导航tab切换
一.问题描述 双导航tab切换(底部区块+区域内头部导航),实现方案底部区域使用FragmentTabHost+Fragment, 区域内头部导航使用ViewPager+Fragment,可在之前博客 ...
- Android -- FragmentTabHost实现微信底部切换
1,在商城类的项目中我们开始一个项目的时候经常出现这样的需求,如下图所示: 下面使用户可以切换的模块,上面是对应的模块的详细内容,实现这个效果有很多方式,可以使用radiobutton+fragmen ...
- android学习--TabHost选项卡组件
TabHost是一种非常有用的组件,TabHost能够非常方便地在窗体上放置多个标签页,每一个标签页获得了一个与外部容器同样大小的组件摆放区域.在手机系统的应用类似"未接电话".& ...
- Android学习Tabhost、gallery、listview、imageswitcher
Tabhost控件又称分页控件,在很多的开发语言中都存在.它可以拥有多个标签页,每个标签页可以拥有不同的内容.android中,一个标签页可以放 一个view或者一个activity.TabHost是 ...
随机推荐
- POJ 1147
#include <iostream> #include <algorithm> #define MAXN 3005 using namespace std; int _m[M ...
- django.db.utils.InternalError: (1050, "Table 'tb_content' already exists")
在goods应用里面写了tb_content数据表的模型类(不该写在这里的),进行了数据迁移,还导入了数据. 在contents应用里也写了tb_content数据表的模型类(应该写在这里的), 解决 ...
- 使用图片预加载,解决断网后无法从后台获取提示网络异常的logo图片的问题
项目中有需求,断网后,显示小提示窗,里面包含网络异常提示语和异常小logo图片. 在实际操作时,遇到,断网后,无法从后台获取异常小logo图片. 我是才用图片预加载的方法解决这个问题的,解决方法如下: ...
- PowerDesigner最基础的使用方法入门学习(转)
PowerDesigner最基础的使用方法入门学习 1:入门级使用PowerDesigner软件创建数据库(直接上图怎么创建,其他的概念知识可自行学习) 我的PowerDesigner版本是16. ...
- JavaMail学习之一-邮件传输协议
协议:规定好的格式就是协议.就像http协议有请求协议和响应协议,邮件传输也分为发.收邮件的协议. 邮件协议分3种: 发邮件的:SMTP (Simple Mail Transport Protoca ...
- PMP备考指南之第一章:引论
本文已同步至 GitHub/Gitee/公众号,感兴趣的同学帮忙点波关注~ 第一章 引论 1."项目管理知识体系":应该包含所有行业.应用领域项目管理的具体知识.技能.方法和实践 ...
- 带你了解数据库中事务的ACID特性
前言 前面我们介绍过数据库中 带你了解数据库中JOIN的用法 与 带你了解数据库中group by的用法的相关用法.本章节主要来介绍下数据库中一个非常重要的知识点事务,也是我们项目中或面试中经常会遇到 ...
- eclipse中explorer显示方式
不知道是不是上面的描述.做个记录 project explorer 项目资源管理器 这个要打开代码目录需要再点开java resources 还会出现deployment Descriptor项目工程 ...
- dynamic解析Http xml格式响应数据
继续上一篇 构建RESTful风格的WCF服务 ,咱已经把服务端的数据和服务准备好了,客户端调用 wcf rest接口后如何解析xml?下面使用dynamic关键字解析来至于WCF REST XML响 ...
- 软件级负载均衡器(LVS/HAProxy/Nginx)的特点简介和对比
本文出自 “抚琴煮酒” 博客,出处http://andrewyu.blog.51cto.com/1604432/697466 现在网站发展的趋势对网络负载均衡的使用是随着网站规模的提升根据不同的阶 ...