ViewPager+Fragment实现滑动显示,且Fragment里面又放Fragment+viewPager
思路:新建一个Activity,且这个Activity要继承FragementActivity,在Activity的布局文件中放入了一个viewPager,为了效果好看,还做了个导航,使得ViewPager和导航栏能够实现联动。代码里面有解释,我就不详细介绍了!!
在往ViewPager放Fragment的时候,用到的适配器应该是FragmentPagerAdapter
导航栏的制作我是用了一个ImageView+TextView,若这时使用Imageview(或TextView)实现点击事件的话,到你点击不到ImageView(或TextView)的话,不会产生联动效果,所以我用一个LinearLayout去把ImageView和TextView包含起来,并使用LinearLayout相应点击事件,并设置ImageView和TextView不能被点击.
MainActivity.java
package com.example.administrator.viewpagerfagmentdemo;

import android.os.Bundle;

import android.support.v4.app.Fragment;

import android.support.v4.app.FragmentActivity;

import android.support.v4.app.FragmentPagerAdapter;

import android.support.v4.view.ViewPager;

import android.view.View;

import android.widget.ImageView;

import android.widget.LinearLayout;

import java.util.ArrayList;

import java.util.List;

public class MainActivity extends FragmentActivity implements View.OnClickListener {

    private ViewPager myViewPager;  //声明ViewPager

    private FragmentPagerAdapter myFragmentPagerAdapter;   //Fragment适配器

    private List<Fragment> myContionter;  //存放的容器

    // 声明一下四个Fragment

    private FirstFragment myFirstFragment;

    private SecondFragment mySecondtFragment;

    private ThirdFragment myThirdFragment;

    private FourFragment myFourFragment;

    // 声明四个ImageView

    private ImageView down_first_image;

    private ImageView down_second_image;

    private ImageView down_third_image;

    private ImageView down_four_image;

    private LinearLayout first;

    private LinearLayout second;

    private LinearLayout third;

    private LinearLayout four;

    @Override

    protected void onCreate(Bundle savedInstanceState) {

        super.onCreate(savedInstanceState);

        setContentView(R.layout.activity_main);

        initView();  //初始化各种View

        initEvents(); //初始化监听事件

    }

    //初始化我们需要用到的View

    public void initView(){

        myViewPager = (ViewPager) findViewById(R.id.viewPager);

        down_first_image = (ImageView) findViewById(R.id.down_music);

        down_second_image = (ImageView) findViewById(R.id.down_icon);

        down_third_image = (ImageView) findViewById(R.id.down_people);

        down_four_image = (ImageView) findViewById(R.id.down_shoot);

        first = (LinearLayout) findViewById(R.id.first);

        second = (LinearLayout) findViewById(R.id.second);

        third = (LinearLayout) findViewById(R.id.third);

        four = (LinearLayout) findViewById(R.id.four);

        //初始化Fragment

        myFirstFragment = new FirstFragment();

        mySecondtFragment = new SecondFragment();

        myThirdFragment = new ThirdFragment();

        myFourFragment = new FourFragment();

        //初始化容器

        myContionter = new ArrayList<>();

        myContionter.add(myFirstFragment);

        myContionter.add(mySecondtFragment);

        myContionter.add(myThirdFragment);

        myContionter.add(myFourFragment);

        //初始化 适配器

        myFragmentPagerAdapter = new FragmentPagerAdapter(getSupportFragmentManager()) {

            @Override

            public Fragment getItem(int i) {

                return myContionter.get(i);

            }

            @Override

            public int getCount() {

                return myContionter.size();

            }

        };

        myViewPager.setAdapter(myFragmentPagerAdapter);

        //设置监听器,没什么服用价值,就直接匿名内部类了

        myViewPager.setOnPageChangeListener(new ViewPager.OnPageChangeListener() {

            @Override

            public void onPageScrolled(int i, float v, int i2) {

            }

            //当 界面 切换 的时候

            @Override

            public void onPageSelected(int position) {

                initImageViewBackGround();   //图片先置为暗色

                switch (position){

                    case :

                        down_first_image.setBackgroundResource(R.drawable.shake_icon_music_pressed);

                        break;

                    case :

                        down_second_image.setBackgroundResource(R.drawable.notification_icon);

                        break;

                    case :

                        down_third_image.setBackgroundResource(R.drawable.shake_icon_people_pressed);

                        break;

                    case :

                        down_four_image.setBackgroundResource(R.drawable.sns_shoot_location_pressed);

                        break;

                }

            }

            @Override

            public void onPageScrollStateChanged(int i) {

            }

        });

        //这俩 得对应起来

        myViewPager.setCurrentItem();

        down_first_image.setBackgroundResource(R.drawable.shake_icon_music_pressed);

    }

    //初始化 监听事件

    private void initEvents() {

//        down_first_image.setOnClickListener(this);

//        down_second_image.setOnClickListener(this);

//        down_third_image.setOnClickListener(this);

//        down_four_image.setOnClickListener(this);

        first.setOnClickListener(this);

        second.setOnClickListener(this);

        third.setOnClickListener(this);

        four.setOnClickListener(this);

    }

    //监听事件的方法

    @Override

    public void onClick(View v) {

        initImageViewBackGround();  //先设置图片为亮色

        switch (v.getId()){

            case R.id.first:

                myViewPager.setCurrentItem();

                down_first_image.setBackgroundResource(R.drawable.shake_icon_music_pressed);

                break;

            case R.id.second:

                myViewPager.setCurrentItem();

                down_second_image.setBackgroundResource(R.drawable.notification_icon);

                break;

            case R.id.third:

                myViewPager.setCurrentItem();

                down_third_image.setBackgroundResource(R.drawable.shake_icon_people_pressed);

                break;

            case R.id.four:

                myViewPager.setCurrentItem();

                down_four_image.setBackgroundResource(R.drawable.sns_shoot_location_pressed);

                break;

        }

    }

    //初始化图片都为暗色

    private void initImageViewBackGround(){

        down_first_image.setBackgroundResource(R.drawable.shake_icon_music_normal);

        down_second_image.setBackgroundResource(R.drawable.notification_icon_gray);

        down_third_image.setBackgroundResource(R.drawable.shake_icon_people_normal);

        down_four_image.setBackgroundResource(R.drawable.sns_shoot_location_normal);

    }

}
activity_main.xml
<LinearLayout

    xmlns:android="http://schemas.android.com/apk/res/android"

    xmlns:tools="http://schemas.android.com/tools"

    android:layout_width="match_parent"

    android:layout_height="match_parent"

    android:orientation="vertical"

    tools:context=".MainActivity">

    <LinearLayout

        android:layout_width="match_parent"

        android:layout_height="40dp"

        android:gravity="center"

        android:background="@color/title_background">

        <TextView

            android:layout_width="wrap_content"

            android:layout_height="wrap_content"

            android:layout_gravity="center"

            android:textColor="@color/title_text_color"

            android:text="微信"/>

    </LinearLayout>

    <android.support.v4.view.ViewPager

        android:id="@+id/viewPager"

        android:layout_width="wrap_content"

        android:layout_height="0dp"

        android:layout_weight="1">

    </android.support.v4.view.ViewPager>

    <LinearLayout

        android:layout_width="match_parent"

        android:layout_height="50dp"

        android:background="@drawable/abc_list_selector_disabled_holo_light"

        android:orientation="horizontal">

        <LinearLayout

            android:id="@+id/first"

            android:layout_width="0dp"

            android:layout_height="match_parent"

            android:orientation="vertical"

            android:layout_weight="1"

            android:gravity="center">

            <ImageView

                android:id="@+id/down_music"

                android:layout_width="wrap_content"

                android:layout_height="0dp"

                android:layout_weight="2"

                android:clickable="false"

                android:background="@drawable/shake_icon_music_normal"/>

            <TextView

                android:layout_width="wrap_content"

                android:layout_height="0dp"

                android:textColor="#000"

                android:layout_weight="1"

                android:clickable="false"

                android:text="音乐"/>

        </LinearLayout>

        <LinearLayout

            android:id="@+id/second"

            android:layout_width="0dp"

            android:layout_height="match_parent"

            android:orientation="vertical"

            android:layout_weight="1"

            android:gravity="center">

            <ImageView

                android:id="@+id/down_icon"

                android:layout_width="wrap_content"

                android:layout_height="0dp"

                android:layout_weight="2"

                android:clickable="false"

                android:background="@drawable/notification_icon_gray"/>

            <TextView

                android:layout_width="wrap_content"

                android:layout_height="0dp"

                android:textColor="#000"

                android:layout_weight="1"

                android:clickable="false"

                android:text="哈哈"/>

        </LinearLayout>

        <LinearLayout

            android:id="@+id/third"

            android:layout_width="0dp"

            android:layout_height="match_parent"

            android:orientation="vertical"

            android:layout_weight="1"

            android:gravity="center">

            <ImageView

                android:id="@+id/down_people"

                android:layout_width="wrap_content"

                android:layout_height="0dp"

                android:layout_weight="2"

                android:clickable="false"

                android:background="@drawable/shake_icon_people_normal"/>

            <TextView

                android:layout_width="wrap_content"

                android:layout_height="0dp"

                android:textColor="#000"

                android:layout_weight="1"

                android:clickable="false"

                android:text="好友"/>

        </LinearLayout>

        <LinearLayout

            android:id="@+id/four"

            android:layout_width="0dp"

            android:layout_height="match_parent"

            android:layout_weight="1"

            android:orientation="vertical"

            android:gravity="center">

            <ImageView

                android:id="@+id/down_shoot"

                android:layout_width="wrap_content"

                android:layout_height="0dp"

                android:layout_weight="2"

                android:clickable="false"

                android:background="@drawable/sns_shoot_location_normal"/>

            <TextView

                android:layout_width="wrap_content"

                android:layout_height="0dp"

                android:textColor="#000"

                android:layout_weight="1"

                android:clickable="false"

                android:text="啦啦"/>

        </LinearLayout>

    </LinearLayout>

</LinearLayout>
建立四个Fragment,这四个Fragment都是一样,在这里我就贴出一个代码,并且我还在这个Frament中又放了ViewPager,在这个viewPager中我又放了Fragment,那么这是你在设置Fragment里面viewPager的适配器的时候,需要用到FragmentPagerAdapter,那么这里穿进去的参数应该是getChildFragmentManager(),否则会报错。
Fragment.java
package com.example.administrator.viewpagerfagmentdemo;

import android.os.Bundle;

import android.support.v4.app.Fragment;

import android.support.v4.app.FragmentPagerAdapter;

import android.support.v4.view.PagerAdapter;

import android.support.v4.view.ViewPager;

import android.view.LayoutInflater;

import android.view.View;

import android.view.ViewGroup;

import java.util.ArrayList;

import java.util.List;

/**

 * Created by Administrator on 2015/9/2.

 */

public class FirstFragment extends Fragment {

    private ViewPager myViewPager;

    private List<View> myContiontar ;   //viewPager的数据源

    private PagerAdapter myPagerAdapter;   //有了数据源,必然要有适配器

    private FragmentPagerAdapter fragmentPagerAdapter;

    private List<Fragment> list;

    private View view;  //Fragment的布局

    private Lunboa lunboa;

    private Lunbob lunbob;

    private Lunboc lunboc;

    private Lunbod lunbod;

    @Override

    public View onCreateView(LayoutInflater inflater, ViewGroup container, Bundle savedInstanceState) {

        view = inflater.inflate(R.layout.first_fragment,null);

        initViews();  //初始化各种View

        return view;

    }

    //初始化各种View

    private void initViews(){

        // 先将xml文件 换成 view

        myViewPager = (ViewPager) view.findViewById(R.id.first_fragment_viewpager);

        //建立五个view 去获得四个ImageView

        View view1 = LayoutInflater.from(getActivity().getApplicationContext()).inflate(R.layout.lunbo_image1,null);

        View view2 = LayoutInflater.from(getActivity().getApplicationContext()).inflate(R.layout.lunbo_image2,null);

        View view3 = LayoutInflater.from(getActivity().getApplicationContext()).inflate(R.layout.lunbo_image3,null);

        View view4 = LayoutInflater.from(getActivity().getApplicationContext()).inflate(R.layout.lunbo_image4,null);

        View view5 = LayoutInflater.from(getActivity().getApplicationContext()).inflate(R.layout.lunbo_image5,null);

        //加入到容器里面

        myContiontar = new ArrayList<>();

        myContiontar.add(view1);

        myContiontar.add(view2);

        myContiontar.add(view3);

        myContiontar.add(view4);

        myContiontar.add(view5);

        lunboa = new Lunboa();

        lunbob = new Lunbob();

        lunboc = new Lunboc();

        lunbod = new Lunbod();

        list = new ArrayList<>();

        list.add(lunboa);

        list.add(lunbob);

        list.add(lunboc);

        list.add(lunbod);

        //fragmentPagerAdapter

        fragmentPagerAdapter = new FragmentPagerAdapter(getFragmentManager()) {

            @Override

            public Fragment getItem(int i) {

                return list.get(i);

            }

            @Override

            public int getCount() {

                return list.size();

            }

        };

        //初始化 适配器

        myPagerAdapter = new PagerAdapter() {

            //返回显示多少项

            @Override

            public int getCount() {

                return myContiontar.size();

            }

            @Override

            public boolean isViewFromObject(View view, Object o) {

                return view == o;

            }

            //滑动切换时,移除当前组件

            @Override

            public void destroyItem(ViewGroup container, int position, Object object) {

                container.removeView(myContiontar.get(position));

            }

            //每次滑动时生成的组件

            @Override

            public Object instantiateItem(ViewGroup container, int position) {

                container.addView(myContiontar.get(position));

                return myContiontar.get(position);

            }

        };

        //设置适配器

        myViewPager.setAdapter(myPagerAdapter);

        //设置fragment适配器

//        myViewPager.setAdapter(fragmentPagerAdapter);

    }

}
布局文件fragment.xml也很简单,不多说了,我就直接上代码了。
<?xml version="1.0" encoding="utf-8"?>

<LinearLayout

    xmlns:android="http://schemas.android.com/apk/res/android"

    android:orientation="vertical"

    android:layout_width="match_parent"

    android:layout_height="match_parent">

    <FrameLayout

        android:layout_width="match_parent"

        android:layout_height="0dp"

        android:layout_weight="1"

        android:orientation="vertical"

        android:gravity="center|bottom">

        <android.support.v4.view.ViewPager

            android:id="@+id/first_fragment_viewpager"

            android:layout_width="match_parent"

            android:layout_height="match_parent">

        </android.support.v4.view.ViewPager>

        <LinearLayout

            android:layout_width="wrap_content"

            android:layout_height="wrap_content"

            android:orientation="horizontal"

            android:layout_gravity="center|bottom">

            <ImageView

                android:id="@+id/first_fragment_down_image1"

                android:layout_width="wrap_content"

                android:layout_height="wrap_content"

                android:background="@drawable/wallet_coin_purse_guide_purse_dot_normal"/>

            <ImageView

                android:id="@+id/first_fragment_down_image2"

                android:layout_width="wrap_content"

                android:layout_height="wrap_content"

                android:background="@drawable/wallet_coin_purse_guide_purse_dot_normal"/>

            <ImageView

                android:id="@+id/first_fragment_down_image3"

                android:layout_width="wrap_content"

                android:layout_height="wrap_content"

                android:background="@drawable/wallet_coin_purse_guide_purse_dot_normal"/>

            <ImageView

                android:id="@+id/first_fragment_down_image4"

                android:layout_width="wrap_content"

                android:layout_height="wrap_content"

                android:background="@drawable/wallet_coin_purse_guide_purse_dot_normal"/>

            <ImageView

                android:id="@+id/first_fragment_down_image5"

                android:layout_width="wrap_content"

                android:layout_height="wrap_content"

                android:background="@drawable/wallet_coin_purse_guide_purse_dot_normal"/>

            </LinearLayout>

    </FrameLayout>

    <ImageView

        android:layout_width="match_parent"

        android:layout_height="0dp"

        android:layout_weight="2.5"

        android:background="@color/fitst_fragment_image_color"/>

</LinearLayout>
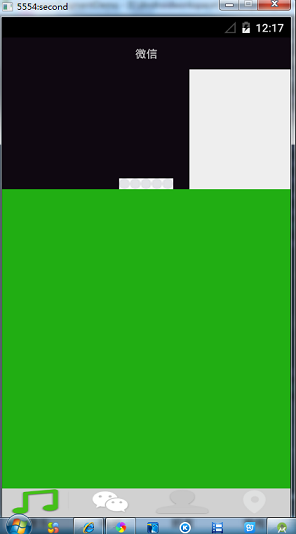
效果图:
ViewPager+Fragment实现滑动显示,且Fragment里面又放Fragment+viewPager的更多相关文章
- fragment中嵌套viewpager,vierpager中有多个fragment,不显示 .
fragment中嵌套viewpager,vierpager中有多个fragment,不显示 ... 现在好多应用流行一种布局.底部几个工具栏选项,上面也有类似tab的选项. 底部用RadioGrou ...
- 兔子--Fragment与ViewPager要切换滑动效果
效果图: 文件夹结构: 代码分析: MainActivity.java package com.example.myfragment; /** * @author Arthur Lee * @time ...
- Android Studio 使用ViewPager + Fragment实现滑动菜单Tab效果 --简易版
描述: 之前有做过一个记账本APP,拿来练手的,做的很简单,是用Eclipse开发的: 最近想把这个APP重新完善一下,添加了一些新的功能,并选用Android Studio来开发: APP已经完善了 ...
- Android Viewpager+Fragment实现滑动标签页
ViewPager 结合Fragment实现一个Activity里包含多个可滑动的标签页,每个标签页可以有独立的布局及响应. 主页布局 <?xml version="1.0" ...
- Android:Fragment+ViewPager实现Tab滑动
public class FragAdapter extends FragmentPagerAdapter { private List<Fragment> fragments ; pub ...
- Fragment利用ViewPager实现左右滑动--第三方开源--SlidingTabLayout和SlidingTabStrip实现
MainActivity: package com.zzw.fragmentteb; import java.util.ArrayList; import android.graphics.Color ...
- Android Fragment 隐藏或显示时调用的生命周期方法
Fragment使用方式大体分两种: 大家要注意不同的Fragment使用方法,Fragment隐藏和显示调用的生命周期方法是不同的,以下是Fragment显示隐藏调用的方法: //判断是否展示—与V ...
- 创建多个Fragment可滑动界面
创建新项目,选择Tabbed Activity 默认就有2个Fragment,这里我们删除相关代码. 在切换时 FragmentPagerAdapter onDestroyView onCreateV ...
- 【Android Developers Training】 70. 使用ViewPager实现屏幕滑动
注:本文翻译自Google官方的Android Developers Training文档,译者技术一般,由于喜爱安卓而产生了翻译的念头,纯属个人兴趣爱好. 原文链接:http://developer ...
随机推荐
- 支撑5亿用户、1.5亿活跃用户的Twitter最新架构详解及相关实现
如果你对项目管理.系统架构有兴趣,请加微信订阅号"softjg",加入这个PM.架构师的大家庭 摘要:Twitter出道之初只是个奋斗在RoR上的小站点,而如今已拥有1.5亿的活跃 ...
- 默菲定律 [Murphy's Law]
一.关于默菲定律(Murphy's Law) “墨菲定律”.“帕金森定律”和“彼德原理”并称为二十世纪西方文化三大发现. “墨菲定律”的原话是这样说的:If there are two or mo ...
- NTP服务器地址及IP
yum install ntp */20 * * * * /usr/sbin/ntpdate 61.172.254.29 210.72.145.44 (国家授时中心服务器IP地址)133.100.11 ...
- 未来十年的十三条思考(FW)
支付宝在某种意义上延续了“双十一”的购物狂欢. 如果你关注微信朋友圈,你会发现支付宝最近以各种广告.方案植入方式推出强劲广告.而其中很重要的一个促销手段便是,从今年12月1日到12月15日,用户在一些 ...
- 洛谷P1214 [USACO1.4]等差数列 Arithmetic Progressions
P1214 [USACO1.4]等差数列 Arithmetic Progressions• o 156通过o 463提交• 题目提供者该用户不存在• 标签USACO• 难度普及+/提高 提交 讨论 题 ...
- 洛谷P2320 鬼谷子的钱袋
P2320 06湖南 鬼谷子的钱袋 171通过 480提交 题目提供者xmyzwls 标签各省省选 难度普及+/提高 提交该题 讨论 题解 记录 最新讨论 题目有误 数据需要特判 评测系统太神了 题目 ...
- No.012 Integer to Roman
12. Integer to Roman Total Accepted: 71315 Total Submissions: 176625 Difficulty: Medium Given an int ...
- Java中自定泛型方法
泛型用到哪些集合:List Set Map List<String> list=new ArraList<String>(); list.add("美女") ...
- 在AX4.0中使用C#脚本的实现
1,虽然ms收购了ax,但是在ax低版本(ver<=4.0)中,还没有办法直接使用ms现在主推的.net技术. 通常的做法是现在AX中天津.net的引用,然后才能在代码中使用.net的一些对象以 ...
- 【MariaDB】MariaDB的复制
GTID的说明 官网:https://mariadb.com/kb/en/mariadb/global-transaction-id/ 官网:http://dev.mysql.com/doc/refm ...