
tensorflow目标检测API之训练自己的数据集
1.训练文件的配置
将生成的csv和record文件都放在新建的mydata文件夹下,并打开object_detection文件夹下的data文件夹,复制一个后缀为.pbtxt的文件到mtdata文件夹下,并重命名为gaoyue.pbtxt
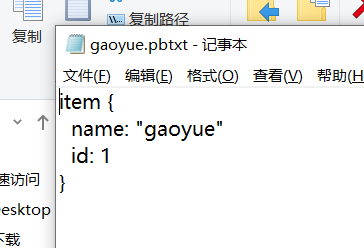
用记事本打开该文件,因为我只分了一类,所以将其他内容删除,只剩下这一个类别,并将name改为gaoyue。
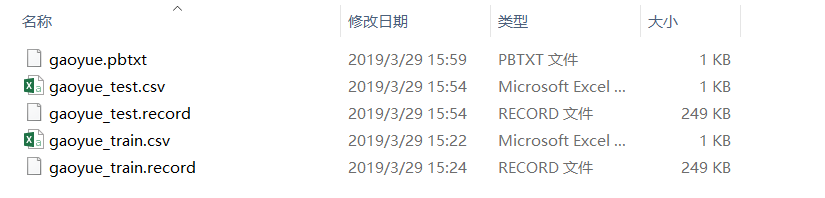
这时我们拥有的所有文件如下图所示。
我们在object_detection文件夹下新建一个training文件夹,在里面新建一个记事本文件并命名为 ssd_mobilenet_v1_coco.config
打开,输入以下代码,按右边注释进行修改
# SSD with Mobilenet v1 configuration for MSCOCO Dataset.

# Users should configure the fine_tune_checkpoint field in the train config as

# well as the label_map_path and input_path fields in the train_input_reader and

# eval_input_reader. Search for "PATH_TO_BE_CONFIGURED" to find the fields that

# should be configured.

model {

  ssd {

    num_classes: 1                          # 你类别的数量,我这里只分了一类

    box_coder {

      faster_rcnn_box_coder {

        y_scale: 10.0

        x_scale: 10.0

        height_scale: 5.0

        width_scale: 5.0

      }

    }

    matcher {

      argmax_matcher {

        matched_threshold: 0.5

        unmatched_threshold: 0.5

        ignore_thresholds: false

        negatives_lower_than_unmatched: true

        force_match_for_each_row: true

      }

    }

    similarity_calculator {

      iou_similarity {

      }

    }

    anchor_generator {

      ssd_anchor_generator {

        num_layers: 6

        min_scale: 0.2

        max_scale: 0.95

        aspect_ratios: 1.0

        aspect_ratios: 2.0

        aspect_ratios: 0.5

        aspect_ratios: 3.0

        aspect_ratios: 0.3333

      }

    }

    image_resizer {

      fixed_shape_resizer {

        height: 300

        width: 300

      }

    }

    box_predictor {

      convolutional_box_predictor {

        min_depth: 0

        max_depth: 0

        num_layers_before_predictor: 0

        use_dropout: false

        dropout_keep_probability: 0.8

        kernel_size: 1

        box_code_size: 4

        apply_sigmoid_to_scores: false

        conv_hyperparams {

          activation: RELU_6,

          regularizer {

            l2_regularizer {

              weight: 0.00004

            }

          }

          initializer {

            truncated_normal_initializer {

              stddev: 0.03

              mean: 0.0

            }

          }

          batch_norm {

            train: true,

            scale: true,

            center: true,

            decay: 0.9997,

            epsilon: 0.001,

          }

        }

      }

    }

    feature_extractor {

      type: 'ssd_mobilenet_v1'

      min_depth: 16

      depth_multiplier: 1.0

      conv_hyperparams {

        activation: RELU_6,

        regularizer {

          l2_regularizer {

            weight: 0.00004

          }

        }

        initializer {

          truncated_normal_initializer {

            stddev: 0.03

            mean: 0.0

          }

        }

        batch_norm {

          train: true,

          scale: true,

          center: true,

          decay: 0.9997,

          epsilon: 0.001,

        }

      }

    }

    loss {

      classification_loss {

        weighted_sigmoid {

        }

      }

      localization_loss {

        weighted_smooth_l1 {

        }

      }

      hard_example_miner {

        num_hard_examples: 3000

        iou_threshold: 0.99

        loss_type: CLASSIFICATION

        max_negatives_per_positive: 3

        min_negatives_per_image: 0

      }

      classification_weight: 1.0

      localization_weight: 1.0

    }

    normalize_loss_by_num_matches: true

    post_processing {

      batch_non_max_suppression {

        score_threshold: 1e-8

        iou_threshold: 0.6

        max_detections_per_class: 100

        max_total_detections: 100

      }

      score_converter: SIGMOID

    }

  }

}

train_config: {

  batch_size: 16                                       # 电脑好的话可以调高点,我电脑比较渣就调成16了

  optimizer {

    rms_prop_optimizer: {

      learning_rate: {

        exponential_decay_learning_rate {

          initial_learning_rate: 0.004

          decay_steps: 800720

          decay_factor: 0.95

        }

      }

      momentum_optimizer_value: 0.9

      decay: 0.9

      epsilon: 1.0

    }

  }

  # Note: The below line limits the training process to 200K steps, which we

  # empirically found to be sufficient enough to train the pets dataset. This

  # effectively bypasses the learning rate schedule (the learning rate will

  # never decay). Remove the below line to train indefinitely.

  num_steps: 200000                   # 训练的steps

  data_augmentation_options {

    random_horizontal_flip {

    }

  }

  data_augmentation_options {

    ssd_random_crop {

    }

  }

}

train_input_reader: {

  tf_record_input_reader {

    input_path: "mydata/gaoyue_train.record"                 # 训练的tfrrecord文件路径

  }

  label_map_path: "mydata/gaoyue.pbtxt"

}

eval_config: {

  num_examples: 8000             # 验证集的数量

  # Note: The below line limits the evaluation process to 10 evaluations.

  # Remove the below line to evaluate indefinitely.

  max_evals: 10

}

eval_input_reader: {

  tf_record_input_reader {

    input_path: "mydata/gaoyue_test.record"                   # 验证的tfrrecord文件路径

  }

  label_map_path: "mydata/gaoyue.pbtxt"

  shuffle: false

  num_readers: 1

}
新建后的文件显示如下。

这时,我们训练的准备工作就做好了。
2.训练模型
在object_detection文件夹下打开Anaconda Prompt,输入命令
python model_main.py --pipeline_config_path=training/ssd_mobilenet_v1_coco.config --model_dir=training --alsologtostderr
在训练过程中如果出现no model named pycocotools的问题的话,请参考这个网址(http://www.mamicode.com/info-detail-2660241.html)解决。亲测有效
即:
(1)从https://github.com/pdollar/coco.git 下载源码,解压至全英文路径下。
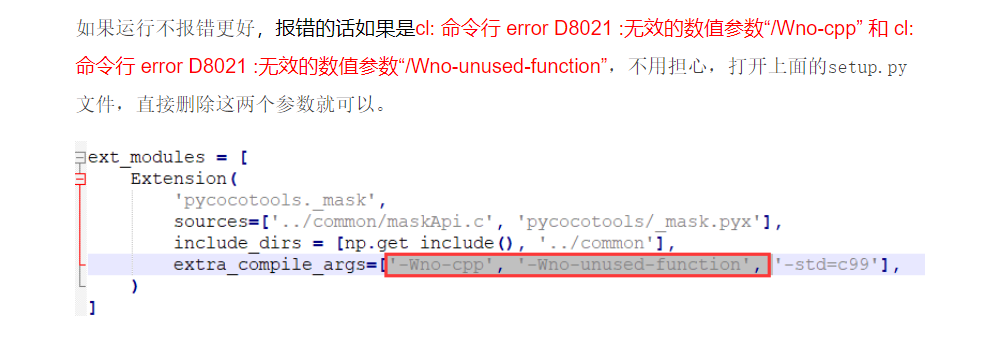
(2)使用cmd进入解压后的cocoapi-master/PythonAPI路径下,输入python setup.py build_ext --inplace。如果这一步有报错,请打开set_up.py文件,将其中这两个参数删除。
即:
(3)上一步执行没问题之后,继续在cmd窗口运行命令:python setup.py build_ext install
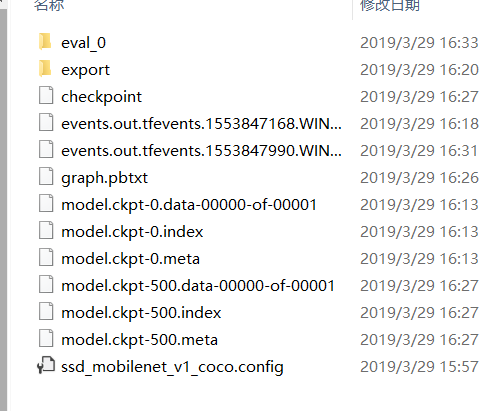
训练完成后,training文件夹下是这样的情况
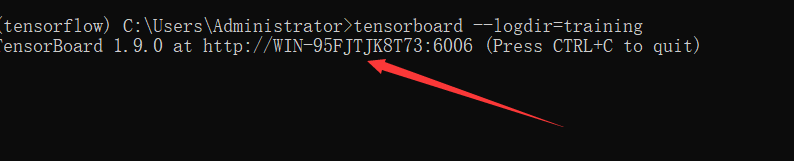
(如果想观察训练过程中参数的变化以及网络的话,可以打开新的一个Anaconda Prompt cd到object_detection文件夹下
输入命令:tensorboard --logdir=training),复制出现的网址即可。如图所示\
如果显示不出来的话,新建网页在地址栏输入http://localhost:6006/(后面的6006是我的端口号,根据你自己的输入)
3.生成模型
定位到object_detection目录下,打开Anaconda Promp输入命令
python export_inference_graph.py \ --input_type image_tensor \ --pipeline_config_path training/ssd_mobilenet_v1_coco.config \ --trained_checkpoint_prefix training/model.ckpt-500 \ --output_directory gaoyue_detection
(注意这两处标红的地方,1. model.ckpt-500是指你训练的轮数的文件,这里因为我只训练了500轮,所以改成了500(如下图中的500)
2. output_directory是输出模型的路径,最好是新建一个文件夹来存放模型,我新建了一个名为gaoyue_detection的模型)
命令执行完成后,打开gaoyue_detection文件夹,里面的内容如图所示
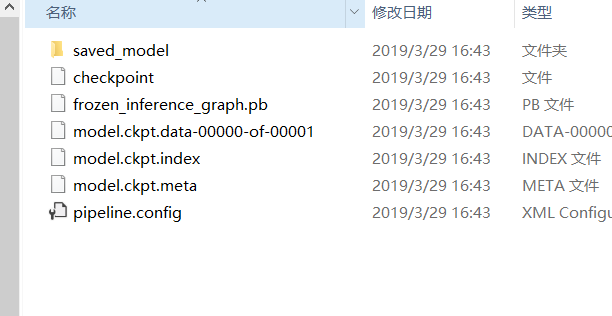
表示执行成功,这样,我们用自己数据集训练的目标检测模型就做好了
下一节会详细说我们自己模型的验证
tensorflow目标检测API之训练自己的数据集的更多相关文章
- tensorflow目标检测API之建立自己的数据集
1 收集数据 为了方便,我找了11张月儿的照片做数据集,如图1,当然这在实际应用过程中是远远不够的 2 labelImg软件的安装 使用labelImg软件(下载地址:https://github.c ...
- tensorflow目标检测API安装及测试
1.环境安装配置 1.1 安装tensorflow 安装tensorflow不再仔细说明,但是版本一定要是1.9 1.2 下载Tensorflow object detection API 下载地址 ...
- tensorflow2.4与目标检测API在3060显卡上的配置安装
目前,由于3060显卡驱动版本默认>11.0,因此,其不能使用tensorflow1版本的任何接口,所以学习在tf2版本下的目标检测驱动是很有必要的,此配置过程同样适用于任何30系显卡配置tf2 ...
- TensorFlow目标检测(object_detection)api使用
https://github.com/tensorflow/models/tree/master/research/object_detection 深度学习目标检测模型全面综述:Faster R-C ...
- OpenCV:OpenCV目标检测Boost方法训练
在古老的CNN方法出现以后,并不能适用于图像中目标检测.20世纪60年代,Hubel和Wiesel( 百度百科 )在研究猫脑皮层中用于局部敏感和方向选择的神经元时发现其独特的网络结构可以有效地降低反馈 ...
- 【Tensorflow系列】使用Inception_resnet_v2训练自己的数据集并用Tensorboard监控
[写在前面] 用Tensorflow(TF)已实现好的卷积神经网络(CNN)模型来训练自己的数据集,验证目前较成熟模型在不同数据集上的准确度,如Inception_V3, VGG16,Inceptio ...
- TensorFlow学习笔记——LeNet-5(训练自己的数据集)
在之前的TensorFlow学习笔记——图像识别与卷积神经网络(链接:请点击我)中了解了一下经典的卷积神经网络模型LeNet模型.那其实之前学习了别人的代码实现了LeNet网络对MNIST数据集的训练 ...
- 目标检测:keras-yolo3之制作VOC数据集训练指南
制作VOC数据集指南 Github:https://github.com/hyhouyong/keras-yolo3 LabelImg标注工具(windows环境下):https://github.c ...
- tensorflow+ssd_mobilenet实现目标检测的训练
本文在Ubuntu下使用tensorflow的object detection API来训练自己的数据集.所用模型为ssd_mobilenet,也可以使用其他的模型.当然也可以在windows下训练, ...
随机推荐
- centos6上安装CDH5.7
目录 一.环境说明及所需软件包... 1 1.环境说明... 1 2.所需软件及说明... 1 二.安装前的主机准备(所有主机都有做) 2 1.配置主机名和修改host文件... 2 2.下载系统基本 ...
- 制作windows启动盘
·首先:不要使用“老毛桃,大白菜,u深度,电脑店,u大师”等工具,国产流氓软件了解下. ·工具:UltraISO (自行下载)环境:Windows ·Windows 7微软原版无修改的系统镜像下载地址 ...
- 解决windows下nginx中文文件名乱码
我的根目录文件夹放在d盘work文件夹下,一般这样配置 nginx\conf\nginx.conf location / { root D:/work; index index_bak.html; a ...
- BZOJ 1123 && Luogu P3469 [POI2008]BLO-Blockade 割点+乘法原理
想了半天式子...最后在邓大师的帮助下想出此题....QWQ我还是太菜了 对于一个非割点,ans+=2*(n-1); 对于一个割点,ans+= #include<cstdio> #incl ...
- H.天神的密码
链接:https://ac.nowcoder.com/acm/contest/903/H 题意: 2018年,icebound打开了神殿.而在2019年,icebound正在试图破解天神的密码,以期获 ...
- hdu6062RXD and logic gates多校题 构造
听说标算的点数是2^(n+1)级别的,也不知道我是不是比标算优一点? (话说这种题一眼看过去怎么跟题答一样) 然而并不是题答,没法手玩,来考虑一下一般解法: 考虑一个规模较小的问题:最后一位一定是0 ...
- (转)Nginx/Apache服务连接数梳理
Nginx/Apache服务连接数梳理 原文:http://www.cnblogs.com/kevingrace/p/6211542.html 统计连接数,使用netstat命令或ss命令都可以1)统 ...
- 《从0到1学习Flink》—— Data Source 介绍
前言 Data Sources 是什么呢?就字面意思其实就可以知道:数据来源. Flink 做为一款流式计算框架,它可用来做批处理,即处理静态的数据集.历史的数据集:也可以用来做流处理,即实时的处理些 ...
- 1044 拦截导弹 1999年NOIP全国联赛提高组 个人博客:attack.cf
1044 拦截导弹 1999年NOIP全国联赛提高组 时间限制: 1 s 空间限制: 128000 KB 题目等级 : 黄金 Gold 题目描述 Description 某国为了防御敌 ...
- html5 02 随记
HTML 02 全局通用属性 id name class style 一. 图像标签 标签名:<img /> 常用属性: Alt -- 代表图像的替代文字 作用: 当图片不显示的 ...