Android 自定义view (一)——attr 理解
前言:
自定义view是android自定义控件的核心之一,那么在学习自定义view之前,我们先来了解下自定义view的自定义属性的attr的用法吧
Android attr 是什么
(1)attr 的简单理解就是一个属性约束,约束具体属性字段的属性的数据类型(boolean、string、float…)
(2)attr的文件名称不是固定的,只是方便理解和规范,也可以是其他名称,比如arrt、aesa…
(3)其实我们经常在使用,比如我们界面的布局文件,从狭隘的方面理解只要用xml形式文件就涉及到约束,而attr就是其中的一种约束文件(类似Schema)而已
(4)如果要深入理解请大家去简单了解 XML DTD和XML Schema(我大学选修课),这里就不带大家去理解了。
(5)这里给出两个参考网址:http://blog.chinaunix.net/uid-7308906-id-2059766.html ,http://blog.csdn.net/sunxing007/article/details/5684265
Android attr 的作用
(1)attr 作用就是约束属性数据类型,xml资源文件中定义各种attr,指定attr的数据类型。
Android attr 的使用方式
(1) 在自定义View的构造函数中解析这些从XML中定义的属性值,将其存放到View对应的成员变量中
(2) 在layout文件中为自定义View的XML属性赋值
Android attr 的简单创建
(1)我们在res/values目录下新建了一个名为attrs_ysj.xml文件,文件名是什么不重要,只要是xml文件就行。
(2)我们在该文件中定义我们自定义View所支持的XML属性。

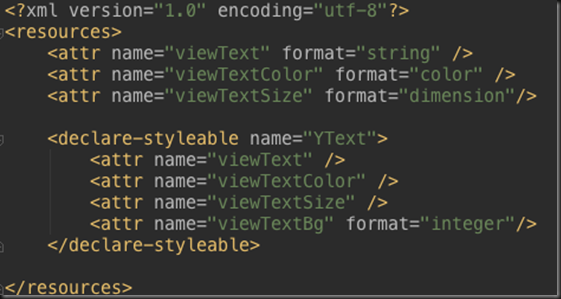
由图可知该文件的根结点是<resources> </resources>,我们在根节点下可以添加多个子节点,在节点中通过name指定XML属性名称,通过format指定XML属性值的类型,如下图所示:

当然为了方便理解format支持的数据类型,我在其他地方找了一张图片
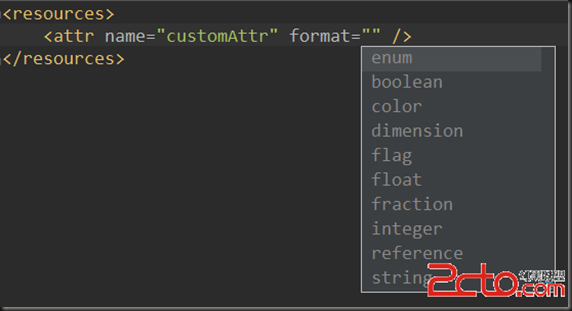
由上图我们可知,format支持的类型有enum、boolean、color、dimension、flag、float、fraction、integer、reference、string。
按照以上的方法我们就可以定义好自己的属性以及相关的数据类型,接下来我们看看怎么简单的使用
Android attr 属性放入 styleable 节点中
首先要明确一点,attr不依赖于styleable,styleable只是为了方便attr的使用。我们可以直接在resources文件中定义一些属性,也可以自己定义属性放到styleable里面。使用declare-styleable的方式有利于我们我们把相关的属性组织起来,有一个分组的概念,属性的使用范围更加明确。
他们区别就是在自定义view中获取属性的方式有略微差异
如果直接使用attr定义,

定义一个attr就会在R文件里面生成一个Id,那么我们去获取这个属性时。那么获取我们自定义的相关属性的方式为:
int[] custom_attrs = {R.attr.viewText,R.viewTextColor,R.viewTextSize};

TypedArray typedArray = context.obtainStyledAttributes(set,custom_attrs);如果自己定义属性放到styleable里面如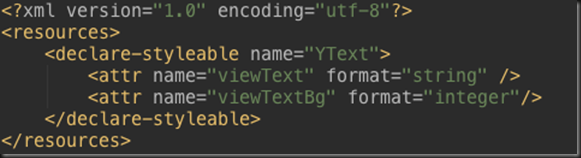
通过定义一个styleable,我们可以在R文件里自动生成一个int[],数组里面的int就是定义在styleable里面的attr的id。所以我们在获取属性的时候就可以直接使用styleable数组来获取一系列的属性。那么获取我们自定义的相关属性的方式为:
TypedArray typedArray = context.obtainStyledAttributes(set,R.styleable.YText);由上面的例子可以知道,定义一个declare-styleable,在获取属性的时候为我们自动提供了一个属性数组。此外,使用declare-styleable的方式有利于我们我们把相关的属性组织起来,有一个分组的概念,属性的使用范围更加明确。
format 数据类型参考
1. reference:参考某一资源ID。
(1)属性定义:
<declare-styleable name = "名称">
<attr name = "background" format = "reference" />
</declare-styleable>
(2)属性使用:
<ImageView
android:layout_width = "42dip"
android:layout_height = "42dip"
android:background = "@drawable/图片ID"
/>
2. color:颜色值。
(1)属性定义:
<declare-styleable name = "名称">
<attr name = "textColor" format = "color" />
</declare-styleable>
(2)属性使用:
<TextView
android:layout_width = "42dip"
android:layout_height = "42dip"
android:textColor = "#00FF00"
/>
3. boolean:布尔值。
(1)属性定义:
<declare-styleable name = "名称">
<attr name = "focusable" format = "boolean" />
</declare-styleable>
(2)属性使用:
<Button
android:layout_width = "42dip"
android:layout_height = "42dip"
android:focusable = "true"
/>
4. dimension:尺寸值。
(1)属性定义:
<declare-styleable name = "名称">
<attr name = "layout_width" format = "dimension" />
</declare-styleable>
(2)属性使用:
<Button
android:layout_width = "42dip"
android:layout_height = "42dip"
/>
5. float:浮点值。
(1)属性定义:
<declare-styleable name = "AlphaAnimation">
<attr name = "fromAlpha" format = "float" />
<attr name = "toAlpha" format = "float" />
</declare-styleable>
(2)属性使用:
<alpha
android:fromAlpha = "1.0"
android:toAlpha = "0.7"
/>
6. integer:整型值。
(1)属性定义:
<declare-styleable name = "AnimatedRotateDrawable">
<attr name = "visible" />
<attr name = "frameDuration" format="integer" />
<attr name = "framesCount" format="integer" />
<attr name = "pivotX" />
<attr name = "pivotY" />
<attr name = "drawable" />
</declare-styleable>
(2)属性使用:
<animated-rotate
xmlns:android = "http://schemas.android.com/apk/res/android"
android:drawable = "@drawable/图片ID"
android:pivotX = "50%"
android:pivotY = "50%"
android:framesCount = "12"
android:frameDuration = "100"
/>
7. string:字符串。
(1)属性定义:
<declare-styleable name = "MapView">
<attr name = "apiKey" format = "string" />
</declare-styleable>
(2)属性使用:
<com.google.android.maps.MapView
android:layout_width = "fill_parent"
android:layout_height = "fill_parent"
android:apiKey = "0jOkQ80oD1JL9C6HAja99uGXCRiS2CGjKO_bc_g"
/>
8. fraction:百分数。
(1)属性定义:
<declare-styleable name="RotateDrawable">
<attr name = "visible" />
<attr name = "fromDegrees" format = "float" />
<attr name = "toDegrees" format = "float" />
<attr name = "pivotX" format = "fraction" />
<attr name = "pivotY" format = "fraction" />
<attr name = "drawable" />
</declare-styleable>
(2)属性使用:
<rotate
xmlns:android = "http://schemas.android.com/apk/res/android"
android:interpolator = "@anim/动画ID"
android:fromDegrees = "0"
android:toDegrees = "360"
android:pivotX = "200%"
android:pivotY = "300%"
android:duration = "5000"
android:repeatMode = "restart"
android:repeatCount = "infinite"
/>
9. enum:枚举值。
(1)属性定义:
<declare-styleable name="名称">
<attr name="orientation">
<enum name="horizontal" value="0" />
<enum name="vertical" value="1" />
</attr>
</declare-styleable>
(2)属性使用:
<LinearLayout
xmlns:android = "http://schemas.android.com/apk/res/android"
android:orientation = "vertical"
android:layout_width = "fill_parent"
android:layout_height = "fill_parent"
>
</LinearLayout>
10. flag:位或运算。
(1)属性定义:
<declare-styleable name="名称">
<attr name="windowSoftInputMode">
<flag name = "stateUnspecified" value = "0" />
<flag name = "stateUnchanged" value = "1" />
<flag name = "stateHidden" value = "2" />
<flag name = "stateAlwaysHidden" value = "3" />
<flag name = "stateVisible" value = "4" />
<flag name = "stateAlwaysVisible" value = "5" />
<flag name = "adjustUnspecified" value = "0x00" />
<flag name = "adjustResize" value = "0x10" />
<flag name = "adjustPan" value = "0x20" />
<flag name = "adjustNothing" value = "0x30" />
</attr>
</declare-styleable>
(2)属性使用:
<activity
android:name = ".StyleAndThemeActivity"
android:label = "@string/app_name"
android:windowSoftInputMode = "stateUnspecified | stateUnchanged | stateHidden">
<intent-filter>
<action android:name = "android.intent.action.MAIN" />
<category android:name = "android.intent.category.LAUNCHER" />
</intent-filter>
</activity>
注意:
属性定义时可以指定多种类型值。
(1)属性定义:
<declare-styleable name = "名称">
<attr name = "background" format = "reference|color" />
</declare-styleable>
(2)属性使用:
<ImageView
android:layout_width = "42dip"
android:layout_height = "42dip"
android:background = "@drawable/图片ID|#00FF00" />
Android 自定义view (一)——attr 理解的更多相关文章
- Android 自定义 view(三)—— onDraw 方法理解
前言: 上一篇已经介绍了用自己定义的属性怎么简单定义一个view<Android 自定义view(二) -- attr 使用>,那么接下来我们继续深究自定义view,下一步将要去简单理解自 ...
- Android 自定义view(二) —— attr 使用
前言: attr 在前一篇文章<Android 自定义view -- attr理解>已经简单的进行了介绍和创建,那么这篇文章就来一步步说说attr的简单使用吧 自定义view简单实现步骤 ...
- Android 自定义 view(四)—— onMeasure 方法理解
前言: 前面我们已经学过<Android 自定义 view(三)-- onDraw 方法理解>,那么接下我们还需要继续去理解自定义view里面的onMeasure 方法 推荐文章: htt ...
- Android自定义View(三、深入解析控件测量onMeasure)
转载请标明出处: http://blog.csdn.net/xmxkf/article/details/51490283 本文出自:[openXu的博客] 目录: onMeasure什么时候会被调用 ...
- android自定义view系列:认识activity结构
标签: android 自定义view activity 开发中虽然我们调用Activity的setContentView(R.layout.activity_main)方法显示View视图,但是vi ...
- Android 自定义 View 详解
View 的绘制系列文章: Android View 绘制流程之 DecorView 与 ViewRootImpl Android View 的绘制流程之 Measure 过程详解 (一) Andro ...
- 【朝花夕拾】Android自定义View篇之(四)自定义View的三种实现方式及自定义属性使用介绍
前言 转载请声明,转自[https://www.cnblogs.com/andy-songwei/p/10979161.html],谢谢! 尽管Android系统提供了不少控件,但是有很多酷炫效果仍然 ...
- (转)[原] Android 自定义View 密码框 例子
遵从准则 暴露您view中所有影响可见外观的属性或者行为. 通过XML添加和设置样式 通过元素的属性来控制其外观和行为,支持和重要事件交流的事件监听器 详细步骤见:Android 自定义View步骤 ...
- Android 自定义View (五)——实践
前言: 前面已经介绍了<Android 自定义 view(四)-- onMeasure 方法理解>,那么这次我们就来小实践下吧 任务: 公司现有两个任务需要我完成 (1)监测液化天然气液压 ...
- Android自定义View的实现方法,带你一步步深入了解View(四)
转载请注明出处:http://blog.csdn.net/guolin_blog/article/details/17357967 不知不觉中,带你一步步深入了解View系列的文章已经写到第四篇了,回 ...
随机推荐
- mac os x 10.10.3 安装protoc
预装如下环境 autoconf 2.6.9automake 1.14libtool 2.4 Building from source Download latest version of procbu ...
- Node.js-视图引擎【1】-Swig集成express的安装与配置
node.js视图引擎,选来选去发现Swig最符合我的胃口哈哈. 一.安装Swig视图引擎 npm install -g swig 二.在node.js代码中配置如下 var app = requir ...
- bzoj3212 pku3468 A Simple Problem with Integers
一个有初值的数列.区间加.区间查 用线段树直接水过 然而并没有1A,主要是做题太快没看规模结果没注意线段树要用longlong建 卧槽怎么可以这么坑爹,害得我看见wa心慌了,还以为连线段树都要跪 一开 ...
- extjs4 各种怪异问题
用extjs4 已经有一段时间了,过去开发的时候用过extjs2.2 因为放下了两年所有很多东西记得不是很清楚了,现在又直接使用4 突然发现这个世界变得太快连代码都变得这么快,大部分东西都完全不一样了 ...
- Ubuntu 14.04 安装pdf阅读器
1. 个人推荐 okular. 关于安装okular的原因,可以很好的做到护眼功能. Ubuntu 14.04 自带的阅读器,因为白色太刺眼,长时间使用对眼睛不好. 对于,长时间编程的朋友们习惯夜间模 ...
- oracle[insert 时报错: 单行子查询返回多行]
-- 错误的写法 insert into t_b_partner_vehicle(id, partner_id, vehicle_id) (seq_t_b_partner_vehicle.nextva ...
- php字符串笔记
1.explode:英语的意思就是爆炸,此函数用于将字符串切成数组 2.implode:英语意思是向心聚,将数据拼成字符串. 3.substr:截取字符串,从指定位置截取指定长度,不指定就到最后 4. ...
- SQL模仿Split 功能
--方法0:动态SQL法 declare @s varchar(100),@sql varchar(1000) set @s='1,2,3,4,5,6,7,8,9,10' set @sql='sele ...
- 读取bmp图片数据
public void getBMPImage(String source) throws Exception { clearNData(); //清除数据保存区 FileInputStream fs ...
- Office 365 Licence使用情况统计
负责采购的同事需要知道目前公司使用了多少License,但是通过O365控制台界面似乎无法直接导出License使用量的信息,于是让我帮忙从后台统计一下. $mail_text = Read-Host ...