React中的Context——从父组件传递数据
简介:在React中,数据可以以流的形式自上而下的传递,每当你使用一个组件的时候,你可以看到组件的props属性会自上而下的传递。但是,在某些情况下,我们不想通过父组件的props属性一级一级的往下传递,我们希望在某一级子组件中,直接得到上N级父组件中props中的值。
1.一般情况下通过props传值的情况
class Button extends React.Component {

  render() {

    return (

      <button style={{background: this.props.color}}>

        {this.props.children}

      </button>

    );

  }

}

class Message extends React.Component {

  render() {

    return (

      <div>

        {this.props.text} <Button color={this.props.color}>Delete</Button>

      </div>

    );

  }

}

class MessageList extends React.Component {

  render() {

    const color = "purple";

    const children = this.props.messages.map((message) =>

      <Message text={message.text} color={color} />

    );

    return <div>{children}</div>;

  }

}
我们来分析一下这段代码,大致的组件分为3级:
顶层MessageLists——>Message一级子类——>Button底层子类
我们来看从父组件到子组件的值的传递情况:
(1)text:
我们可以看到,在顶层组件MessageLists中的值,传递到一级子组件Message中,并在此组件中被使用。
(2)color:
再看props中的color的传递情况,在顶层组件MessageLists中的值,先传递到一级子组件Message中,
在传递到二级子组件Button中,最后在二级子组件中被使用。
综上:这就是一般在React中,所使用的通过props属性,在父组件与子组件中进行值传递。
2.如何利用React中的Context来进行值的越级传递。
class Button extends React.Component {

  render() {

    return (

      <button style={{background: this.context.color}}>

        {this.props.children}

      </button>

    );

  }

}

Button.contextTypes = {

  color: React.PropTypes.string

};

class Message extends React.Component {

  render() {

    return (

      <div>

        {this.props.text} <Button>Delete</Button>

      </div>

    );

  }

}

class MessageList extends React.Component {

  getChildContext() {

    return {color: "purple"};

  }

  render() {

    const children = this.props.messages.map((message) =>

      <Message text={message.text} />

    );

    return <div>{children}</div>;

  }

}

MessageList.childContextTypes = {

  color: React.PropTypes.string

};
上述代码,我们实现了通过React的Context实现了值——color的越级传递。我们来分析一下上述的方法。
(1)首先在顶层组件中:
MessageList.childContextTypes = {

  color: React.PropTypes.string

};
定义了顶层组件所拥有的子类context对象——该顶层组件所拥有的的子类context对象为color,且必须为字符串。
然后通过getChildText方法,来给子context对象的属性赋值:
getChildContext() {

    return {color: "purple"};

  }
这样就完成了顶层组件中,context对象的赋值。
(2)越级传递,因为color属性只在最底层使用
我们来看color属性的越级传递,因为color属性,在一级子组件Message中并没有直接用到,因此我们可以
直接传递到最底层(越级),在Button组件中使用。
首先Button组件中,再次声明了所接受到的context的子组件color的类型,声明必须为字符串:
Button.contextTypes = {

  color: React.PropTypes.string

};
然后可以通过this.context.color这种方式调用:
 <button style={{background: this.context.color}}>

        {this.props.children}

 </button>
综上:这样,我们发现通过Context,我们就能实现值得越级传递。
注意的是:子组件要用this.context.color进行调用
======================================================================================================
注意:
constructor(props, context) {

    super(props, context);

}
类似上面 一定要把context引进来
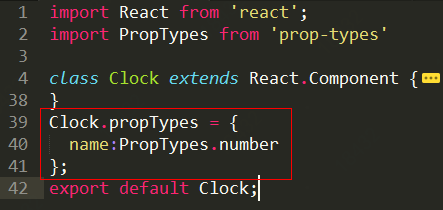
注意引入propTypes的方式
React中的Context——从父组件传递数据的更多相关文章
- vuejs子组件向父组件传递数据
子组件通过$emit方法向父组件发送数据,子组件在父组件的模板中,通过自定义事件接收到数据,并通过自定义函数操作数据 <!DOCTYPE html> <html lang=" ...
- vue 父向子组件传递数据,子组件向父组件传递数据方式
父组件向子组件传递数据通过props,子组件引入到父组件中,设置一个值等于父组件的数据,通过:bind将数据传到子组件中,子组件中通过props接收父组件的数据,这样就可以使用父组件的数据了,循环组件 ...
- Vue : props 使用细节(父组件传递数据给子组件)
props使用细节 在Vue.js中我们可以使用 props 实现父组件传递数据给子组件,下面我们总结一下props的使用细节 1.基础类型检查 2.必填数据 3.默认值 4.自定义验证函数 其中每一 ...
- vue子组件使用自定义事件向父组件传递数据
使用v-on绑定自定义事件可以让子组件向父组件传递数据,用到了this.$emit(‘自定义的事件名称’,传递给父组件的数据) <!DOCTYPE html> <html lang= ...
- vue单文件组件形成父子(子父)组件之间通信(vue父组件传递数据给子组件,子组件传递数据给父组件)
看了很多文章,官网文档也有看,对父子组件通信说的不是很明白:决定自己总结一下: vue一般都使用构建工具构建项目:这样每个组件都是单文件组件:而网上很多文章都是script标签方式映入vue,组件通信 ...
- Vue父组件向子组件传递方法(自定义方法)并且子组件向父组件传递数据
<!DOCTYPE html> <html lang="en"> <head> <meta charset="UTF-8&quo ...
- vue 父组件传递数据给子组件
父组件 <body> <div id="app"> <child v-bind:data = "test"></chi ...
- vue 实现,子组件向父组件 传递数据
首先理清组件之间的关系 组件与组件之间,还存在着不同的关系.父子关系与兄弟关系(不是父子的都暂称为兄弟吧). 父子组件 父子关系即是组件 A 在它的模板中使用了组件 B,那么组件 A 就是父组件,组件 ...
- vue组件-子组件向父组件传递数据-自定义事件
自定义事件 我们知道,父组件是使用 props 传递数据给子组件,但如果子组件要把数据传递回去,应该怎样做?那就是自定义事件!
随机推荐
- getopts的使用方法
getopts的使用 语法格式:getopts [option[:]] [DESCPRITION] VARIABLE option:表示为某个脚本可以使用的选项 ":":如果某个选 ...
- PC/FORTH 循环
body, table{font-family: 微软雅黑} table{border-collapse: collapse; border: solid gray; border-width: 2p ...
- web service基础知识
Web服务基础 用户访问网站的基本流程 我们每天都会用web客户端上网,浏览器就是一个web客户端,例如谷歌浏览器,以及火狐浏览器等. 当我们输入www.oldboyedu.com/时候,很快就能看到 ...
- c算法:字符串查找-KMP算法
/* *用KMP算法实现字符串匹配搜索方法 *该程序实现的功能是搜索本目录下的所有文件的内容是否与给定的 *字符串匹配,如果匹配,则输出文件名:包含该字符串的行 *待搜索的目标串搜索指针移动位数 = ...
- Java的file类
package IO; import java.io.File; import java.io.IOException; public class FileDemo01 { public static ...
- spring boot 集成 quartz 定时任务
spring boot: @EnableScheduling开启计划任务支持,@Scheduled计划任务声明 1.pom.xml 引入依赖 <dependency> <groupI ...
- 奇怪问题之@RequestBody问题
在项目中使用到了@RequestBody注解:该注解的作用是获取Request请求中body中的数据:最近测试项目的时候发现调用该接口的时候直接返回状态400,当将@RequestBody注解去掉以后 ...
- 51nod1009
给定一个十进制正整数N,写下从1开始,到N的所有正数,计算出其中出现所有1的个数. 例如:n = 12,包含了5个1.1,10,12共包含3个1,11包含2个1,总共5个1. Input 输入N( ...
- <Yarn> <Capacity Scheduler> <Source Code>
Yarn capacity scheduler 首先要知道, [Attention: RM有两个组件,其中Scheduler完全就只是负责资源的分配:ApplicationsManager则负责接受a ...
- python scrapy爬虫存储数据库方法带去重步骤
import pymongo import requests import random import time import pymysql db = pymongo.MongoClient()[' ...