IdentityServer4-用EF配置Client(一)
一、背景
IdentityServer4的介绍将不再叙述,百度下可以找到,且官网的快速入门例子也有翻译的版本。这里主要从Client应用场景方面介绍对IdentityServer4的应用。
首先简要介绍ID Token和Access Token:
Access Token是授权第三方客户端访问受保护资源的令牌。 ID Token是第三方客户端标识用户身份认证的问令牌,是JSON Web Token格式。
二、Client应用场景介绍
Client类是为OpenID Connect或OAuth 2.0 协议建模的。
我们先看官网快速入门中给的Client例子
 public static IEnumerable<Client> GetClients()

        {

            // client credentials client

            return new List<Client>

            {

                new Client

                {

                    ClientId = "Client",

                    AllowedGrantTypes = GrantTypes.ClientCredentials,

                    ClientSecrets =

                    {

                        new Secret("secret".Sha256())

                    },

                    AllowedScopes = { "api1" }

                },

                // resource owner password grant client

                new Client

                {

                    ClientId = "ro.client",

                    AllowedGrantTypes = GrantTypes.ResourceOwnerPassword,

                    ClientSecrets =

                    {

                        new Secret("secret".Sha256())

                    },

                    AllowedScopes = { "api1" }                },

                // OpenID Connect hybrid flow and client credentials client (MVC)

                new Client

                {

                    ClientId = "mvc",

                    ClientName = "MVC Client",

                    AllowedGrantTypes = GrantTypes.HybridAndClientCredentials,

                    ClientSecrets =

                    {

                        new Secret("secret".Sha256())

                    },

                    RedirectUris = { "http://localhost:5002/signin-oidc" },

                    PostLogoutRedirectUris = { "http://localhost:5002/signout-callback-oidc" },

                    AllowedScopes =

                    {

                        IdentityServerConstants.StandardScopes.OpenId,

                        IdentityServerConstants.StandardScopes.Profile,

                        "api1"

                    },

                    AllowOfflineAccess = true

                },

                // JavaScript Client

                new Client

                {

                    ClientId = "js",

                    ClientName = "JavaScript Client",

                    AllowedGrantTypes = GrantTypes.Implicit,

                    AllowAccessTokensViaBrowser = true,

                    RedirectUris = { "http://localhost:5003/callback.html" },

                    PostLogoutRedirectUris = { "http://localhost:5003/index.html" },

                    AllowedCorsOrigins = { "http://localhost:5003" },

                    AllowedScopes =

                    {

                        IdentityServerConstants.StandardScopes.OpenId,

                        IdentityServerConstants.StandardScopes.Profile,

                        "api1"

                    },

                }

            };

        }
里面主要介绍四种Client应用场景。
(1)客户端模式(AllowedGrantTypes = GrantTypes.ClientCredentials)
这是一种最简单的授权方式,应用于服务于服务之间的通信,token通常代表的是客户端的请求,而不是用户。
使用这种授权类型,会向token endpoint发送token请求,并获得代表客户机的access token。客户端通常必须使用token endpoint的Client ID和secret进行身份验证。
适用场景:用于和用户无关,服务与服务之间直接交互访问资源
(2)密码模式(ClientAllowedGrantTypes = GrantTypes.ResourceOwnerPassword)
该方式发送用户名和密码到token endpoint,向资源服务器请求令牌。这是一种“非交互式”授权方法。
官网上称,为了解决一些历史遗留的应用场景,所以保留了这种授权方式,但不建议使用。
适用场景:用于当前的APP是专门为服务端设计的情况。
(3)混合模式和客户端模式(ClientAllowedGrantTypes =GrantTypes.HybridAndClientCredentials)
ClientCredentials授权方式在第一种应用场景已经介绍了,这里主要介绍Hybrid授权方式。Hybrid是由Implicit和Authorization code结合起来的一种授权方式。其中Implicit用于身份认证,ID token被传输到浏览器并在浏览器进行验证;而Authorization code使用反向通道检索token和刷新token。
推荐使用Hybrid模式。
适用场景:用于MVC框架,服务器端 Web 应用程序和原生桌面/移动应用程序。
(4)简化模式(ClientAllowedGrantTypes =GrantTypes.Implicit)
Implicit要么仅用于服务端和JavaScript应用程序端进行身份认证,要么用于身份身份验证和access token的传输。
在Implicit中,所有token都通过浏览器传输的。
适用场景:JavaScript应用程序。
三、Server端搭建
为了介绍IdentityServer4的Client应用场景,我们需要先搭建IdentityServer服务端。
这里搭建的是使用EF Core来做数据操作,保存到SQL Server中。
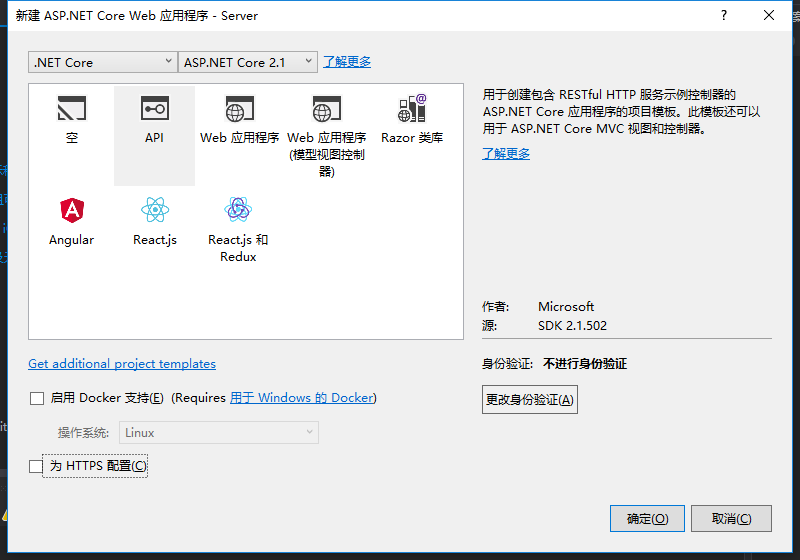
(1)新建API项目
(2)安装IdentityServer4.EntityFramework包

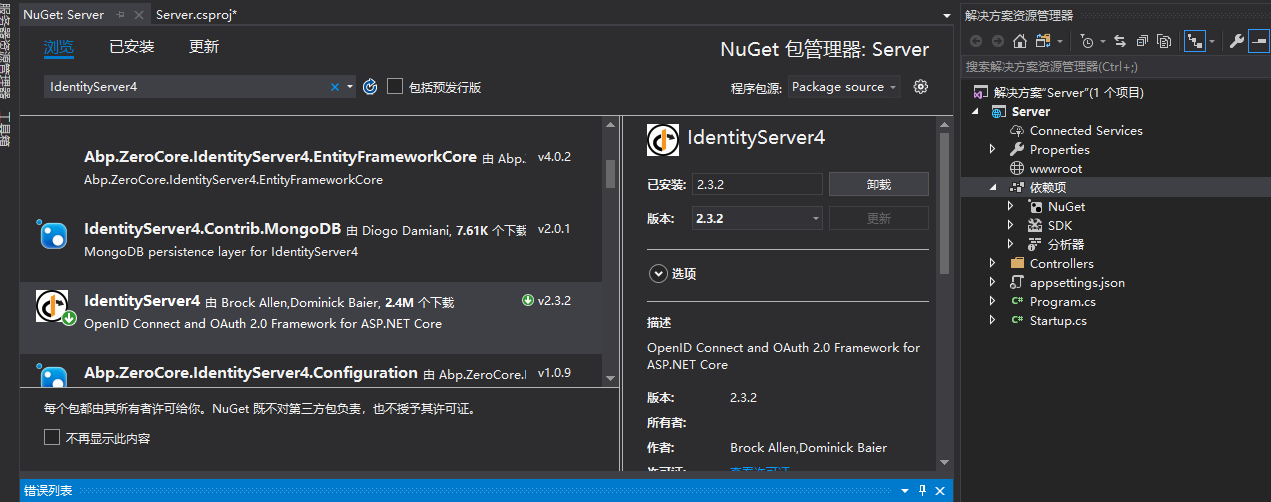
(3)安装IdentityServer4包
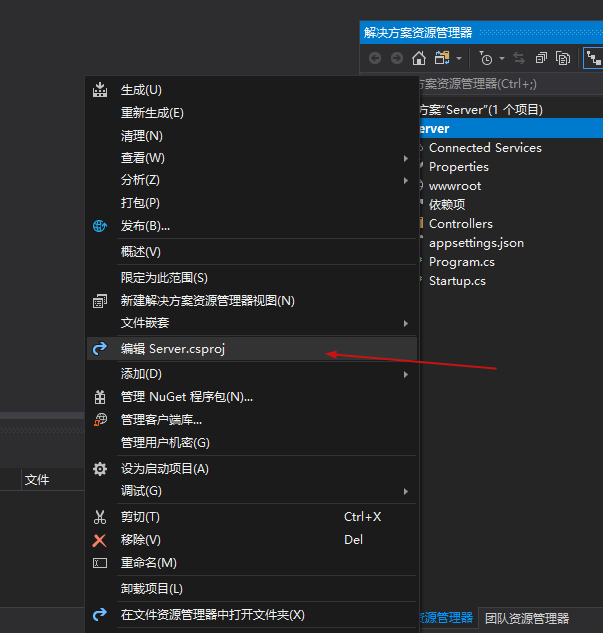
(4)右键项目的属性,编辑项目的.csproj文件
添加如下元素
<ItemGroup>

    <DotNetCliToolReference Include="Microsoft.EntityFrameworkCore.Tools.DotNet" Version="2.0.0" />

</ItemGroup>
如图:

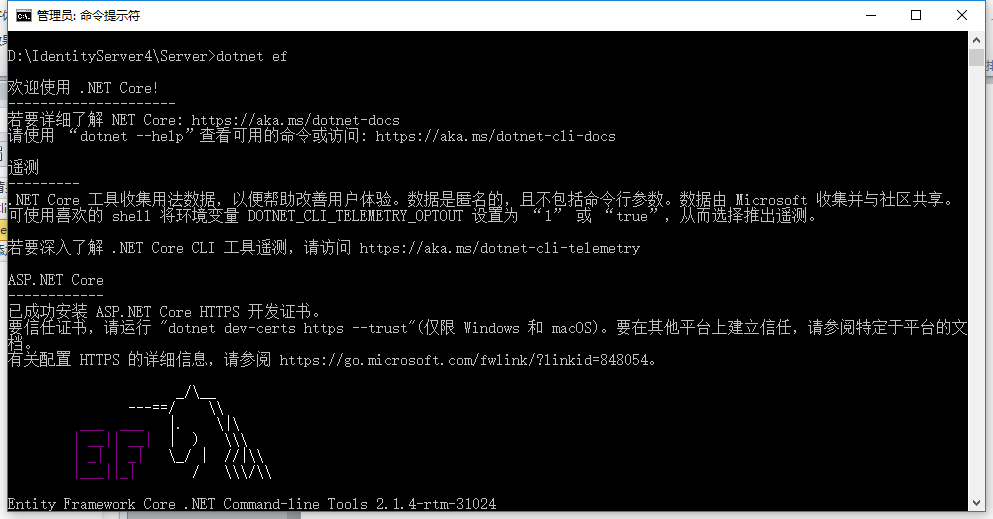
(5)cmd管理员身份进入项目目录路径(D:\IdentityServer4\Server),运行:dotnet ef
(6)项目内添加Config.cs类,代码如下
 public class Config

    {

        public static List<TestUser> GetUsers()

        {

            return new List<TestUser>

            {

                new TestUser

                {

                    SubjectId = "",

                    Username = "alice",

                    Password = "password",

                  Claims = new List<Claim>(){new Claim(JwtClaimTypes.Role,"superadmin") }

                },

                new TestUser

                {

                    SubjectId = "",

                    Username = "bob",

                    Password = "password",

                    Claims = new List<Claim>

                    {

                        new Claim("name", "Bob"),

                        new Claim("website", "https://bob.com")

                    },

                }

            };

        }

        public static IEnumerable<Client> GetClients()

        {

            // client credentials client

            return new List<Client>

            {

                new Client

                {

                    ClientId = "Client",

                    AllowedGrantTypes = GrantTypes.ClientCredentials,

                    ClientSecrets =

                    {

                        new Secret("secret".Sha256())

                    },

                    AllowedScopes = { "api1" }

                },

                // resource owner password grant client

                new Client

                {

                    ClientId = "ro.client",

                    AllowedGrantTypes = GrantTypes.ResourceOwnerPassword,

                    ClientSecrets =

                    {

                        new Secret("secret".Sha256())

                    },

                    AllowedScopes = { "api1" }

                },

                // OpenID Connect hybrid flow and client credentials client (MVC)

                new Client

                {

                    ClientId = "mvc",

                    ClientName = "MVC Client",

                    AllowedGrantTypes = GrantTypes.HybridAndClientCredentials,

                    ClientSecrets =

                    {

                        new Secret("secret".Sha256())

                    },

                    RedirectUris = { "http://localhost:5002/signin-oidc" },

                    PostLogoutRedirectUris = { "http://localhost:5002/signout-callback-oidc" },

                    AllowedScopes =

                    {

                        IdentityServerConstants.StandardScopes.OpenId,

                        IdentityServerConstants.StandardScopes.Profile,

                        "api1"

                    },

                    AllowOfflineAccess = true

                },

                // JavaScript Client

                new Client

                {

                    ClientId = "js",

                    ClientName = "JavaScript Client",

                    AllowedGrantTypes = GrantTypes.Implicit,

                    AllowAccessTokensViaBrowser = true,

                    RedirectUris = { "http://localhost:5003/callback.html" },

                    PostLogoutRedirectUris = { "http://localhost:5003/index.html" },

                    AllowedCorsOrigins = { "http://localhost:5003" },

                    AllowedScopes =

                    {

                        IdentityServerConstants.StandardScopes.OpenId,

                        IdentityServerConstants.StandardScopes.Profile,

                        "api1"

                    },

                }

            };

        }

        public static IEnumerable<IdentityResource> GetIdentityResources()

        {

            return new List<IdentityResource>

            {

                new IdentityResources.OpenId(),

                new IdentityResources.Profile(),

            };

        }

        public static IEnumerable<ApiResource> GetApiResources()

        {

            return new List<ApiResource>

            {

                new ApiResource("api1", "My API")

            };

        }
添加引用:
using IdentityModel;
using IdentityServer4;
using IdentityServer4.Models;
using IdentityServer4.Test;
using System.Collections.Generic;
using System.Security.Claims;
(7)编辑Startup.cs文件的ConfigureServices方法,改成如下代码。
public void ConfigureServices(IServiceCollection services)

        {

            const string connectionString = @"Server=localhost;database=IdentityServer4;User ID=sa;Password=Pwd;trusted_connection=yes";

            var migrationsAssembly = typeof(Startup).GetTypeInfo().Assembly.GetName().Name;

            // configure identity server with in-memory stores, keys, clients and scopes

            services.AddIdentityServer()

                .AddDeveloperSigningCredential()

                .AddTestUsers(Config.GetUsers())

                // this adds the config data from DB (clients, resources)

                .AddConfigurationStore(options =>

                {

                    options.ConfigureDbContext = builder =>

                        builder.UseSqlServer(connectionString,

                            sql => sql.MigrationsAssembly(migrationsAssembly));

                })

                // this adds the operational data from DB (codes, tokens, consents)

                .AddOperationalStore(options =>

                {

                    options.ConfigureDbContext = builder =>

                        builder.UseSqlServer(connectionString,

                            sql => sql.MigrationsAssembly(migrationsAssembly));

                    // this enables automatic token cleanup. this is optional.

                    options.EnableTokenCleanup = false;//是否从数据库清楚令牌数据,默认为false

                    options.TokenCleanupInterval = ;//令牌过期时间,默认为3600秒,一个小时

                });

            //.AddInMemoryClients(Config.GetClients());

            services.AddMvc().SetCompatibilityVersion(CompatibilityVersion.Version_2_1);

        }
添加引用:
using Microsoft.EntityFrameworkCore;
using System.Reflection;
(8)cmd管理员身份进入到项目目录路径(D:\IdentityServer4\Server\Server),注意,多了一层目录,分别运行以下两条指令:
dotnet ef migrations add InitialIdentityServerPersistedGrantDbMigration -c PersistedGrantDbContext -o Data/Migrations/IdentityServer/PersistedGrantDb

dotnet ef migrations add InitialIdentityServerConfigurationDbMigration -c ConfigurationDbContext -o Data/Migrations/IdentityServer/ConfigurationDb

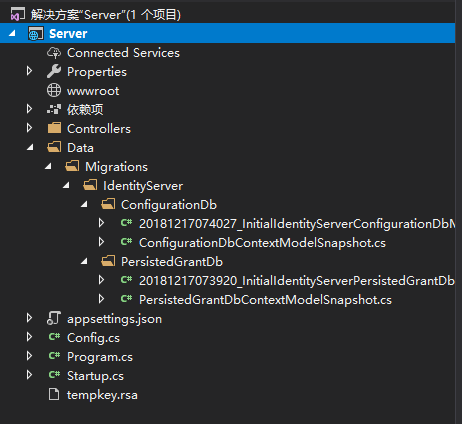
运行完后,项目中会多了一个Data文件夹
(9)在Startup.cs中添加初始化数据库方法。
private void InitializeDatabase(IApplicationBuilder app)

{

    using (var serviceScope = app.ApplicationServices.GetService<IServiceScopeFactory>().CreateScope())

    {

        serviceScope.ServiceProvider.GetRequiredService<PersistedGrantDbContext>().Database.Migrate();

        var context = serviceScope.ServiceProvider.GetRequiredService<ConfigurationDbContext>();

        context.Database.Migrate();

        if (!context.Clients.Any())

        {

            foreach (var client in Config.GetClients())

            {

                context.Clients.Add(client.ToEntity());

            }

            context.SaveChanges();

        }

        if (!context.IdentityResources.Any())

        {

            foreach (var resource in Config.GetIdentityResources())

            {

                context.IdentityResources.Add(resource.ToEntity());

            }

            context.SaveChanges();

        }

        if (!context.ApiResources.Any())

        {

            foreach (var resource in Config.GetApiResources())

            {

                context.ApiResources.Add(resource.ToEntity());

            }

            context.SaveChanges();

        }

    }

}
添加引用:
using IdentityServer4.EntityFramework.DbContexts;
using IdentityServer4.EntityFramework.Mappers;
(10)在Startup.cs中的Configure方法修改成以下代码。
  public void Configure(IApplicationBuilder app, IHostingEnvironment env)

        {

            //if (env.IsDevelopment())

            //{

            //    app.UseDeveloperExceptionPage();

            //}

            InitializeDatabase(app);

            //app.UseMvc();

        }
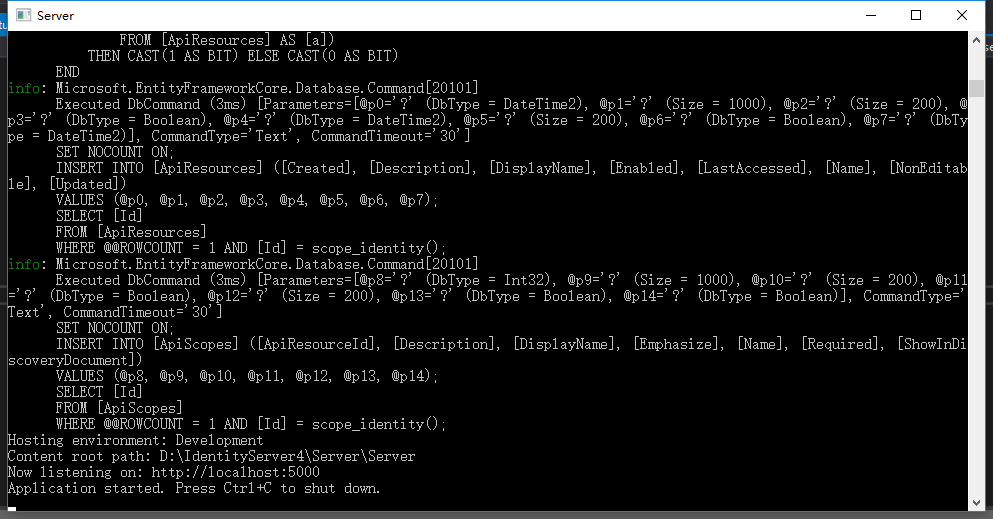
到这里,把项目以控制台形式运行
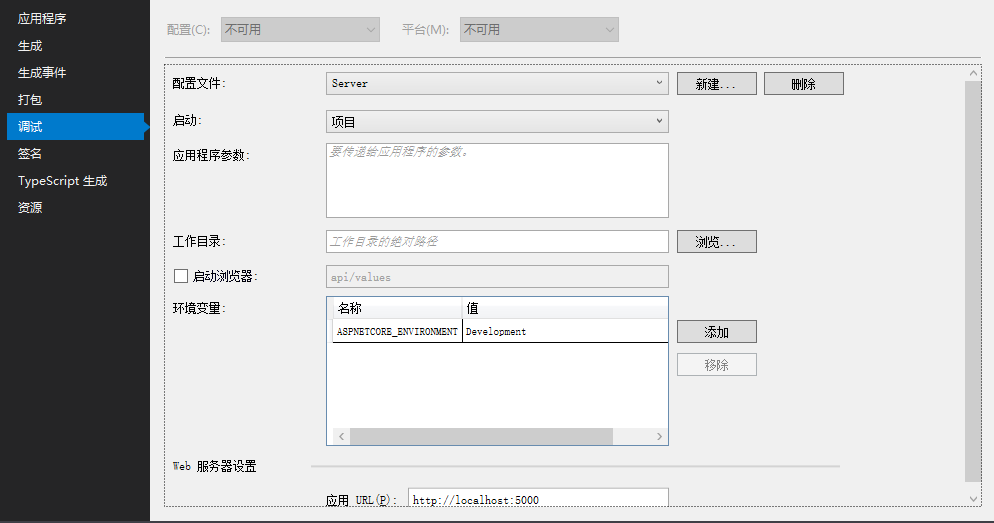

点击运行,可以跑起来,且生成数据库IdentityServer4DB。

关于Client的说明可以查阅官网资料:https://identityserver4.readthedocs.io/en/release/reference/client.html
源码地址:https://github.com/Bingjian-Zhu/Server.git
服务端准备好之后,下篇文章开始介绍Client客户端的应用。
IdentityServer4-用EF配置Client(一)的更多相关文章
- 27.集成EFCore配置Client和API
copy链接字符串,这是一个官方的字符串,直接复制过来,放在上面. 添加包的引用 引入IdentityServer4.EntityFramework的命名空间 主要是这个地方初始化我们的数据库 Ope ...
- IdentityServer4-EF动态配置Client和对Claims授权(二)
本节介绍Client的ClientCredentials客户端模式,先看下画的草图: 一.在Server上添加动态新增Client的API 接口. 为了方便测试,在Server服务端中先添加swagg ...
- EF配置模型
配置方法 EF里面的默认配置有两个方法,一个是用Data Annotations(在命名空间System.ComponentModel.DataAnnotations;),直接作用于类的属性上面,还有 ...
- 从头编写 asp.net core 2.0 web api 基础框架 (4) EF配置
第1部分:http://www.cnblogs.com/cgzl/p/7637250.html 第2部分:http://www.cnblogs.com/cgzl/p/7640077.html 第3部分 ...
- 【转载】从头编写 asp.net core 2.0 web api 基础框架 (4) EF配置
Github源码地址:https://github.com/solenovex/Building-asp.net-core-2-web-api-starter-template-from-scratc ...
- EF 配置MySQL
添加 mysql dll 引用 WebConfig 配置: 1.先添加connectionstrings,providerName 换成 mysql的 <connectionStrings> ...
- EF 配置实现建表与迁移
通过EF 作为操作数据库的工具有一段时间了,也做了几个相对不大的项目,慢慢的也对EF的使用摸索出来了一些规则,虽然说不是技术难点,但是,我说的是但是,能够提高我们开发效率的棉花糖有时我们还是必须要吃的 ...
- 【甘道夫】Hadoop2.2.0 NN HA具体配置+Client透明性试验【完整版】
引言: 前面转载过一篇团队兄弟[伊利丹]写的NN HA实验记录,我也基于他的环境实验了NN HA对于Client的透明性. 本篇文章记录的是亲自配置NN HA的具体全过程,以及全面測试HA对clien ...
- 基于IdentityServer4的单点登录——Client
以MvcClient项目为例 1.新建项目并添加引用 新建一个asp .net core 2.0的项目引用IdentityModel 2.配置 比之前的控制台客户端多这个步骤,需要配置这个客户端的Cl ...
随机推荐
- python - class类 (三) 类的组合
类的组合: #组合 class A1(): def pr(self): return 'a1' class A2(): def pr(self): return 'a2' class A3(): de ...
- Android APP常见的5类内存泄露及解决方法
1.static变量引起的内存泄漏 因为static变量的生命周期是在类加载时开始 类卸载时结束,也就是说static变量是在程序进程死亡时才释放,如果在static变量中 引用了Activity 那 ...
- 原 layer父子页面交互
1.访问父页面元素值 2.访问父页面方法 3.如何关闭弹出的子页面窗口 parent.layer.close(index);//关闭弹出的子页面窗口 4.如何从子页面执行刷新父页面操作 [javasc ...
- 【漏洞分析】两个例子-数组溢出修改返回函数与strcpy覆盖周边内存地址
修改返回函数 return 0 下面的程序的运行流程为main()函数调用了Magic()函数,通常执行完Magic()函数后会调用return 0 的地址, 但是在执行Magic()函数中时,数组下 ...
- V4L2学习记录【转】
转自:http://blog.chinaunix.net/uid-30254565-id-5637600.html V4L2学习记录 这个还没有分析完,先在这放着,防止电脑坏掉丢了,以后再完善 V4L ...
- springboot系列七:springboot 集成 MyBatis、事物配置及使用、druid 数据源、druid 监控使用
一.MyBatis和druid简介 MyBatis 是一款优秀的持久层框架,它支持定制化 SQL.存储过程以及高级映射.MyBatis 避免了几乎所有的 JDBC 代码和手动设置参数以及获取结果集.M ...
- dubbo系列一、dubbo背景介绍、微服务拆分
一.背景 随着互联网的发展,网站应用的规模不断扩大,常规的垂直应用架构已无法应对,分布式服务架构以及流动计算架构势在必行,亟需一个治理系统确保架构有条不紊的演进. 二.传统应用到分布式应用的演进过程 ...
- elasticsearch5.0集群大数据量迁移方法及注意事项
当es集群的数据量较小的情况下elasticdump这个工具比较方便,但是当数据量达到一定级别比如上百G的时候,elasticdump速度就很慢了,此时我们可以使用快照的方法进行备份 elasticd ...
- SQL代码整理
--SQL代码整理: create database mingzi--创建数据库go--连接符(可省略)create table biao--创建表( lieming1 int not null,-- ...
- Vue2.0 探索之路——生命周期和钩子函数的一些理解 - JS那些事儿
在使用vue一个多礼拜后,感觉现在还停留在初级阶段,虽然知道怎么和后端做数据交互,但是对于mounted这个挂载还不是很清楚的.放大之,对vue的生命周期不甚了解.只知道简单的使用,而不知道为什么,这 ...