Spring boot异常统一处理方法:@ControllerAdvice注解的使用、全局异常捕获、自定义异常捕获
一、全局异常
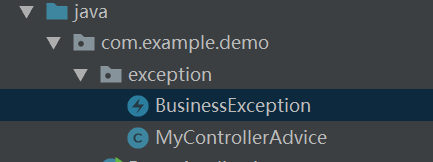
1、首先创建异常处理包和类

2、使用@ControllerAdvice注解,全局捕获异常类,只要作用在@RequestMapping上,所有的异常都会被捕获

package com.example.demo.exception;

import org.springframework.web.bind.annotation.ControllerAdvice;

import org.springframework.web.bind.annotation.ExceptionHandler;

import org.springframework.web.bind.annotation.ResponseBody;

import java.util.HashMap;

import java.util.Map;

/**

 * 全局捕获异常类,只要作用在@RequestMapping上,所有的异常都会被捕获

 */

@ResponseBody

@ControllerAdvice

public class MyControllerAdvice {

    @ExceptionHandler(value = Exception.class)

    public Map<String,Object> errorHandle(Exception e){

        Map<String,Object> map = new HashMap<String,Object>();

        map.put("code",-1);

        map.put("msg",e.getMessage());

        return map;

    }

}
这上面有个需要注意的是要加上@ResponseBody注解,如果不加会怎么样呢,我们试下,报错:
javax.servlet.ServletException: Circular view path [hello]: would dispatch back to the current handler URL [/hello] again.
Check your ViewResolver setup! (Hint: This may be the result of an unspecified view, due to default view name generation.)

    at org.springframework.web.servlet.view.InternalResourceView.prepareForRendering(InternalResourceView.java:209) ~[spring-webmvc-5.0.6.RELEASE.jar:5.0.6.RELEASE]

    at org.springframework.web.servlet.view.InternalResourceView.renderMergedOutputModel(InternalResourceView.java:147) ~[spring-webmvc-5.0.6.RELEASE.jar:5.0.6.RELEASE]

    at org.springframework.web.servlet.view.AbstractView.render(AbstractView.java:314) ~[spring-webmvc-5.0.6.RELEASE.jar:5.0.6.RELEASE]

    at org.springframework.web.servlet.DispatcherServlet.render(DispatcherServlet.java:1325) ~[spring-webmvc-5.0.6.RELEASE.jar:5.0.6.RELEASE]

    at org.springframework.web.servlet.DispatcherServlet.processDispatchResult(DispatcherServlet.java:1069) ~[spring-webmvc-5.0.6.RELEASE.jar:5.0.6.RELEASE]

    at org.springframework.web.servlet.DispatcherServlet.doDispatch(DispatcherServlet.java:1008) ~[spring-webmvc-5.0.6.RELEASE.jar:5.0.6.RELEASE]

    at org.springframework.web.servlet.DispatcherServlet.doService(DispatcherServlet.java:925) ~[spring-webmvc-5.0.6.RELEASE.jar:5.0.6.RELEASE]

    at org.springframework.web.servlet.FrameworkServlet.processRequest(FrameworkServlet.java:974) ~[spring-webmvc-5.0.6.RELEASE.jar:5.0.6.RELEASE]

    at org.springframework.web.servlet.FrameworkServlet.doGet(FrameworkServlet.java:866) ~[spring-webmvc-5.0.6.RELEASE.jar:5.0.6.RELEASE]

    at javax.servlet.http.HttpServlet.service(HttpServlet.java:635) ~[tomcat-embed-core-8.5.31.jar:8.5.31]

    at org.springframework.web.servlet.FrameworkServlet.service(FrameworkServlet.java:851) ~[spring-webmvc-5.0.6.RELEASE.jar:5.0.6.RELEASE]

    at javax.servlet.http.HttpServlet.service(HttpServlet.java:742) ~[tomcat-embed-core-8.5.31.jar:8.5.31]

    at org.apache.catalina.core.ApplicationFilterChain.internalDoFilter(ApplicationFilterChain.java:231) ~[tomcat-embed-core-8.5.31.jar:8.5.31]
因为是个json的格式,所以必须要有@ResponseBody
3、测试:在hello里面造个异常
package com.example.demo;

import org.springframework.beans.factory.annotation.Value;

import org.springframework.web.bind.annotation.RequestMapping;

import org.springframework.web.bind.annotation.RestController;

@RestController

public class HelloController {

    @Value("${gwf.name}")

    private String msg;

    @RequestMapping("/hello")

    public String hello() {

        int num = 1/0;

        return this.msg;

    }

}
结果: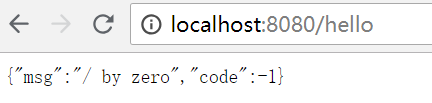
二、自定义异常
1、首先创建自定义异常类:注意需要继承extends RuntimeException
package com.example.demo.exception;

public class BusinessException extends RuntimeException{

    private String code;

    private String msg;

    public BusinessException(String code, String msg) {

        super();

        this.code = code;

        this.msg = msg;

    }

    public String getCode() {

        return code;

    }

    public void setCode(String code) {

        this.code = code;

    }

    public String getMsg() {

        return msg;

    }

    public void setMsg(String msg) {

        this.msg = msg;

    }

}
这里介绍下idea自动生成get/set和构造函数的快捷键:alt + insert,然后选择getter和setter,constructor,自动生成get、set方法和构造函数
2、然后就是自定义异常捕获
package com.example.demo.exception;

import org.springframework.web.bind.annotation.ControllerAdvice;

import org.springframework.web.bind.annotation.ExceptionHandler;

import org.springframework.web.bind.annotation.ResponseBody;

import java.util.HashMap;

import java.util.Map;

/**

 * 全局捕获异常类,只要作用在@RequestMapping上,所有的异常都会被捕获

 */

@ResponseBody

@ControllerAdvice

public class MyControllerAdvice {

    @ExceptionHandler(value = Exception.class)

    public Map<String,Object> errorHandle(Exception e){

        Map<String,Object> map = new HashMap<String,Object>();

        map.put("code",-1);

        map.put("msg",e.getMessage());

        return map;

    }

    @ExceptionHandler(value = BusinessException.class)

    public Map<String,Object> errorHandle(BusinessException e){

        Map<String,Object> map = new HashMap<String,Object>();

        map.put("code",e.getCode());

        map.put("msg",e.getMsg());

        return map;

    }

}
3、最后我们测试下:抛出自定义异常
package com.example.demo;

import com.example.demo.exception.BusinessException;

import org.springframework.beans.factory.annotation.Value;

import org.springframework.web.bind.annotation.RequestMapping;

import org.springframework.web.bind.annotation.RestController;

@RestController

public class HelloController {

    @Value("${gwf.name}")

    private String msg;

    @RequestMapping("/hello")

    public String hello() {

        //int num = 1/0;

        throw new BusinessException("100","密码错误");

        //return this.msg;

    }

}
结果: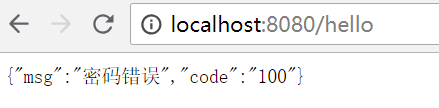
Spring boot异常统一处理方法:@ControllerAdvice注解的使用、全局异常捕获、自定义异常捕获的更多相关文章
- spring mvc异常统一处理(ControllerAdvice注解)
首先我的项目是一个为移动端提供的json数据的,当后台报错时如果为移动端返回一个错误页面显得非常不友好,于是通过ControllerAdvice注解返回json数据. 首先创建一个异常处理类: pac ...
- Spring Boot 系列(八)@ControllerAdvice 拦截异常并统一处理
在spring 3.2中,新增了@ControllerAdvice 注解,可以用于定义@ExceptionHandler.@InitBinder.@ModelAttribute,并应用到所有@Requ ...
- Spring Boot API 统一返回格式封装
今天给大家带来的是Spring Boot API 统一返回格式封装,我们在做项目的时候API 接口返回是需要统一格式的,只有这样前端的同学才可对接口返回的数据做统一处理,也可以使前后端分离 模式的开发 ...
- 精尽Spring Boot源码分析 - 剖析 @SpringBootApplication 注解
该系列文章是笔者在学习 Spring Boot 过程中总结下来的,里面涉及到相关源码,可能对读者不太友好,请结合我的源码注释 Spring Boot 源码分析 GitHub 地址 进行阅读 Sprin ...
- Spring Boot入门(三):使用Scheduled注解实现定时任务
在程序开发的过程中,经常会使用定时任务来实现一些功能,比如: 系统依赖于外部系统的非核心数据,可以定时同步 系统内部一些非核心数据的统计计算,可以定时计算 系统内部的一些接口,需要间隔几分钟或者几秒执 ...
- Spring Boot 最核心的 25 个注解,都是干货!
学习和应用 Spring Boot 有一些时间了,你们对 Spring Boot 注解了解有多少呢?今天栈长我给大家整理了 Spring Boot 最核心的 25 个注解,都是干货! 你所需具备的基础 ...
- Spring Boot 项目学习 (二) MySql + MyBatis 注解 + 分页控件 配置
0 引言 本文主要在Spring Boot 基础项目的基础上,添加 Mysql .MyBatis(注解方式)与 分页控件 的配置,用于协助完成数据库操作. 1 创建数据表 这个过程就暂时省略了. 2 ...
- 基于Spring Boot的统一异常处理设计
基于Spring Boot的统一异常处理设计 作者: Grey 原文地址:https://www.cnblogs.com/greyzeng/p/11733327.html Spring Boot中,支 ...
- 自定义的Spring Boot starter如何设置自动配置注解
本文首发于个人网站: 在Spring Boot实战之定制自己的starter一文最后提到,触发Spring Boot的配置过程有两种方法: spring.factories:由Spring Boot触 ...
- 使用Spring Boot和AspectJ实现方法跟踪基础结构
了解如何使用Spring Boot和AspectJ实现方法跟踪基础结构!最近在优锐课学习收获颇多,记录下来大家一起进步! 在我们的应用程序中,获取方法的堆栈跟踪信息可能会节省很多时间.具有输入输出参数 ...
随机推荐
- Qt5.WebView.添加节点的测试代码
1.代码: #include "mainwindow.h" #include "ui_mainwindow.h" #include <QWebFrame& ...
- 力扣(LeetCode)461. 汉明距离
两个整数之间的汉明距离指的是这两个数字对应二进制位不同的位置的数目. 给出两个整数 x 和 y,计算它们之间的汉明距离. 注意: 0 ≤ x, y < 231. 示例: 输入: x = 1, y ...
- python3.5学习第一章
在python中,变量赋值或者其他语句后不需要加”:“ python中,缩进特别重要! 条件语句和循环语句,要加”:“ 一.变量赋值 name = "cecelia"name2 = ...
- 桂电第一次程序设计 C STL 排序
Problem 1197 # 共享厕所 ediszhao添加于2017-12-22 15:00:56 时间限制 : 1000MS 内存限制 : 65536KB ×提示 : 你已解决此题目. 问题描述 ...
- conda-使用手册
conda remove -n tf --all ##删除环境 conda env export -- name ##首先导出配置文件: conda env create -f name.yml ## ...
- Java的三种代理模式(Proxy,CGLib)
1.静态代理,这种不用说最不靠谱.每个类一个代理,代码量很大. 2.JDK代理.使用java.lang.reflect.Proxy进行代理,但是被代理的类必须要实现接口. 3.Cglib代理.不用实现 ...
- legend2---开发日志8(thinkphp和vue如何配合才能达到最优)
legend2---开发日志8(thinkphp和vue如何配合才能达到最优) 一.总结 一句话总结:凡是php可以做的,都可以先在后端处理好数据,然后再丢给前端 凡php可以做的,都可以先在后端处理 ...
- CRC分段校验
crc16 modbus分段校验码: const uint8_t ModbusCRCHighTab[] = { 0x00, 0xC1, 0x81, 0x40, 0x01, 0xC0, 0x80, 0x ...
- CPU型号各个字母的含义
CPU 型号的含义 首先介绍 4 个数字的含义(以 i7-3540M) 第一位 3540M 中的 "3"代表:代, 3 表示第三代 第二位 3540M 中的 "5&quo ...
- centos 安装 和 linux 简单命令
1. centos 安装 参照:https://www.cnblogs.com/tiger666/articles/10259102.html 安装过程注意点: 1. 安装过程中的选择安装Basic ...