强大的shell(一键redis,mysql,php,openresty,jdk)
前序
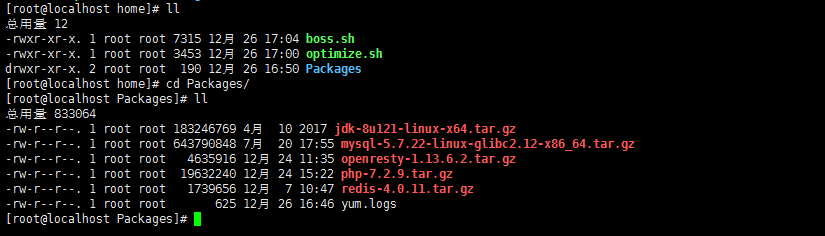
集成了一键安装离线包redis,mysql,php,openresty,jdk,系统优化等脚本, 一个shell搞掂。
JDK:自动识别本地安装包,自动解压,部署,配置环境变量。
REDIS:自动识别本地安装包,自动解压,部署,判断编译错误退出,修改配置文件加入后台,日志,快捷启动。
MYSQL:自动识别本地安装包,自动解压,部署, 自动修改配置文件,初始化,编译,启动, 修改新密码。
PHP:自动识别本地安装包,自动解压,部署, 使用yum跑依赖,自动编译输出,make输出,自动配置文件, 快捷启动。
OPENRESTY:自动识别本地安装包,自动解压,部署。
系统优化: yum缓存优化,ntpdate/lrzsz工具调用优化,安全设置,hosts安全优化。
注:OPENRESTY可以说是另一种形式的nginx了, 很强大?!第一个脚本属于安装脚本, 第二个脚本是优化脚本。
shell
#/usr/bin/env bash

currentDIR=$(cd `dirname $0`; pwd)

installDIR=/usr/local

#很大一块系统调优

#system optimize

function OPTIMIZE(){

    sh ./optimize.sh

}

#JDK

function JDK(){

    j=`whereis java`

    java=$(echo ${j} | grep "jdk")

    if [[ "$java" != "" ]]

    then

        echo;

        echo "JDK已安装"

    else

        echo;

        echo "正在部署JDK"

        cd Packages

        tar -zxvf jdk-*.tar.gz -C ${installDIR} >/dev/null 2>&1

        echo;

        cd ${installDIR}/jdk* && jdkname=`pwd | awk -F '/' '{print $NF}'`

        echo;

        sed -i '$a\export JAVA_HOME='${installDIR}'/'${jdkname}'\nexport JRE_HOME=${JAVA_HOME}/jre\nexport CLASSPATH=.:${JAVA_HOME}/lib:${JRE_HOME}/lib\nexport PATH=${JAVA_HOME}/bin:$PATH' /etc/profile

        echo "source /etc/profile"

    fi

}

#REDIS

function REDIS(){

    echo "正在部署REDIS"

    mkdir -p ${installDIR}/redis/{logs,nodes,conf,bin}

    cd ${currentDIR}/Packages

    tar -zxvf redis*.tar.gz >/dev/null 2>&1

    cd redis*/src && make >/dev/null 2>&1

    if [[ $? -ne 0 ]]; then

        echo "编译出错"

    else

        cp redis-cli redis-server ${installDIR}/redis/bin

        cp redis-trib.rb ${installDIR}/redis

        cp ../redis.conf ${installDIR}/redis/conf

        cd ${installDIR}/redis/conf

        #后台

        sed -i 's/daemonize no/daemonize yes/' redis.conf

        #日志

        sed -i 's/logfile ""/logfile "\/usr\/local\/redis\/logs\/redis.logs"/' redis.conf

        #启动

        cd ../

        echo "./bin/redis-server conf/redis.conf" > start.sh

        chmod +x start.sh

    fi

}

#MYSQL

function MYSQL(){

    echo "正在部署MYSQL"

    cd ${currentDIR}/Packages

    tar -zxvf mysql*.tar.gz -C ${installDIR} >/dev/null 2>&1

    cd ${installDIR} && mv mysql* mysql

    mkdir -p /data/mysql && mkdir ${installDIR}/mysql/logs

    touch ${installDIR}/mysql/logs/mysql.logs && touch ${installDIR}/mysql/logs/initialize.logs

    touch ${installDIR}/mysql/logs/start.logs

    useradd mysql -s /usr/sbin/nologin

    configfile="/etc/my.cnf"

    NdataDIR="/data/mysql"

    OdataDIR=`cat /etc/my.cnf | grep datadir | awk -F '=' '{print$2}'`

    Nsocket="/tmp/mysql.sock"

    Osocket=`cat /etc/my.cnf | grep socket | awk -F '=' '{print$2}'`

    Nlogerror="${installDIR}/mysql/logs/mysql.logs"

    Ologerror=`cat /etc/my.cnf | grep log-error | awk -F '=' '{print$2}'`

    Npidfile="${installDIR}/mysql/mysql.pid"

    Opidfile=`cat /etc/my.cnf | grep pid-file | awk -F '=' '{print$2}'`

    sed -i "s|${OdataDIR}|${NdataDIR}|g" ${configfile}

    sed -i "s|${Ologerror}|${Nlogerror}|g" ${configfile}

    sed -i "s|${Opidfile}|${Npidfile}|g" ${configfile}

    sed -i "s|${Osocket}|${Nsocket}|g" ${configfile}

    chown -R mysql:mysql /etc/my.cnf

    chown -R mysql:mysql ${installDIR}/mysql

    chown -R mysql:mysql /data/

    echo "初始化"

    ${installDIR}/mysql/bin/mysqld --initialize --user=mysql --basedir=${installDIR}/mysql --datadir=/data/mysql > ${installDIR}/mysql/logs/initialize.logs 2>&1

    echo "#!/bin/bash" > ${installDIR}/mysql/start.sh

    echo "./bin/mysqld_safe --user=mysql --basedir=${installDIR}/mysql --datadir=/data/mysql > logs/start.logs 2>&1 &" >> ${installDIR}/mysql/start.sh

    chmod +x ${installDIR}/mysql/start.sh

    echo "启动"

    cd ${installDIR}/mysql && ./start.sh

    echo "修改新的密码"

    ln -fs /usr/local/mysql/bin/mysql /usr/bin/mysql

    password1=`cat ${installDIR}/mysql/logs/initialize.logs | grep password | awk -F ' ' '{print$NF}'`

    #echo "旧的密码:${password1}"

    password2="123456"

    #炮灰牺牲品

    mysql --protocol=TCP -u root -p''${password1}'' --connect-expired-password -e "flush PRIVILEGES;" >/dev/null 2>&1

    /usr/bin/sleep 5

    #主力

    mysql --protocol=TCP -u root -p''${password1}'' --connect-expired-password -e "alter user 'root'@'localhost' identified by '${password2}';" >/dev/null 2>&1

    echo "新的密码:${password2}"

    echo "部署完成!"

}

function PHP(){

    echo "正在部署PHP"

    cd Packages

    wget https://mirrors.ustc.edu.cn/centos/7.5.1804/extras/x86_64/Packages/epel-release-7-11.noarch.rpm

    rpm -ivh epel-release*.rpm

    echo;

    echo "部署需要时间,请耐心稍等"

    mkdir -p ${installDIR}/php/logs && touch ${installDIR}/php/logs/{yum.logs,configure.logs,make.logs}

    tar -zxvf php*.tar.gz >/dev/null 2>&1

    cd php*

    #依赖

    yum install -y gcc gcc-c++ libmcrypt-devel mcrypt mhash gd-devel ncurses-devel libxml2-devel bzip2-devel libcurl-devel curl-devel libjpeg-devel libpng-devel freetype-devel net-snmp-devel openssl-deve python-devel zlib-devel freetype libxslt* bison autoconf re2c >${installDIR}/php/logs/yum.logs 2>&1

    #编译

    ./configure --prefix=/usr/local/php --exec-prefix=/usr/local/php --bindir=/usr/local/php/bin --sbindir=/usr/local/php/sbin --includedir=/usr/local/php/include --libdir=/usr/local/php/lib/php --mandir=/usr/local/php/php/man --with-config-file-path=/usr/local/php/etc --with-mysql-sock=/var/run/mysql/mysql.sock --with-mhash --with-openssl --with-mysqli=shared,mysqlnd --with-pdo-mysql=shared,mysqlnd --with-gd --with-iconv --with-zlib --enable-zip --enable-inline-optimization --disable-debug --disable-rpath --enable-shared --enable-xml --enable-bcmath --enable-shmop --enable-sysvsem --enable-mbregex --enable-mbstring --enable-ftp --enable-pcntl --enable-calendar --enable-exif --enable-sockets --with-xmlrpc --with-libxml-dir --enable-soap --without-pear --with-gettext --enable-session --with-curl --with-jpeg-dir --with-png-dir --with-freetype-dir --with-bz2 --enable-opcache --enable-fpm --with-fpm-user=nginx --with-fpm-group=nginx --without-gdbm --enable-fast-install --disable-fileinfo > ${installDIR}/php/logs/configure.logs 2>&1

    #安装

    make && make install > ${installDIR}/php/logs/make.logs 2>&1

    #配置

    cp php.ini-production ${installDIR}/php/etc/php.ini

    echo;

    M=`cat ${installDIR}/php/etc/php.ini | grep date.timezone | tail -n 1`

    datatime="date.timezone = Asia/shanghai"

    sed -i "s|${M}|${datatime}|g" ${installDIR}/php/etc/php.ini

    echo "zend_extension=opcache.so" >> ${installDIR}/php/etc/php.ini

    cp ${installDIR}/php/etc/php-fpm.conf.default ${installDIR}/php/etc/php-fpm.conf

    cp ${installDIR}/php/etc/php-fpm.d/www.conf.default ${installDIR}/php/etc/php-fpm.d/www.conf

    cp sapi/fpm/init.d.php-fpm /etc/init.d/php-fpm

    chmod +x /etc/rc.d/init.d/php-fpm

    #慎用(仅限centos&redhat)

    chkconfig --add php-fpm

    useradd nginx -s /usr/sbin/nologin

    echo "部署完成"

    echo;

    echo "启动PHP"

    service php-fpm start

}

function OPENRESTY(){

    echo "正在部署OPENRESTY"

    cd Packages

    yum install -y gcc gcc-c++ zlib-devel pcre-devel openssl-devel readline-devel > yum.logs 2>&1

    useradd www -s /usr/sbin/nologin

    mkdir /usr/local/openresty

    tar -zxvf openresty*.tar.gz >/dev/null 2>&1

    cd openresty*

    #编译

    ./configure --prefix=/usr/local/openresty --user=www --group=www --with-http_ssl_module --with-http_flv_module --with-http_stub_status_module --with-http_gzip_static_module --with-pcre --with-http_realip_module > configure.logs 2>&1

    gmake && gmake install >gmake.logs 2>&1

    echo "部署完成"

}

function main(){

    #OPTIMIZE

    #JDK

    #REDIS

    #MYSQL

    #PHP

    #OPENRESTY

}

main
shell2
#!/bin/bash

# Close SELINUX

setenforce 0

sed -i 's/^SELINUX=.*$/SELINUX=disabled/' /etc/selinux/config

# Custom profile

cat > /etc/profile.d/iot.sh << EOF

HISTSIZE=10000

PS1="\[\e[37;40m\][\[\e[32;40m\]\u\[\e[37;40m\]@\h \[\e[35;40m\]\W\[\e[0m\]]\\\\$ "

HISTTIMEFORMAT="%F %T \$(whoami) "

alias l='ls -AFhlt'

alias lh='l | head'

alias vi=vim

GREP_OPTIONS="--color=auto"

alias grep='grep --color'

alias egrep='egrep --color'

alias fgrep='fgrep --color'

EOF

source /etc/profile.d/iot.sh

[ -z "$(grep ^'PROMPT_COMMAND=' /etc/bashrc)" ] && cat >> /etc/bashrc << EOF

PROMPT_COMMAND='{ msg=\$(history 1 | { read x y; echo \$y; });logger "[euid=\$(whoami)]":\$(who am i):[\`pwd\`]"\$msg"; }'

EOF

# /etc/security/limits.conf

[ -e /etc/security/limits.d/*nproc.conf ] && rename nproc.conf nproc.conf_bk /etc/security/limits.d/*nproc.conf

sed -i '/^# End of file/,$d' /etc/security/limits.conf

cat >> /etc/security/limits.conf <<EOF

# End of file

* soft nproc 1000000

* hard nproc 1000000

* soft nofile 1000000

* hard nofile 1000000

EOF

# /etc/hosts

[ "$(hostname -i | awk '{print $1}')" != "127.0.0.1" ] && sed -i "s@127.0.0.1.*localhost@&\n127.0.0.1 $(hostname)@g" /etc/hosts

# Set timezone

rm -rf /etc/localtime

ln -s /usr/share/zoneinfo/Asia/Shanghai /etc/localtime

# ip_conntrack table full dropping packets

[ ! -e "/etc/sysconfig/modules/iptables.modules" ] && { echo -e "modprobe nf_conntrack\nmodprobe nf_conntrack_ipv4" > /etc/sysconfig/modules/iptables.modules; chmod +x /etc/sysconfig/modules/iptables.modules; }

modprobe nf_conntrack

modprobe nf_conntrack_ipv4

echo options nf_conntrack hashsize=131072 > /etc/modprobe.d/nf_conntrack.conf

# /etc/sysctl.conf

[ ! -e "/etc/sysctl.conf_bk" ] && /bin/mv /etc/sysctl.conf{,_bk}

cat > /etc/sysctl.conf << EOF

fs.file-max=1000000

net.ipv4.tcp_max_tw_buckets = 6000

net.ipv4.tcp_sack = 1

net.ipv4.tcp_window_scaling = 1

net.ipv4.tcp_rmem = 4096 87380 4194304

net.ipv4.tcp_wmem = 4096 16384 4194304

net.ipv4.tcp_max_syn_backlog = 16384

net.core.netdev_max_backlog = 32768

net.core.somaxconn = 32768

net.core.wmem_default = 8388608

net.core.rmem_default = 8388608

net.core.rmem_max = 16777216

net.core.wmem_max = 16777216

net.ipv4.tcp_timestamps = 1

net.ipv4.tcp_fin_timeout = 20

net.ipv4.tcp_synack_retries = 2

net.ipv4.tcp_syn_retries = 2

net.ipv4.tcp_syncookies = 1

#net.ipv4.tcp_tw_len = 1

net.ipv4.tcp_tw_reuse = 1

net.ipv4.tcp_mem = 94500000 915000000 927000000

net.ipv4.tcp_max_orphans = 3276800

net.ipv4.ip_local_port_range = 1024 65000

net.nf_conntrack_max = 6553500

net.netfilter.nf_conntrack_max = 6553500

net.netfilter.nf_conntrack_tcp_timeout_close_wait = 60

net.netfilter.nf_conntrack_tcp_timeout_fin_wait = 120

net.netfilter.nf_conntrack_tcp_timeout_time_wait = 120

net.netfilter.nf_conntrack_tcp_timeout_established = 3600

EOF

sysctl -p

#安全设置 centos 6

#sed -i 's@^ACTIVE_CONSOLES.*@ACTIVE_CONSOLES=/dev/tty[1-2]@' /etc/sysconfig/init

#sed -i 's@^start@#start@' /etc/init/control-alt-delete.conf

#sed -i 's@LANG=.*$@LANG="en_US.UTF-8"@g' /etc/sysconfig/i18n

# Update time

yum -y install ntpdate  lrzsz

ntpdate pool.ntp.org

[ ! -e "/var/spool/cron/root" -o -z "$(grep 'ntpdate' /var/spool/cron/root)" ] && { echo "*/20 * * * * $(which ntpdate) pool.ntp.org > /dev/null 2>&1" >> /var/spool/cron/root;chmod 600 /var/spool/cron/root; }

service iptables stop

service rsyslog restart

service crond restart

##set yum

sed -i 's@^exclude@#exclude@' /etc/yum.conf

yum clean all

yum makecachell
强大的shell(一键redis,mysql,php,openresty,jdk)的更多相关文章
- Centos 6.4上面用Shell脚本一键安装mysql 5.6.15
Centos 6.4上面用Shell脚本一键安装mysql 5.6.15 #!/bin/bash if [ `uname -m` == "x86_64" ];then machi ...
- 基于Redis+MySQL+MongoDB存储架构应用
摘 要: Redis+MySQL+MongoDB技术架构实现了本项目中大数据存储和实时云计算的需求.使用MongoDB切片的水平动态添加,可在不中断平台业务系统的同时保障扩容后的查询速度和云计算效能 ...
- mongodb,redis,mysql的区别和具体应用场景
一.MySQL 关系型数据库. 在不同的引擎上有不同 的存储方式. 查询语句是使用传统的sql语句,拥有较为成熟的体系,成熟度很高. 开源数据库的份额在不断增加,mysql的份额页在持续增长. 缺点就 ...
- 分布式锁(redis/mysql)
单台机器所能承载的量是有限的,用户的量级上万,基本上服务都会做分布式集群部署.很多时候,会遇到对同一资源的方法.这时候就需要锁,如果是单机版的,可以利用java等语言自带的并发同步处理.如果是多台机器 ...
- mongodb,redis,mysql的区别和具体应用场景(转)
一.MySQL 关系型数据库. 在不同的引擎上有不同 的存储方式. 查询语句是使用传统的sql语句,拥有较为成熟的体系,成熟度很高. 开源数据库的份额在不断增加,mysql的份额页在持续增长. 缺点就 ...
- shell脚本操作mysql数据库
shell脚本操作mysql数据库,使用mysql的-e参数可以执行各种sql的(创建,删除,增,删,改.查)等各种操作 mysql -hhostname -Pport -uusername -pp ...
- shell中读写mysql数据库
本文介绍了如何在shell中读写mysql数据库.主要介绍了如何在shell 中连接mysql数据库,如何在shell中创建数据库,创建表,插入csv文件,读取mysql数据库,导出mysql数据库为 ...
- shell脚本操作mysql库
shell脚本操作mysql数据库-e参数执行各种sql(指定到处编码--default-character-set=utf8 -s,去掉第一行的字段名称信息-N) 2011-05-11 18:18: ...
- shell脚本修复MySQL主从同步
发布:thebaby 来源:net [大 中 小] 分享一例shell脚本,用于修改mysql的主从同步问题,有需要的朋友参考下吧. 一个可以修改mysql主从同步的shell脚本. 例子 ...
随机推荐
- Xcode $(SRCROOT)和$(PROJECT_DIR)区别
$(SRCROOT)代表的时项目根目录下 $(PROJECT_DIR)代表的是整个项目 PS:往项目添加文件时,例如.a等,要先show in finder ,复制到项目中,然后再拖到xcode项目中 ...
- 原生table相关写法
1.<table style="width: 100%;text-align: center" cellpadding="0" cellspacing=& ...
- node.js初识09
1.node_module文件夹 如果你的require中没有写./,那么Node.js将该文件视为node_modules目录下的一个文件. 2.package.json文件 如果使用文件夹来统筹管 ...
- MFC 显示图片
//定义成员变量 CStatic m_picture; m_picture.Create(L"XXX",WS_VISIBLE|WS_CHILD|SS_BITMAP ,CRect(, ...
- Linux shell脚本 批量创建多个用户
Linux shell脚本 批量创建多个用户 #!/bin/bash groupadd charlesgroup for username in charles1 charles2 charles3 ...
- Lua class
local _class = {} function class(super) local class_type = {} class_type.ctor = false class_type.sup ...
- jQuery-切换效果
<!DOCTYPE html PUBLIC "-//W3C//DTD XHTML 1.0 Transitional//EN" "http://www.w3.org/ ...
- php 静态方法 静态属性 和 普通方法 普通属性区别
1,实例属性,是每个对象都可以不一样的数据,也是每个对象都“独自拥有”的数据: 2,静态属性,他不属于任何一个对象,而只属于该类本身,也可以理解为为所有对象所共有的数据:
- Unity shader学习之屏幕后期处理效果之均值模糊
均值模糊,也使用卷积来实现,之不过卷积中每个值均相等,且相加等于1. 代码如下, 子类: using UnityEngine; public class MeanBlurRenderer : Post ...
- hdu4870 高斯消元
题意 一个人打比赛 ,rating 有p的概率 为加50分 有1-p的概率为 x-100分 最大值为 1000 最小值为0 有两个号 每次拿较小的号来提交 , 计算最后到达 1000分得期望场数是多少 ...