kaptcha验证码实现,配合spring boot使用
一、kaptcha介绍
Kaptcha是谷歌放在github上的一个验证码jar包,我们可以简单配置属性实现验证码的验证功能。
kaptcha参数设置如下所示:
Constant 描述 默认值
kaptcha.border 图片边框,合法值:yes , no yes
kaptcha.border.color 边框颜色,合法值: r,g,b (and optional alpha) 或者 white,black,blue. black
kaptcha.border.thickness 边框厚度,合法值:>0 1
kaptcha.image.width 图片宽 200
kaptcha.image.height 图片高 50
kaptcha.producer.impl 图片实现类 com.google.code.kaptcha.impl.DefaultKaptcha
kaptcha.textproducer.impl 文本实现类 com.google.code.kaptcha.text.impl.DefaultTextCreator
kaptcha.textproducer.char.string 文本集合,验证码值从此集合中获取 abcde2345678gfynmnpwx
kaptcha.textproducer.char.length 验证码长度 5
kaptcha.textproducer.font.names 字体 Arial, Courier
kaptcha.textproducer.font.size 字体大小 40px.
kaptcha.textproducer.font.color 字体颜色,合法值: r,g,b 或者 white,black,blue. black
kaptcha.textproducer.char.space 文字间隔 2
kaptcha.noise.impl 干扰实现类 com.google.code.kaptcha.impl.DefaultNoise
kaptcha.noise.color 干扰颜色,合法值: r,g,b 或者 white,black,blue. black
kaptcha.obscurificator.impl 图片样式: 水纹com.google.code.kaptcha.impl.WaterRipple 鱼眼com.google.code.kaptcha.impl.FishEyeGimpy 阴影
com.google.code.kaptcha.impl.ShadowGimpy com.google.code.kaptcha.impl.WaterRipple
kaptcha.background.impl 背景实现类 com.google.code.kaptcha.impl.DefaultBackground
kaptcha.background.clear.from 背景颜色渐变,开始颜色 light grey
kaptcha.background.clear.to 背景颜色渐变,结束颜色 white
kaptcha.word.impl 文字渲染器 com.google.code.kaptcha.text.impl.DefaultWordRenderer
kaptcha.session.key session key KAPTCHA_SESSION_KEY
kaptcha.session.date session date KAPTCHA_SESSION_DATE
二、实现
1、引入maven依赖
<dependency>

    <groupId>com.github.penggle</groupId>

    <artifactId>kaptcha</artifactId>

    <version>2.3.2</version>

</dependency>
2、编写配置类
 package com.example.demo.config;

 import com.google.code.kaptcha.impl.DefaultKaptcha;

 import com.google.code.kaptcha.util.Config;

 import org.springframework.context.annotation.Bean;

 import org.springframework.context.annotation.Configuration;

 import java.util.Properties;

 /**

  * @author zsh

  * @company wlgzs

  * @create 2019-03-10 9:37

  * @Describe CaptchaConfig配置类

  */

 @Configuration

 public class CaptchaConfig {

     @Bean(name = "captchaProducer")

     public DefaultKaptcha getKaptchaBean(){

         DefaultKaptcha defaultKaptcha=new DefaultKaptcha();

         Properties properties=new Properties();

         properties.setProperty("kaptcha.border", "yes");

         properties.setProperty("kaptcha.border.color", "105,179,90");

         properties.setProperty("kaptcha.textproducer.font.color", "blue");

         properties.setProperty("kaptcha.image.width", "125");

         properties.setProperty("kaptcha.image.height", "45");

         properties.setProperty("kaptcha.session.key", "code");

         properties.setProperty("kaptcha.textproducer.char.length", "5");

         properties.setProperty("kaptcha.textproducer.font.names", "宋体,楷体,微软雅黑");

         Config config=new Config(properties);

         defaultKaptcha.setConfig(config);

         return defaultKaptcha;

     }

 }
3、编写controller类
package com.example.demo;

import com.google.code.kaptcha.impl.DefaultKaptcha;

import org.springframework.beans.factory.annotation.Autowired;

import org.springframework.stereotype.Controller;

import org.springframework.ui.Model;

import org.springframework.web.bind.annotation.GetMapping;

import org.springframework.web.bind.annotation.PostMapping;

import org.springframework.web.bind.annotation.RequestMapping;

import org.springframework.web.servlet.ModelAndView;

import javax.imageio.ImageIO;

import javax.servlet.ServletOutputStream;

import javax.servlet.http.HttpServletRequest;

import javax.servlet.http.HttpServletResponse;

import javax.servlet.http.HttpSession;

import java.awt.image.BufferedImage;

import java.io.ByteArrayOutputStream;

/**

 * @author zsh

 * @company wlgzs

 * @create 2019-03-10 9:41

 * @Describe Captcha测试controller

 */

@Controller

public class CaptchaController {

    @Autowired

    DefaultKaptcha defaultKaptcha;

    /**

     * 显示验证码

     * @param request

     * @param response

     * @throws Exception

     */

    @RequestMapping("/defaultKaptcha")

    public void defaultKaptcha(HttpServletRequest request, HttpServletResponse response) throws Exception {

        byte[] captchaChallengeAsJpeg = null;

        ByteArrayOutputStream jpegOutputStream = new ByteArrayOutputStream();

        try {

            //生产验证码字符串并保存到session中

            String createText = defaultKaptcha.createText();

            request.getSession().setAttribute("verifyCode", createText);

            //使用生产的验证码字符串返回一个BufferedImage对象并转为byte写入到byte数组中

            BufferedImage challenge = defaultKaptcha.createImage(createText);

            ImageIO.write(challenge, "jpg", jpegOutputStream);

        } catch (IllegalArgumentException e) {

            response.sendError(HttpServletResponse.SC_NOT_FOUND);

            return;

        }

        //定义response输出类型为image/jpeg类型,使用response输出流输出图片的byte数组

        captchaChallengeAsJpeg = jpegOutputStream.toByteArray();

        response.setHeader("Cache-Control", "no-store");

        response.setHeader("Pragma", "no-cache");

        response.setDateHeader("Expires", 0);

        response.setContentType("image/jpeg");

        ServletOutputStream responseOutputStream =

                response.getOutputStream();

        responseOutputStream.write(captchaChallengeAsJpeg);

        responseOutputStream.flush();

        responseOutputStream.close();

    }

    @PostMapping("/verifyCode")

    public String imgverifyControllerDefaultKaptcha(Model model, HttpSession session, String verifyCode) {

        String captchaId = (String) session.getAttribute("verifyCode");

        System.out.println("验证码是:" + captchaId);

        System.out.println("用户输入的是:" + verifyCode);

        if (!captchaId.equals(verifyCode)) {

            System.out.println("输入错误");

            model.addAttribute("info", "错误的验证码");

        } else {

            System.out.println("输入正确");

            model.addAttribute("info", "正确");

        }

        return "/index";

    }

    @GetMapping("/")

    public ModelAndView test() {

        return new ModelAndView("index");

    }

}
4、编写测试页面
 -------------Kaptcha验证码

 <h1 th:text="${info}"/>

 <div>

     <img alt="验证码" onclick="this.src='/defaultKaptcha?d='+new Date()*1" src="/defaultKaptcha"/>

 </div>

 <form action="/verifyCode" method="post">

     <input type="text" name="verifyCode"/>

     <input type="submit" value="提交"/>

 </form>
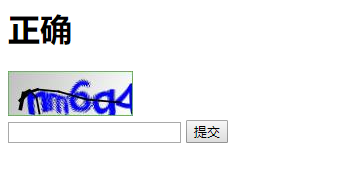
5、效果

kaptcha验证码实现,配合spring boot使用的更多相关文章
- Spring Boot快速集成kaptcha生成验证码
Kaptcha是一个非常实用的验证码生成工具,可以通过配置生成多样化的验证码,以图片的形式显示,从而无法进行复制粘贴:下面将详细介绍下Spring Boot快速集成kaptcha生成验证码的过程. 本 ...
- 在Spring Boot启动后执行指定代码
在开发时有时候需要在整个应用开始运行时执行一些特定代码,比如初始化环境,准备测试数据等等. 在Spring中可以通过ApplicationListener来实现相关的功能,不过在配合Spring Bo ...
- Spring Boot 2.x(十三):你不知道的PageHelper
PageHelper 说起PageHelper,使用过Mybatis的朋友可能不是很陌生,作为一款国人开发的分页插件,它基本上满足了我们的日常需求.但是,我想去官方文档看看这个东西配合Spring B ...
- 精通Spring Boot
原 精通Spring Boot—— 第二十一篇:Spring Social OAuth 登录简介 1.什么是OAuth OAuth官网介绍是这样的: An open protocol to allow ...
- spring boot:spring security给用户登录增加自动登录及图形验证码功能(spring boot 2.3.1)
一,图形验证码的用途? 1,什么是图形验证码? 验证码(CAPTCHA)是"Completely Automated Public Turing test to tell Computers ...
- spring boot:用redis+lua限制短信验证码的发送频率(spring boot 2.3.2)
一,为什么要限制短信验证码的发送频率? 1,短信验证码每条短信都有成本制约, 肯定不能被刷接口的乱发 而且接口被刷会影响到用户的体验, 影响服务端的正常访问, 所以既使有图形验证码等的保护, 我们仍然 ...
- Spring boot配合Spring session(redis)遇到的错误
背景:本MUEAS项目,一开始的时候,是没有引入redis的,考虑到后期性能的问题而引入.之前没有引用redis的时候,用户登录是正常的.但是,在加入redis支持后,登录就出错!错误如下: . __ ...
- Spring Boot 创建定时任务(配合数据库动态执行)
序言:创建定时任务非常简单,主要有两种创建方式:一.基于注解(@Scheduled) 二.基于接口(SchedulingConfigurer). 前者相信大家都很熟悉,但是实际使用中我们往往想从数据库 ...
- (转)Spring Boot (十四): Spring Boot 整合 Shiro-登录认证和权限管理
http://www.ityouknow.com/springboot/2017/06/26/spring-boot-shiro.html 这篇文章我们来学习如何使用 Spring Boot 集成 A ...
随机推荐
- Install the mongdb
#!/bin/bash#Function: Install the mongdb#Author: WangDonghui#Date: 20180124 #Installing mongdbecho & ...
- Thinkphp 框架
核心函数库: 配置文件: 语言包 : 核心资源库:入口文件 核心配置文件 系统行为目录:功能目录:核心文件:摸板类文件目录
- SQL中的关联更新和关联删除
在SQL中,经常用到关联查询,比如select a.* from A a inner join B b on a.PId=b.FId where 条件,SQL中也支持类似的关联更新和关联删除. 关联更 ...
- 记学习hadoop时无法启动namenode的问题
1. 按照apache的文档,学习搭建hadoop. 2. 当把机器重启之后发现无法启动 namenode. 3. 查看日志发现是一些文件找不到,这些文件的位置是在/tmp目录下的,而/tmp 目录下 ...
- Oracle数据库备份实验笔记[不完整,内容乱]
rman target / log=/orasoft/backup/${DATE}backup1.log <<EOFrun {allocate channel c1 device type ...
- DX9 顶点缓存案例
// @time 2012.3.5 // @author jadeshu //包含头文件 #include <Windows.h> #include <d3d9.h> #pra ...
- pdf转txt
ubuntu pdf转jpg或txt chenlei posted @ 2009年12月30日 17:22 inLinux , 1818 阅读 呵呵,刚刚在网上定购了一款mp5,后来才发现它不支持PD ...
- 4.7 引入NULL对象
[1]引入NULL对象范例 Book.h #ifndef _BOOK_H #define _BOOK_H #include <string> using namespace std; cl ...
- 【javascript】内存泄露及其解决办法
1.内存泄露:一般由于开发者使用不当导致不用的内存没有被操作系统或者空闲内存池回收释放. 2.造成内存泄露的常见原因: 1) 意外的全局变量引起的内存泄露 2)闭包引起的内存泄露 闭包可以维持函数内局 ...
- Java并发编程1--synchronized关键字用法详解
1.synchronized的作用 首先synchronized可以修饰方法或代码块,可以保证同一时刻只有一个线程可以执行这个方法或代码块,从而达到同步的效果,同时可以保证共享变量的内存可见性 2.s ...