图像处理---《在图片上打印文字 windows+GDI+TrueType字体》
图像处理---《在图片上打印文字 windows+GDI+TrueType字体》
刚开始使用的是putText()函数做,缺陷是只能显示非中文; 接着,看大多数推荐Freetype库来做,尝试了,可以的,适合图像输入的是IPLImage格式,其他格式需要转换一下;现在,看到可以不使用Freetype库做的,也尝试了,好用:
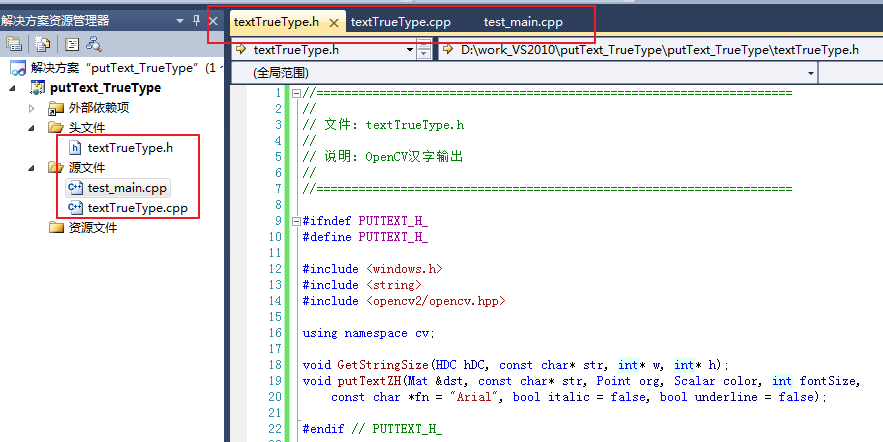
上接前几篇,(3)“采用windows的GDI显示系统的TrueType字体,没有封装,就两个函数,分成了h和cpp文件,可以自己编辑文件名和函数名,亦可以直接将cpp的代码复制到你需要的程序中。”
//====================================================================

//

// 文件: textTrueType.h

//

// 说明: OpenCV汉字输出

//

//====================================================================

#ifndef PUTTEXT_H_

#define PUTTEXT_H_

#include <windows.h>

#include <string>

#include <opencv2/opencv.hpp>

using namespace cv;

void GetStringSize(HDC hDC, const char* str, int* w, int* h);

void putTextZH(Mat &dst, const char* str, Point org, Scalar color, int fontSize,

    const char *fn = "Arial", bool italic = false, bool underline = false);

#endif // PUTTEXT_H_
//====================================================================

//

// 文件: textTrueType.cpp

//

// 说明: OpenCV汉字输出

//

//====================================================================

//#include "putText.h"

#include "textTrueType.h"

void GetStringSize(HDC hDC, const char* str, int* w, int* h)

{

    SIZE size;

    GetTextExtentPoint32A(hDC, str, strlen(str), &size);

    if (w != ) *w = size.cx;

    if (h != ) *h = size.cy;

}

void putTextZH(Mat &dst, const char* str, Point org, Scalar color, int fontSize, const char* fn, bool italic, bool underline)

{

    CV_Assert(dst.data !=  && (dst.channels() ==  || dst.channels() == ));

    int x, y, r, b;

    if (org.x > dst.cols || org.y > dst.rows) return;

    x = org.x <  ? -org.x : ;

    y = org.y <  ? -org.y : ;

    LOGFONTA lf;

    lf.lfHeight = -fontSize;

    lf.lfWidth = ;

    lf.lfEscapement = ;

    lf.lfOrientation = ;

    lf.lfWeight = ;

    lf.lfItalic = italic;   //斜体

    lf.lfUnderline = underline; //下划线

    lf.lfStrikeOut = ;

    lf.lfCharSet = DEFAULT_CHARSET;

    lf.lfOutPrecision = ;

    lf.lfClipPrecision = ;

    lf.lfQuality = PROOF_QUALITY;

    lf.lfPitchAndFamily = ;

    strcpy_s(lf.lfFaceName, fn);

    HFONT hf = CreateFontIndirectA(&lf);

    HDC hDC = CreateCompatibleDC();

    HFONT hOldFont = (HFONT)SelectObject(hDC, hf);

    int strBaseW = , strBaseH = ;

    int singleRow = ;

    char buf[ << ];

    strcpy_s(buf, str);

    char *bufT[ << ];  // 这个用于分隔字符串后剩余的字符,可能会超出。

    //处理多行

    {

        int nnh = ;

        int cw, ch;

        const char* ln = strtok_s(buf, "\n",bufT);

        while (ln != )

        {

            GetStringSize(hDC, ln, &cw, &ch);

            strBaseW = max(strBaseW, cw);

            strBaseH = max(strBaseH, ch);

            ln = strtok_s(, "\n",bufT);

            nnh++;

        }

        singleRow = strBaseH;

        strBaseH *= nnh;

    }

    if (org.x + strBaseW <  || org.y + strBaseH < )

    {

        SelectObject(hDC, hOldFont);

        DeleteObject(hf);

        DeleteObject(hDC);

        return;

    }

    r = org.x + strBaseW > dst.cols ? dst.cols - org.x -  : strBaseW - ;

    b = org.y + strBaseH > dst.rows ? dst.rows - org.y -  : strBaseH - ;

    org.x = org.x <  ?  : org.x;

    org.y = org.y <  ?  : org.y;

    BITMAPINFO bmp = {  };

    BITMAPINFOHEADER& bih = bmp.bmiHeader;

    int strDrawLineStep = strBaseW *  %  ==  ? strBaseW *  : (strBaseW *  +  - ((strBaseW * ) % ));

    bih.biSize = sizeof(BITMAPINFOHEADER);

    bih.biWidth = strBaseW;

    bih.biHeight = strBaseH;

    bih.biPlanes = ;

    bih.biBitCount = ;

    bih.biCompression = BI_RGB;

    bih.biSizeImage = strBaseH * strDrawLineStep;

    bih.biClrUsed = ;

    bih.biClrImportant = ;

    void* pDibData = ;

    HBITMAP hBmp = CreateDIBSection(hDC, &bmp, DIB_RGB_COLORS, &pDibData, , );

    CV_Assert(pDibData != );

    HBITMAP hOldBmp = (HBITMAP)SelectObject(hDC, hBmp);

    //color.val[2], color.val[1], color.val[0]

    SetTextColor(hDC, RGB(, , ));

    SetBkColor(hDC, );

    //SetStretchBltMode(hDC, COLORONCOLOR);

    strcpy_s(buf, str);

    const char* ln = strtok_s(buf, "\n",bufT);

    int outTextY = ;

    while (ln != )

    {

        TextOutA(hDC, , outTextY, ln, strlen(ln));

        outTextY += singleRow;

        ln = strtok_s(, "\n",bufT);

    }

    uchar* dstData = (uchar*)dst.data;

    int dstStep = dst.step / sizeof(dstData[]);

    unsigned char* pImg = (unsigned char*)dst.data + org.x * dst.channels() + org.y * dstStep;

    unsigned char* pStr = (unsigned char*)pDibData + x * ;

    for (int tty = y; tty <= b; ++tty)

    {

        unsigned char* subImg = pImg + (tty - y) * dstStep;

        unsigned char* subStr = pStr + (strBaseH - tty - ) * strDrawLineStep;

        for (int ttx = x; ttx <= r; ++ttx)

        {

            for (int n = ; n < dst.channels(); ++n){

                double vtxt = subStr[n] / 255.0;

                int cvv = vtxt * color.val[n] + ( - vtxt) * subImg[n];

                subImg[n] = cvv >  ?  : (cvv <  ?  : cvv);

            }

            subStr += ;

            subImg += dst.channels();

        }

    }

    SelectObject(hDC, hOldBmp);

    SelectObject(hDC, hOldFont);

    DeleteObject(hf);

    DeleteObject(hBmp);

    DeleteDC(hDC);

}
//====================================================================
//
// 文件: test_main.cpp
//
// 说明: OpenCV汉字输出,测试主函数
//
//====================================================================
#include "opencv2/opencv.hpp" //#include "putText.h"
#include "textTrueType.h" using namespace std;
using namespace cv; /*int main()
{
Mat img = imread("D:\\005_test_4\\testImg\\road_6.png"); putTextZH(img, "Arial字体换...\n行显示!", Point(50, 50), Scalar(0, 0, 255), 30, "Arial");
putTextZH(img, "Times New Roman字体换...\n行显示!", Point(50, 50), Scalar(0, 0, 255), 30, "Times New Roman");
putTextZH(img, "微软雅黑字体换...\n行,斜体,下划线,显示!", Point(50, 100), Scalar(0, 255, 0), 30, "微软雅黑", true, true);
putTextZH(img, "楷体字体换...\n行,斜体,下划线,显示!", Point(50, 200), Scalar(128, 255, 0), 30, "楷体", true, true); imshow("test", img); waitKey(); return 0;
}*/ void main()
{
//Mat img(150,600,CV_8UC3,Scalar(255,255,255));//初始化图像
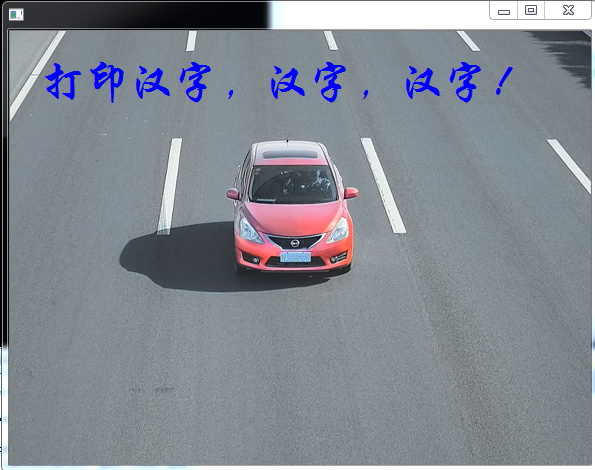
Mat img = imread("D:\\005_test_4\\testImg\\road_6.png");
putTextZH(img, "打印汉字,汉字,汉字!", Point(, ), Scalar(, , ), , "华文行楷");
imwrite("1.png", img);
imshow("", img);
waitKey();
}

致谢:https://blog.csdn.net/wanggao_1990/article/details/52955056;https://blog.csdn.net/weixinhum/article/details/84074594;
图像处理---《在图片上打印文字 windows+GDI+TrueType字体》的更多相关文章
- 图像处理---《在图片上打印文字 FreeType库》
图像处理---<在图片上打印文字 FreeType库> 目的:想在处理之后的图像上打印输出结果.方法: (1)只在图像上打印 数字.字母的话: 1.Mat格式 ...
- 图像处理---《在图片上打印文字 putText()》
图像处理---<在图片上打印文字 putText()> 目的:想在处理之后的图像上打印输出结果. 方法: (1)只在图像上打印 数字.字母的话: 1.Mat ...
- C#图像处理(1):在图片上加文字和改变文字的方向
C#在图片上加文字,代码如下: /// <summary> /// 图片上方加文字,文字将会被180度反转 /// </summary> /// <param name= ...
- Python3.x:如何识别图片上的文字
Python3.x:如何识别图片上的文字 安装pytesseract库,必须先安装其依赖的PIL及tesseract-ocr,其中PIL为图像处理库,而后面的tesseract-ocr则为google ...
- C#实现图片叠加,图片上嵌入文字,文字生成图片的方法
/// <summary> /// 图片叠加 /// </summary> /// <param name="sender"& ...
- python 图片上添加文字
import PIL from PIL import ImageFont from PIL import Image from PIL import ImageDraw #设置字体,如果没有,也可以不 ...
- 使用Qpaint在图片上写文字
开发过程中需要实现在图片上叠加文字,可以采用Qpaint在图片上写文字,然后将图片显示在上面.再将Qlabel加到Qwidget中.效果如下 //创建对象,加载图片 QPixmap pix; pix. ...
- 函数putText()在图片上写文字
#include <iostream> #include <opencv2/opencv.hpp> using namespace std; using namespace c ...
- 把图片上的文字转换成word文字?
转换后的文字不是很如意,但是免费方便. 1.打开Office办公软件自带的OneNote工具.随便新建一个笔记页面,以方便我们接下来的操作. 2.插入图片.在菜单栏里点击[插入],选择插入[图片],找 ...
随机推荐
- OpenGL学习(3)——Shader(补)
完成章节后练习. 练习 1. Adjust the vertex shader so that the triangle is upside down. #version 330 core layou ...
- 刀塔OMG塔防1.26b单机版使用方法
使用方法 1.确保魔兽的版本为1.26以上(低版本会报错),如果版本不对用附件中的版本转换器转一下 2.把 omg.w3x 复制到 魔兽的MAPS文件夹 WarcraftIII 游戏根目录\Maps\ ...
- Java基础——值传递
值传递? 参数传递的值的拷贝,改变拷贝不影响原参数. 引用传递? 参数传递的是参数本身,改变形参,实参也改变. Java中是什么传递? Java中只有值传递 实际情况为什么不对呢? 1. 基本数据类型 ...
- JAVA数据结构和算法 3-简单排序
排序中的两种基本操作是比较和交换.在插入排序中还有移动. 冒泡排序:两两比较相邻元素,如果较大数位于较小数前面,则交换: 每一趟遍历将一个最大的数移到序列末尾,共遍历N-1趟. 如果执行完一趟之后没有 ...
- 如何在视图中启用thymeleaf
1.在HTML标签中引入一个属性 <html xmlns:th="http://www.thymeleaf.org"> <!-- 引入xmlns:th属性才能启用 ...
- JS中删除数组中的元素方法
删除指定下标数组元素 Array.prototype.del=function(index){ if(isNaN(index)||index>=this.length){ return fals ...
- [AT2062] ~K Perm Counting
AT2602 , Luogu 求对于 \(n\) 个数的排列 , 有多少种方案满足对于所有的 \(i\) , \(|P_i - i| != K\) , 答案对 \(924844033\) 取模 . \ ...
- 《剑指offer》查找二维数组内元素 c++
在一个二维数组中(每个一维数组的长度相同),每一行都按照从左到右递增的顺序排序,每一列都按照从上到下递增的顺序排序. 请完成一个函数,输入这样的一个二维数组和一个整数,判断数组中是否含有该整数. cl ...
- String类基础的那些事!
第三阶段 JAVA常见对象的学习 第一章 常见对象--String类 (一) String 类的概述及其构造方法 (1) 概述 多个字符组成的一串数据,例如 "abc" 也可以看成 ...
- [转帖]订购微软Windows 7延长支持服务的报价曝光 第三年要价两百美金
订购微软Windows 7延长支持服务的报价曝光 第三年要价两百美金 cnbeta 年2月份的新闻 https://www.cnbeta.com/articles/tech/815885.htm 微软 ...