如何画svg路径图
在画路径图之前,首先得在package.json引入2个依赖

废话不多说,直接上代码
 <style>

   .green {

     position: absolute;

   }

   .blue {

     position: absolute;

   }

   .yellow {

     position: absolute;

   }

   .red {

     position: absolute;

   }

   .orange {

     position: absolute;

   }

   .path {

     width: 300px;

     height: 150px;

     stroke: pink;

     stroke-width: 10;

     stroke-dasharray: 15, 5;

     fill: transparent;

     display: block;

     position: absolute;

   }

   .article {

     display: flex;

     flex-direction: column;

     position: relative;

     width: 100%;

     min-height: 8rem;

     margin-bottom: 1rem;

     padding: 1rem;

   }

 </style>

 <template>

   <div>

     <section style="display: flex;

     flex-direction: column;

     position: relative;

     width: 100%;

     max-width: 30rem;

     margin: auto;

     text-align: center;">

       <article class="article">

         <svg version="1.1" class="svg" height="400px">

           <!--下右下-->

           <path d="M100 0 L 100 65 , 180 65,180 115" class="path"/>

           <path fill="none" stroke="" d="M95 -5 L 95 60,175 60,175 110" id="yellow"/>

           <!--下左下-->

           <path d="M300 0 L 300 65 , 220 65,220 115" class="path"/>

           <path fill="none" stroke="" d="M295 -5 L 295 60,215 60,215 110" id="red"/>

           <!--下左-->

           <path d="M0 275 L 150 275 , 150 235" class="path"/>

           <path fill="none" stroke="" d="M145 230 L 145 270,-5 270" id="orange"/>

           <!--上左-->

           <path d="M0 300 L 150 300 , 150 340" class="path"/>

           <path fill="none" stroke="" d="M145 335 L 145 295,-5 295" id="green"/>

           <!--左上-->

           <path d="M390 275 L 220 275 , 220 235" class="path"/>

           <path fill="none" stroke="" d="M385 270 L 215 270 , 215 230" id="blue"/>

         </svg>

         <div class="yellow" style="background-color: yellow;width: 10px;height: 10px"></div>

         <div class="red" style="background-color: red;width: 10px;height: 10px"></div>

         <div class="orange" style="background-color: orange;width: 10px;height: 10px"></div>

         <div class="green" style="background-color: green;width: 10px;height: 10px"></div>

         <div class="blue" style="background-color: blue;width: 10px;height: 10px"></div>

       </article>

     </section>

     <Button @click="stop">停止</Button>

     <Button @click="start">开始</Button>

     <Button @click="reset">重置</Button>

   </div>

 </template>

 <script>

 import anime from 'animejs'

 export default {

   data () {

     return {

       yellow: undefined,

       red: undefined,

       orange: undefined,

       green: undefined,

       blue: undefined

     }

   },

   methods: {

     stop () {

       const self = this

       self.yellow.pause()

       self.red.pause()

       self.orange.pause()

       self.green.pause()

       self.blue.pause()

     },

     start () {

       const self = this

       self.yellow.play()

       self.red.play()

       self.orange.play()

       self.green.play()

       self.blue.play()

     },

     reset () {

       const self = this

       self.yellow.reset()

       self.red.reset()

       self.orange.reset()

       self.green.reset()

       self.blue.reset()

     }

   },

   mounted () {

     const self = this

     let yellowPath = anime.path('#yellow')

     let redPath = anime.path('#red')

     let orangePath = anime.path('#orange')

     let greenPath = anime.path('#green')

     let bluePath = anime.path('#blue')

     self.yellow = anime({

       targets: '.yellow',

       // 沿着路径对象的x值

       translateX: yellowPath('x'),

       // 沿着路径对象的y值

       translateY: yellowPath('y'),

       easing: 'linear',

       duration: 10000,

       loop: true

     })

     self.red = anime({

       targets: '.red',

       // 沿着路径对象的x值

       translateX: redPath('x'),

       // 沿着路径对象的y值

       translateY: redPath('y'),

       easing: 'linear',

       duration: 10000,

       loop: true

     })

     self.orange = anime({

       targets: '.orange',

       // 沿着路径对象的x值

       translateX: orangePath('x'),

       // 沿着路径对象的y值

       translateY: orangePath('y'),

       easing: 'linear',

       duration: 10000,

       loop: true

     })

     self.green = anime({

       targets: '.green',

       // 沿着路径对象的x值

       translateX: greenPath('x'),

       // 沿着路径对象的y值

       translateY: greenPath('y'),

       easing: 'linear',

       duration: 10000,

       loop: true

     })

     self.blue = anime({

       targets: '.blue',

       // 沿着路径对象的x值

       translateX: bluePath('x'),

       // 沿着路径对象的y值

       translateY: bluePath('y'),

       easing: 'linear',

       duration: 10000,

       loop: true

     })

     self.blue.pause()

     self.yellow.pause()

     self.red.pause()

     self.orange.pause()

     self.green.pause()

   }

 }

 </script>
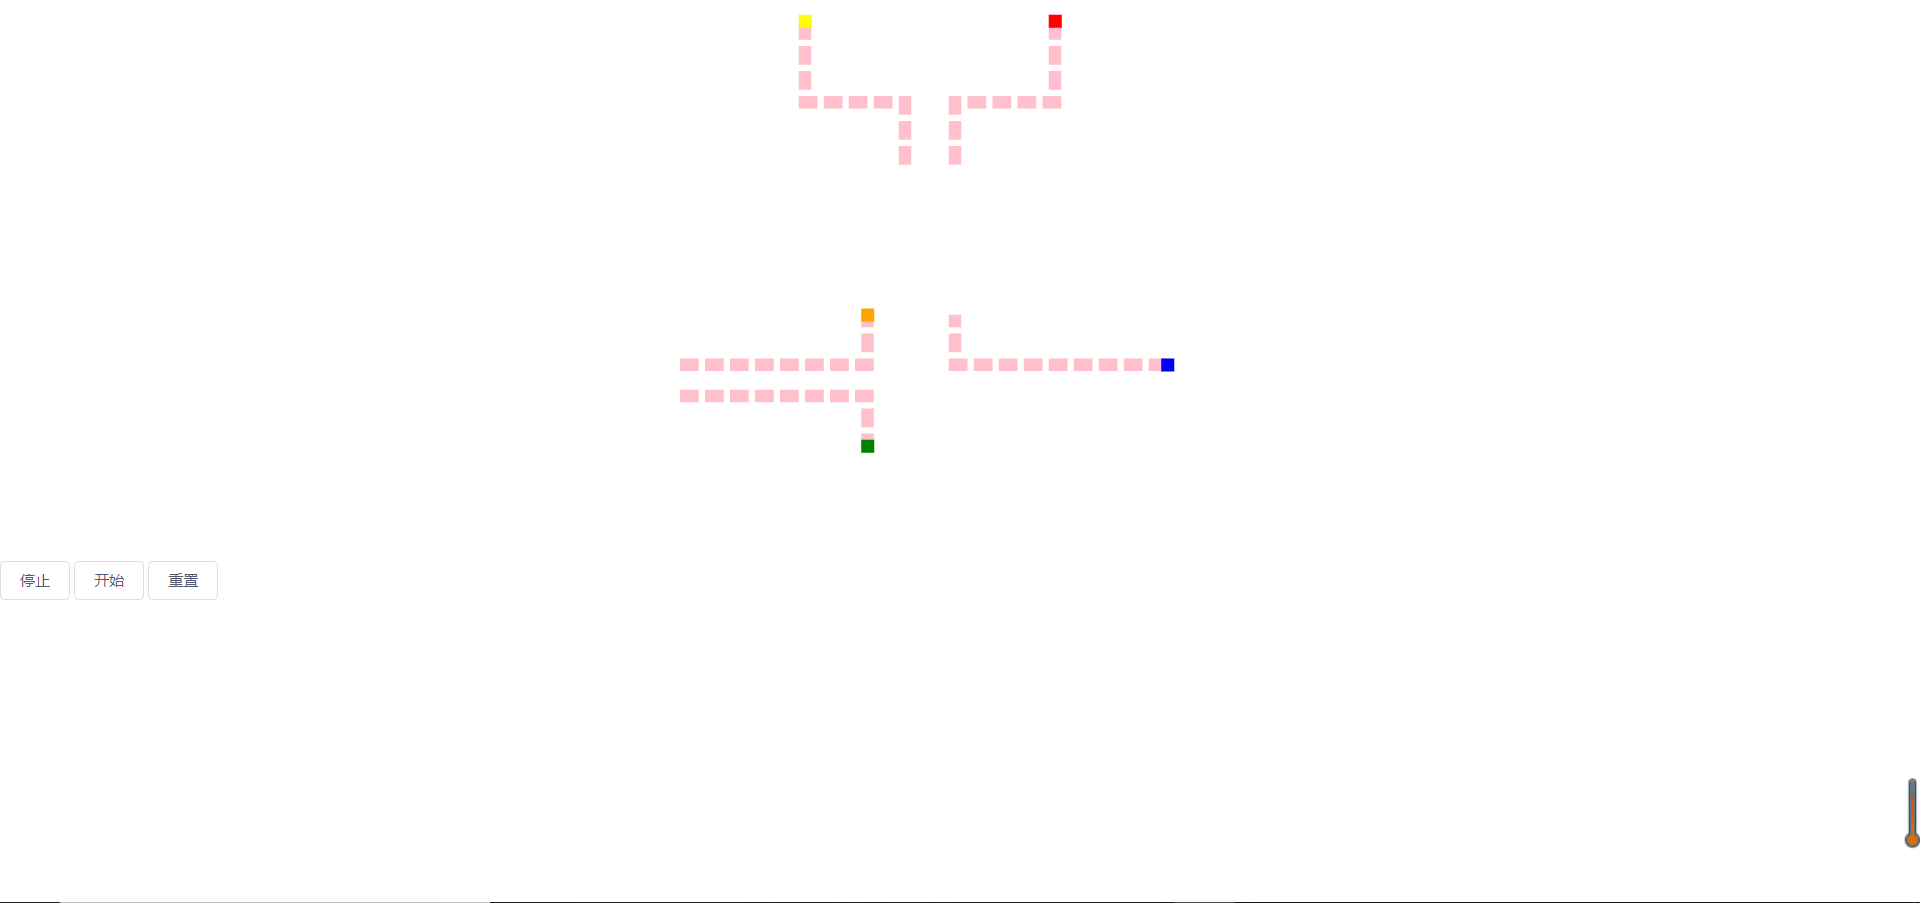
通过以上代码,最终可以生成如下图所示,点击开始,点就会跟着模拟路径跑,流动方向请看代码注释。
如何画svg路径图的更多相关文章
- SVG路径动画解密
原文:SVG路径动画解密 原文链接:http://www.gbtags.com/gb/share/5581.htm SVG路径动画效果现在貌似越来越多网站都使用了,给我的感觉就像是一段时间的流行而已, ...
- 【机器学习】【条件随机场CRF-3】条件随机场的参数化形式详解 + 画出对应的状态路径图 + 给出对应的矩阵表示
1.条件随机场概念CRF,Conditional Random Field,是给定一组输入随机变量条件下另一组输出随机变量的条件概率分布模式,其特点是假设输出随机变量构成马尔可夫随机场. 条件随机场用 ...
- R数据分析:如何给结构方程画路径图,tidySEM包详解
之前一直是用semPlot这个包给来进行结构方程模型的路径绘制,自从用了tidySEM这个包后就发现之前那个包不香了,今天就给大家分享一下tidySEM. 这个包的很大特点就是所有的画图原始都是存在数 ...
- 深度掌握SVG路径path的贝塞尔曲线指令
一.数字.公式.函数.变量,哦,NO! 又又一次说起贝塞尔曲线(英语:Bézier curve,维基百科详尽中文释义戳这里),我最近在尝试实现复杂的矢量图形动画,发现对贝塞尔曲线的理解馒头那么厚,是完 ...
- SVG路径PATH
SVG路径PATH 在使用之前建议下个PS或者FLASH玩玩里面的钢笔工具(FLASH里的钢笔工具比PS里的好用) PATH用到的指令: M----(X Y):移动到 Z----(none):关闭路径 ...
- Android中使用SVG矢量图(一)
SVG矢量图介绍 首先要解释下什么是矢量图像,什么是位图图像? 1.矢量图像:SVG (Scalable Vector Graphics, 可伸缩矢量图形) 是W3C 推出的一种开放标准的文本式矢量图 ...
- SVG路径
前面的话 本文将详细介绍SVG路径 path字符串 路径(path)是一个非常强大的绘图工具,可以用path元素绘制矩形(直角矩形或者圆角矩形).圆形.椭圆.折线形.多边形,以及一些其他的形状,例如贝 ...
- svg矢量图
svg简介 Scalable Vector Graphics 可缩放矢量图形 SVG 图像在放大或改变尺寸的情况下其图形质量不会有所损失 svg知识点 svg如何绘图 svg和cnavas区别 svg ...
- GDI+编程(画笔/画刷/路径/区域)
构造Graphics对象 Graphics类是GDI+程序设计的核心,Graphics类能够完成大部分的绘图,文本输出,几何图形的填充及坐标系统的转换等各种操作.在功能上,它与GDI的设备环境(DC) ...
随机推荐
- Python2和Python3的字符串编码和类型
一.字符串编码和类型 任何编码格式的字符串,都可以和Unicode互相转换. gbk -> utf8 # 将字符串按指定格式进行解码,返回Unicode字符串unicode_str = gbk_ ...
- zabbix4.4 (server,proxy,agent)安装部署实战
一. 部署架构图 二. 安装环境及版本信息 操作系统:centos7 zabbix版本: 4.4 mysql: 5.7.28 三.zabbix server安装(192.168.182.132) rp ...
- pycharm 对mysql的可视化操作
参照: https://blog.csdn.net/qq_24189933/article/details/75666243
- MySQL中表的列结构的修改操作
首先创建一个用于测试的表test_table: drop table if exists test_table; CREATE TABLE `test_table` ( `id` int(11) DE ...
- FlappyBird
学习CocosCreator有段时间了,现在花了两天时间写了个像素鸟的小游戏,这个游戏之前又看到过,但是不知道怎么又下架了,之前还是蛮火的游戏,想起来后去网上看了看,原来是因为侵犯了 超级玛丽 的游戏 ...
- jqGrid获取展示的所有行id集合
$("#jqGrid").getDataIDs();
- golang json解析到map中
package main import ( "fmt" "encoding/json" ) type ItemMessage struct { ItemType ...
- uniapp跨域两次请求解决方案
引入qs模块 使用 qs模块将data序列化,再传递,注意header必须设置为 'content-type':'application/x-www-form-urlencoded', import ...
- python字典推导式 - python基础入门(17)
在昨天的文章中,我们介绍了关于python列表推导式 的使用,字典推导式使用方法其实也类似,也是通过循环和条件判断表达式配合使用,不同的是字典推导式返回值是一个字典,所以整个表达式需要写在{}内部. ...
- PowerShell->>获取本地计算机的用户组和组成员
获取本地计算机的用户组和组成员 function Get-LocalGroups() { net localgroup | ?{ $_ -match "^\*.*" } | %{ ...