ansible开局配置-openEuler
ansible干啥用的就不多介绍了,这篇文章主要在说ansible的安装、开局配置、免密登录。
ansible安装
- 查看系统版本
cat /etc/openEuler-latest
输出内容如下:
openeulerversion=openEuler-24.03-LTS
compiletime=2024-05-27-21-31-28
gccversion=12.3.1-30.oe2403
kernelversion=6.6.0-28.0.0.34.oe2403
openjdkversion=1.8.0.412.b08-5.oe2403
- 清除软件库缓存
dnf clean all
- 建议软件库缓存
dnf makecache
- 安装epel-release软件仓
- 下载对应版本epel-release的软件仓库
# 不同系统版本需要安装不同的epel-release

wget https://mirrors.aliyun.com/repo/epel-testing.repo
2. 重新建立软件库索引
mv epel-testing.repo /etc/yum.repo.d/

dnf clean all

dnf makecache
- 安装ansible
dnf -y install ansible
等待安装完成即可
开局配置
- 常用文件介绍
/etc/ansible/hosts ## 用于存放需要批量管理的主机IP或主机名称
/etc/ansible/ansible.cfg ## 该文件为ansible的主要配置文件
- 添加主机到ansible
192.168.0.10    ansible_ssh_pass=主机密码        ansible_ssh_user=主机账号

192.168.0.11    ansible_ssh_pass=主机密码        ansible_ssh_user=主机账号

192.168.0.12    ansible_ssh_pass=主机密码       ansible_ssh_user=主机账号
ansible_ssh_pass:远程主机登录密码
ansible_ssh_user:远程主机登录账号
- 远程执行ping命令,会发现执行报错
ansible all -m ping
输出内容如下:
192.168.0.10 | FAILED! => {
"msg": "Using a SSH password instead of a key is not possible because Host Key checking is enabled and sshpass does not support
this. Please add this host's fingerprint to your known_hosts file to
manage this host."}
192.168.0.11 | FAILED! => {
"msg": "Using a SSH password instead of a key is not possible because Host Key checking is enabled and sshpass does not support
this. Please add this host's fingerprint to your known_hosts file to
manage this host."}
192.168.0.12 | FAILED! => {
"msg": "Using a SSH password instead of a key is not possible because Host Key checking is enabled and sshpass does not support
this. Please add this host's fingerprint to your known_hosts file to
manage this host."}
出现这个问题主要是因为ansible默认是没有开启账号密码登录的,默认采用证书登录,只需要在配置文件中把证书登录关闭就可以执行成功了。
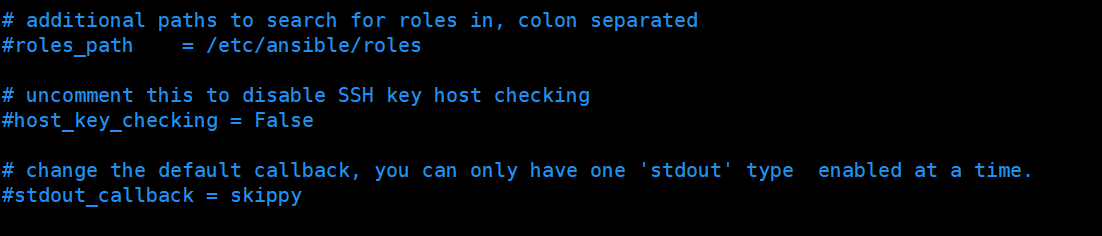
进入/etc/ansible/ansible.cfg文件,将host_key_checking = False取消注释或者增加该内容即可

再次重新执行就不会有问题了,成功后输出内容如下
192.168.0.11 | SUCCESS => {
"ansible_facts": {

    "discovered_interpreter_python": "/usr/bin/python"

},

"changed": false,

"ping": "pong"
}
192.168.0.10 | SUCCESS => {
"ansible_facts": {

    "discovered_interpreter_python": "/usr/bin/python"

},

"changed": false,

"ping": "pong"
}
192.168.0.12 | SUCCESS => {
"ansible_facts": {

    "discovered_interpreter_python": "/usr/bin/python"

},

"changed": false,

"ping": "pong"
}
配置免密登录
- 生成密钥
ssh-keygen
一路回车即可,输出内容如下:
Generating public/private rsa key pair.
Enter file in which to save the key (/root/.ssh/id_rsa):
Enter passphrase (empty for no passphrase):
Enter same passphrase again:
Your identification has been saved in /root/.ssh/id_rsa
Your public key has been saved in /root/.ssh/id_rsa.pub
The key fingerprint is:
SHA256:+RGyyNnrIHOLllk+e2hpNyTmxjBZkMY5vvDmTGuEh5g root@ecs-5352
The key's randomart image is:
+---[RSA 3072]----+
| . o |
| B |
| o o . . |
| . ...+ + . |
| o = ++ S . |
|E o @ + .o . |
| Bo%o=. . |
| O=@++ |
| o.+o=.. |
+----[SHA256]-----+
- 编写playbook脚本文件
- hosts: # 主机组

  remote_user: # 用户名

  tasks:

    - name: push ansible key

      authorized_key: user=root key="{{ lookup('file' ,'密钥存放位置')}}" state=present
示例:
- hosts: all

  remote_user: root

  tasks:

    - name: push ansible key

      authorized_key: user=root key="{{ lookup('file' ,'/root/.ssh/id_rsa.pub')}}" state=present
- 执行playbook脚本文件
ansible-playbook push_key.yml
输出结果如下表示执行成功:
[root@ecs-5352 yml]# ansible-playbook push_key.yml
PLAY [all]
TASK [Gathering Facts]
ok: [192.168.0.10]
ok: [192.168.0.12]
ok: [192.168.0.11]
TASK [push ansible key]
changed: [192.168.0.10]
changed: [192.168.0.12]
changed: [192.168.0.11]
PLAY RECAP
192.168.0.10 : ok=2 changed=1 unreachable=0 failed=0 skipped=0 rescued=0 ignored=0
192.168.0.11 : ok=2 changed=1 unreachable=0 failed=0 skipped=0 rescued=0 ignored=0
192.168.0.12 : ok=2 changed=1 unreachable=0 failed=0 skipped=0 rescued=0 ignored=0
- 测试是否可以免密
- 将ansible.cfg配置文件中的host_key_checking = False注释掉
2. 删除hosts文件主机后面的用户名和密码

3. 测试执行ping命令
ansible all -m ping
输出结果如下:
192.168.0.10 | SUCCESS => {
"ansible_facts": {

    "discovered_interpreter_python": "/usr/bin/python"

},

"changed": false,

"ping": "pong"
}
192.168.0.12 | SUCCESS => {
"ansible_facts": {

    "discovered_interpreter_python": "/usr/bin/python"

},

"changed": false,

"ping": "pong"
}
192.168.0.11 | SUCCESS => {
"ansible_facts": {

    "discovered_interpreter_python": "/usr/bin/python"

},

"changed": false,

"ping": "pong"
}
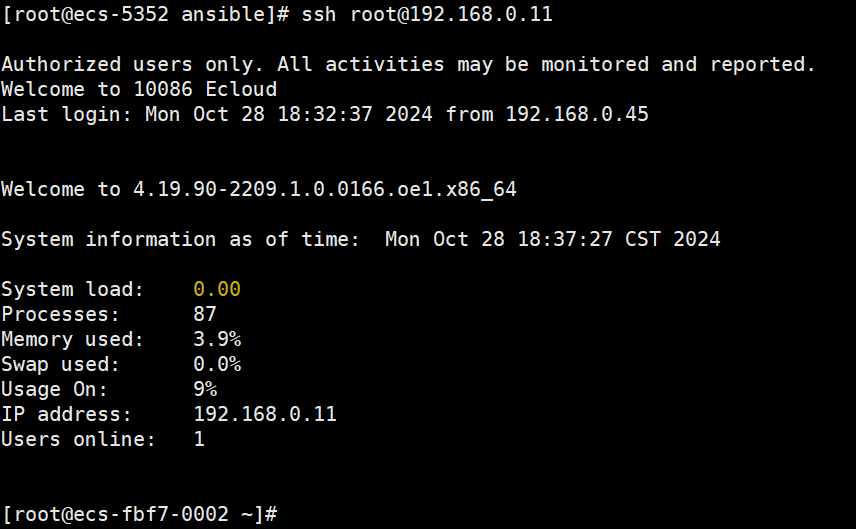
- 再次测试
直接在ansible主机上,使用ssh命令测试是否可以免密登录
ssh root@192.168.0.11
无需输入密码即可登录成功
ansible开局配置-openEuler的更多相关文章
- Ansible自动化配置详解
第1章 Ansible基本概述 1.1 ansible是一个配置管理系统configuration management system, 你只需要可以使用ssh访问你的服务器或设备就行. 1.安装软件 ...
- Ansible安装配置及命令使用详解
Ansible和saltstack目前市面上一些其它的项目管理工具有很大的不同,它的设计初衷就是为了更方便.快捷的进行配置管理.它易于安装和使用.语法也非常简单易学.你可以用Ansible将平常复杂的 ...
- Ansible 使用配置
1.配置 /etc/ansible/hosts 文件,添加被管控主机ip #vim /etc/ansible/hosts 文件末尾添加组[group1]和被管控主机的IP [group1] 192 ...
- CentOS 9 开局配置
CentOS 9 开局配置 CentOS 9 发布有几年了,一直没有尝试使用,CentOS 9 有一些变动. 查看系统基础信息 # 查看系统基础信息 [root@chenby ~]# neofetch ...
- Ansible安装配置Nginx
一.思路 现在一台机器上编译安装好nginx.打包,然后在用ansible去下发 cd /etc/ansible 进入ansible配置文件目录 mkdir roles/{common,install ...
- Ansible安装配置及使用
一.Ansible特点 1.不需要安装客户端,通过sshd通信 2.基于模块工作,模块可以由任何序言开发 3.不仅支持命令行使用模块,也支持编写yaml格式的playbook 4.支持sudo 5.有 ...
- Ansible安装配置
Ansible工具的安装与配置 Ansible基于SSH,不需要在远程端安装任何软件,只需要在管理端安装ansible及其组件即可. Ansible使用前提是已配置ssh密钥免登陆. 一.安装组件: ...
- Ansible(二) - 配置及命令简介
Ⅰ. Ansible Inventory Hosts文件配置 # mkdir /etc/ansible # touch /etc/ansible/hosts # cat /etc/hosts 127. ...
- 1、Ansible安装配置
ansible介绍: Ansible是一款基于Python开发的自动化运维工具,主要是实现批量系统配置.批量程序部署.批量运行命令.批量执行任务等等诸多功能.Ansible是一款灵活的开源工具,能够很 ...
- ansible常用配置
1.什么是Ansible 部署参考连接:http://www.ansible.com.cn/ ansible是新出现的自动化运维工具,基于Python开发,集合了众多运维工具(puppet.cfeng ...
随机推荐
- CentOS下离线安装gcc环境,图文详细,方法全面
CentOS下离线安装gcc环境,图文详细,方法全面 下载 方式1:如果有网的虚拟机还没有安装,可以直接 yum install --downloadonly --downloaddir=/root/ ...
- Linux统计文件目录下文件的数目命令
Linux下有三个命令:ls.grep.wc.通过这三个命令的组合可以统计目录下文件及文件夹的个数. 1.ls -l | grep "^-" | wc -l:统计当前目录下文件的个 ...
- CryptoHouse:由 ClickHouse 和 Goldsky 支持的免费区块链分析服务(ClickHouse 博客)
我们很高兴地宣布 CryptoHouse,在 crypto.clickhouse.com 上可访问,这是一个由 ClickHouse 提供支持的免费区块链分析服务. https://crypto.cl ...
- SMU Spring 2023 Contest Round 1(MINEYE杯第十六届华中科技大学程序设计邀请赛)
B. Contest Preparation 对n<=m和n==0时特判一下 #include <iostream> #include <cstdio> #include ...
- Jetpack架构组件学习(5)——Hilt 注入框架使用
原文: Jetpack架构组件学习(5)--Hilt 注入框架使用-Stars-One的杂货小窝 本篇需要有Kotlin基础知识,否则可能阅读本篇会有所困难! 介绍说明 实际上,郭霖那篇文章已经讲得比 ...
- C#自定义结构体的(用SendMessage)传递
要传递结构体 public struct STUDENT { public int id; //ID public string name; //姓名 } 要引用Win32api函数FindWindo ...
- Gluon 编译 JavaFx -> exe
Gluon 编译 JavaFx -> exe 能力强的伙伴可以直接参考官方文档 开发工具 idea 2023.3 idea gluon plugin git apache-maven-3.8.4 ...
- Android Adapter中组件EditText文本变化监听 addTextChangedListener
问题背景:使用适配器显示一个列表,列表中Item中有EditText,滚动时会有EditText组件内容消失 步骤: 1. 在Adapter中,添加interface public interface ...
- 【YashanDB数据库】PHP无法通过ODBC连接到数据库
[问题分类]驱动使用 [关键字]ODBC.驱动使用.PHP [问题描述]应用使用php-fpm+nginx架构,通过php的ODBC拓展连接YashanDB时出现报错: [unixODBC][Driv ...
- 在stable diffussion中控制生成图片的光线
在摄影中,光线起着至关重要的作用,它对图像的整体质量和氛围有着显著的影响.您可以使用光线来增强主题,创造深度和维度,传达情感,以及突出重要细节. 在这篇文章中,我会告诉你如何在stable diffu ...