PC端-上传头像并裁剪
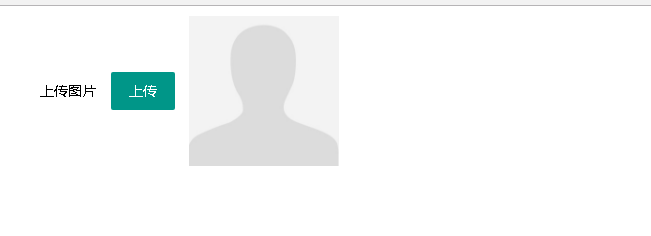
界面一:
<link href="../theme/js/layui.layim/src/css/layui.css" rel="stylesheet"/>

<style>

    #form1 { padding: 10px; }

    .usericon { margin-left: 0; }

</style>

<form class="layui-form" id="form1" runat="server">

    <div class="layui-form-item">

        <div class="layui-inline">

            <label class="layui-form-label">上传图片</label>

            <div class="layui-input-block">

                <button id="btnUpload" class="layui-btn" type="button">上传</button>

            </div>

        </div>

        <div class="layui-inline">

            <div class="layui-input-block usericon">

                <img id="imgShow" src="../theme/img/user.jpg" onerror="../theme/img/user.jpg" width="150" height="150" />

            </div>

        </div>

    </div>

</form>
页面布局代码
<script src="../theme/js/layui.layim/src/layui.js"></script>

<script src="../theme/js/jquery.min.js"></script>

<script type="text/javascript">

    layui.use(['layer'], function () {

        //上传

        $("#btnUpload").on("click", function () {

            layer.open({

                title: ['上传', 'font-size:18px;'],

                area: ['700px', '550px'],

                fixed: false, //不固定

                maxmin: true,

                type: 2,

                content: "/test/PreviewImg.aspx"

            });

        });

    });

    function Update(src) {

        $("#imgShow").attr("src", src);

    }

</script>
加入js脚本-点击上传弹出页面进行头像上传和截图,完成后调用Update方法刷新页面
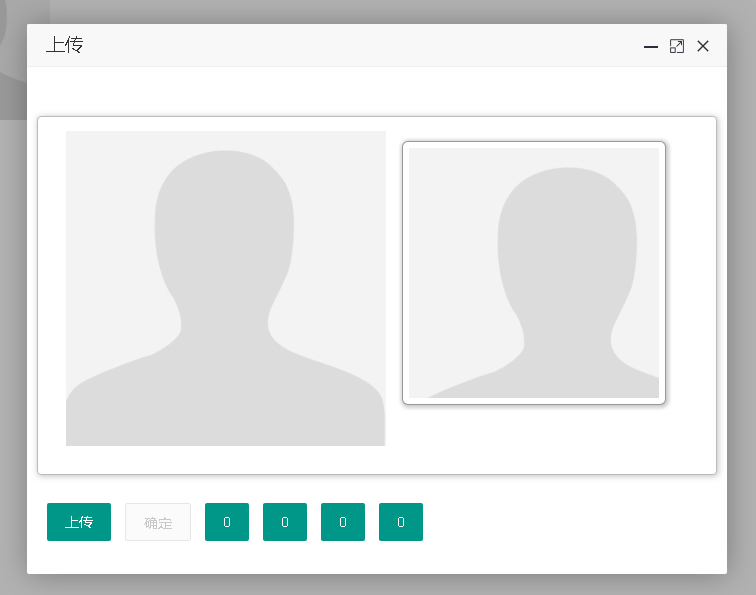
界面二:
<link href="../theme/js/layui.layim/src/css/layui.css" rel="stylesheet" />

<link href="../theme/js/Jcrop/css/jquery.Jcrop.min.css" rel="stylesheet" />

<style>

    .container { margin-right: auto; margin-left: auto; *zoom: 1; }

        .container:before,

        .container:after { display: table; content: ""; line-height: 0; }

        .container:after { clear: both; }

    .row { *zoom: 1; }

        .row:before,

        .row:after { display: table; content: ""; line-height: 0; }

        .row:after { clear: both; }

    .span12 { margin-left: 10px; margin-right: 10px; }

    .span12 .layui-btn{margin-left:10px;}

    .jc-demo-box { text-align: left; margin: 2em auto; background: white; border: 1px #bbb solid; -webkit-border-radius: 4px; -moz-border-radius: 4px; border-radius: 4px; -webkit-box-shadow: 1px 1px 10px rgba(0, 0, 0, 0.25); -moz-box-shadow: 1px 1px 10px rgba(0, 0, 0, 0.25); box-shadow: 1px 1px 10px rgba(0, 0, 0, 0.25); padding: 1em 2em 2em; }

    form { margin: 1.5em 0; }

    .jcrop-holder #preview-pane { display: block; position: absolute; z-index: 2000; top: 10px; right: -280px; padding: 6px; border: 1px rgba(0,0,0,.4) solid; background-color: white; -webkit-border-radius: 6px; -moz-border-radius: 6px; border-radius: 6px; -webkit-box-shadow: 1px 1px 5px 2px rgba(0, 0, 0, 0.2); -moz-box-shadow: 1px 1px 5px 2px rgba(0, 0, 0, 0.2); box-shadow: 1px 1px 5px 2px rgba(0, 0, 0, 0.2); }

    #preview-pane .preview-container { width: 250px; height: 250px; overflow: hidden; }

</style>

<form id="form1" runat="server">

    <div class="container">

        <div class="row">

            <div class="span12">

                <div class="jc-demo-box">

                    <img src="../theme/img/user.jpg" id="target" alt="[Jcrop Example]" />

                    <div id="preview-pane">

                        <div class="preview-container">

                            <img src="../theme/img/user.jpg" class="jcrop-preview" alt="Preview" />

                        </div>

                    </div>

                </div>

                <button id="btnUpload" class="layui-btn" type="button">上传</button>

                <button id="btnOk" class="layui-btn layui-btn-disabled" type="button">确定</button>

                <button id="btnX" class="layui-btn" type="button">0</button>

                <button id="btnY" class="layui-btn" type="button">0</button>

                <button id="btnW" class="layui-btn" type="button">0</button>

                <button id="btnH" class="layui-btn" type="button">0</button>

            </div>

        </div>

    </div>

    <asp:HiddenField ID="x1" runat="server" />

    <asp:HiddenField ID="y1" runat="server" />

    <asp:HiddenField ID="w" runat="server" />

    <asp:HiddenField ID="h" runat="server" />

</form>
页面布局代码
<script src="../theme/js/jquery.min.js"></script>

<script src="../theme/js/Jcrop/js/jquery.Jcrop.min.js"></script>

<script src="../theme/js/layui.layim/src/layui.js"></script>
jQuery(function ($) {

    // Create variables (in this scope) to hold the API and image size

    var jcrop_api,

        boundx,

        boundy,

        // Grab some information about the preview pane

        $preview = $('#preview-pane'),

        $pcnt = $('#preview-pane .preview-container'),

        $pimg = $('#preview-pane .preview-container img'),

        xsize = $pcnt.width(),

        ysize = $pcnt.height();

    //console.log('init', [xsize, ysize]);

    $('#target').Jcrop({

        onChange: updatePreview,

        onSelect: updatePreview,

        aspectRatio: xsize / ysize

    }, function () {

        // Use the API to get the real image size

        var bounds = this.getBounds();

        boundx = bounds[0];

        boundy = bounds[1];

        // Store the API in the jcrop_api variable

        jcrop_api = this;

        // Move the preview into the jcrop container for css positioning

        $preview.appendTo(jcrop_api.ui.holder);

    });

    function updatePreview(c) {

        if (parseInt(c.w) > 0) {

            var rx = xsize / c.w;

            var ry = ysize / c.h;

            $pimg.css({

                width: Math.round(rx * boundx) + 'px',

                height: Math.round(ry * boundy) + 'px',

                marginLeft: '-' + Math.round(rx * c.x) + 'px',

                marginTop: '-' + Math.round(ry * c.y) + 'px'

            });

        }

        $('#x1').val(c.x);//左顶点的x坐标

                $('#y1').val(c.y);//右顶点的x坐标

                $('#w').val(c.w);//截图的宽度

                $('#h').val(c.h);//截图的高度

        $('#btnX').html(c.x);//左顶点的x坐标

                $('#btnY').html(c.y);//右顶点的x坐标

                $('#btnW').html(c.w);//截图的宽度

                $('#btnH').html(c.h);//截图的高度

    };

});
js裁剪的脚本
//上传文件

layui.use('upload', function () {

    var upload = layui.upload;

    //单个文件上传

    var uploadInst = upload.render({

        elem: '#btnUpload' //绑定元素

      , url: '/test/ashx/ashx.ashx' //上传接口

      , data: {

          action: "uploadimg"

          //, maxSize: $(".jcrop-holder>.jcrop-tracker").width()

      }

      , before: function (obj) {//在 choose 回调之后、done/error 回调之前触发

          //layer.load(); //上传loading

      }

      , done: function (res) {

          //上传完毕回调

          $("#target").attr("src", res.data.src);

          $(".jcrop-holder>img").attr("src", res.data.src);

          $(".preview-container>img.jcrop-preview").attr("src", res.data.src);

          $(".jcrop-tracker").siblings("img").attr("src", res.data.src);

          //上传图片后-确定按钮可用

          $("#btnOk").removeClass("layui-btn-disabled");

      }

      , error: function () {

          //请求异常回调

      }

    });

});
上传文件
//确定

$("#btnOk").on("click", function () {

    if (!$(this).hasClass("layui-btn-disabled")) {

       var x= $('#x1').val();//左顶点的x坐标

       var y = $('#y1').val();//右顶点的x坐标

       var w = $('#w').val();//截图的宽度

       var h = $('#h').val();//截图的高度

        $.ajax({

            //提交数据的类型 POST GET

            type: "POST",

            //提交的网址

            url: '/test/ashx/ashx.ashx',

            //提交的数据

            data: {

                action: "cutimg",

                x: x,

                y: y,

                w: w,

                h: h,

                src: $("#target").attr("src"),

                maxWidth: $(".jcrop-holder>.jcrop-tracker").width(),

                maxHeight: $(".jcrop-holder>.jcrop-tracker").height()

            },

            //返回数据的格式-"xml", "html", "script", "json", "jsonp", "text".

            datatype: "json",

            //成功返回之后调用的函数

            success: function (data) {

                if (data.code == 0) {

                    parent.Update(data.src);

                    CloseThis();

                }

            },

            //调用出错执行的函数

            error: function () {

                //请求出错处理

            }

        });

    }

});

//关闭当前iframe

function CloseThis() {

    //先得到当前iframe层的索引

    var index = parent.layer.getFrameIndex(window.name);

    parent.layer.close(index); //再执行关闭

}
确定
/// <summary>

/// 上传图片(如果没有传入宽高,不压缩图片)

/// </summary>

/// <param name="context"></param>

/// <returns></returns>

private string Uploadimg(HttpContext context)

{

    int maxSize = ;//压缩后的最大尺寸(长或高,单位px)

    int.TryParse(context.Request.Params["maxSize"], out maxSize);

    //图片保存路径

    string savePath = "/uploadfiles/test/" + DateTime.Now.ToString("yyyyMM") + "/";

    if (!Directory.Exists(context.Server.MapPath(savePath)))

    {

        Directory.CreateDirectory(context.Server.MapPath(savePath));

    }

    string fileName = Guid.NewGuid().ToString("N");

    HttpPostedFile file = context.Request.Files[];//上传的图片

    if (file != null)

    {//上传的图片不为空

        string fileExt = Path.GetExtension(file.FileName);//文件扩展名

        fileName += fileExt;

        //压缩后的图片

        Bitmap img = FileExt.ImageZip(file.InputStream, fileExt, maxSize);

        if (img != null)

        {//压缩后的图片不为空

            img.Save(context.Server.MapPath(savePath + fileName));

        }

        else

        {//原图片保存

            file.SaveAs(context.Server.MapPath(savePath + fileName));

        }

    }

    return "{\"code\":0,\"msg\":\"上传成功\",\"data\":{\"src\":\"" + (savePath + fileName) + "\"}}";

}
执行后台代码-上传文件
/// <summary>

/// 裁剪图片-返回裁剪后的图片地址

/// </summary>

/// <param name="context"></param>

/// <returns></returns>

private string CutImg(HttpContext context)

{

    string src = context.Request.Params["src"];//原图片地址

    Image file = Image.FromFile(context.Server.MapPath(src));//上传的图片

    int x = string.IsNullOrEmpty(context.Request.Params["x"]) ?  : int.Parse(context.Request.Params["x"]);//左顶点的x坐标

    int y = string.IsNullOrEmpty(context.Request.Params["y"]) ?  : int.Parse(context.Request.Params["y"]);//右顶点的x坐标

    int w = string.IsNullOrEmpty(context.Request.Params["w"]) ?  : int.Parse(context.Request.Params["w"]);//截图的宽度

    int h = string.IsNullOrEmpty(context.Request.Params["h"]) ?  : int.Parse(context.Request.Params["h"]);//截图的高度

    int maxWidth = string.IsNullOrEmpty(context.Request.Params["maxWidth"]) ?  : int.Parse(context.Request.Params["maxWidth"]);//最大宽

    int maxHeight = string.IsNullOrEmpty(context.Request.Params["maxHeight"]) ?  : int.Parse(context.Request.Params["maxHeight"]);//最大高

    string fileExt = Path.GetExtension(src);//图片格式

    string fileName = Guid.NewGuid().ToString("N") + fileExt;

    string savePath = "/uploadfiles/test/" + DateTime.Now.ToString("yyyyMM") + "/" + fileName;

    CutImage(GetReducedImage(file, maxHeight, maxHeight), x, y, w, h, savePath, context);

    return "{\"code\":0,\"src\":\"" + savePath + "\"}";

}

/// <summary>

/// 生成缩略图重载方法1,返回缩略图的Image对象

/// </summary>

/// <param name="Width">缩略图的宽度</param>

/// <param name="Height">缩略图的高度</param>

/// <returns>缩略图的Image对象</returns>

public Bitmap GetReducedImage(Image ResourceImage, int Width, int Height)

{

    try

    {

        //用指定的大小和格式初始化Bitmap类的新实例

        Bitmap bitmap = new Bitmap(Width, Height, PixelFormat.Format32bppArgb);

        //从指定的Image对象创建新Graphics对象

        Graphics graphics = Graphics.FromImage(bitmap);

        //清除整个绘图面并以透明背景色填充

        graphics.Clear(Color.Transparent);

        //在指定位置并且按指定大小绘制原图片对象

        graphics.DrawImage(ResourceImage, new Rectangle(, , Width, Height));

        return bitmap;

    }

    catch (Exception e)

    {

        return null;

    }

}

/// <summary>

/// 截取图片方法

/// </summary>

/// <param name="bitmap">原图</param>

/// <param name="beginX">开始位置-X</param>

/// <param name="beginY">开始位置-Y</param>

/// <param name="width">截取宽度</param>

/// <param name="height">截取长度</param>

/// <param name="path">保存路径</param>

/// <param name="context">上下文</param>

public static void CutImage(Bitmap bitmap, int beginX, int beginY, int width, int height, string path, HttpContext context)

{

    if (beginX + width > bitmap.Width)

        beginX = bitmap.Width - width;

    if (beginY + height > bitmap.Height)

        beginY = bitmap.Height - height;

    Bitmap destBitmap = new Bitmap(width, height);//目标图

    Rectangle destRect = new Rectangle(, , width, height);//矩形容器

    Rectangle srcRect = new Rectangle(beginX, beginY, width, height);

    Graphics g = Graphics.FromImage(destBitmap);

    g.DrawImage(bitmap, destRect, srcRect, GraphicsUnit.Pixel);

    destBitmap.Save(context.Server.MapPath(path), ImageFormat.Jpeg);

}
点击确定-后台进行截图


PC端-上传头像并裁剪的更多相关文章
- 移动端 上传头像 并裁剪功能(h5)
<!DOCTYPE html> <html> <head> <meta charset="utf-8"> <meta name ...
- html5 上传头像的裁剪
本示例使用HTML5 canvas,简单的编写了上传头像的裁剪效果,移动端支持拖拽后裁剪, 虽然样式不好看,但是功能还算全: 下图为裁剪后的效果: html部分: <!DOCTYPE html& ...
- WebAPI实现移动端上传头像接口
测试时可以直接使用PostMan模拟发送请求 /// <summary> /// 手机端上传头像接口 /// </summary> /// <param name=&qu ...
- Jcrop+uploadify+php实现上传头像预览裁剪
最近由于项目需要,所以做了一个上传头像预览并且可以预览裁剪的功能,大概思路是上传的图片先保存到服务器,然后通过ajax从服务器获取到图片信息,再利用Jcrop插件进行裁剪,之后通过PHP获取到的四个裁 ...
- ASP.NET MVC在服务端把异步上传的图片裁剪成不同尺寸分别保存,并设置上传目录的尺寸限制
我曾经试过使用JSAjaxFileUploader插件来把文件.照片以异步的方式上传,就像"MVC文件图片ajax上传轻量级解决方案,使用客户端JSAjaxFileUploader插件01- ...
- asp.net实现图片在线上传并在线裁剪
1.说明 接上一篇文章uploadify实现多附件上传完成后,又突然用到头像上传并在线裁剪.在网上找个众多例子都没有符合要求的,有一篇文章写的不错,就是文旺老兄写的这篇Asp.Net平台下的图片在线裁 ...
- 上传头像,界面无跳转,php+js
上传头像,界面无跳转的方式很多,我用的是加个iframe那种.下面直接上代码. html: //route 为后端接口//upload/avatar 为上传的头像的保存地址//imgurl=/uplo ...
- php实现手机拍照上传头像功能
现在手机拍照很火,那么如何使用手机拍照并上传头像呢?原因很简单,就是数据传递,首先手机传递照片信息,这个就不是post传递 也不是get函数传递, 这个另外一种数据格式传递,使用的是$GLOBALS ...
- Android基础之——startActivityForResult启动界面并返回数据,上传头像
在android应用的开发过程中,常常会出现启动一个界面后填写部分内容后带着数据返回启动前的界面,最典型的应用就是登录过程.在非常多应用程序的模块中,都有"我的"这个模块,在未登录 ...
随机推荐
- word里的字号与html字号的对应关系
在word里输入一段文字,把文字调成需要的大小,即"三号或者小三",然后把文件另存为网页,在格式里选择“html”格式,然后把word关闭,将另存的html文件用编辑工具打开,就可 ...
- SQL语句01
SQL(Structured Query Language):结构化查询语言 SQL分类: 数据操纵语言DML(Data Manipulation Language) SELECT ...
- CentOS7 安装 Adobe Flash 看网络视频
登录 Adobe 网站,找到 Adobe Flash Player 下载页,进入后网页自动识别 Linux 环境,手动选择版本,选择 YUM 方式,自动下载一个 rpm 文件 定位到下载目录,通常默认 ...
- springcloud(七)-Feign声明式REST调用
前言 前面我们使用的RestTemplate实现REST API调用,代码大致如下: public User findById(@PathVariable Long id) { return rest ...
- [转] 遇见 TiDB - 分布式关系数据库
[From] http://kuaibao.qq.com/s/20180510G0UFL000?refer=cp_1026 最近TiDB掀起了一波分布式数据库的热潮,公司也在着手准备TiDB的落地工作 ...
- 关于如何用js完成全选反选框等内容
在学习js过程中按照视频写了这个页面 可以在点上面全选/全不选时全部选中或者取消 在单击下面的单选框时上面的全选会根据下面的单选框进行相应的调整 功能比较完善 以下是代码 <!DOCTYPE h ...
- MongoDB与c#(二)简单例子 使用1.7版本驱动
//创建数据库链接 在1.7的版本驱动中这样写是会报 MongoServer方法已过时的 //MongoServer server = MongoDB.Driver.Mongo ...
- C 扩展库 - mysql API general outline
Application programs should use this general outline for interacting with MySQL Initialize the MySQL ...
- 端口扫描工具nmap
nmap 使用介绍 nmap是目前为止最广为使用的国外端口扫描工具之一.我们可以从[url]http://www.insecure.org/[/url]进行下载,可以很容易的安装到Windows和un ...
- [PY3]——函数——函数注解 | 实现类型检查功能
函数注解(Function Annotations)——> 可以在定义函数的时候对参数和返回值添加注解 写函数注解 #平时我们使用help()可以查看一个函数的说明,我们自己写的函数也可以提供这 ...