Spring Boot 2 使用Servlet、Listener和Filter配置
开发环境:IntelliJ IDEA 2019.2.2
Spring Boot版本:2.1.8
新建一个名称为demo的Spring Boot项目。
一、使用Servlet配置
1、修改启动类 DemoApplication.java代码,加入注解ServletComponentScan,它用于扫描Servlet组件,包括使用@WebServlet、
@WebFilter和@WebListener进行修饰的类。
package com.example.demo;

import org.springframework.boot.SpringApplication;

import org.springframework.boot.autoconfigure.SpringBootApplication;

import org.springframework.boot.web.servlet.ServletComponentScan;

@SpringBootApplication

@ServletComponentScan

public class DemoApplication {

    public static void main(String[] args) {

        SpringApplication.run(DemoApplication.class, args);

    }

}
2、新建一个类 MyServlet.java,继承HttpServlet并且加入注解 @WebServlet
package com.example.demo;

import javax.servlet.annotation.WebServlet;

import javax.servlet.http.HttpServlet;

import javax.servlet.http.HttpServletRequest;

import javax.servlet.http.HttpServletResponse;

@WebServlet(value="/servlet")

public class MyServlet extends HttpServlet {

    public MyServlet(){

        System.out.println("servlet类");

    }

    protected void service(HttpServletRequest arg0, HttpServletResponse arg1){

        System.out.println("servlet方法");

    }

}
在浏览器中访问http://localhost:8080/servlet,可看到IDEA控制台输出
servlet类
servlet方法
二、使用Listener配置
1、启动类 DemoApplication.cs 代码在使用Servlet配置上已经加入注解ServletComponentScan,在此保持不变。
2、新建一个类 MyServlet.java
package com.example.demo;

import javax.servlet.ServletRequestEvent;

import javax.servlet.ServletRequestListener;

import javax.servlet.annotation.WebListener;

@WebListener

public class MyListener implements ServletRequestListener {

    @Override

    public void requestInitialized(ServletRequestEvent servletRequestEvent){

        System.out.println("请求创建");

    }

    @Override

    public void requestDestroyed(ServletRequestEvent servletRequestEvent){

        System.out.println("请求销毁");

    }

}
在浏览器中访问一个接口,如上步http://localhost:8080/servlet,可看到IDEA控制台输出:
请求创建
请求销毁
附,常用的监听器接口:
1.ServletContextListener -- 监听servletContext对象的创建以及销毁

    1.1  contextInitialized(ServletContextEvent arg0)   -- 创建时执行

    1.2  contextDestroyed(ServletContextEvent arg0)  -- 销毁时执行

2.HttpSessionListener  -- 监听session对象的创建以及销毁

    2.2  sessionCreated(HttpSessionEvent se)   -- 创建时执行

    2.2  sessionDestroyed(HttpSessionEvent se) -- 销毁时执行

3.ServletRequestListener -- 监听request对象的创建以及销毁

    3.1  requestInitialized(ServletRequestEvent sre) -- 创建时执行

    3.2  requestDestroyed(ServletRequestEvent sre) -- 销毁时执行

4.ServletContextAttributeListener  -- 监听servletContext对象中属性的改变

    4.1  attributeAdded(ServletContextAttributeEvent event) -- 添加属性时执行

    4.2  attributeReplaced(ServletContextAttributeEvent event) -- 修改属性时执行

    4.3  attributeRemoved(ServletContextAttributeEvent event) -- 删除属性时执行

5.HttpSessionAttributeListener  --监听session对象中属性的改变

    5.1  attributeAdded(HttpSessionBindingEvent event) -- 添加属性时执行

    5.2  attributeReplaced(HttpSessionBindingEvent event) -- 修改属性时执行

    5.3  attributeRemoved(HttpSessionBindingEvent event) -- 删除属性时执行

6.ServletRequestAttributeListener  --监听request对象中属性的改变

    6.1  attributeAdded(ServletRequestAttributeEvent srae) -- 添加属性时执行

    6.2  attributeReplaced(ServletRequestAttributeEvent srae) -- 修改属性时执行

    6.3  attributeRemoved(ServletRequestAttributeEvent srae) -- 删除属性时执行
三、使用Filter配置
1、启动类 DemoApplication.cs 代码在使用Servlet配置上已经加入注解ServletComponentScan,在此保持不变。
2、新建一个类 MyFilter.java
package com.example.demo;

import javax.servlet.*;

import javax.servlet.annotation.WebFilter;

import java.io.IOException;

//第一个参数为过滤器名字,第二个参数为要拦截的请求地址

@WebFilter(filterName="myFilter", urlPatterns="/*")

public class MyFilter implements Filter {

    @Override

    public void init(FilterConfig filterConfig) throws ServletException {

        System.out.println("filter初始化");

    }

    @Override

    public void doFilter(ServletRequest request, ServletResponse response, FilterChain chain) throws IOException,

ServletException {

        System.out.println("filter方法");

        chain.doFilter(request, response);

    }

    @Override

    public void destroy() {

        System.out.println("filter销毁");

    }

}
在浏览器中访问http://localhost:8080/servlet,可看到IDEA控制台输出:
filter方法
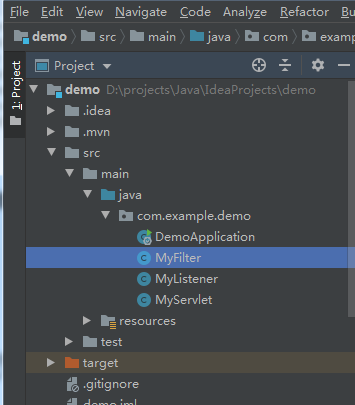
最后,附上项目结构图:
Spring Boot 2 使用Servlet、Listener和Filter配置的更多相关文章
- 从零开始的Spring Boot(2、在Spring Boot中整合Servlet、Filter、Listener的方式)
在Spring Boot中整合Servlet.Filter.Listener的方式 写在前面 从零开始的Spring Boot(1.搭建一个Spring Boot项目Hello World):http ...
- Spring boot中使用servlet filter
Spring boot中使用servlet filter liuyuhang原创,未经允许请勿转载! 在web项目中经常需要一些场景,如参数过滤防止sql注入,防止页面攻击,空参数矫正等, 也可以做成 ...
- Spring Boot中使用Servlet与Filter
在Spring Boot中使用Servlet,根据Servlet注册方式的不同,有两种使用方式.若使用的是Servlet3.0+版本,则两种方式均可使用:若使用的是Servlet2.5版本,则只能使用 ...
- (7)Spring Boot web开发 --- servlet容器
文章目录 配置嵌入式 Servlet 容器 注册 三大组件 使用其他 servlet 容器 使用外置的 `Servlet` 容器 配置嵌入式 Servlet 容器 Spirng Boot 默认使用自带 ...
- Servlet, Listener 、 Filter.
Java Web的三大组件:Servlet, Listener . Filter. 使用Listener监听器:八大监听器: 第一组:用于监听Servlet三个域对象的创建与销毁 1. Servlet ...
- Spring boot中注册Servlet
Spring boot中注册Servlet 如何在spring boot项目中注册Servlet呢? 如何在spring boot项目中注册Servlet呢? 由于没有web.xml,无法直接在xml ...
- Spring boot 默认静态资源路径与手动配置访问路径的方法
这篇文章主要介绍了Spring boot 默认静态资源路径与手动配置访问路径的方法,非常不错,具有参考借鉴价值,需要的朋友可以参考下 在application.propertis中配置 ##端口号 ...
- Spring boot项目maven的profile多环境配置不自动替换变量的问题解决
Spring boot项目maven的profile多环境配置不自动替换变量的问题解决 在网上找了好久,配置都很简单,可是我的程序就是不能自动替换变量,最终单独测试,发现原来是引用spring b ...
- spring boot: 中文显示乱码,在applicationContext里面配置
spring boot: 中文显示乱码,在applicationContext里面配置 applicationContext.properties ########################## ...
- Spring Boot 2.4版本前后的分组配置变化及对多环境配置结构的影响
前几天在<Spring Boot 2.4 对多环境配置的支持更改>一文中,给大家讲解了Spring Boot 2.4版本对多环境配置的配置变化.除此之外,还有一些其他配置变化,所以今天我们 ...
随机推荐
- Spring-web-security Issue (Access is denied. User must have one of the these roles: ACTUATOR)
前提条件(Prerequisite) 1.你的项目里引进了Spring web security <dependency> <groupId>org.springframewo ...
- 缓存keep-alive
keep-alive缓存 如果没有缓存,每点击一次导航,内容区就会创建一个组件,该组件会经历整个生命周期,每点击一次,就会创建一个组件,比较浪费性能,这时,我们就要考虑到是否能将点击过的已创建的组件进 ...
- VMware_Player_nat网络的端口映射_手工设置
VMware_Player_nat网络的端口映射_手工设置 转载注明来源: 本文链接 来自osnosn的博客,写于 2019-12-21. vmware nat的配置文件在 C:\ProgramDat ...
- 2019 Vue开发指南:你都需要学点啥?
转载请注明出处:葡萄城官网,葡萄城为开发者提供专业的开发工具.解决方案和服务,赋能开发者.原文出处:https://dzone.com/articles/vue-development-in-2019 ...
- Python 3.7的安装过程
百度云Pyhton3.7-32位安装包: 链接:https://pan.baidu.com/s/1P5Egkl2KNt_DjhiFaDzqsg提取码:5171 百度云Pyhton3.7-64位安装包: ...
- 坚果云+typora(个人十分喜欢的一个记笔记方式)
1.名称 坚果云 markdown--->typora 2.喜欢原因 2.1 坚果云 坚果云全平台覆盖,支持Windows.Mac.Linux.iOS(iPad及iPhone).Android. ...
- Vue-cli脚手架 安装 并创建项目--命令
检查是否有 node - v 安装Vue-cli npm install -g vue-cli 安装好后,执行 vue list可以看到很多实用的模板,我这里实用的webpack 初始化模板 vue ...
- 程序员:May the Force be with you!
程序员如何理解:May the Force be with you! 我们并没有向其他人那样讨论现象级产品的生成原因,因为我们并不清楚这个原因是什么. 我们也不知道足记是否会重复过去一些现象级产品忽生 ...
- Codeforces 7E - Defining Macros 题解
目录 Codeforces 7E - Defining Macros 题解 前言 做法 程序 结尾 Codeforces 7E - Defining Macros 题解 前言 开始使用博客园了,很想写 ...
- mysql数据库多表查询where与内连接inner join的区别
按理说where是对前面的笛卡尔积进行过滤,工作量大增,inner join则不会.但我实际测试了一下,两种查询耗时基本相等,甚至where还快一些,多次测试后基本如此. 如下图: where: in ...