
angular cli + primeNG
目录:
1、安装 angular cli
2、创建项目
3、构建路由
4、新建组件
5、组件之间的通信
6、引入primeNG
7、修改primeNG组件样式
8、问题
------------------------------------------------------------------------------------------
1、安装 angular cli
命令 --cnpm install -g @angular/cli
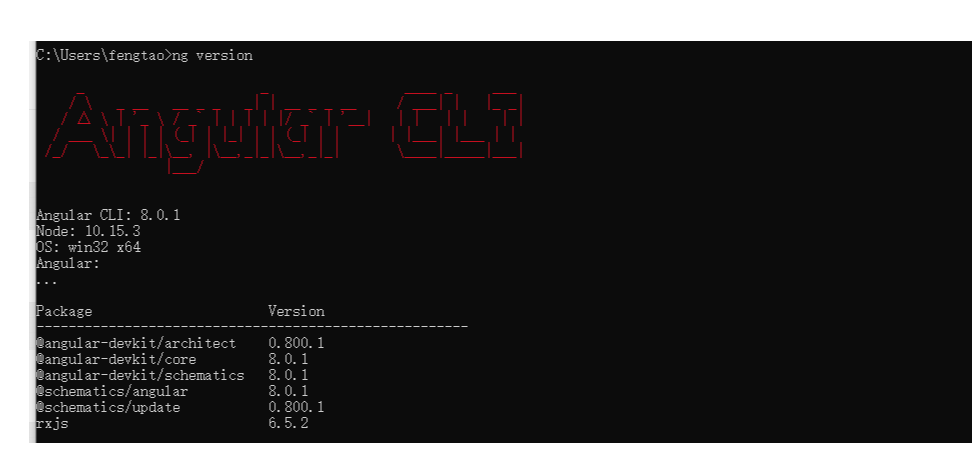
安装完成后可以查看版本是否ok --ng version
官网地址: https://angular.io/start/data 查看语法这些 *ngIf *ngFor
2、创建项目
-- ng init - 在当前目录创建新的应用程序
-- ng new - 创建新的目录,然后在新建的目录中运行 ng init 命令
-- ng new web 创建web
项目创建完成之后开始运行
-- cd web
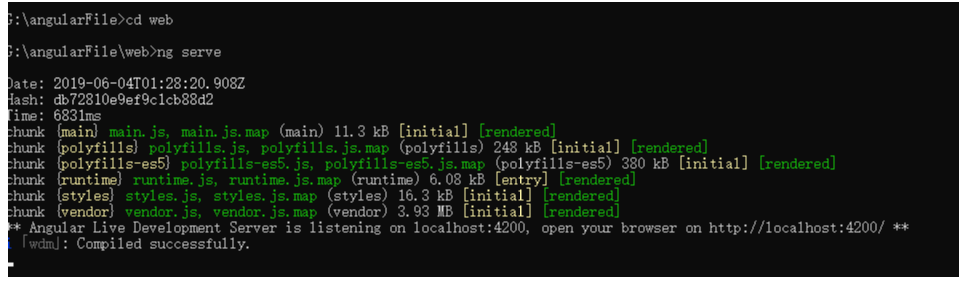
-- ng serve
运行成功默认为4200,网页上可以访问
3、构建路由
web目录下,先生成components
-- cd web
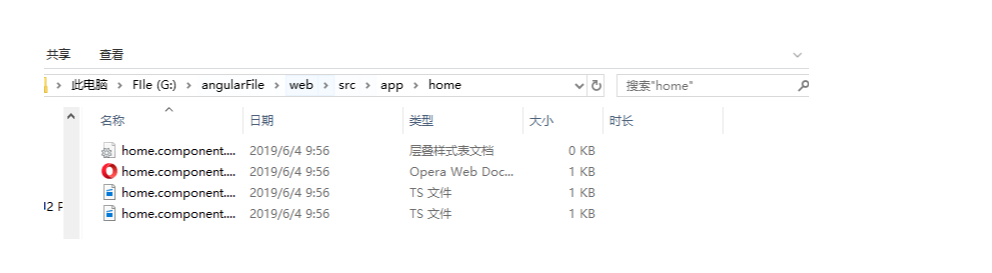
-- ng g c home // 简写 ng generate component home
创建完成后
app.module.ts web/src/app/app.module.ts
import { BrowserModule } from '@angular/platform-browser';

import { NgModule } from '@angular/core';

import { AppRoutingModule } from './app-routing.module';

import { AppComponent } from './app.component';

import { HomeComponent } from './home/home.component';   引入

@NgModule({

  declarations: [

    AppComponent,

    HomeComponent   //使用

  ],

  imports: [

    BrowserModule,

    AppRoutingModule

  ],

  providers: [],

  bootstrap: [AppComponent]

})

export class AppModule { }
在app-routing.module.ts 创建路由 web/src/app/app-routing.module.ts
import { HomeComponent } from './home/home.component';  引入

const routes: Routes = [

  {path: '', pathMatch: 'full', redirectTo:'home'},  // redirect

  {path: 'home', component:HomeComponent}

];
打开主页页面就会自动进入home页面
4、新建组件
上面已经用到了,使用 -- ng generate component header / -- ng g c header
创建好的组件我移动到了components目录下
里面的selector 就是调用的名称 <app-header></app-header> 这样调用
在app.module.ts 里面引入
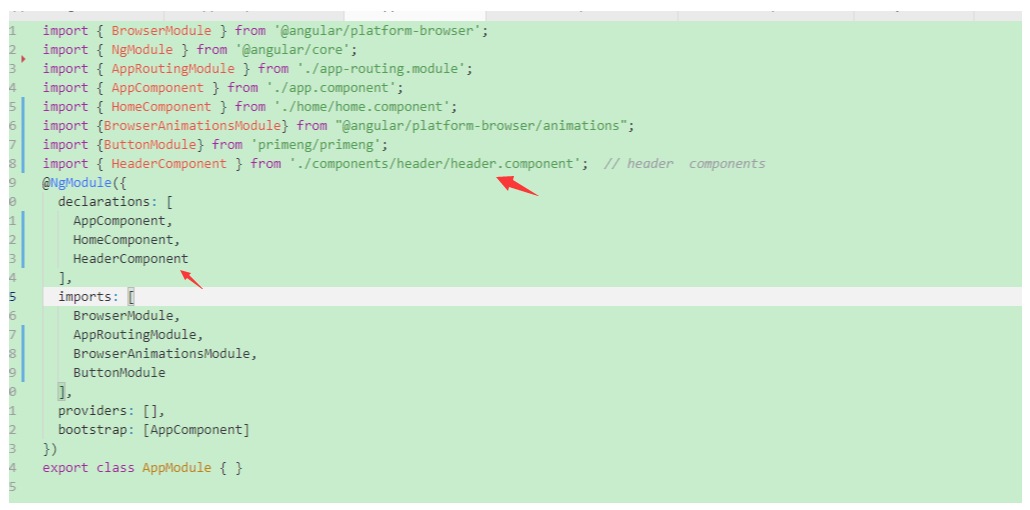
调用app-header

5、组件之间的通信
父组件-> 子组件 通过@Input
home -> header
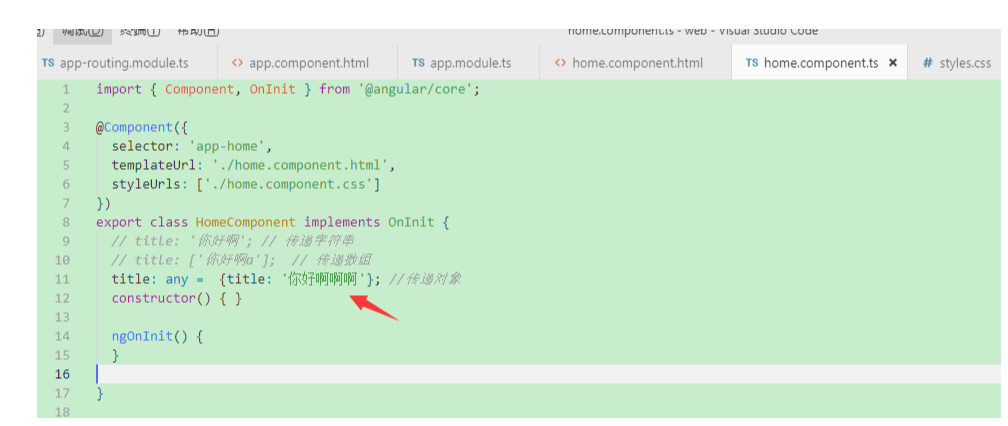
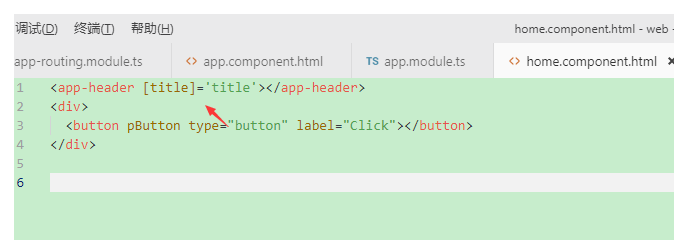
上面我们顶一个title对象传递给header组件,接下来header组件要接收
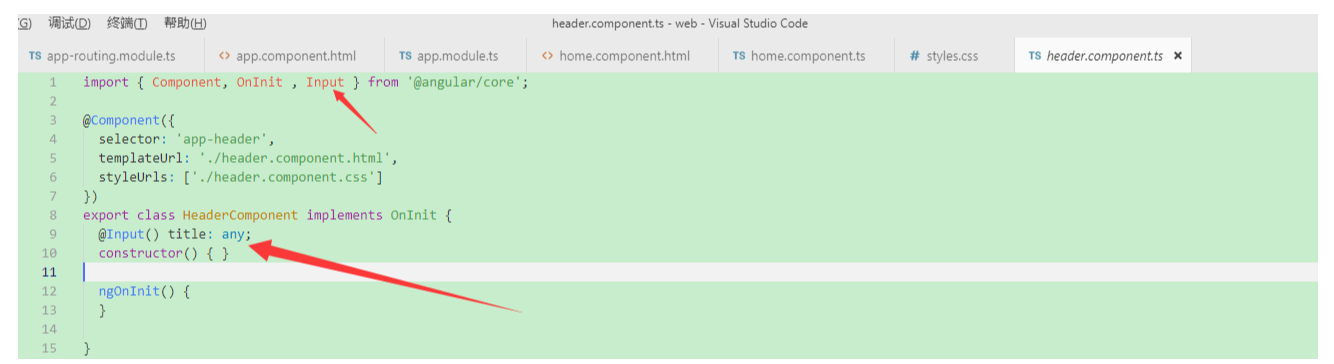
接收完之后,就可以使用

子组件-> 父组件 通过@Output
添加点击按钮
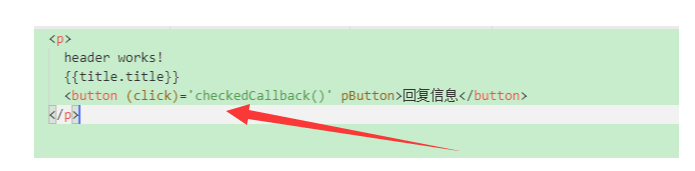
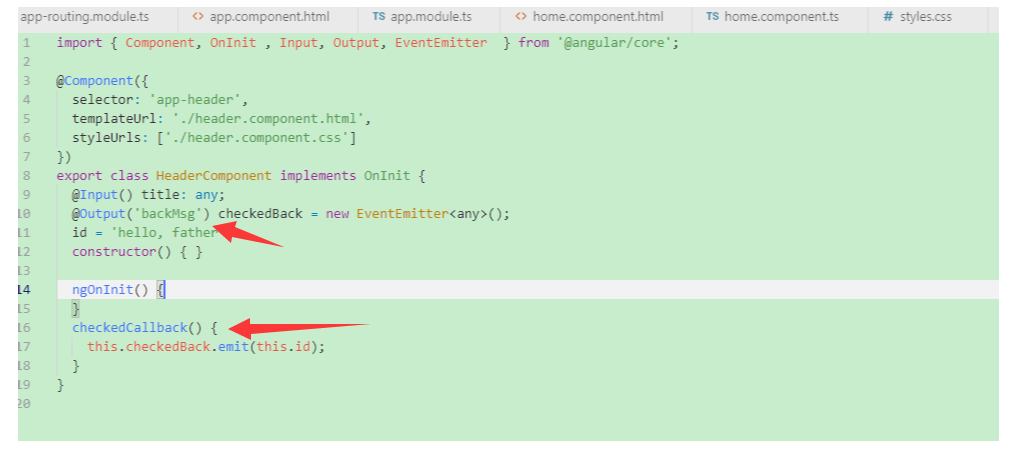
子组件上面点击按钮出发checkedCallback时间,将id值存到checkedBack里面传给父组件
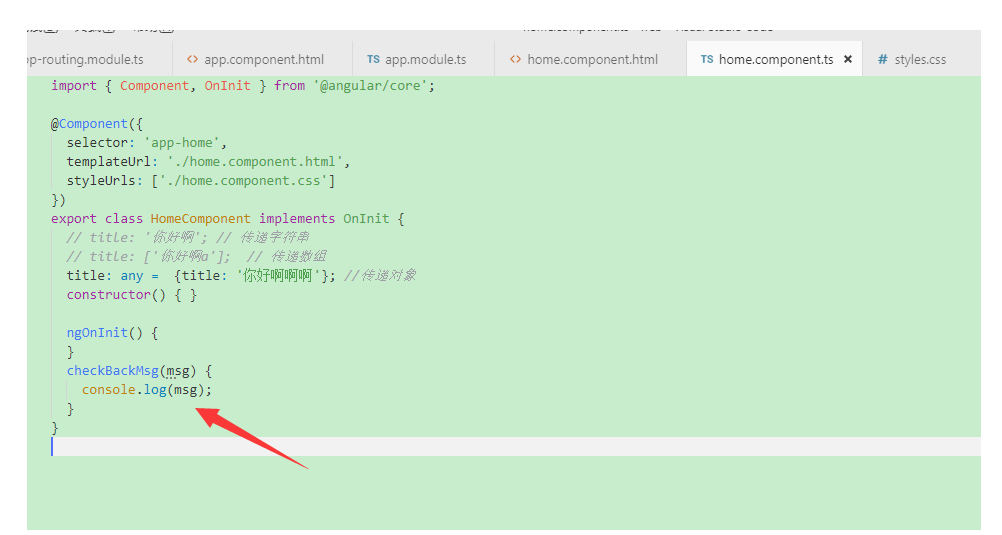
父组件接收,通过backMsg
<app-header [title]='title' (backMsg)='checkBackMsg($event)'></app-header>
6、引入primeNG
-- npm install primeng --save
-- npm install primeicons --save
-- npm install @angular/animations --save
使用模块
import {BrowserModule} from '@angular/platform-browser';

import {BrowserAnimationsModule} from '@angular/platform-browser/animations';

@NgModule({

    imports: [

        BrowserModule,

        BrowserAnimationsModule,

        //...

    ],

    //...

})

export class YourAppModule { }
引入样式
angular.json 修改styles web/src/angular.json
"styles": [

  "node_modules/primeicons/primeicons.css",

  "node_modules/primeng/resources/themes/nova-light/theme.css",

  "node_modules/primeng/resources/primeng.min.css",

  //...

],
针对每个组件看官网文档, 官网: https://www.primefaces.org
7、修改primeNG组件样式
/*修改.ui-panelmenu a的css*/

:host ::ng-deep .ui-panelmenu a{

    background:gray;

    color: white;

    font-size: 14px;

}
8、问题
a、Can't resolve '@angular/cdk/scrolling
-- npm install --save @angular/material
-- npm install --save @angular/cdk
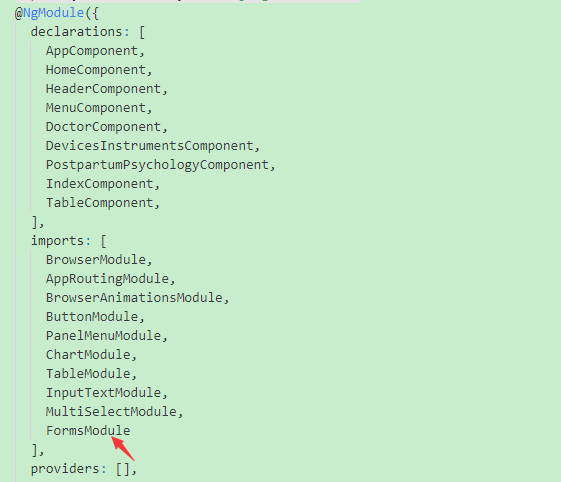
b、ngModel问题
import { FormsModule } from '@angular/forms';
c、语法问题
angular cli语法 改变 ng-if ----> *ngIF ng-for ----> *ngFOr
angular cli + primeNG的更多相关文章
- PrimeNG01 angular集成PrimeNG
1 开发环境 本博文基于angular5 2 步骤 2.1 创建angular5项目 详情参见百度 2.2 下载PrimeNG依赖 npm install primeng --save npm ins ...
- angular cli 反向代理实现跨域
版本: 1.后端实现跨域(php) header("Access-Control-Allow-Origin: *"); // // 响应类型 // header('Access-C ...
- Angular环境准备和Angular cli
Angular4.0来了,更小,更快,改动少 接下来为Angular4.0准备环境和学会使用Angular cli项目 1.环境准备: 1)在开始工作之前我们必须设置好开发环境 如果你的机器上还没有安 ...
- 迈向angularjs2系列(8):angular cli和angular2种子项目
文章目录 1.angular cli快速搭建项目 2.angular2-seed 3.手动配置 题外话:如何更好的阅读本篇文章 一: angular cli的安装 Angular-cli(命令行界面, ...
- Visual Studio Code作为Angular开发工具常用插件安装、json-server安装与使用、angular/cli安装失败问题
前提准备: 搭建好Angular开发环境 1 安装Visual Studio Code 教程简单,不会的去问度娘 2 安装Chrome浏览器 教程简单,不会的趣闻度娘 3 Visual Studio ...
- angular4.0 安装最新版本的nodejs、npm、@angular/cli的方法
在使用ng项目的ui框架时,比如ng-zorro.angular Material,需要安装最新版本的@angular/cli: 配置ng-zorro框架 ng-zorro官网:https://ng. ...
- 使用Angular CLI生成 Angular 5项目
如果您正在使用angular, 但是没有好好利用angular cli的话, 那么可以看看本文. Angular CLI 官网: https://github.com/angular/angular- ...
- Angular4---起步----环境配置安装@angular/cli
学习angular,首先要搭建起angular的手脚架@angular/cli.首先需要NodeJS环境. 1.安装NodeJS 首先检查电脑是否安装了NodeJS环境,打开cmd命令行,运行node ...
- 使用Angular CLI进行单元测试和E2E测试
第一篇文章是: "使用angular cli生成angular5项目" : http://www.cnblogs.com/cgzl/p/8594571.html 第二篇文章是: & ...
随机推荐
- SpringBoot整合freemarker模板
一.目录展示 二.导入依赖 三.application.properties配置文件 四.在src/main/resource/templates文件夹中创建HelloFreeMarker.ftl文件 ...
- 基于SCN增量恢复DG同步
问题描述:做scn恢复备库的测试,吭哧了几天,今天终于可以记录一下,遇到了很多坑,作为初学者可以更好地理解DG,主要先关闭备库,在主库做归档丢失备库无法同步,备库产生GAP,然后增量备份恢复备库,版本 ...
- shell 替换文本中的某个符号为换行符
替换后为: 0.06774 脚本: :%s/,"/\r/g
- python数据挖掘第一篇:正则表达式
正则表达式 re 模块 re.match(pattern,string[,flag]) match方法 从首字母开始匹配,如果包含pattern字符串,则匹配成功,返回match对象,失败则返回Non ...
- vue反向代理(解决跨域)
1,vue中有提供反向代理的接口,就是config/index.js中的proxyTable,我的脚手架版本是2.9.6,proxyTable配置初始为空,如下图. 2,将proxyTable配置如下 ...
- metronic 表格插件 datatables
官方网站:https://datatables.net/ css引入:datatables.min.css && datatables.bootstrap.css && ...
- ios instancetype与id区别
我们都知道未知类型的的对象可以用id关键字表示,那为什么还会再有一个instancetype呢? instancetype能返回相关联的类型(使那些非关联返回类型的方法返回所在类的类型):而id 返回 ...
- dubbo 发布 RPC 服务
Dubbo 发布 RPC 服务 建立服务提供者项目 pom.xml <?xml version="1.0" encoding="UTF-8"?> & ...
- HDU-3339 IN ACTION(Dijkstra +01背包)
Since 1945, when the first nuclear bomb was exploded by the Manhattan Project team in the US, the ...
- C语言之推箱子游戏代码
前言本文的文字及图片来源于网络,仅供学习.交流使用,不具有任何商业用途,版权归原作者所有,如有问题请及时联系我们以作处理.作者:Yan_Less 正文 新手注意:如果你学习遇到问题找不到人解答,可以点 ...