【转】UINavigationBar 使用总结
原文网址:http://www.jianshu.com/p/f0d3df54baa6
UINavigationBar是我们在开发过程中经常要用到的一个控件,下面我会为大家介绍一些常用的用法。
1. 设置导航栏的标题
这个不多说,直接上代码self.navigationItem.title = @"UINavigationBar使用总结";
2. 设置导航栏的背景颜色
//通过barTintColor来设置背景色

 self.navigationController.navigationBar.barTintColor = [UIColor redColor];
得到的效果如下:

barTintColor: 这个属性需要在iOS7以上才可以使用; 如果要支持iOS6以及以下的系统,可以参考这篇文章:UINavigationBar Background Color
3. 设置导航栏的背景图片
除了通过设置背景颜色来改变导航栏的外观外,我们还可以通过背景图片来设置导航栏的外观。
[self.navigationController.navigationBar setBackgroundImage:[UIImage imageNamed:@"Background"]

                                                  forBarMetrics:UIBarMetricsDefault];
在这里得稍微说说UIBarMetrics这个枚举, 它主要是用来控制在不同状态下导航栏的显示。和UIButton的- (void)setBackgroundImage:(nullable UIImage *)image forState:(UIControlState)state 这个方法有点类似。
//表示横屏竖屏都显示
UIBarMetricsDefault,
//表示在只横屏下才显示,和UIBarMetricsLandscapePhone功效一样,不过iOS8已经弃用了
UIBarMetricsCompact,
UIBarMetricsDefaultPrompt和UIBarMetricsCompactPrompt这两个我还没搞清楚是什么意思,有知道的朋友不妨给我们来普及一下。。
4. 更改顶部状态栏的颜色
从效果图可以看出,我们设置背景色或者背景图之后,状态栏依然还是默认的黑色,这样感觉不好看。好在,系统给我们提供了UIStatusBarStyleDefault和UIStatusBarStyleLightContent两种样式供我们选择。
- UIStatusBarStyleDefault,系统的默认样式,黑色内容,用于浅色的背景(如白色)
- UIStatusBarStyleLightContent 白色内容,用于深色的背景(如红色)
下面来看看具体怎么实现,主流的实现方式是分两步:
- 在工程的Info.plist文件中添加一行UIViewControllerBasedStatusBarAppearance,选择Boolean类型,并设置为YES,Xcode会自动把名称变为View controller-based status bar appearance。
 Snip20150913_4.png
 - 在你的ViewController中添加下面的方法
-(UIStatusBarStyle)preferredStatusBarStyle{

 return UIStatusBarStyleLightContent;

}

想知道更多地方式,可以参考这两个页面:How to change Status Bar text color in iOS 7 和 iOS7下Status Bar字体颜色修改
另外,特别需要注意的是,如果你的ViewController是通过navigationController push进来的,还需要加下面一句代码才能生效:
self.navigationController.navigationBar.barStyle = UIBarStyleBlack;
具体,可参考UIStatusBarStyle PreferredStatusBarStyle does not work on iOS 7
恩,我们来看看运行效果。

5. 设置返回按钮
从上面的效果图中我们可以看到返回按钮还是默认的蓝色按钮,下面我将会大家来介绍返回按钮的个性化。
- 设置返回按钮的颜色
只需要设置tintColor属性即可self.navigationController.navigationBar.tintColor = [UIColor whiteColor];得到的效果图如下:
 Snip20150915_1.png
 - 只设置返回按钮的图片

- (void)goToBack {

    [self.navigationController popViewControllerAnimated:YES];

}

- (void)setBackButtonWithImage {

    UIImage *leftButtonIcon = [[UIImage imageNamed:@"LeftButton_back_Icon"]

                               imageWithRenderingMode:UIImageRenderingModeAlwaysOriginal];

    UIBarButtonItem *leftButton = [[UIBarButtonItem alloc] initWithImage:leftButtonIcon

                                                                   style:UIBarButtonItemStyleBordered

                                                                  target:self

                                                                  action:@selector(goToBack)];

    self.navigationItem.leftBarButtonItem = leftButton;

    //修复navigationController侧滑关闭失效的问题

    self.navigationController.interactivePopGestureRecognizer.delegate = (id)self;

}
得到的效果如下:

这里需要注意的地方有三点:
- 需要自己实现返回按钮的事件。
- 特别的解释下UIImage的imageWithRenderingMode:方法,参数UIImageRenderingModeAlwaysOriginal 表示总是用原图渲染,如果不这么设置,返回按钮将会显示tintColor的颜色(默认为蓝色)。UITabbarItem也存在同样地问题。
- 我们自己设置返回按钮,会导致系统的侧滑关闭效果失效。添加上面代码中最后一句代码即可修复。
- 仅设置返回按钮的文字
- (void)setBackButtonTitle {

    UIBarButtonItem *leftButton = [[UIBarButtonItem alloc] initWithTitle:NSLocalizedString(@"取消", nil)

                                                                   style:UIBarButtonItemStylePlain

                                                                  target:self action:@selector(goToBack)];

    leftButton.tintColor = [UIColor whiteColor];

    self.navigationItem.leftBarButtonItem = leftButton;

}
得到的效果如下:

- 自定义返回按钮
如果上面几种方式还无法满足你的要求(比如,需要同时设置返回按钮文字和图片),就需要用到UIBarButtonItem的initWithCustomView方法。
- (void)setCustomLeftButton {

    UIView* leftButtonView = [[UIView alloc]initWithFrame:CGRectMake(0, 0, 60, 40)];

    UIButton* leftButton = [UIButton buttonWithType:UIButtonTypeSystem];

    leftButton.backgroundColor = [UIColor clearColor];

    leftButton.frame = leftButtonView.frame;

    [leftButton setImage:[UIImage imageNamed:@"LeftButton_back_Icon"] forState:UIControlStateNormal];

    [leftButton setTitle:@"返回" forState:UIControlStateNormal];

    leftButton.tintColor = [UIColor redColor];

    leftButton.autoresizesSubviews = YES;

    leftButton.contentHorizontalAlignment = UIControlContentHorizontalAlignmentLeft;

    leftButton.autoresizingMask = UIViewAutoresizingFlexibleWidth | UIViewAutoresizingFlexibleLeftMargin;

    [leftButton addTarget:self action:@selector(goToBack) forControlEvents:UIControlEventTouchUpInside];

    [leftButtonView addSubview:leftButton];

    UIBarButtonItem* leftBarButton = [[UIBarButtonItem alloc] initWithCustomView:leftButtonView];

    self.navigationItem.leftBarButtonItem = leftBarButton;

}
得到的效果图如下:

设置rightBarButtonItem基本上脱离不了上面的几种方式,大家可以参照上面返回按钮的设置方式。
6. 隐藏导航栏底部的线条
有时候遇到一些特殊的要求,需要隐藏导航栏底部的线条。
两行代码就可以做到。
- 设置导航栏的背景图(setBackgroundImage方法)
- 设置导航栏的shadowImage (setShadowImage方法)
UINavigationBar *navigationBar = self.navigationController.navigationBar;

    //设置透明的背景图,便于识别底部线条有没有被隐藏

    [navigationBar setBackgroundImage:[[UIImage alloc] init]

                       forBarPosition:UIBarPositionAny

                           barMetrics:UIBarMetricsDefault];

    //此处使底部线条失效

    [navigationBar setShadowImage:[UIImage new]];
来看看效果图:

另外,还有一种做法,一行代码就可以达到效果,也真是够神奇的。。
//方法二:

self.navigationController.navigationBar.clipsToBounds = YES;想要知道更详细的内容可以参考这个页面:How to hide iOS7 UINavigationBar 1px bottom line
7. 设置导航条底部线条的颜色
有了上面的基础,设置导航栏线条的颜色就变得很简单了。
首先,我做了个UIImage的分类:通过颜色转成UIImage;
然后,用上面的方案来设置导航栏底部线条。
颜色转图片的代码:
@implementation UIImage (ColorImage)

+ (UIImage *)imageWithColor:(UIColor *)color

{

    CGRect rect = CGRectMake(0.0f, 0.0f, 1.0f, 1.0f);

    UIGraphicsBeginImageContext(rect.size);

    CGContextRef context = UIGraphicsGetCurrentContext();

    CGContextSetFillColorWithColor(context, [color CGColor]);

    CGContextFillRect(context, rect);

    UIImage *image = UIGraphicsGetImageFromCurrentImageContext();

    UIGraphicsEndImageContext();

    return image;

}

@end
设置导航栏底部线条颜色的代码:
UINavigationBar *navigationBar = self.navigationController.navigationBar;

    [navigationBar setBackgroundImage:[[UIImage alloc] init]

                       forBarPosition:UIBarPositionAny

                           barMetrics:UIBarMetricsDefault];

    //此处使底部线条颜色为红色

    [navigationBar setShadowImage:[UIImage imageWithColor:[UIColor redColor]]];
依照惯例,看下效果图:

当然还有其他的方式也可以做到,如addSubview, addSubLayer等。感兴趣的话可以参考下这个页面:iOS7 - Change UINavigationBar border color
8. 在导航栏上添加多个按钮
以微信打开网页时的效果为例,效果图如下,有两个按钮:返回和关闭。

有下面两种方式可供选择,但是最终还是要用到leftBarButtonItems这个方法。
#define UserMethod1 0

    UIBarButtonItem *closeItem = [[UIBarButtonItem alloc] initWithTitle:@"关闭" style:UIBarButtonItemStylePlain target:self action:@selector(closeAction)];

    if (UserMethod1) {

        //方法一:

        self.navigationItem.leftBarButtonItems = @[closeItem];

        //要求显示默认的返回按钮,但是文字会显示默认的Back,暂时还不知道这个文字怎么改

        self.navigationItem.leftItemsSupplementBackButton = YES;

    }

    else {

        //方法二

        UIButton* leftButton = [UIButton buttonWithType:UIButtonTypeSystem];

        leftButton.backgroundColor = [UIColor clearColor];

        leftButton.frame = CGRectMake(0, 0, 45, 40);

        [leftButton setImage:[UIImage imageNamed:@"LeftButton_back_Icon"] forState:UIControlStateNormal];

        [leftButton setTitle:@"返回" forState:UIControlStateNormal];

        leftButton.tintColor = [UIColor whiteColor];

        leftButton.autoresizesSubviews = YES;

        leftButton.contentHorizontalAlignment = UIControlContentHorizontalAlignmentLeft;

        leftButton.autoresizingMask = UIViewAutoresizingFlexibleWidth | UIViewAutoresizingFlexibleLeftMargin;

        [leftButton addTarget:self action:@selector(goToBack) forControlEvents:UIControlEventTouchUpInside];

        UIBarButtonItem* backItem = [[UIBarButtonItem alloc] initWithCustomView:leftButton];

        self.navigationItem.leftBarButtonItems = @[backItem,closeItem];

    }
然后,运行的效果图如下:

方法一用到了
leftItemsSupplementBackButton这个属性,会显示系统默认的返回按钮,但是文字也是显示默认的Back文字,目前还没找到怎么修改这个文字,如果有谁知道,还请不吝赐教;所以我暂时还是建议大家用方法二。相应的还有 rightBarButtonItems 这个属性,如果要在导航栏右侧展示多个按钮的话,可以设置这个属性。
9. 在导航栏上添加分段控件
这次,以QQ为例,代码如下:
UISegmentedControl *segControl = [[UISegmentedControl alloc] initWithItems:@[@"消息",@"电话"]];

    segControl.tintColor = [UIColor colorWithRed:0.07 green:0.72 blue:0.96 alpha:1];

    [segControl setSelectedSegmentIndex:0];

self.navigationItem.titleView = segControl;代码很简单,就是设置titleView这个属性,当然,你也可以把这个属性设置为你自定义的View。

10. 导航栏全局属性设置
//全局设置导航栏主题

- (void)setNavigationControllerAppearance {

    [UINavigationBar appearance].barStyle  = UIBarStyleBlack;

    [[UINavigationBar appearance] setBarTintColor:[UIColor colorWithWhite:0.1 alpha:0.5]];

    [[UINavigationBar appearance] setTintColor:[UIColor whiteColor]];

}
全局设置导航栏的好处有两个:一是不用对每个NavigationBar进行设置;二是方便做主题管理,切换主题,只需要更改全局设置即可。
11. 与导航栏相关的一些开源组件
11.1 NJKWebViewProgress - 类似于Safiri加载网页时的进度显示
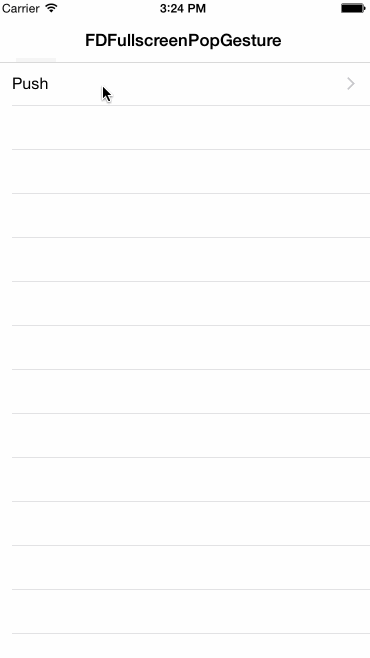
11.2 FDFullscreenPopGesture - 一个丝滑的全屏滑动返回手势
对应的文章介绍可以点这个链接。
最后,奉上Demo的地址:NavigationBarDemo
原文链接:http://www.jianshu.com/p/f0d3df54baa6
著作权归作者所有,转载请联系作者获得授权,并标注“简书作者”。
【转】UINavigationBar 使用总结的更多相关文章
- iOS阶段学习第31天笔记(UINavigationBar介绍)
iOS学习(UI)知识点整理 一.UINavigationBar 的介绍 1)概念:UINavigationBar 是用于定义导航栏按钮的一个类对象 2)在使用UINavigationBar之前必须先 ...
- UINavigationItem UINavigationBar 关系分析
目录 1.关系分析 2.关系综述 3.概念点 4.疑问 1.关系分析 UIBarItem-> UIBarButtonItem -> UINavigationItem 1.1 UIBarIt ...
- UINavigationItem UINavigationBar 关系分析[转]
http://blog.csdn.net/luoyeffcs/article/details/16106707 目录 1.关系分析 2.关系综述 3.概念点 4.疑问 1.关系分析 UIBarItem ...
- iOS开发备忘录:自定义UINavigationBar背景图片和Back按钮
iOS项目,根据设计图,有时需要自定义UIView的UINavigationBar的背景.可以切出来一张1像素左右的背景图片,来充当UINavigationBar的背景. 可以利用Navigation ...
- UITabBar,UINavigationBar的布局和隐藏问题
---恢复内容开始--- 1. 前言 UITabBar,UINavigationBar非常的好用,但是毕竟是系统自带的,不受自己完全掌握,对于布局和隐藏会有一些问题,现在就来谈谈我的想法和一些问题. ...
- UINavigationBar 和 UINavigationItem的属性设置
#import "RootViewController.h" @interface RootViewController () @end @implementation RootV ...
- IOS 入门开发之创建标题栏UINavigationBar的使用(二)
IOS 入门开发之创建标题栏UINavigationBar的使用 http://xys289187120.blog.51cto.com/3361352/685746 IOS 开发有关界面的东西 ...
- iOS7中如何去除UINavigationbar下边的那条黑线
做项目过程中遇到要去掉导航栏下面的一条黑线,从网上找到的一个方法 默认UINavigationbar样式 准备用于替换的背景 替换后的效果 if ([self.navigationController ...
- ios7 自定义UINavigationBar UIBarButtonItem 10px的偏移纠正
为UINavigationBar 写一个分类.UINavigationItem+correct_offset.h 转载 http://www.colabug.com/thread-1112420-1 ...
- iOS 开发 中级:UIToolbar,UINavigationBar,UITabBar,UIBarButtonItem,UITabBarItem自定义方法总结
原文: http://blog.csdn.net/songrotek/article/details/8692866?utm_source=tuicool 对于UIToolbar,UINavigat ...
随机推荐
- (转)Memcached
Memcached 是一个高性能的分布式内存对象缓存系统,用于动态Web应用以减轻数据库负载.它通过在内存中缓存数据和对象来减少读取数据库的次数,从而提供动态.数据 库驱动网站的速度.Memcache ...
- Hadoop 相关链接
Apache 软件下载 http://mirror.bit.edu.cn/apache/ 相关文档链接: Apache Hadoop 2.5.2 http://hadoop.apache.org ...
- ORA-15025: could not open disk 处理
刚才下班回家的路上,接到客户的电话:"回家了吗?我们这边的一套RAC库有个节点有问题哦,一直刷异常,一下子就把磁盘弄满了,我现在停掉了那个节点了.从日志上看好像跟权限有关,现在还有个实例跑着 ...
- Object调用静态方法
谁说空指针不能调用方法 public class Foo { public static void bar() { System.out.println("bar"); } pub ...
- Extjs4 treePanel异步加载菜单(后台从数据库读取)
运行环境:springMVC+mybatis 一.建表 说明:0表示此节点为非叶子节点,即此节点还包括了子节点:1表示此节点为叶子节点,即此节点没有子节点.:关于图标iconCls是从Extjs的文件 ...
- @Entity设置实体lazy = false
问题描述 在通过Hibernate查询Bean信息时报以下异常信息: org.hibernate.LazyInitializationException: could not initialize p ...
- EF+lambda表达式 实现LIKE模糊查询
s => s.XianWID.StartsWith(str) 匹配以str开头的 s => s.XianWID.EndsWith(str) 匹配以str结尾的 s => s.Xian ...
- hdu 4403
水水的dfs #include <cstdio> #include <cstring> #include <cstdlib> #include <cmath& ...
- 电商安全无小事,如何有效地抵御 CSRF 攻击?
现在,我们绝大多数人都会在网上购物买东西.但是很多人都不清楚的是,很多电商网站会存在安全漏洞.比如乌云就通报过,国内很多家公司的网站都存在 CSRF 漏洞.如果某个网站存在这种安全漏洞的话,那么我们在 ...
- printf在终端输出时改变颜色
在调试程序时,有时候要输出大量数据,如果让printf/fprintf改变输出数据的颜色,那观察数据就方便多了. 终端的字符颜色是用转义序列控制的,是文本模式下的系统显示功能,和具体的语言无关.转义序 ...