
vue项目全局引入vue-awesome-swiper插件做出轮播效果
在安装了vue的前提下,打开命令行窗口,输入vue init webpack swiper-test,创建一个vue项目且名为swiper-test(创建速度可能会有点慢,耐心等),博文讲完后,源码托管在GitHub中,供下载并理解。

vue项目自动生成完毕后,继续在命令行窗口输入cd swiper-test,将目录切换到swiper-test。

下面就开始启动vue项目了,输入启动命令行:npm run dev。
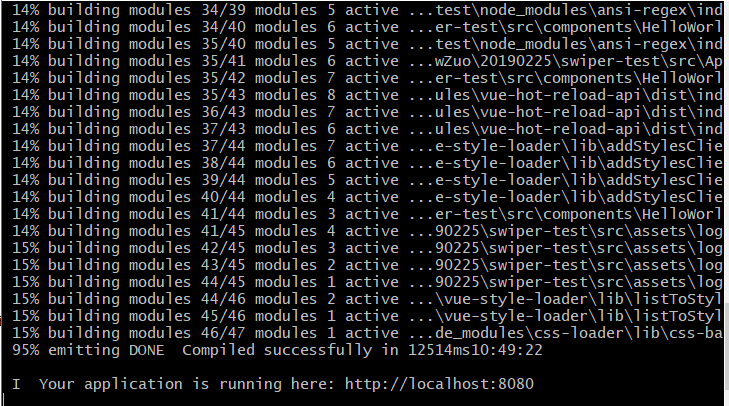
打开浏览器输入网址:localhost:8080

环境搭好了,进入主题,要想引入vue-awsome-swiper插件,还得下载vue-awesome-swiper模块包,我是通过npm来下载的,虽然很慢,但我有耐心。在swiper-test目录下打开命令行窗口,输入npm install vue-awesome-swiper --save。若正常的话,node_modules文件夹中就有vue-awesome-swiper文件夹以及相关文件生成。

我用开发工具Hbuilder打开swiper-test项目,找到目录src/main.js,开始编辑代码,引入vue-awesome-swiper模块:
import VueAwesomeSwiper from "vue-awesome-swiper";
使用模块:
Vue.use(VueAwesomeSwiper);
图下:

引入了结构,没有样式怎么行,所以,找到目录src/App.vue,开始编辑,在<script>标签里添加这么一行:
import "swiper/dist/css/swiper.css";
图下:

app.Vue文件中,为了预览效果,把第三行的代码注释掉,<img src="./assets/logo.png">一般按ctrl+/就可以注释
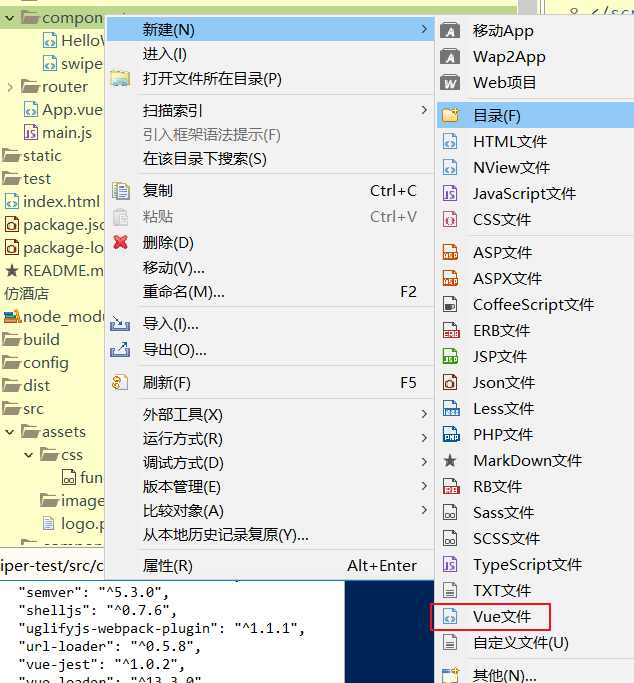
在目录src/components下创建swiper.Vue文件,编辑此文件,可以直接使用swiper组件:<swiper></swiper>
关于swiperOption的配置问题,可以去swiper官网了解:https://www.swiper.com.cn/api/,在这里,介绍的比谁都牛逼!
swiper.vue内容如下:
<template>

	<div class="swiper-plugs">

		<swiper :options="swiperOption" refs="lwSwiper">

			<swiper-slide>

				<img src="../assets/logo.png" alt="" />

			</swiper-slide>

			<swiper-slide>

				<img src="../assets/logo.png" alt="" />

			</swiper-slide>

			<swiper-slide>

				<img src="../assets/logo.png" alt="" />

			</swiper-slide>

			<!--分页器-->

			<div class="swiper-pagination" slot="pagination"></div>

			<!--前进后退按钮-->

			<div class="swiper-button-prev" slot="button-prev"></div>

			<div class="swiper-button-next" slot="button-next"></div>

			<!--滚动条-->

			<div class="swiper-scrollbar" slot="scrollbar"></div>

		</swiper>

	</div>

</template>

<script>

	export default{

		data(){

			return {

				swiperOption: {

			         autoplay : {

				      disableOnInteraction: false, //用户操作后是否禁止自动循环

				      delay: 1000 //自动循环时间

				     }, //可选选项,自动滑动

				     speed: 1000, //切换速度,即slider自动滑动开始到结束的时间(单位ms)

				     loop:false, //循环切换

				     grabCursor: false, //设置为true时,鼠标覆盖Swiper时指针会变成手掌形状,拖动时指针会变成抓手形状

				     // setWrapperSize: true, //Swiper使用flexbox布局(display: flex),开启这个设定会在Wrapper上添加等于slides相加的宽或高,在对flexbox布局的支持不是很好的浏览器中可能需要用到。

				     autoHeight: true,   //自动高度。设置为true时,wrapper和container会随着当前slide的高度而发生变化。

				     scrollbar: '.swiper-scrollbar',//显示滚动条

				     mousewheelControl: true, //设置为true时,能使用鼠标滚轮控制slide滑动

				     observeParents: false, //当改变swiper的样式(例如隐藏/显示)或者修改swiper的子元素时,自动初始化swiper

				     pagination: {

				      el: '.swiper-pagination',

				      // type : 'progressbar', //分页器形状

				      clickable :true, //点击分页器的指示点分页器会控制Swiper切换

				     },

				     navigation: {

				      nextEl: '.swiper-button-next',

				      prevEl: '.swiper-button-prev',

				     },

				   }

			}

		}

	}

</script>

<style>

</style>
想预览效果啥办?那就得给一个路由规则了,打开目录src/router/index.js,往routes数组添加一组路由规则。
index.js修改后的内容:
import Vue from 'vue'

import Router from 'vue-router'

import HelloWorld from '@/components/HelloWorld'

import swiper from '@/components/swiper'

Vue.use(Router)

export default new Router({

  routes: [

    {

      path: '/',

      name: 'HelloWorld',

      component: HelloWorld

    },

    {

    	path:'/swiper',

    	name:'swiper',

    	component:swiper

    }

  ]

})
打开浏览器,网址输入:http://localhost:8080/#/swiper
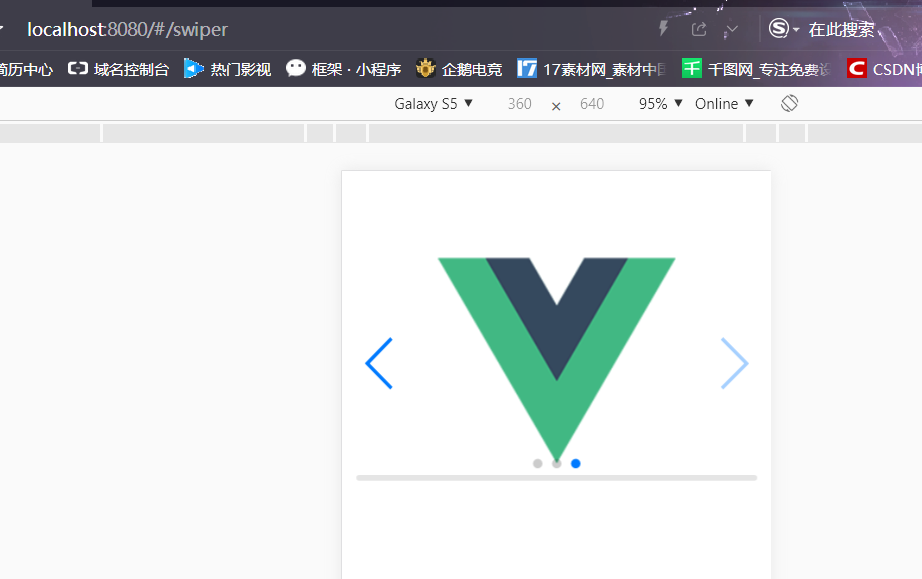
到这,就基本上有轮播效果了,但是,有个要注意的是,图片每次轮播都调用调用事件,导致页面性能低,所以,就给了一个计算属性,大大简化了运算。
swiper.vue最终的修改:<template>
	<div class="swiper-plugs">

		<swiper :options="swiperOption" refs="lwSwiper">

			<swiper-slide>

				<img src="../assets/logo.png" alt="" />

			</swiper-slide>

			<swiper-slide>

				<img src="../assets/logo.png" alt="" />

			</swiper-slide>

			<swiper-slide>

				<img src="../assets/logo.png" alt="" />

			</swiper-slide>

			<!--分页器-->

			<div class="swiper-pagination" slot="pagination"></div>

			<!--前进后退按钮-->

			<div class="swiper-button-prev" slot="button-prev"></div>

			<div class="swiper-button-next" slot="button-next"></div>

			<!--滚动条-->

			<div class="swiper-scrollbar" slot="scrollbar"></div>

		</swiper>

	</div>

</template>

<script>

	export default{

		data(){

			return {


				swiperOption: {

			         autoplay : {

				      disableOnInteraction: false, //用户操作后是否禁止自动循环

				      delay: 1000 //自动循环时间

				     }, //可选选项,自动滑动

				     speed: 1000, //切换速度,即slider自动滑动开始到结束的时间(单位ms)

				     loop:false, //循环切换

				     grabCursor: false, //设置为true时,鼠标覆盖Swiper时指针会变成手掌形状,拖动时指针会变成抓手形状

				     // setWrapperSize: true, //Swiper使用flexbox布局(display: flex),开启这个设定会在Wrapper上添加等于slides相加的宽或高,在对flexbox布局的支持不是很好的浏览器中可能需要用到。

				     autoHeight: true,   //自动高度。设置为true时,wrapper和container会随着当前slide的高度而发生变化。

				     scrollbar: '.swiper-scrollbar',//显示滚动条

				     mousewheelControl: true, //设置为true时,能使用鼠标滚轮控制slide滑动

				     observeParents: false, //当改变swiper的样式(例如隐藏/显示)或者修改swiper的子元素时,自动初始化swiper

				     pagination: {

				      el: '.swiper-pagination',

				      // type : 'progressbar', //分页器形状

				      clickable :true, //点击分页器的指示点分页器会控制Swiper切换

				     },

				     navigation: {

				      nextEl: '.swiper-button-next',

				      prevEl: '.swiper-button-prev',

				     },

				   }

			}

		},

		computed:{

			swiper(){

				return this.$refs.lwSwiper.swiper;

			}

		}

	}

</script>

<style>

</style>
还有注意的是,在控制台中,莫名其妙出现大量警告信息。找到目录build/webpack.base.conf.js,把43行注释掉:...(config.dev.useEslint ? [createLintingRule()] : []),保存文件,退出当前运行环境,重新输入启动命令行:npm run dev
github源码网址:https://github.com/murenziwei/swipertest
vue项目全局引入vue-awesome-swiper插件做出轮播效果的更多相关文章
- ionic3 使用swiper插件 实现轮播效果
由于app的更新迭代 我需要完成新版本设计图的开发 刚开始就遇到一个问题 首页的banner图需要实现某种效果 而ionic3自带的轮播图效果怎么改都改不到我想要的效果 效果图如下 自动播放 不断 ...
- 如何在Vue项目中优雅的使用swiper插件
个人网站 https://iiter.cn 程序员导航站 开业啦,欢迎各位观众姥爷赏脸参观,如有意见或建议希望能够不吝赐教! 开始之前,请先确保有一个基于webpack模板的项目(vue-cli脚手架 ...
- vue项目从引入vue.js 改为使用vue-cil (webpack)时修改的一些内容
在元素属性中不要写js关键字,会报使用关键字的错如@click='if(){}else{}', if-else 语句可以使用三元表达式或短路运算符来实现 v-for 不写:key 会有警告 ,使用: ...
- swiper插件制作轮播图swiper2.x和3.x区别
swiper3.x仅仅兼容到ie10+.比較适合移动端. swiper3.x官网 http://www.swiper.com.cn/ swiper2.x能够兼容到ie7+.官网是http://swi ...
- Vue如何使用vue-awesome-swiper实现轮播效果
在Vue项目中如何实现轮播图的效果呢,在传统项目中第一个想到的一般都是swiper插件,代码简单好用.一开始我也是直接npm安装swiper然后照着之前的传统写法写,然而却没有效果,只会显示图片但没有 ...
- Swiper 3D flow轮播使用方法
swiper 的3d轮播效果,移动端适用 (1). 如需使用Swiper的3d切换首先加载3D flow插件(js和css). <head> <link rel="styl ...
- 在vue项目中引入jquery
在vue项目中引入jquerycnpm install jquery --save在main.js中引入,加入下面这行代码:import 'jquery'注:有些项目是按需加载的,在main.js里面 ...
- vue项目中引入Sass
Sass作为目前成熟,稳定,强大的css扩展语言,让越来越多的前端工程师喜欢上它.下面介绍了如何在vue项目 中引入Sass. 首先在项目文件夹执行命令 npm install vue-cli -g, ...
- MintUI引入vue项目以及引入iconfont图标
官网地址:http://mint-ui.github.io/#!/zh-cn 中文文档:http://mint-ui.github.io/docs/#/zh-cn2 示例展示:http://eleme ...
随机推荐
- s6 传输层
标题 s6-1 传输层概述(2019-04-06 21:19) s6-2 UDP(2019-04-07 08:39) s6-3 通信模型(2019-04-07 08:47) s6-4 TCP 数据段( ...
- Book : <Hands-on ML with Sklearn & TF> pdf/epub
非常好的书,最近发现了pdf版本,链接:http://www.finelybook.com/hands-on-machine-learning-with-scikit-learn-and-tensor ...
- SpringBoot 基础01
SpringBoot 基础 pom.xml <!-- Spring Boot 依赖版本控制 --> <parent> <groupId>org.springfram ...
- now
- Oracle 12c client with .NET legacy Oracle driver
如果使用Oracle 12c Client和.NET的Oracle driver,你很可能会碰到跟下面一样的问题: https://www.codeproject.com/Questions/8767 ...
- vue watch高级用法
watch是vue组件最常用,最重要的功能之一,我们都知道它最基本的特性就是监听的data对象里的属性变化了,watch就会自动执行. 那它还有什么骚操作呢?下面我带大家看看,菜鸟一枚,如有错误欢迎指 ...
- vs编译器堆栈保护(GS选项)
参考: 安全编码实践一:GS编译选项和缓存溢出 堆栈溢出第三话--GS机制
- C# WebSocket Fleck 调用非托管C++ DLL 实现通信(使用stringbuilder接收)
[DllImport(@"XXX.dll", CallingConvention = CallingConvention.StdCall)]public static exter ...
- 吴恩达机器学习笔记16-决策边界(decision boundary)
现在讲下决策边界(decision boundary)的概念.这个概念能更好地帮助我们理解逻辑回归的假设函数在计算什么. 在逻辑回归中,我们预测:当ℎ
- 第45节:Java当中的变量,面向对象
Java当中的变量 01 Java当中的实例变量和类变量 什么是实例变量和类变量呢? 实例变量为没有用static修饰符修饰的变量,而类变量为用static修饰符修饰的变量. public class ...