Jupyter Notebook的快捷键
Jupyter Notebook 有两种键盘输入模式。
编辑模式,允许你往单元中键入代码或文本,这时的单元框线是绿色的。
命令模式,键盘输入运行程序命令;这时的单元框线是蓝色。
命令模式 (按键 Esc 开启)
- Enter : 转入编辑模式
- Shift-Enter : 运行本单元,选中下个单元
- Ctrl-Enter : 运行本单元
- Alt-Enter : 运行本单元,在其下插入新单元
- Y : 单元转入代码状态
- M :单元转入markdown状态
- R : 单元转入raw状态
- 1 : 设定 1 级标题
- 2 : 设定 2 级标题
- 3 : 设定 3 级标题
- 4 : 设定 4 级标题
- 5 : 设定 5 级标题
- 6 : 设定 6 级标题
- Up : 选中上方单元
- K : 选中上方单元
- Down : 选中下方单元
- J : 选中下方单元
- Shift-K : 扩大选中上方单元
- Shift-J : 扩大选中下方单元
- A : 在上方插入新单元
- B : 在下方插入新单元
- X : 剪切选中的单元
- C : 复制选中的单元
- Shift-V : 粘贴到上方单元
- V : 粘贴到下方单元
- Z : 恢复删除的最后一个单元
- D,D : 删除选中的单元
- Shift-M : 合并选中的单元
- Ctrl-S : 文件存盘
- S : 文件存盘
- L : 转换行号
- O : 转换输出
- Shift-O : 转换输出滚动
- Esc : 关闭页面
- Q : 关闭页面
- H : 显示快捷键帮助
- I,I : 中断Notebook内核
- 0,0 : 重启Notebook内核
- Shift : 忽略
- Shift-Space : 向上滚动
- Space : 向下滚动
编辑模式 ( Enter 键启动)
- Tab : 代码补全或缩进
- Shift-Tab : 提示
- Ctrl-] : 缩进
- Ctrl-[ : 解除缩进
- Ctrl-A : 全选
- Ctrl-Z : 复原
- Ctrl-Shift-Z : 再做
- Ctrl-Y : 再做
- Ctrl-Home : 跳到单元开头
- Ctrl-Up : 跳到单元开头
- Ctrl-End : 跳到单元末尾
- Ctrl-Down : 跳到单元末尾
- Ctrl-Left : 跳到左边一个字首
- Ctrl-Right : 跳到右边一个字首
- Ctrl-Backspace : 删除前面一个字
- Ctrl-Delete : 删除后面一个字
- Esc : 进入命令模式
- Ctrl-M : 进入命令模式
- Shift-Enter : 运行本单元,选中下一单元
- Ctrl-Enter : 运行本单元
- Alt-Enter : 运行本单元,在下面插入一单元
- Ctrl-Shift-- : 分割单元
- Ctrl-Shift-Subtract : 分割单元
- Ctrl-S : 文件存盘
- Shift : 忽略
- Up : 光标上移或转入上一单元
- Down :光标下移或转入下一单元
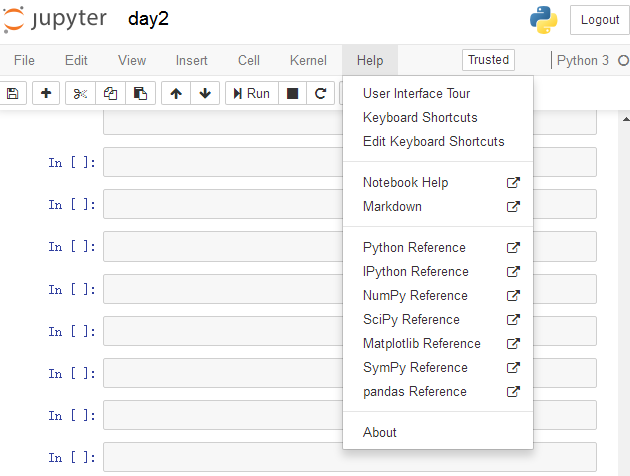
HELP可以帮助我们直接进入对应的官方文档
Keyboard Shortcuts 原文档
Command Mode (press Esc to enable)Edit Shortcuts
Edit Mode (press Enter to enable)
Jupyter Notebook的快捷键的更多相关文章
- jupyter notebook常用快捷键
阅读目录 命令模式 (按键 Esc 开启) 编辑模式 ( Enter 键启动) Jupyter Notebook 的快捷键 使用前需要进行安装: pip install jupyter (前提是你 ...
- Jupyter Notebook 的快捷键
原文:http://blog.csdn.net/lawme/article/details/51034543 Jupyter Notebook 的快捷键 Jupyter Notebook 有两种键盘输 ...
- Jupyter Notebook 常用快捷键
Jupyter Notebook 提供了比 IPython 美观的多得多的可视化形式.(比如对于 pandas 下的 DataFrame 的展示,df.head(5)) Jupyter Noteboo ...
- [转载]Jupyter Notebook 的快捷键
原文:http://blog.csdn.net/lawme/article/details/51034543 Jupyter Notebook 的快捷键 Jupyter Notebook 有两种键盘输 ...
- 【转载】Jupyter Notebook 常用快捷键
原文:http://blog.csdn.net/lawme/article/details/51034543 Jupyter Notebook 有两种键盘输入模式.编辑模式,允许你往单元中键入代码或文 ...
- Jupyter Notebook 常用快捷键 (转)
Jupyter Notebook 有两种键盘输入模式. 编辑模式,允许你往单元中键入代码或文本:这时的单元框线是绿色的. 命令模式,键盘输入运行程序命令:这时的单元框线为蓝色. 命令模式 (按键 Es ...
- Jupyter NoteBook使用快捷键
命令模式 (按键 Esc 开启) Enter : 转入编辑模式 Shift-Enter : 运行本单元,选中下个单元 Ctrl-Enter : 运行本单元 Alt-Enter : 运行本单元,在其下插 ...
- [转]Jupyter NoteBook 的快捷键使用指南
- Jupyter Notebook(推荐使用Anaconda安装)
一.Jupyter Notebook介绍 1.简介 Jupyter Notebook是基于网页的用于交互计算的应用程序.其可被应用于全过程计算:开发.文档编写.运行代码和展示结果. 简而言之,Jupy ...
随机推荐
- org.apache.jasper.JasperException: /pages/path.jsp
1.错误描述 三月 15, 2015 8:56:37 下午 org.apache.jasper.compiler.TldLocationsCache tldScanJar 信息: At least o ...
- 物联网框架ServerSuperIO在.NetCore实现跨平台的实践路线
正所谓天下大势,不跟风不行.你不跨平台,很low嘛.java说:你们能跨嘛,跨给我看看.C#说:不要强人所难嘛.java说:能部署在云上吗?docker?微服务?C#说:不要强人所难嘛.java说:你 ...
- 【SPOJ】Distinct Substrings(后缀自动机)
[SPOJ]Distinct Substrings(后缀自动机) 题面 Vjudge 题意:求一个串的不同子串的数量 题解 对于这个串构建后缀自动机之后 我们知道每个串出现的次数就是\(right/e ...
- centos7下搭建 MongoDB -01
距离上次写的一篇mongoDB搭建已经有一年多的时间了,刚好这次在公司搭建好在centos7下的mongodb搭建,简单的做一个记录吧 mongo 是一个基于分布式文件存储的数据库,数据主要存储在磁盘 ...
- 如何使用mysqldump备份数据库
一.背景 在开发项目中,数据库是核心资产.除了做主备冗余增加可靠性外,定期备份数据也是必须的. 使用mysqldump备份数据具有操作简单,备份和恢复时间短的优点(mysqldump备份数据生成的是批 ...
- 关系型数据库工作原理-时间复杂度(翻译自Coding-Geek文章)
本文翻译自Coding-Geek文章:< How does a relational database work>. 原文链接:http://coding-geek.com/how-dat ...
- WPF自学入门(九)WPF自定义窗口基类
今天简单记录一个知识点:WPF自定义窗口基类,常用winform的人知道,winform的窗体继承是很好用的,写一个基础窗体,直接在后台代码改写继承窗体名.但如果是WPF要继承窗体,我个人感觉没有理解 ...
- 元素化设计原理及规则v1.0
一.元素设计架构 元素设计架构展示在基于元素化设计的思想下,系统各元素之间如何相互协作,并完成整个系统搭建. 架构中以Entity(数据)为中心,由Entity产生数据库表结构,并且Entity作为业 ...
- jmeter--简单的接口测试(GET/POST)
最近在学习接口测试,本文就简单的谈一谈对接口相关知识的理解. 一.什么是接口? 程序接口:由一套陈述.功能.选项.其它表达程序结构的形式.以及程序师使用的程序或者程序语言提供的数据组成(百度百科定义) ...
- 笔记:Spring Cloud Hystrix 服务容错保护
由于每个单元都在不同的进程中运行,依赖通过远程调用的方式执行,这样就有可能因为网络原因或是依赖服务自身问题出现调用故障或延迟,而这些问题会直接导致调用方的对外服务也出现延迟,若此时调用方的请求不断增加 ...