原生nodejs 学习笔记2
本章节学习流, 流的一个好处在于减少各种异步IO的回调地狱。IO操作遍及我们各种操作,比如数据库读写,文件读写, 文件转换压缩……别的不说,比如第一节,我们要将一个HTML文件返回浏览器,就涉及IO操作。
一个页面,如果按版本划分功能,可能切成一块块给不同的人做,使用fs方法的异步IO方法,可能是这样写的:
fs.asyncXXX(function(err,data){

   fs.asyncXXX(function(err,data){

      fs.asyncXXX(function(err,data){

         fs.asyncXXX(function(err,data){

         })

      })

   })

})
如果使用流,则是这样写
readStream.pipe(transformStream).pipe(writeStream)

a.pipe(b).pipe(c).pipe(d)

//相当于

a.pipe(b);

b.pipe(c);

c.pipe(d);
这是不是与Unix中的管道很相似呢?!无错,它的灵感就在于这!
a | b | c | d
此外,不使用流,如果读出一个很大的文件,则需要将它整个装进内存中,这会很影响性能。使用了流就不用担心这个。
nodejs底层一个提供了4个流, Readable 流、Writable 流、Duplex 流和Transform 流。如果还不能满足你的需求,可以自己继承其个流的基类进行扩展。(例如util.inherits(MyTransform, Transform); )
| 使用情景 | 类 | 需要重写的方法 |
| 只读 | Readable | _read |
| 只写 | Writable | _write |
| 双工 | Duplex | _read, _write |
| 操作被写入数据,然后读出结果 | Transform | _transform, _flush |
说了这么多,我们还没有瞧见一个流。我们来一些例子吧.
可读流:
//aaa.js

var fs = require('fs');

var readStream = fs.createReadStream('myfile.txt');//里面乱写几行

readStream.pipe(process.stdout);
上面是直接读文本的,然后输出到控制台。我们也可以加密一下输出
var crypto = require('crypto');

var fs = require('fs');

var readStream = fs.createReadStream('myfile.txt');

var hash = crypto.createHash('sha1');

readStream

  .on('data', function (chunk) {

    hash.update(chunk);

  })

  .on('end', function () {

    console.log(hash.digest('hex'));

  });
输出一大堆看不懂的密码:
fs模块也有创建可读流的方法:
var fs = require('fs');

var readableStream = fs.createReadStream('file.txt');

var data = '';

readableStream.setEncoding('utf8');

readableStream.on('data', function(chunk) {

    data+=chunk;

});

readableStream.on('end', function() {

    console.log(data);

});
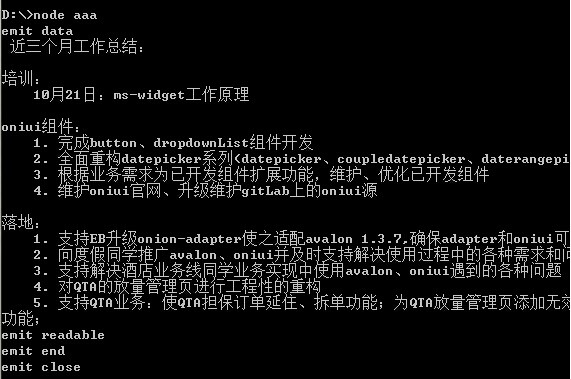
我们再看一下可读流的各种事件
var fs = require('fs');

var readStream = fs.createReadStream('myfile.txt');

readStream

  .on('data', function (chunk) {

  	console.log("emit data")

    console.log(chunk.toString('utf8'))

  })

  .on('end', function () {

    console.log("emit end");

  })

  .on('close', function () {

    console.log("emit close");

  })

  .on("readable", function(){

     console.log("emit readable")

  })

  .on("error", function(e){

     console.log("emit error")

  })

再看一下如何重写_read方法:
var Readable = require('stream').Readable;

var util = require('util');

function CountingObjectStream(length, options) {

  if (!(this instanceof CountingObjectStream)) {

    return new CountingObjectStream(length, options);

  }

  if (!options) options = {}; // ensure object

  options.objectMode = true; // forcing object mode

  Readable.call(this, options);

  this.lenToCount = length;  // how far to count

  this.index = 0;  // to track our count

}

util.inherits(CountingObjectStream, Readable);

CountingObjectStream.prototype._read = function () {

  this.index += 1;

  if (this.index > this.lenToCount) {

    return this.push(null); // done, return

  }

  // pushing number, but could be any non-null obj

  this.push(this.index);

};

// consume this stream and output to stdout

// coercing it to a string

var readStream = new CountingObjectStream(10);

readStream

  .on('readable', function () {

    var obj;

    while (null !== (obj = readStream.read())) {

      console.log(obj);

    }

  });
Readable有一个可选的hash参数里,里面有三个配置项:
- highWaterMark {Number} 停止从底层资源读取前内部缓冲区最多能存放的字节数。缺省为 16kb,对于 objectMode 流则是 16
- encoding {String} 若给出,则 Buffer 会被解码成所给编码的字符串。缺省为 null
- objectMode {Boolean} 该流是否应该表现为对象的流。意思是说 stream.read(n) 返回一个单独的对象,而不是大小为 n 的 Buffer
前两个配置项比较易懂,我们看第三个:
var stream = require('stream');

var util = require('util');

function StringifyStream(){

    stream.Transform.call(this);

    this._readableState.objectMode = false;

    this._writableState.objectMode = true;

}

util.inherits(StringifyStream, stream.Transform);

StringifyStream.prototype._transform = function(obj, encoding, cb){

    this.push(JSON.stringify(obj));

    cb();

};

var json = require(__dirname + 'test.json');

console.log(json) //这是一个对象

var rs = new stream.Readable({ objectMode: true });

rs.push(json);

rs.push(null);

rs.pipe(new StringifyStream()).pipe(process.stdout);
下面是test.json
{

"a":"2",

"b":{

      "xxx": 1,

	   "yyy": false

   }

}
可写流
构造器有一个可选配置对象,默认是编码是utf8
var fs = require('fs');

var wstream = fs.createWriteStream('myOutput.txt');

wstream.write('Hello world!\n');

wstream.write('Another line\n');

wstream.end();
我们可以这样改编码
var fs = require('fs');

var wstream = fs.createWriteStream('myOutput.txt');

wstream.write('Hello world!\n');

wstream.write('Another line\n');

wstream.end();
输出二进制文件
var crypto = require('crypto');

var fs = require('fs');

var wstream = fs.createWriteStream('myBinaryFile');

// creates random Buffer of 100 bytes

var buffer = crypto.randomBytes(100);

wstream.write(buffer);

// create another Buffer of 100 bytes and write

wstream.write(crypto.randomBytes(100));

wstream.end();
http://www.sandersdenardi.com/readable-writable-transform-streams-node/
http://www.slideshare.net/shigeki_ohtsu/stream2-kihon
https://cnodejs.org/topic/513ef6cc069911196d0c90a6
http://nodeapi.ucdok.com/#/api/stream.html
http://www.it165.net/pro/html/201406/15924.html
http://calv.info/an-introduction-to-nodes-new-streams/
http://codewinds.com/blog/2013-08-20-nodejs-transform-streams.html
http://stackoverflow.com/questions/20317759/implementing-a-buffered-transform-stream
http://maxogden.com/node-streams.html
http://codewinds.com/blog/2013-08-19-nodejs-writable-streams.html、
http://codewinds.com/blog/2013-08-04-nodejs-readable-streams.html
http://codewinds.com/blog/2013-08-20-nodejs-transform-streams.html
原生nodejs 学习笔记2的更多相关文章
- 原生nodejs 学习笔记1
网上许多nodejs教程或书藉都是教你调用第三方模块来编写nodejs应用的,虽然这是非常便捷的,但是封装太厚,你基本一点东西还是没有学到.人家的模块,人家想怎么改就行,可以下一版本就改了接口,你的应 ...
- Nodejs学习笔记(四)——支持Mongodb
前言:回顾前面零零碎碎写的三篇挂着Nodejs学习笔记的文章,着实有点名不副实,当然,这篇可能还是要继续走着离主线越走越远的路子,从简短的介绍什么是Nodejs,到如何寻找一个可以调试的Nodejs ...
- Nodejs学习笔记(三)——一张图看懂Nodejs建站
前言:一条线,竖着放,如果做不到精进至深,那就旋转90°,至少也图个幅度宽广. 通俗解释上面的胡言乱语:还没学会爬,就学起走了?! 继上篇<Nodejs学习笔记(二)——Eclipse中运行调试 ...
- Nodejs学习笔记(二)——Eclipse中运行调试Nodejs
前篇<Nodejs学习笔记(一)——初识Nodejs>主要介绍了在搭建node环境过程中遇到的小问题以及搭建Eclipse开发Node环境的前提步骤.本篇主要介绍如何在Eclipse中运行 ...
- NodeJS学习笔记之Connect中间件模块(一)
NodeJS学习笔记之Connect中间件模块(一) http://www.jb51.net/article/60430.htm NodeJS学习笔记之Connect中间件模块(二) http://w ...
- Nodejs学习笔记(六)--- Node.js + Express 构建网站预备知识
目录 前言 新建express项目并自定义路由规则 如何提取页面中的公共部分? 如何提交表单并接收参数? GET 方式 POST 方式 如何字符串加密? 如何使用session? 如何使用cookie ...
- Nodejs学习笔记(十五)--- Node.js + Koa2 构建网站简单示例
目录 前言 搭建项目及其它准备工作 创建数据库 创建Koa2项目 安装项目其它需要包 清除冗余文件并重新规划项目目录 配置文件 规划示例路由,并新建相关文件 实现数据访问和业务逻辑相关方法 编写mys ...
- Nodejs学习笔记(十六)--- Pomelo介绍&入门
目录 前言&介绍 安装Pomelo 创建项目并启动 创建项目 项目结构说明 启动 测试连接 聊天服务器 新建gate和chat服务器 配置master.json 配置servers.json ...
- [转]Nodejs学习笔记(十五)--- Node.js + Koa2 构建网站简单示例
本文转自:https://www.cnblogs.com/zhongweiv/p/nodejs_koa2_webapp.html 目录 前言 搭建项目及其它准备工作 创建数据库 创建Koa2项目 安装 ...
随机推荐
- pm2 知识点
pm2:node进程管理工具 pm2 命令: pm2 命令 作用 pm start xxx.js 启动 xxx.js pm stop xxx.js 停止 xxx.js pm2 list 显示所有进程状 ...
- POJ1135 Domino Effect
题目:http://poj.org/problem?id=1135 只是求以1为起点的最短路罢了.稍稍判断一下在边上的情况. 多亏提醒:毒数据——n==1!一定要dis [ k ] >= ans ...
- 【python】正则表达式-group和group的区别
__author__ = 'paul' import re a = "123abc456" print re.search("([0-9]*)([a-z]*)([0-9] ...
- System V 消息队列 实例
前言: 消息队列是消息的链接表,存放在内核中,并由消息队列标识符标识.我们将称消息队列为 “队列”,其标识符为“队列I D”.msgget创建一个新队列或打开一个存在的队列; msgsnd向队列末端添 ...
- SpringCloud之最大的坑
就一句话,controller里面的API方法千万不要夹@Bean,因为加了这个就变成预编译的了!!!!不能断点不能log!!!!!!当然,如果想项目启动就执行的话,那就加上这个.
- DevExpress 组件
最近看到 伍华聪 的博客里, DevExpress 组件那个效果很好看,特别是 LookUpEdit GridLookUpEdit 这两个控件,完美改善了 WinForm 里的 ComboBox 今天 ...
- 让MySql支持Emoji表情(MySQL中4字节utf8字符保存方法)
手机端插入Emoji表情,保存到数据库时报错: Caused by: java.sql.SQLException: Incorrect string value: '\xF0\x9F\x98\x84' ...
- iOS线程开发小结
在iOS开发线程操作时,一般方法名决定是否开启新线程(async,sync),队列类型(全局队列,串行队列)决定开启多少条线程 1.快速线程调用 *开启后台线程执行任务 [self performSe ...
- Valve新员工手册中文版
- 信息学奥赛(NOIP)初赛学习方法推荐
首先声明:本帖针对初学者,本帖只是列出一个大概的框架,不属于自学方法,有条件有能力,请找一位好老师来教,多跟前辈交流经验.(否则多会出现事倍功半的悲剧!) 一.初赛内容 初赛偏重于基础知识. 1. 一 ...
