gitlab与LDAP 联调
gitlab整理
1.安装Gitlab依赖包
#系统要求

Ubuntu (16.04/18.04/20.04)

Debian (9/10)

CentOS (7/8)

openSUSE Leap (15.2)

SUSE Linux Enterprise Server (12 SP2/12 SP5)

Red Hat Enterprise Linux (please use the CentOS packages and instructions)

#硬件要求

##磁盘

存放代码,比代码空间大

7.2k以上的磁盘 sas

ssd

##CPU

4 核心 500用户

8 核心 1000用户

##内存

4 G内存 500用户

8 G内存 1000用户
2.下载,安装
#1. 关闭防火墙

#2. 安装gitlab所有依赖

yum install -y curl openssh-server postfix wget

#3安装组件

# 下载安装 gitlab-ce-12.0.3  2019-07-03 18:00  稳定版12.10.6  2020-05-16 05:02

更换源:

sed -i "s|\$releasever|8-stream|g" /etc/yum.repos.d/CentOS-*.repo

重新加载源:

yum makecache

下载rpm包,注意版本

wget --content-disposition https://packages.gitlab.com/gitlab/gitlab-ce/packages/el/8/gitlab-ce-13.2.2-ce.0.el8.x86_64.rpm/download.rpm

yum install -y https://mirror.tuna.tsinghua.edu.cn/gitlab-ce/yum/el7/gitlab-ce-12.0.3-ce.0.el7.x86_64.rpm

#清华园已经不维护了要换源,从gitlab官方下载

wget --content-disposition https://packages.gitlab.com/gitlab/gitlab-ce/packages/el/8/gitlab-ce-13.2.2-ce.0.el8.x86_64.rpm/download.rpm

#https://mirror.tuna.tsinghua.edu.cn/gitlab-ce/yum/el7/gitlab-ce-13.11.7-ce.0.el7.x86_64.rpm

yum localinstall -y xxxx.rpm   # gitlab-ce-12.0.3-ce.0.el7.x86_64.rpm

# 安装 成功 提示
GitLab was unable to detect a valid hostname for your instance.

Please configure a URL for your GitLab instance by setting `external_url` #修改gitlab配置文件 设置 gitlab

url (server_name)

configuration in /etc/gitlab/gitlab.rb file. #配置文件的路径和名字

Then, you can start your GitLab instance by running the following command:

sudo gitlab-ctl reconfigure #初始化(重新配置)

For a comprehensive list of configuration options please see the Omnibus GitLab readme

https://gitlab.com/gitlab-org/omnibus-gitlab/blob/master/README.md
3.配置,访问域名及邮箱
配置访问url

external_url 'http://gitlab.oldboylinux.com' #gitlab url

配置邮箱 (发件人)

注册的时候 Gitlab 服务器,给用户发送邮件,激活 或者找回密码

用提交合并请求的时候,负责人可以收到邮件通知

#  /etc/gitlab/gitlab.rb file. #配置文件的路径和名字

##配置发件人

51 ### Email Settings

52 gitlab_rails['gitlab_email_enabled'] = true

53 gitlab_rails['gitlab_email_from'] = 'lidao996@163.com'

54 gitlab_rails['gitlab_email_display_name'] = 'Oldboy_gitlab_tongzhi'

##配置详细发件人信息

513 ### GitLab email server settings

514 ###! Docs: https://docs.gitlab.com/omnibus/settings/smtp.html

515 ###! **Use smtp instead of sendmail/postfix.**

516

517 gitlab_rails['smtp_enable'] = true

518 gitlab_rails['smtp_address'] = "smtp.163.com"

519 gitlab_rails['smtp_port'] = 465

520 gitlab_rails['smtp_user_name'] = "lidao996@163.com"

521 gitlab_rails['smtp_password'] = "????"

522 gitlab_rails['smtp_domain'] = "163.com"

523 gitlab_rails['smtp_authentication'] = "login"

524 gitlab_rails['smtp_enable_starttls_auto'] = true

525 gitlab_rails['smtp_tls'] = true

#优化暂时不用组件

#关闭目前不使用的组件 默认都是true 修改为 false

1385 prometheus['enable'] = false

1386 prometheus['monitor_kubernetes'] = false

1452 alertmanager['enable'] = false

1474 node_exporter['enable'] = false

1493 redis_exporter['enable'] = false

1511 postgres_exporter['enable'] = false

1540 gitlab_monitor['enable'] = false

1553 prometheus_monitoring['enable'] = false

1560 grafana['enable'] = false

awk '/true$/' /etc/gitlab/gitlab.rb

#测试配置文件

[root@gitlabtest gitlab]# egrep -v "^#" /etc/gitlab/gitlab.rb |egrep -v "^$"

external_url 'http://gitlabtest.test.com'

gitlab_rails['object_store']['enabled'] = false

gitlab_rails['object_store']['connection'] = {}

gitlab_rails['object_store']['proxy_download'] = false

gitlab_rails['object_store']['objects']['artifacts']['bucket'] = nil

gitlab_rails['object_store']['objects']['external_diffs']['bucket'] = nil

gitlab_rails['object_store']['objects']['lfs']['bucket'] = nil

gitlab_rails['object_store']['objects']['uploads']['bucket'] = nil

gitlab_rails['object_store']['objects']['packages']['bucket'] = nil

gitlab_rails['object_store']['objects']['dependency_proxy']['bucket'] = nil

gitlab_rails['object_store']['objects']['terraform_state']['bucket'] = nil

gitlab_rails['smtp_enable'] = true

gitlab_rails['smtp_address'] = "smtp.163.com"

gitlab_rails['smtp_port'] = 465

gitlab_rails['smtp_user_name'] = "15201581995@163.com"

gitlab_rails['smtp_password'] = "ULPRYHQRCSLCMITL"

gitlab_rails['smtp_domain'] = "163.com"

gitlab_rails['smtp_authentication'] = "login"

gitlab_rails['smtp_enable_starttls_auto'] = true

gitlab_rails['smtp_tls'] = true

[root@gitlabtest gitlab]#
4.初始化,启动
#初始化

修改配置文件需要初始化 gitlab

gitlab-ctl reconfigure

Chef Client finished, 345/855 resources updated in 02 minutes 25 seconds

gitlab Reconfigured!

gitlab-ctl status

gitlab-ctl stop

gitlab-ctl start

#登录界面设置密码

用户名默认root
5.访问,以及邮箱测试
验证Gitlab组件

gitlab-rails console

Notify.test_email('youjiu_linux@qq.com','Gitlab-test','测试').diliver_now

[root@gitlab ~]# gitlab-rails c

-------------------------------------------------------------------------------------

GitLab: 12.0.3 (08a51a9db93)

GitLab Shell: 9.3.0

PostgreSQL: 10.7

-------------------------------------------------------------------------------------

Loading production environment (Rails 5.1.7)

irb(main):001:0>

irb(main):002:0>

irb(main):002:0>

irb(main):003:0> Notify.test_email('lidao996@qq.com','Gitlab-test','').deliver_now

Notify#test_email: processed outbound mail in 1.4ms

Sent mail to lidao996@qq.com (293.9ms)

Date: Fri, 30 Jul 2021 07:36:00 +0800

From: Oldboy_gitlab_notice <lidao996@163.com>

Reply-To: Oldboy_gitlab_notice <noreply@gitlab.oldboylinux.com>

To: lidao996@qq.com

Message-ID: <61033b6079ea9_eb33fb7081cf9a4538b5@gitlab.mail>

Subject: Gitlab-test

Mime-Version: 1.0

Content-Type: text/html;

charset=UTF-8

Content-Transfer-Encoding: 7bit

#目前版本:

[root@git ~]# gitlab-rails c

--------------------------------------------------------------------------------

 GitLab:       13.2.2 (64fc0138d55) FOSS

 GitLab Shell: 13.3.0

 PostgreSQL:   11.7

--------------------------------------------------------------------------------

Loading production environment (Rails 6.0.3.1)

irb(main):001:0>

5 登录与查看

设置密码

登录 root:密码5.9 汉化

https://gitlab.com/xhang/gitlab

[gitlab-ce]

name=Gitlab CE Repository

baseurl=https://mirrors.tuna.tsinghua.edu.cn/gitlab-ce/yum/el7/

gpgcheck=0

enabled=1
5.1汉化
#汉化包下载地址

wget https://gitlab.com/xhang/gitlab/-/tree/v12.3.5-zh/包名

#停止 gitlab 服务

[root@gitlab ~]# gitlab-ctl stop

#中文版覆盖英文版

#替换这个目录下的文件即可

[root@gitlabtest gitlab-rails]# pwd

/opt/gitlab/embedded/service/gitlab-rails

[root@gitlab ~]# \cp -r gitlab-12-0-stable-zh/* /opt/gitlab/embedded/service/gitlab-rails/

#全流程

tar xf gitlab-12-0-stable-zh.tar.gz

cat gitlab-12-0-stable-zh/VERSION

rpm -qa |grep gitlab

gitlab-ctl stop

du -sh /opt/gitlab/embedded/service/gitlab-rails/

tar zcf /tmp/gitlab-rails.tar.gz /opt/gitlab/embedded/service/gitlab-rails/

\cp -r gitlab-12-0-stable-zh/* /opt/gitlab/embedded/service/gitlab-rails/

3.重启gitlab,验证汉化结果

#重新配置gitlab服务

[root@gitlab ~]# gitlab-ctl reconfigure

#重启gitlab服务

[root@gitlab ~]# gitlab-ctl restart

4.登陆gitlab服务器,会发现处理半中文半English状态
6.问题总结处理
6.1安装时出现
上次元数据过期检查:0:09:53 前,执行于 2020年05月11日 星期一 01时07分33秒。

错误:

 问题: conflicting requests

  - nothing provides policycoreutils-python needed by gitlab-ce-12.3.5-ce.0.el7.x86_64

(尝试添加 '--skip-broken' 来跳过无法安装的软件包 或 '--nobest' 来不只使用最佳选择的软件包)

执行操作: yum install policycoreutils-python-utils

[root@localhost ~]#yum install -y https://mirror.tuna.tsinghua.edu.cn/gitlab-ce/yum/el7/gitlab-ce-12.0.3-ce.0.el7.x86_64.rpm

[root@localhost ~]# yum -y install policycoreutils openssh-server openssh-clients postfix

#特别注意:目录el7代表是centOS7,目录el8代表的是centOS8,千万别下错版本了。不然报下面的错误:

[root@localhost ~]# sudo yum install gitlab-ce-12.3.5

curl https://packages.gitlab.com/install/repositories/gitlab/gitlab-ce/script.rpm.sh | sudo bash
7.ssl
为了防止内网渗透,将gitlab服务的访问添加了ssl,具体步骤如下:

1.gitlab配置https(请先做个快照.)

external_url 'https: /lip:port'

nginx[' enable' ] = true

nginx['client_max_body_size' ]= '250m '

nginx['redirect_http_to_https' ]= true

nginx[' redirect_http_to_https _port' ] = 443

nginx['ssl_certificate' ] = "path/ key.crt"

nginx['ssl_certificate_key'] = "path/ key.crt"

nginx['ssl_ciphers' ] ="ECDHE-RSA-AES256-GCM-SHA384:ECDHE-RSA-AES128-GCM-SHA256"

nginx['ssl_prefer_server_ciphers']= "on"

nginx['ssl_protocols']= "TLSv1.2"

nginx['ssl_session_cache ' ] = "builtin:1000shared:sSL: 10m"

nginx['ssl_session_timeout']= "5m"

2.gitlab重新初始化

gitlab-ctl reconfigure

重建配置:

sudo gitlab-ctl reconfigure
8.升级
需要遵循以下升级步骤以确保主版本升级成功:

1.升级至之前主要版本的最新次要版本。

2.升级到目标主要版本的第一个次要版本(X.0.Z)。

3.继续升级到较新的版本。
9.备份
#配置文件 的backup部分

backup_

### Backup Settings gitlab备份设置

###! Docs: https://docs.gitlab.com/omnibus/settings/backups.html

gitlab_rails['manage_backup_path'] = true #是否可以指定备份目录

gitlab_rails['backup_path'] = "/var/opt/gitlab/backups" #备份目录

gitlab_rails['backup_archive_permissions'] = 0644 #备份的压缩包权限

gitlab_rails['backup_keep_time'] = 604800 #备份保留多久 7天

#gitlab备份 需要手动执行

[root@gitlab ~]# grep '^gitlab.*backup_' /etc/gitlab/gitlab.rb

gitlab_rails['manage_backup_path'] = true

gitlab_rails['backup_path'] = "/var/opt/gitlab/backups"

gitlab_rails['backup_archive_permissions'] = 0644

gitlab_rails['backup_keep_time'] = 604800

[root@gitlab ~]# grep -n '^gitlab.*backup_' /etc/gitlab/gitlab.rb

333:gitlab_rails['manage_backup_path'] = true

334:gitlab_rails['backup_path'] = "/var/opt/gitlab/backups"

337:gitlab_rails['backup_archive_permissions'] = 0644

342:gitlab_rails['backup_keep_time'] = 604800

#配置生效

gitlab-ctl reconfigure

gitlab-ctl restart

[root@gitlab ~]# ll /var/opt/gitlab/backups -d

drwx------ 2 git root 6 Jul 30 16:28 /var/opt/gitlab/backups

#自动备份

#每天备份1次

#!/bin/bash

#author :lidao996

#desc : backup gitlab all

#0.关闭gitlab

#1.备份gitlab数据

gitlab-rake gitlab:backup:create

#2.备份gitlab配置和密码文件

tar zcf /backup/gitlab-conf-$(date +%F).tar.gz /etc/gitlab/

#写入定时任务

00 03 * * * sh /server/scripts/backup-gitlab.sh &>/dev/null
10.1备份与恢复
2.1 停止相关数据连接服务

在gitlab服务器上停止相关数据连接服务,命令如下:

停止gitlab数据服务

gitlab-ctl stop unicorn

gitlab-ctl stop sidekiq

2.2 恢复gitlab仓库

进入/var/opt/gitlab/backups

现在我们要从1537261122_2018_09_18_9.2.5这个备份编号中,恢复数据,命令如下:

gitlab-rake gitlab:backup:restore BACKUP=1537261122_2018_09_18_9.2.5

gitlab-rake gitlab:backup:restore BACKUP=1546916920_2019_01_08_10.5.1恢复数据

如果出现多个done的信息,说明整个gitlab数据就已经正常恢复完毕。

2.3 启动gitlab服务

恢复完毕以后,我们现在来启动gitlab,使用以下命令:

gitlab-ctl start

强烈建议:重启该新服务器。

三、References:

gitlab的备份与恢复

三、gitlab迁移

迁移的整体思路是:

1、在新服务器上安装相同版本的gitlab

2、将备份生成的备份文件发送到新服务器的相同目录下

这里在10.0.0.6的机器上安装了相同版本的gitlab并能正常运行使用

在老服务器上将备份文件发送至新服务器的相应目录下

[root@gitlab ~]# scp /var/opt/gitlab/backups/1530156812_2018_06_28_10.8.4_gitlab_backup.tar root@10.0.0.6:/var/opt/gitlab/backups/

四、gitlab恢复

[root@gitlab ~]# gitlab-ctl stop unicorn #停止相关数据连接服务

[root@gitlab ~]# gitlab-ctl stop sidekiq

[root@gitlab-new ~]# chmod 777 /var/opt/gitlab/backups/1530156812_2018_06_28_10.8.4_gitlab_backup.tar

#修改权限,如果是从本服务器恢复可以不修改

[root@gitlab ~]# gitlab-rake gitlab:backup:restore BACKUP=1530156812_2018_06_28_10.8.4

#从1530156812_2018_06_28_10.8.4编号备份中恢复

[root@gitlab ~]# gitlab-ctl start #启动gitlab

浏览器访问新服务器的地址进行查看,迁移成功
补充
2. docker搭建postgresql
postgresql选择了了11版本。住:支持是到gitlab14.0。故其实也可以安装更高版本的postgresql。
mkdir /data/pgsql
docker run --name dockerPG11
-e POSTGRES_PASSWORD=postgres
-v /data/pgsql:/var/lib/postgresql/data
-p 54322:5432
-d postgres:11.5
## 创建数据库
psql -U postgres -h localhost -p 54322
psql (11.5 (Debian 11.5-3.pgdg90+1))
Type "help" for help.
postgres=# create role gitlab login encrypted password 'gitlab';
CREATE ROLE
postgres=# create database gitlabhq_production owner=gitlab ENCODING = 'UTF8';
CREATE DATABASE
postgres=# c gitlabhq_production
You are now connected to database "gitlabhq_production" as user "postgres".
gitlabhq_production=# CREATE EXTENSION IF NOT EXISTS btree_gist;
CREATE EXTENSION
gitlabhq_production=# CREATE EXTENSION IF NOT EXISTS pg_trgm;
CREATE EXTENSION
postgres=# q
三. gitlab与postgresql集成
1. 编辑/etc/gitlab/gitlab.rb
gitlab_rails['db_adapter'] = "postgresql"
gitlab_rails['db_encoding'] = "utf8"
# gitlab_rails['db_collation'] = nil
gitlab_rails['db_database'] = "gitlabhq_production"
gitlab_rails['db_username'] = "gitlab"
gitlab_rails['db_password'] = "gitlab"
gitlab_rails['db_host'] = "127.0.0.1"
gitlab_rails['db_port'] = 54322
postgresql['enable'] = false
重载配置文件:
gitlab-ctl reconfigure
2. 验证配置生效
cat /opt/gitlab/embedded/service/gitlab-rails/config/database.yml
# This file is managed by gitlab-ctl. Manual changes will be
# erased! To change the contents below, edit /etc/gitlab/gitlab.rb
# and run `sudo gitlab-ctl reconfigure`.
production:
adapter: postgresql
encoding: utf8
collation:
database: gitlabhq_production
username: "gitlab"
password: "gitlab"
host: "127.0.0.1"
port: 54322
socket:
sslmode:
sslcompression: 0
sslrootcert:
sslca:
load_balancing: {"hosts":[]}
prepared_statements: false
statement_limit: 1000
connect_timeout:
keepalives:
keepalives_idle:
keepalives_interval:
keepalives_count:
tcp_user_timeout:
application_name:
variables:
statement_timeout:
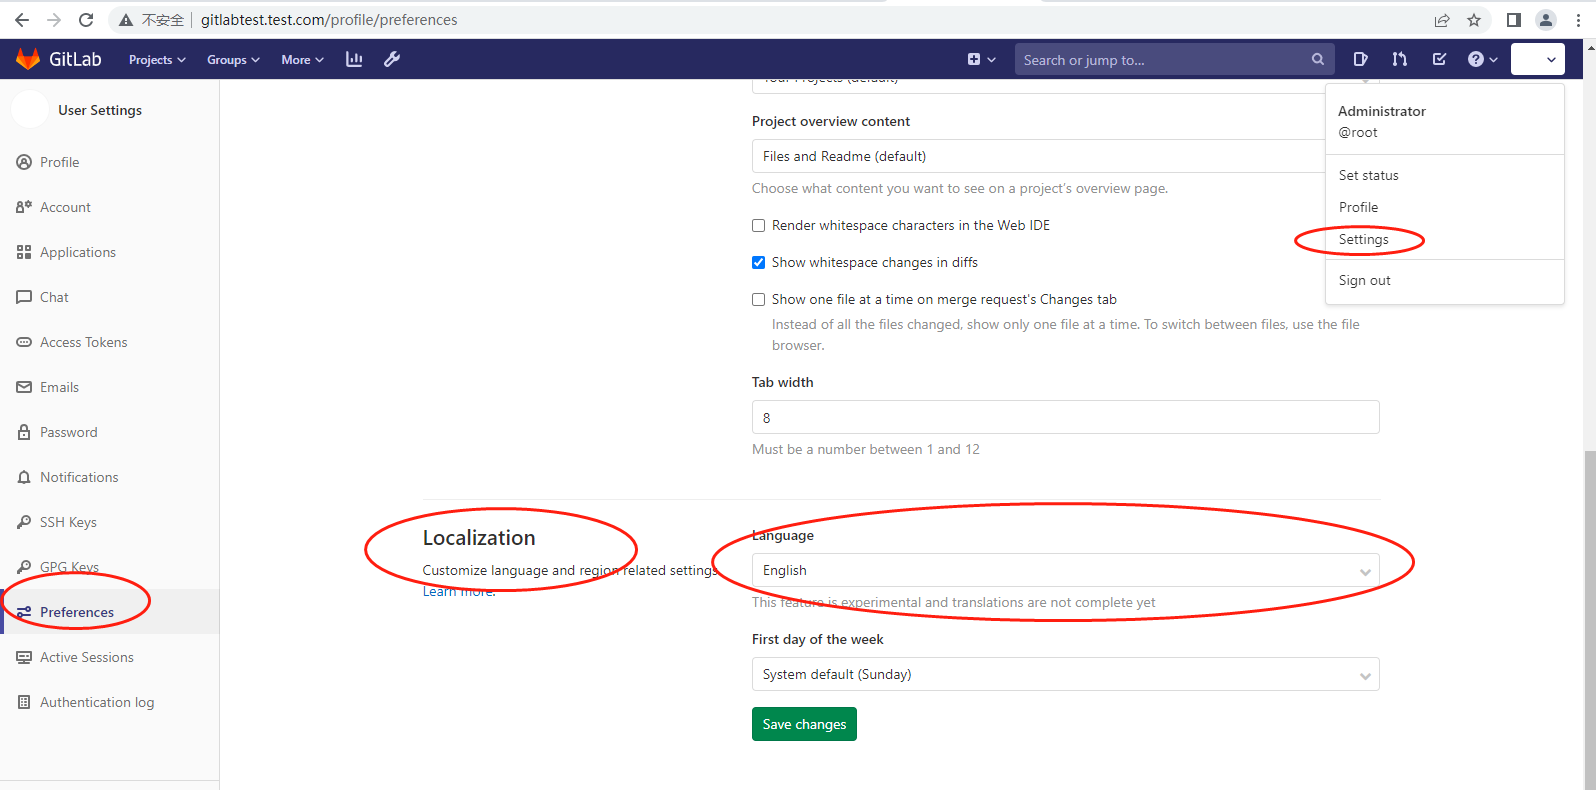
继续登陆gitlab页面
修改默认语言为中文:
10.git创建公钥与基础配置
#配置用户caitiantian@bis.com.cn caitiantian@youjivest.com

git config

git config --global user.name 'quanying'

git config --global user.email 'quanying@bis.com.cn'

git config --global user.email 'caitiantian@youjivest.com'

git config --global user.email 'quanying@bis.com.cn'

quanying@bis.com.cn

git config --global color.ui true

git config --global --list

git init 初始化本地仓库目录

git config --global 邮箱,用户名,颜色

git add 提交数据到缓冲区(暂存区) git add . (所有文件) 或 git add 文件

git commit 把暂存区的数据提交到本地仓库 git commit -m "标记/说明"

git status 显示工作空间的状态

git reset 回滚

git reset --soft cid(版本号) 把指定的版本数据内容下载到暂存区

git reset HEAD 暂存区--->工作空间(被修改的状态)

git checkout 文件下载到工作空间并可以使用 git checkout . 或 git checkout 文件

git reset --mix 版本号

git reset --hard 版本号 把本地仓库指定版本信息数据下载到工作目录中

git branch 查看分支

git branch name 创建分支

git branch -d name 删除分支

git checkout 分支名字 切换分支

git merge 分支名字 合并(吸收)分支(把指定的分支合并到当前分支中)

git checkout -b name 创建分支并切换到这个分支

-------------

git config --global user.name “输入你的用户名”

git config --global user.email “输入你的邮箱”

git config --list

#查看配置好的用户名和密码添加远程仓库,

#由于本地 Git 仓库和 Gitlab 仓库之间的传输是通过SSH加密的,

#所以我们需要配置验证信息quanying@bis.com.cn

ssh-keygen -t rsa -C “刚才输入的邮箱”

ssh-keygen -t rsa -C “745053486@qq.com”

ssh-keygen -t rsa -C “quanying@bis.com.cn”

#按回车,之后会要求确认路径和输入密码,我们这使用默认的一路回车就行,

#会在C:\Users\lshel\.ssh会生成公钥和私钥文件

----------

Git 全局设置

git config --global user.name "Administrator"

git config --global user.email "admin@example.com"

创建一个新仓库

git clone http://gitlabtest.test.com/root/test_project.git

git clone https://git.youjivest.com/esg/esg-spider.git

cd test_project

touch README.md

git add README.md

git commit -m "add README"

git push -u origin master

推送现有文件夹

cd existing_folder

git init

git remote add origin http://gitlabtest.test.com/root/test_project.git

git add .

git commit -m "Initial commit"

git push -u origin master

推送现有的 Git 仓库

cd existing_repo

git remote rename origin old-origin

git remote add origin http://gitlabtest.test.com/root/test_project.git

git push -u origin --all

git push -u origin --tags
11.gitlab镜像仓库配置文件
[root@gitlabtest ssl]# egrep -v "^#" /etc/gitlab/gitlab.rb |egrep -v "^$"

external_url 'http://gitlabtest.test.com'

gitlab_rails['object_store']['enabled'] = false

gitlab_rails['object_store']['connection'] = {}

gitlab_rails['object_store']['proxy_download'] = false

gitlab_rails['object_store']['objects']['artifacts']['bucket'] = nil

gitlab_rails['object_store']['objects']['external_diffs']['bucket'] = nil

gitlab_rails['object_store']['objects']['lfs']['bucket'] = nil

gitlab_rails['object_store']['objects']['uploads']['bucket'] = nil

gitlab_rails['object_store']['objects']['packages']['bucket'] = nil

gitlab_rails['object_store']['objects']['dependency_proxy']['bucket'] = nil

gitlab_rails['object_store']['objects']['terraform_state']['bucket'] = nil

gitlab_rails['smtp_enable'] = true

gitlab_rails['smtp_address'] = "smtp.163.com"

gitlab_rails['smtp_port'] = 465

gitlab_rails['smtp_user_name'] = "15201581995@163.com"

gitlab_rails['smtp_password'] = "ULPRYHQRCSLCMITL"

gitlab_rails['smtp_domain'] = "163.com"

gitlab_rails['smtp_authentication'] = "login"

gitlab_rails['smtp_enable_starttls_auto'] = true

gitlab_rails['smtp_tls'] = true

registry_external_url 'https://registry.youjivest.com'

gitlab_rails['registry_enabled'] = true

registry_nginx['redirect_http_to_https'] = true

registry['enable'] = true

registry['dir'] = "/var/opt/gitlab/registry"

gitlab_rails['ldap_enabled'] = true

gitlab_rails['prevent_ldap_sign_in'] = false

gitlab_rails['ldap_servers'] = {

'main' => {

  'label' => 'freeIPA',

  'host' =>  'ipa.test.com',

  'port' => 636,

  'uid' => 'uid',

  'encryption' => 'simple_tls',

  'bind_dn' => 'uid=admin,cn=users,cn=accounts,dc=test,dc=com',

  'password' => 'chenhu1.',

   'ca_file' => '/etc/ipa/ca.crt',

  'timeout' => 10,

  'active_directory' => true,

  'allow_username_or_email_login' => false,

  'block_auto_created_users' => false,

  'base' => 'cn=users,cn=accounts,dc=test,dc=com',

  'user_filter' => '(&(objectClass=posixAccount)(memberOf=cn=ipausers,cn=groups,cn=accounts,dc=test,dc=com))',

  'attributes' => {

    'username' => ['uid', 'userid', 'sAMAccountName'],

    'email' => ['mail', 'email', 'userPrincipalName'],

    'name' => 'cn',

    'first_name' => 'givenName',

    'last_name' => 'sn'

  },

  'lowercase_usernames' => false,

  # EE Only

  'group_base' => 'cn=groups,cn=accounts,dc=test,dc=com',

  'admin_group' => 'admin',

  'sync_ssh_keys' => false

  }

}

[root@gitlabtest ssl]#
gitlab与LDAP 联调的更多相关文章
- 配置Gitlab使用LDAP认证
1. 通过SSH登陆Gitlab服务器. 2. 进行以下配置文件夹. [root@c720141 ~]# cd /etc/gitlab/ 3. 打开gitlab.rb配置文件,并加入以下配置. git ...
- Gitlab 修改ldap认证
1. 备份数据 2. 修改配置 使用自己搭建的openldap 使用用户中心的openldap 说明:base属性执行所有员工,user_filter属性主要用来实现分组功能.上面的配置是只有ldap ...
- gitlab&fengoffice的ldap配置
1.fengoffice配置config/ldap_config.php $config_ldap = array ( 'binddn' => 'cn=admin,dc=xxx,dc=xxx', ...
- gitlab、openvpn配置ldap认证
gitlab配置ldap认证: vim /etc/gitlab/gitlab.rb 添加以下内容: gitlab_rails['ldap_enabled'] = true gitlab_rails[' ...
- LDAP落地实战(三):GitLab集成OpenLDAP认证
上一篇文章介绍了svn集成OpenLDAP认证,版本控制除了svn外,git目前也被越来越多的开发者所喜爱,本文将介绍GitLab如何集成openldap实现账号认证 GitLab集成OpenLDAP ...
- OpenLdap 对接内部系统(Gitlab+Wiki+Jumpserver+Openvpn)配置
LDAP 全称轻量级目录访问协议(英文:Lightweight Directory Access Protocol),是一个运行在 TCP/IP 上的目录访问协议.目录是一个特殊的数据库,它的数据经常 ...
- Gitlab环境快速部署(RPM包方式安装)
之前梳理了一篇Gitlab的安装CI持续集成系统环境---部署Gitlab环境完整记录,但是这是bitnami一键安装的,版本比较老.下面介绍使用rpm包安装Gitlab,下载地址:https://m ...
- gitlab安装、配置与阿里云产品集成
https://www.ilanni.com/?p=12819 一.gitlab安装与部署 gitlab的安装可以分为源码安装和通过安装包进行安装,要是按照我以前的写作习惯的话,我也会把源码安装在本文 ...
- centos7下源码方式安装gitlab8.9+发送邮件+ldap
CentOS7下源码方式安装gitlab 环境描述 操作系统: centos7 redis: >=2.8 mysql >=5.5.14 git >=2.7.4 架构设计 一台gitl ...
- CentOS6.5 安装gitlab以及gitolite迁移gitlab
CentOS6.5 安装gitlab以及gitolite迁移gitlab gitlab 的安装使用以及数据结构 安装 环境: CentOS6.5 基于 nignx + unicorn 搭建的应用环境, ...
随机推荐
- 源代码管理工具——Git
Git是一个开源的分布式版本控制系统,用于管理软件开发中的版本控制和协作.通过Git,开发人员可以记录文件的修改历史.协作开发,以及在多个分支上进行实验性开发.Git已成为现代软件开发中不可或缺的工具 ...
- SQL后半部和JDBC
SQL后半部 排序order by asc 升序desc 降序select *from 表名 order by 列名 asc ; select *from 表名 order by 列名 asc , 列 ...
- .net 温故知新【11】:Asp.Net Core WebAPI 入门使用及介绍
在Asp.Net Core 上面由于现在前后端分离已经是趋势,所以asp.net core MVC用的没有那么多,主要以WebApi作为学习目标. 一.创建一个WebApi项目 我使用的是VS2022 ...
- 文件系统考古2:1984 - BSD Fast Filing System
今天继续与大家分享系列文章<50 years in filesystems>,由 KRISTIAN KÖHNTOPP 撰写. 我们将进入文件系统的第二个十年,即1984年,计算机由微型计算 ...
- 【可视化大屏】用Python开发「淄博烧烤」微博热评舆情分析大屏
目录 一.开发背景 二.爬虫代码 2.1 爬微博列表 2.2 爬微博评论 2.3 导入MySQL数据库 三.可视化代码 3.1 大标题 3.2 词云图(含:加载停用词) 3.3 玫瑰图(含:snown ...
- 一篇文章带你入门HBase
本文已收录至Github,推荐阅读 Java随想录 微信公众号:Java随想录 目录 HBase特性 Hadoop的限制 基本概念 NameSpace Table RowKey Column Time ...
- 驱动开发:内核RIP劫持实现DLL注入
本章将探索内核级DLL模块注入实现原理,DLL模块注入在应用层中通常会使用CreateRemoteThread直接开启远程线程执行即可,驱动级别的注入有多种实现原理,而其中最简单的一种实现方式则是通过 ...
- 关于Abp Vnext 权限授权的问题
一.问题 最近收到一位朋友的求助,说他项目上的权限授权出现了问题,现象是在基础服务授权角色:RC 权限:X.Default,在基础服务使用RC角色的用户登录能访问到权限X.Default资源,而在X服 ...
- 从源码级深入剖析Tomcat类加载原理
众所周知,Java中默认的类加载器是以父子关系存在的,实现了双亲委派机制进行类的加载,在前文中,我们提到了,双亲委派机制的设计是为了保证类的唯一性,这意味着在同一个JVM中是不能加载相同类库的不同版本 ...
- .NET写一个自己的Lambda表达式与表达式树
LambdaExpression继承Expression Expression又继承LambdaExpressio 所以,Expression与 Expression的区别在于:泛型类以静态类型的方法 ...