搭建 spring boot + mybatis plus 项目框架并进行调试
本文为博主原创,未经允许不得转载:
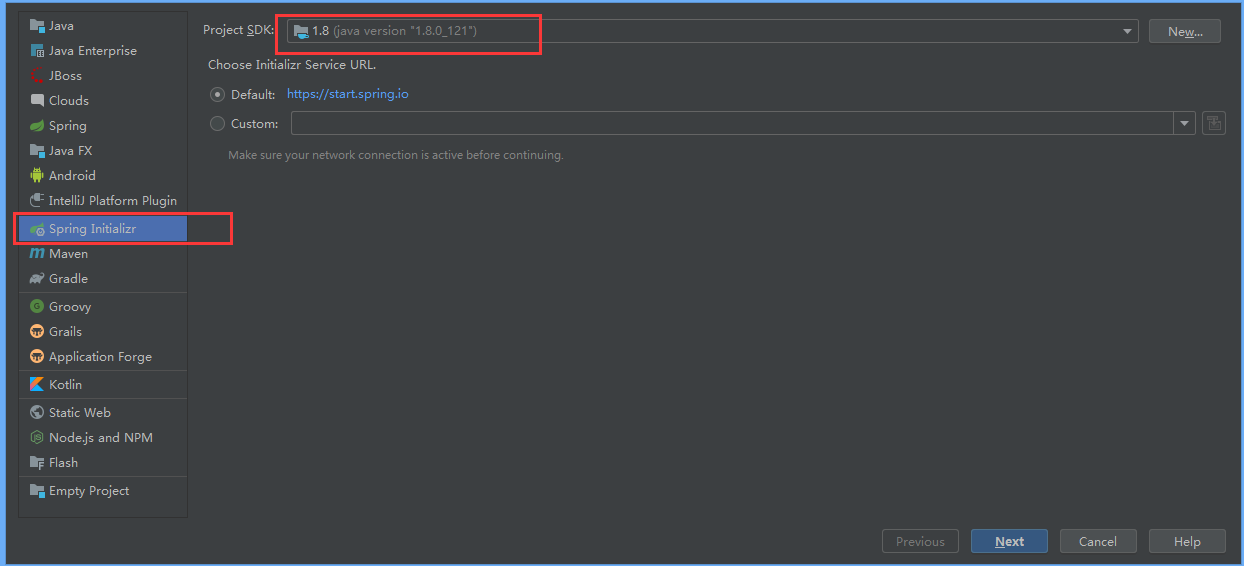
1.创建一个spring boot的工程应用:
File ---- > New ----->Project ----> 然后选中Spring Initializr 继续创建:
2.添加spring boot ,mybatis plus 以及 mysql 相关的依赖:
 <dependencies>

        <!-- spring boot web启动 -->

        <dependency>

            <groupId>org.springframework.boot</groupId>

            <artifactId>spring-boot-starter-web</artifactId>

        </dependency>

        <dependency>

            <groupId>org.projectlombok</groupId>

            <artifactId>lombok</artifactId>

            <optional>true</optional>

        </dependency>

        <dependency>

            <groupId>org.springframework.boot</groupId>

            <artifactId>spring-boot-starter-test</artifactId>

            <scope>test</scope>

        </dependency>

        <!-- mysql 数据库连接 -->

        <dependency>

            <groupId>mysql</groupId>

            <artifactId>mysql-connector-java</artifactId>

            <scope>runtime</scope>

        </dependency>

        <!-- mybatis plus 代码生成器 -->

        <dependency>

            <groupId>com.baomidou</groupId>

            <artifactId>mybatis-plus-boot-starter</artifactId>

            <version>3.2.0</version>

        </dependency>

        <dependency>

            <groupId>com.alibaba</groupId>

            <artifactId>fastjson</artifactId>

            <version>1.2.47</version>

        </dependency>

        <!-- https://mvnrepository.com/artifact/javax.persistence/persistence-api -->

        <dependency>

            <groupId>javax.persistence</groupId>

            <artifactId>persistence-api</artifactId>

            <version>1.0</version>

        </dependency>

    </dependencies>
3. spring boot 的配置文件中配置项目启动名称,端口号,数据库连接等:
此处需要注意的是:spring boot 项目的配置文件是application.properties ,不是bootstrap.yml,bootstrap.yml是spring cloud 中定义解析配置文件的格式
server.port=8002

spring.datasource.driver-class-name=com.mysql.cj.jdbc.Driver

spring.datasource.url=jdbc:mysql://127.0.0.1:3306/test?autoReconnect=true&useUnicode=true&characterEncoding=utf8&useSSL=false&serverTimezone=UTC

spring.datasource.username=root

spring.datasource.password=root


# mybatis plus 调用打印 sql

mybatis-plus.configuration.log-impl=org.apache.ibatis.logging.stdout.StdOutImpl
并启动项目,查看启动日志,会打印spring 以及 mybatis plus 的banner 图案

4.创建用户表,定义表结构如下:
CREATE TABLE `user` (

  `id` bigint(20) NOT NULL COMMENT '主键ID',

  `name` varchar(30) DEFAULT NULL COMMENT '姓名',

  `age` int(11) DEFAULT NULL COMMENT '年龄',

  `email` varchar(50) DEFAULT NULL COMMENT '邮箱',

  PRIMARY KEY (`id`)

) ENGINE=InnoDB DEFAULT CHARSET=utf-8;
5. 业务代码:
5.1 创建实体类:
package com.example.demo.entity;

import lombok.Data;

import javax.persistence.Table;

@Data

@Table(name = "user")

public class User {

    private Long id;

    private String name;

    private int age;

    private String email;

}
5.2 创建 mapper,需要继承BaseMapper
mapper接口需要在项目启动时进行加载扫描,可以使用两种方式进行配置:
第一种可以使用 @Mapper注解,在每个mapper接口进行注解,第二种可以在启动类上使用 @MapperScan 注解,其中的值为mapper的包路径
其中@Repository 表示持久层
package com.example.demo.mapper;

import com.baomidou.mybatisplus.core.mapper.BaseMapper;

import com.example.demo.entity.User;

import org.apache.ibatis.annotations.Mapper;

import org.springframework.stereotype.Repository;

@Repository

//@Mapper

public interface UserMapper extends BaseMapper<User> {

}
5.3 创建service 接口,需要继承IService
package com.example.demo.service;

import com.baomidou.mybatisplus.extension.service.IService;

import com.example.demo.entity.User;

import java.util.List;

public interface UserService extends IService<User> {

    /**

     * query all

     * @return

     */

    List<User> queryAllUser();

}
5.4 实现service接口,需要继承 ServiceImpl
package com.example.demo.service.impl;

import com.baomidou.mybatisplus.extension.service.impl.ServiceImpl;

import com.example.demo.entity.User;

import com.example.demo.mapper.UserMapper;

import com.example.demo.service.UserService;

import org.springframework.beans.factory.annotation.Autowired;

import org.springframework.stereotype.Service;

import java.util.List;

@Service

public class UserServiceImpl extends ServiceImpl<UserMapper, User> implements UserService {

    @Autowired

    private UserMapper userMapper;

    @Override

    public List<User> queryAllUser() {

        return userMapper.selectList(null);

    }

}
5.5 创建controller
package com.example.demo.controller;

import com.example.demo.entity.User;

import com.example.demo.service.UserService;

import org.springframework.beans.factory.annotation.Autowired;

import org.springframework.web.bind.annotation.RequestMapping;

import org.springframework.web.bind.annotation.RestController;

import java.util.List;

@RestController

@RequestMapping("/user")

public class UserInfoController {

    @Autowired

    private UserService userService;

    @RequestMapping("/queryAllUser")

    public List<User> queryAllUser(){

        List<User> userList = userService.queryAllUser();

        return userList;

    }

}
6.测试类
测试类需要添加spring boot 的test依赖,其中已经依赖过了junit test 的依赖,不需要再进行单独添加。
package com.example.demo;

import com.alibaba.fastjson.JSON;

import com.baomidou.mybatisplus.core.conditions.query.QueryWrapper;

import com.example.demo.controller.UserInfoController;

import com.example.demo.entity.User;

import com.example.demo.mapper.UserMapper;

import com.example.demo.service.UserService;

import lombok.extern.slf4j.Slf4j;

import org.junit.jupiter.api.Test;

import org.springframework.beans.factory.annotation.Autowired;

import org.springframework.boot.test.context.SpringBootTest;

import java.util.List;

@Slf4j

@SpringBootTest

class DemoApplicationTests {

    @Autowired

    private UserMapper userMapper;

    @Autowired

    private UserService userService;

    @Autowired

    private UserInfoController userInfoController;

    @Test

    void test() {

        QueryWrapper<User> wrapper = new QueryWrapper<>();

        wrapper.eq("name", "2");

        User user = userMapper.selectOne(wrapper);

        log.info("userMapper.selectOne result is {}", JSON.toJSONString(user));

        int count = userService.count();

        System.out.println(count);

        log.info("userService.count() result is {}", count);

        List<User> userList = userInfoController.queryAllUser();

        log.info("userInfoController.queryAllUser() result is {}", JSON.toJSONString(userList));

    }

}
如果使用以上测试时,出现测试类中注入的bean一直为空时,可使用下面的方式:
@RunWith(SpringRunner.class)

@SpringBootTest(classes = GeneratorApp.class, webEnvironment = SpringBootTest.WebEnvironment.RANDOM_PORT)

public class UserTest {
   @Autowired

    private UserService userService;
}
执行以上测试类截图:

7. 配置 mybatis plus 的分页
package com.example.demo.config;

import com.baomidou.mybatisplus.extension.plugins.PaginationInterceptor;

import org.springframework.context.annotation.Bean;

import org.springframework.context.annotation.Configuration;

@Configuration

public class MybatisPlusConfig {

    // 分页插件

    @Bean

    public PaginationInterceptor paginationInterceptor() {

        return new PaginationInterceptor();

    }

}
通过 junit 进行调试
 @Test

    void testPage() {

        Page<User> page = new Page<>(1, 5);

        IPage<User> paVo = userMapper.selectPage(page, null);

        log.info("------------------{}", JSON.toJSONString(paVo));

    }
mybatis plus 分页之后的格式如下:
{

    "current": 1,

    "orders": [],

    "pages": 1,

    "records": [{

        "age": 3,

        "email": "4",

        "id": 1,

        "name": "2"

    }, {

        "age": 23,

        "email": "344",

        "id": 1352980081638248450,

        "name": "test"

    }, {

        "age": 23,

        "email": "344",

        "id": 1352980446211342337,

        "name": "test"

    }, {

        "age": 23,

        "email": "344",

        "id": 1352980660057944066,

        "name": "test"

    }],

    "searchCount": true,

    "size": 5,

    "total": 4

}
搭建框架过程中遇到的坑:
1. spring boot start启动的依赖是 spring-boot-starter-web ,不是 spring-boot-starter
        <dependency>

            <groupId>org.springframework.boot</groupId>

            <artifactId>spring-boot-starter-web</artifactId>

        </dependency>
2. spring boot 默认解析的配置文件是 application.properties 文件,不是bootstrap.yaml , bootstrap.yaml 是spring cloud 中加载解析的配置文件格式
搭建 spring boot + mybatis plus 项目框架并进行调试的更多相关文章
- myEclipse 搭建 Spring boot+myBatis+maven 项目流程
1.新建一个工程 new-->maven project-->next-->next-->在filter中搜索webapp-->group id.Artifact id- ...
- spring boot+mybatis+quartz项目的搭建完整版
1. 利用spring boot提供的工具(http://start.spring.io/)自动生成一个标准的spring boot项目架构 2. 因为这里我们是搭建spring boot+mybat ...
- Maven 搭建spring boot多模块项目(附源码),亲测可以,感谢原创
原创地址:https://segmentfault.com/a/1190000005020589 我的DEMO码云地址,持续添加新功能: https://gitee.com/itbase/Spring ...
- Maven 搭建spring boot多模块项目
Maven 搭建spring boot多模块项目 备注:所有项目都在idea中创建 1.idea创建maven项目 1-1: 删除src,target目录,只保留pom.xml 1-2: 根目录pom ...
- spring Boot + MyBatis + Maven 项目,日志开启打印 sql
在 spring Boot + MyBatis + Maven 项目中,日志开启打印 sql 的最简单方法,就是在文件 application.properties 中新增: logging.leve ...
- idea搭建Spring Boot+Mybatis及使用教程
环境准备 idea 15 jDK tomcat maven 搭建方式 官网下载源码包解压缩 使用idea中的Spring initializr创建 这两种方法创建的项目完全相同,只是操作方式不一样 这 ...
- Maven搭建Spring+SpringMVC+Mybatis+Shiro项目详解
一. 环境搭建: 1. 开发工具:myeclipse 2014 / IDEA: 2. maven管理版本:apache-maven-3.0+: 3. jdk 1.7.0+4. Tomcat8.0 二: ...
- idea搭建Spring Boot+MyBatis
需要准备的环境: idea 2017.2 jdk1.8.0_144 Maven 3.5.0 请提前将idea与Maven.jdk配置好,本次项目用的都是比较新的. 步骤: 一.首先使用idea新建一个 ...
- spring boot + mybatis + layui + shiro后台权限管理系统
后台管理系统 版本更新 后续版本更新内容 链接入口: springboot + shiro之登录人数限制.登录判断重定向.session时间设置:https://blog.51cto.com/wyai ...
- Spring boot+Mybatis+MySQL插入中文乱码
转载:https://www.jianshu.com/p/bd0311a33c16 现象: 搭建spring boot+mybatis+mysql时出现插入mysql的中文出现乱码???. mys ...
随机推荐
- 神经网络优化篇:机器学习基础(Basic Recipe for Machine Learning)
机器学习基础 下图就是在训练神经网络用到的基本方法:(尝试这些方法,可能有用,可能没用) 这是在训练神经网络时用到地基本方法,初始模型训练完成后,首先要知道算法的偏差高不高,如果偏差较高,试着评估训练 ...
- 10 个免费的 AI 图片生成工具分享
原文: https://openaigptguide.com/ai-picture-generator/ 在人工智能(AI)图像生成技术的推动下,各类AI图片生成网站如雨后春笋般涌现,为我们的日常生活 ...
- Python 潮流周刊第 32 期(摘要)
本周刊由 Python猫 出品,精心筛选国内外的 250+ 信息源,为你挑选最值得分享的文章.教程.开源项目.软件工具.播客和视频.热门话题等内容.愿景:帮助所有读者精进 Python 技术,并增长职 ...
- 记一次 .NET某工控 宇宙射线 导致程序崩溃分析
一:背景 1. 讲故事 为什么要提 宇宙射线, 太阳耀斑 导致的程序崩溃呢?主要是昨天在知乎上看了这篇文章:莫非我遇到了传说中的bug? ,由于 rip 中的0x41变成了0x61出现了bit位翻转导 ...
- Java多线程学习(Day02)
目录 线程简介 线程实现(重点) 线程状态 线程同步(重点) 线程通信问题 线程实现: 方式一:继承Thread类 /** * TODO * @author 清莲孤舟 * @CreateDate 20 ...
- IntelliJ IDEA下载安装,以及关联gitee
https://www.jetbrains.com.cn/ 点击下载 IntelliJ IDEA Ultimate 旗舰版(收费) IntelliJ IDEA Community 社区版(免费) 安装 ...
- 从零玩转SpringSecurity+JWT整合前后端分离-从零玩转springsecurityjwt整合前后端分离
title: 从零玩转SpringSecurity+JWT整合前后端分离 date: 2021-05-06 14:56:57.699 updated: 2021-12-26 17:43:19.478 ...
- 文心一言 VS 讯飞星火 VS chatgpt (18)-- 算法导论4.1 5题
五.使用如下思想为最大子数组问题设计一个非递归的.线性时间的算法.从数组的左边界开始,由左至右处理,记录到目前为止已经处理过的最大子数组.若已知 A[1..j]门的最大子数组,基于如下性质将解扩展为 ...
- C++篇:第九章_字符串_知识点大全
C++篇为本人学C++时所做笔记(特别是疑难杂点),全是硬货,虽然看着枯燥但会让你收益颇丰,可用作学习C++的一大利器 九.字符串 可以用[ ]进行下标访问 使用string类需将头文件包含在程序中, ...
- Angular:都2021年了,你为啥还没用Angular
摘要:数据绑定是将应用程序UI或用户界面绑定到模型的机制.使用数据绑定,用户将能够使用浏览器来操纵网站上存在的元素. Web开发需要模型和视图之间的数据同步.这些模型基本上包含数据值,而视图则处理用户 ...