SpringBoot+Shiro+LayUI权限管理系统项目-4.实现部门管理
1.说明
只讲解关键部分,详细看源码,文章下方捐赠或QQ联系捐赠获取。
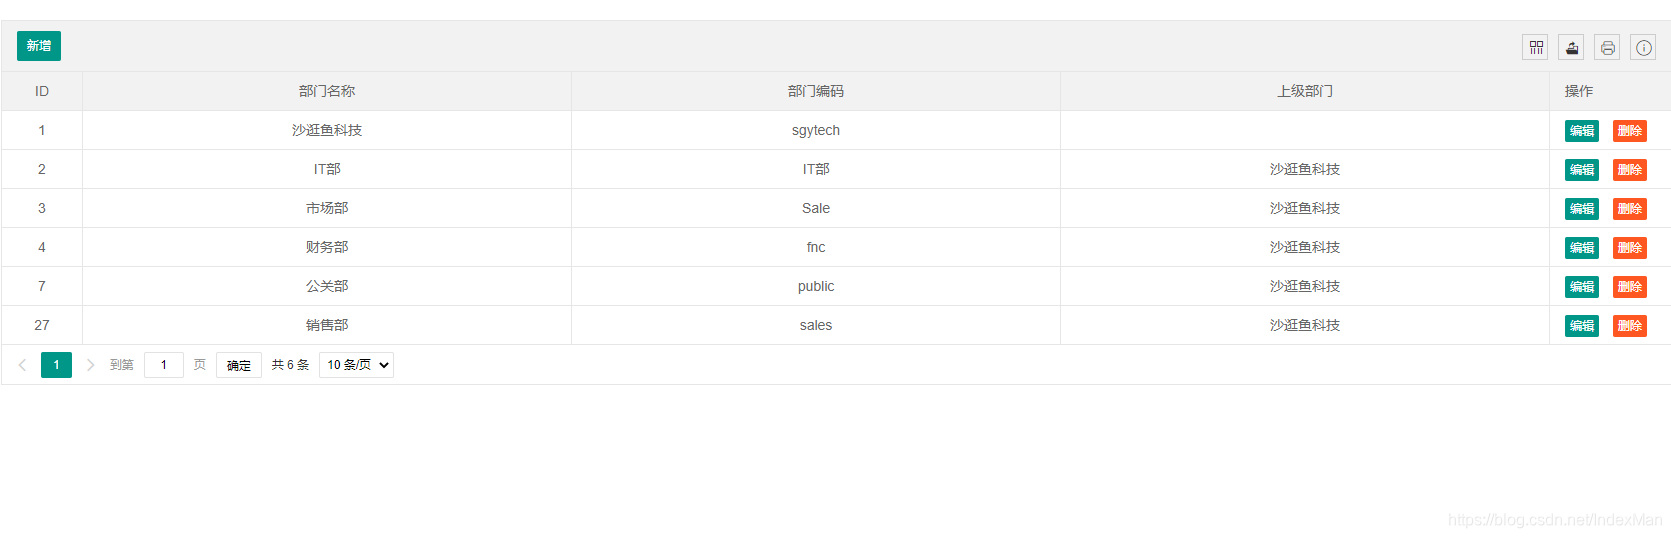
2.功能展示

3.业务模型
@Data

@EqualsAndHashCode(callSuper = false)

@Accessors(chain = true)

@TableName("sys_dept")

public class SysDept implements Serializable {

    private static final long serialVersionUID = 1L;

    @TableId(value = "id", type = IdType.AUTO)

    private Integer id;

    /**

     * 上级部门ID

     */

    private Integer pid;

    /**

     * 所有上级部门ID, 0为根,格式:0,1,2,

     */

    private String pids;

    /**

     * 部门名称

     */

    private String deptName;

    /**

     * 部门编码

     */

    private String deptCode;

    @TableField(exist=false)

    private String pname;

    /**

     * 创建时间

     */

    @TableField(fill = FieldFill.INSERT)

    private Date createTime;

    /**

     * 创建人

     */

    private String createUser;

    /**

     * 修改时间

     */

    @TableField(fill = FieldFill.INSERT_UPDATE)

    private Date updateTime;

    /**

     * 修改人

     */

    private String updateUser;

}
4.控制器
@Controller

@RequestMapping("/sysDept/")

public class SysDeptController {

    @Autowired

    private SysDeptService sysDeptService;

    @GetMapping("listUI")

    public String listUI() {

        return "dept/list";

    }

    @RequestMapping("form")

    public String form(Map<String,Object> map) {

        return "dept/form";

    }

    @GetMapping("toSelectTree")

    public String toSelectTree() {

        return "dept/selectTree";

    }

    @PostMapping("list")

    @ResponseBody

    public Result<IPage<SysDept>> list(@RequestParam(defaultValue = "1") Integer pageNo,

                                       @RequestParam(defaultValue = "10") Integer pageSize) {

        // 构造分页查询条件

        QueryWrapper<SysDept> queryWrapper = new QueryWrapper<>();

        Page<SysDept> page = new Page<>(pageNo,pageSize);

        IPage<SysDept> result = sysDeptService.selectDeptList(page, null);

        // 设置总记录数

        result.setTotal(sysDeptService.count(queryWrapper));

        sysDeptService.count(queryWrapper);

        return ResultUtil.ok(result);

    }

    @GetMapping("listTree")

    @ResponseBody

    public Object listTree() {

        // User user = getUserEntity();

        // 构建查询条件,从根查找

        QueryWrapper<SysDept> queryWrapper = new QueryWrapper<>();

        // queryWrapper.like("pids", user.getDept().getPids()+user.getDeptId()).or().eq("id",user.getDeptId());

        queryWrapper.like("pids", 0);

        List<SysDept> list = sysDeptService.list(queryWrapper);

        return list;

    }

    @OperLog(operModule = "部门管理",operType = "修改",operDesc = "修改部门")

    @PostMapping("save")

    @ResponseBody

    public Result<String> add(@RequestBody SysDept dept){

        // 新增

        if(dept.getId()==null){

            dept.setCreateTime(new Date());

            dept.setCreateUser("TODO");

        }

        // 设置上级部门ID

        if(dept.getPid()!=0){

            // 获取上级部门的ids然后拼接上级部门id

            SysDept parentDept = sysDeptService.getById(dept.getPid());

            dept.setPids(parentDept.getPids()+dept.getPid()+",");

        }

        if(!sysDeptService.saveOrUpdate(dept)){

            return ResultUtil.fail("添加失败");

        }

        return ResultUtil.ok("添加成功");

    }

    @OperLog(operModule = "部门管理",operType = "删除",operDesc = "删除部门")

    @PostMapping("/remove")

    @ResponseBody

    public Result<String> remove(@RequestParam Integer id){

        sysDeptService.removeById(id);

        return ResultUtil.ok("删除成功!");

    }

    @RequestMapping(value="{id}/select",method= RequestMethod.GET)

    public String select(Map<String,Object> map,@PathVariable Integer id) {

        SysDept sysDept = sysDeptService.getById(id);

        map.put("record",sysDept);

        return "sysDept/edit";

    }
5.前端页面
<!DOCTYPE html>
<html xmlns:th="http://www.thymeleaf.org" xmlns:shiro="http://www.pollix.at/thymeleaf/shiro">
<head>
<meta charset="utf-8">
<title>部门列表</title>
<meta name="renderer" content="webkit">
<meta http-equiv="X-UA-Compatible" content="IE=edge,chrome=1">
<meta name="viewport" content="width=device-width, initial-scale=1, maximum-scale=1">
<link rel="stylesheet" th:href="@{/static/plugin/layui/css/layui.css}" media="all">
</head>
<body>
<table class="layui-hide" id="SysDept" lay-filter="SysDept"></table>
<input type="text" id="ctx" hidden="hidden" th:value="${#request.getContextPath()}">
<!--编辑表单-->
<div class="layui-row" id="editForm" style="display:none;">
<div class="layui-col-md10">
<form class="layui-form layui-from-pane" action="" style="margin-top:20px">
<input type="text" id="id" name="id" hidden="hidden">
<div class="layui-form-item">
<div class="layui-inline">
<label class="layui-form-label">上级部门</label>
<div class="layui-input-inline">
<input type="text" id="pname" name="pname" required lay-verify="required" autocomplete="off"
placeholder="" class="layui-input">
</div>
<button class="layui-btn layui-btn-sm" id="chooseDeptBtn" type="button">
<i class="layui-icon"></i>
</button>
<input type="hidden" id="pid" name="pid"/>
</div>
<div class="layui-inline">
<label class="layui-form-label">部门名称</label>
<div class="layui-input-inline">
<input type="text" id="deptName" name="deptName" required lay-verify="required" autocomplete="off"
placeholder="" class="layui-input">
</div>
</div>
<div class="layui-inline">
<label class="layui-form-label">部门编码</label>
<div class="layui-input-inline">
<input type="text" id="deptCode" name="deptCode" required lay-verify="required" autocomplete="off"
placeholder="" class="layui-input">
</div>
</div>
</div>
<div class="layui-form-item" style="margin-top:40px">
<div class="layui-input-block">
<button class="layui-btn layui-btn-submit " lay-submit="" lay-filter="confirm">确认</button>
<button type="button" class="layui-btn layui-btn-primary" id="back">关闭</button>
</div>
</div>
</form>
</div>
</div>
<script type="text/html" id="deptToolBar">
<div class="layui-btn-container">
<button class="layui-btn layui-btn-sm" lay-event="add" shiro:hasPermission="dept:add">新增</button>
</div>
</script>
<script type="text/html" id="barDemo">
<a class="layui-btn layui-btn-xs" lay-event="edit" shiro:hasPermission="dept:edit">编辑</a>
<a class="layui-btn layui-btn-danger layui-btn-xs" lay-event="del" shiro:hasPermission="dept:remove">删除</a>
</script>
6 获取源码
捐赠任意金额,评论区留下邮箱发送 :)

SpringBoot+Shiro+LayUI权限管理系统项目-4.实现部门管理的更多相关文章
- SpringBoot框架的权限管理系统
springBoot框架的权限管理系统,支持操作权限和数据权限,后端采用springBoot,MyBatis,Shiro,前端使用adminLTE,Vue.js,bootstrap-table.tre ...
- SpringBoot&Shiro实现权限管理
SpringBoot&Shiro实现权限管理 引言 相信大家前来看这篇文章的时候,是有SpringBoot和Shiro基础的,所以本文只介绍整合的步骤,如果哪里写的不好,恳请大家能指出错误,谢 ...
- Asp.Net Core 项目实战之权限管理系统(6) 功能管理
0 Asp.Net Core 项目实战之权限管理系统(0) 无中生有 1 Asp.Net Core 项目实战之权限管理系统(1) 使用AdminLTE搭建前端 2 Asp.Net Core 项目实战之 ...
- SpringBoot+Shiro学习(七):Filter过滤器管理
SpringBoot+Shiro学习(七):Filter过滤器管理 Hiwayz 关注 0.5 2018.09.06 19:09* 字数 1070 阅读 5922评论 1喜欢 20 先从我们写的一个 ...
- spring boot + mybatis + layui + shiro后台权限管理系统
后台管理系统 版本更新 后续版本更新内容 链接入口: springboot + shiro之登录人数限制.登录判断重定向.session时间设置:https://blog.51cto.com/wyai ...
- niaobulashi-一个基于springboot shrio的权限管理系统
github项目地址:https://github.com/niaobulashi/niaobulashi springboot学习地址:http://www.ityouknow.com/spring ...
- .NET Core/.NET5/.NET6 开源项目汇总5:权限管理系统项目
系列目录 [已更新最新开发文章,点击查看详细] 企业管理系统一般包含后台管理UI.组织机构管理.权限管理.日志.数据访问.表单.工作流等常用必备功能.下面收集的几款优秀开源的管理系统,值得大家 ...
- 基于easyUI实现权限管理系统(三)——角色管理
此文章是基于 EasyUI+Knockout实现经典表单的查看.编辑 一. 相关文件介绍 1. role.jsp:角色管理界面 <!DOCTYPE html PUBLIC "-//W3 ...
- springboot + shiro 构建权限模块
权限模块基本流程 权限模块的基本流程:用户申请账号和权限 -->登陆认证 -->安全管控模块认证 -->调用具体权限模块(基于角色的权限控制) --> 登陆成功 -->访 ...
- 基于easyUI实现权限管理系统(四)——用户管理
此文章是基于 EasyUI+Knockout实现经典表单的查看.编辑 一. 相关文件介绍 1. user.jsp:用户管理界面 <!DOCTYPE html PUBLIC "-//W3 ...
随机推荐
- [转帖]shell脚本字符串截取的8种方法
https://www.cnblogs.com/zwgblog/p/6031256.html 假设有变量 var=http://www.aaa.com/123.htm. 1. # 号截取,删除左边字符 ...
- [转帖]在麒麟Linux安装Postgis
https://jimolonely.github.io/tech/linux/install-postgis-kylin/ 接着上一篇在麒麟linux上安装Postgresql12.5 ,我们来安装 ...
- [转帖]iozone - 性能压力测试工具
<存储工具系列文章>主要介绍存储相关的测试和调试工具,包括不限于dd.fio.vdbench.iozone.iometer.cosbench等性能负载工具,及strace等调试工具. 1 ...
- Flutter开发桌面应用的一些探索
引言 在移动应用开发领域,Flutter已经赢得了广泛的认可和采用,成为了跨平台移动应用开发的瑞士军刀.然而,Flutter的魅力并不仅限于移动平台,它还可以用于开发桌面应用程序,为开发人员提供了一种 ...
- 如何区分Unity国内版和国际版
从这三个地方都可以判断使用的Unity是国内版本还是国际版,国内版的版本号后面会多出c1,而国际版则不会有c1结尾. 安装目录名 unity hub - 安装 - 查看当前安装的Unity各版本 un ...
- 语义检索系统之排序模块:基于ERNIE-Gram的Pair-wise和基于RocketQA的CrossEncoder训练的单塔模型
语义检索系统之排序模块:基于ERNIE-Gram的Pair-wise和基于RocketQA的CrossEncoder训练的单塔模型 文本匹配任务数据每一个样本通常由两个文本组成(query,title ...
- 大语言模型的预训练[1]:基本概念原理、神经网络的语言模型、Transformer模型原理详解、Bert模型原理介绍
大语言模型的预训练[1]:基本概念原理.神经网络的语言模型.Transformer模型原理详解.Bert模型原理介绍 1.大语言模型的预训练 1.LLM预训练的基本概念 预训练属于迁移学习的范畴.现有 ...
- 深度学习基础入门篇[六]:模型调优,学习率设置(Warm Up、loss自适应衰减等),batch size调优技巧,基于方差放缩初始化方法。
深度学习基础入门篇[六]:模型调优,学习率设置(Warm Up.loss自适应衰减等),batch size调优技巧,基于方差放缩初始化方法. 1.学习率 学习率是训练神经网络的重要超参数之一,它代表 ...
- 5.1 内存CRC32完整性检测
CRC校验技术是用于检测数据传输或存储过程中是否出现了错误的一种方法,校验算法可以通过计算应用与数据的循环冗余校验(CRC)检验值来检测任何数据损坏.通过运用本校验技术我们可以实现对特定内存区域以及磁 ...
- socket编程 [补档-2023-07-10]
Linux网络编程 1.socket编程 socket是一种通信机制,用于在网络中不同计算机之间进行数据传输,当然也可用用于进程间通信.在linux中,有文件描述符这么个东西,我们可以通过socket ...