Pytest自动化测试 - 必知必会的一些插件

Pytest拥有丰富的插件架构,超过800个以上的外部插件和活跃的社区,在PyPI项目中以“ pytest- *”为标识。
本篇将列举github标星超过两百的一些插件进行实战演示。
插件库地址:http://plugincompat.herokuapp.com/
1、pytest-html:用于生成HTML报告
一次完整的测试,测试报告是必不可少的,但是pytest自身的测试结果过于简单,而pytest-html正好可以给你提供一份清晰报告。
安装:
pip install -U pytest-html
用例:
# test_sample.py

import pytest

# import time

# 被测功能

def add(x, y):

    # time.sleep(1)

    return x + y

# 测试类

class TestLearning:

    data = [

        [3, 4, 7],

        [-3, 4, 1],

        [3, -4, -1],

        [-3, -4, 7],

    ]

    @pytest.mark.parametrize("data", data)

    def test_add(self, data):

        assert add(data[0], data[1]) == data[2]
运行:
E:\workspace-py\Pytest>pytest test_sample.py --html=report/index.html

========================================================================== test session starts ==========================================================================

platform win32 -- Python 3.7.3, pytest-6.0.2, py-1.9.0, pluggy-0.13.0

rootdir: E:\workspace-py\Pytest

plugins: allure-pytest-2.8.18, cov-2.10.1, html-3.0.0, rerunfailures-9.1.1, xdist-2.1.0

collected 4 items

test_sample.py ...F                                                                                                                                                [100%]

=============================================================================== FAILURES ================================================================================

_____________________________________________________________________ TestLearning.test_add[data3] ______________________________________________________________________

self = <test_sample.TestLearning object at 0x00000000036B6AC8>, data = [-3, -4, 7]

    @pytest.mark.parametrize("data", data)

    def test_add(self, data):

>       assert add(data[0], data[1]) == data[2]

E       assert -7 == 7

E        +  where -7 = add(-3, -4)

test_sample.py:20: AssertionError

------------------------------------------------- generated html file: file://E:\workspace-py\Pytest\report\index.html --------------------------------------------------

======================================================================== short test summary info ========================================================================

FAILED test_sample.py::TestLearning::test_add[data3] - assert -7 == 7

====================================================================== 1 failed, 3 passed in 0.14s ======================================================================
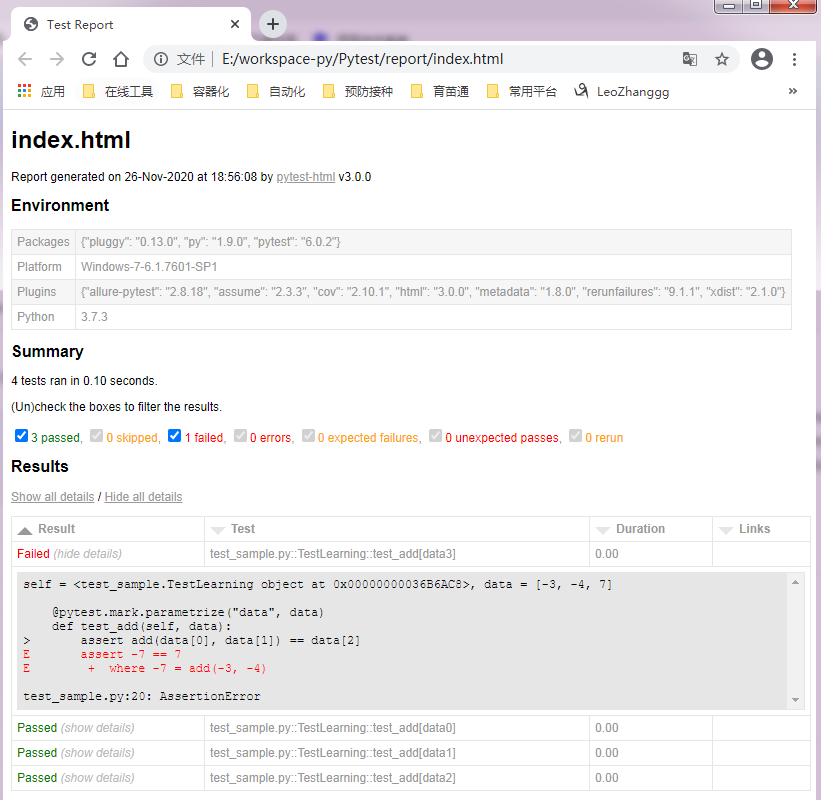
运行完,会生产一个html文件 和 css样式文件夹assets,用浏览器打开html即可查看清晰的测试结果。

后面我将会更新更加清晰美观的测试报告插件: allure-pytest
2、pytest-cov:用于生成覆盖率报告
在做单元测试时,代码覆盖率常常被拿来作为衡量测试好坏的指标,甚至,用代码覆盖率来考核测试任务完成情况。
安装:
pip install -U pytest-cov
运行:
E:\workspace-py\Pytest>pytest --cov=.

========================================================================== test session starts ==========================================================================

platform win32 -- Python 3.7.3, pytest-6.0.2, py-1.9.0, pluggy-0.13.0

rootdir: E:\workspace-py\Pytest

plugins: allure-pytest-2.8.18, cov-2.10.1, html-3.0.0, rerunfailures-9.1.1, xdist-2.1.0

collected 4 items

test_sample.py ....                                                                                                                                                [100%]

----------- coverage: platform win32, python 3.7.3-final-0 -----------

Name             Stmts   Miss  Cover

------------------------------------

conftest.py          5      3    40%

test_sample.py       7      0   100%

------------------------------------

TOTAL               12      3    75%

=========================================================================== 4 passed in 0.06s ===========================================================================
3、pytest-xdist:实现多线程、多平台执行
安装:
pip install -U pytest-xdist
用例:
# test_sample.py

import pytest

import time

# 被测功能

def add(x, y):

    time.sleep(3)

    return x + y

# 测试类

class TestAdd:

    def test_first(self):

        assert add(3, 4) == 7

    def test_second(self):

        assert add(-3, 4) == 1

    def test_three(self):

        assert add(3, -4) == -1

    def test_four(self):

        assert add(-3, -4) == 7
运行:
E:\workspace-py\Pytest>pytest test_sample.py

========================================================================== test session starts ==========================================================================

platform win32 -- Python 3.7.3, pytest-6.0.2, py-1.9.0, pluggy-0.13.0

rootdir: E:\workspace-py\Pytest

plugins: allure-pytest-2.8.18, assume-2.3.3, cov-2.10.1, forked-1.3.0, html-3.0.0, rerunfailures-9.1.1, xdist-2.1.0

collected 4 items

test_sample.py ....                                                                                                                                                [100%]

========================================================================== 4 passed in 12.05s ===========================================================================

E:\workspace-py\Pytest>pytest test_sample.py -n auto

========================================================================== test session starts ==========================================================================

platform win32 -- Python 3.7.3, pytest-6.0.2, py-1.9.0, pluggy-0.13.0

rootdir: E:\workspace-py\Pytest

plugins: allure-pytest-2.8.18, assume-2.3.3, cov-2.10.1, forked-1.3.0, html-3.0.0, rerunfailures-9.1.1, xdist-2.1.0

gw0 [4] / gw1 [4] / gw2 [4] / gw3 [4]

....                                                                                                                                                               [100%]

=========================================================================== 4 passed in 5.35s ===========================================================================

E:\workspace-py\Pytest>pytest test_sample.py -n 2

========================================================================== test session starts ==========================================================================

platform win32 -- Python 3.7.3, pytest-6.0.2, py-1.9.0, pluggy-0.13.0

rootdir: E:\workspace-py\Pytest

plugins: allure-pytest-2.8.18, assume-2.3.3, cov-2.10.1, forked-1.3.0, html-3.0.0, rerunfailures-9.1.1, xdist-2.1.0

gw0 [4] / gw1 [4]

....                                                                                                                                                               [100%]

=========================================================================== 4 passed in 7.65s ===========================================================================
上述分别进行了未开多并发、开启4个cpu、开启2个cpu,从运行耗时结果来看,很明显多并发可以大大缩减你的测试用例运行耗时。
4、pytest-rerunfailures:实现重新运行失败用例
我们在测试时可能会出现一些间接性故障,比如接口测试遇到网络波动,web测试遇到个别插件刷新不及时等,这时重新运行则可以帮忙我们消除这些故障。
安装:
pip install -U pytest-rerunfailures
运行:
E:\workspace-py\Pytest>pytest test_sample.py --reruns 3

========================================================================== test session starts ==========================================================================

platform win32 -- Python 3.7.3, pytest-6.0.2, py-1.9.0, pluggy-0.13.0

rootdir: E:\workspace-py\Pytest

plugins: allure-pytest-2.8.18, assume-2.3.3, cov-2.10.1, forked-1.3.0, html-3.0.0, rerunfailures-9.1.1, xdist-2.1.0

collected 4 items

test_sample.py ...R                                                                                                                                                [100%]R

 [100%]R [100%]F [100%]

=============================================================================== FAILURES ================================================================================

___________________________________________________________________________ TestAdd.test_four ___________________________________________________________________________

self = <test_sample.TestAdd object at 0x00000000045FBF98>

    def test_four(self):

>       assert add(-3, -4) == 7

E       assert -7 == 7

E        +  where -7 = add(-3, -4)

test_sample.py:22: AssertionError

======================================================================== short test summary info ========================================================================

FAILED test_sample.py::TestAdd::test_four - assert -7 == 7

================================================================= 1 failed, 3 passed, 3 rerun in 0.20s ==================================================================
如果你想设定重试间隔,可以使用 --rerun-delay 参数指定延迟时长(单位秒);
如果你想重新运行指定错误,可以使用 --only-rerun 参数指定正则表达式匹配,并且可以使用多次来匹配多个。
pytest --reruns 5 --reruns-delay 1 --only-rerun AssertionError --only-rerun ValueError
如果你只想标记单个测试失败时自动重新运行,可以添加 pytest.mark.flaky() 并指定重试次数以及延迟间隔。
@pytest.mark.flaky(reruns=5, reruns_delay=2)

def test_example():

    import random

    assert random.choice([True, False])
5、pytest-randomly:实现随机排序测试
测试中的随机性非常越大越容易发现测试本身中隐藏的缺陷,并为你的系统提供更多的覆盖范围。
安装:
pip install -U pytest-randomly
运行:
E:\workspace-py\Pytest>pytest test_sample.py

========================================================================== test session starts ==========================================================================

platform win32 -- Python 3.7.3, pytest-6.0.2, py-1.9.0, pluggy-0.13.0

Using --randomly-seed=3687888105

rootdir: E:\workspace-py\Pytest

plugins: allure-pytest-2.8.18, assume-2.3.3, cov-2.10.1, forked-1.3.0, html-3.0.0, randomly-3.5.0, rerunfailures-9.1.1, xdist-2.1.0

collected 4 items

test_sample.py F...                                                                                                                                                [100%]

=============================================================================== FAILURES ================================================================================

___________________________________________________________________________ TestAdd.test_four ___________________________________________________________________________

self = <test_sample.TestAdd object at 0x000000000567AD68>

    def test_four(self):

>       assert add(-3, -4) == 7

E       assert -7 == 7

E        +  where -7 = add(-3, -4)

test_sample.py:22: AssertionError

======================================================================== short test summary info ========================================================================

FAILED test_sample.py::TestAdd::test_four - assert -7 == 7

====================================================================== 1 failed, 3 passed in 0.13s ======================================================================

E:\workspace-py\Pytest>pytest test_sample.py

========================================================================== test session starts ==========================================================================

platform win32 -- Python 3.7.3, pytest-6.0.2, py-1.9.0, pluggy-0.13.0

Using --randomly-seed=3064422675

rootdir: E:\workspace-py\Pytest

plugins: allure-pytest-2.8.18, assume-2.3.3, cov-2.10.1, forked-1.3.0, html-3.0.0, randomly-3.5.0, rerunfailures-9.1.1, xdist-2.1.0

collected 4 items

test_sample.py ...F                                                                                                                                                [100%]

=============================================================================== FAILURES ================================================================================

___________________________________________________________________________ TestAdd.test_four ___________________________________________________________________________

self = <test_sample.TestAdd object at 0x00000000145EA940>

    def test_four(self):

>       assert add(-3, -4) == 7

E       assert -7 == 7

E        +  where -7 = add(-3, -4)

test_sample.py:22: AssertionError

======================================================================== short test summary info ========================================================================

FAILED test_sample.py::TestAdd::test_four - assert -7 == 7

====================================================================== 1 failed, 3 passed in 0.12s ======================================================================
这功能默认情况下处于启用状态,但可以通过标志禁用(假如你并不需要这个模块,建议就不要安装)。
pytest -p no:randomly
如果你想指定随机顺序,可以通过 --randomly-send 参数来指定,也可以使用 last 值来指定沿用上次的运行顺序。
pytest --randomly-seed=4321
pytest --randomly-seed=last
6、其他的框架
还有一些其他功能性比较活跃的、一些专门为个别框架所定制的、以及为了兼容其他测试框架,这里暂不做演示,我就简单的做个列举:
pytest-django:用于测试Django应用程序(Python Web框架)。
pytest-flask:用于测试Flask应用程序(Python Web框架)。
pytest-splinter:兼容Splinter Web自动化测试工具。
pytest-selenium:兼容Selenium Web自动化测试工具。
pytest-testinfra:测试由Salt,Ansible,Puppet, Chef等管理工具配置的服务器的实际状态。
pytest-mock:提供一个mock固件,创建虚拟的对象来实现测试中个别依赖点。
pytest-factoryboy:结合factoryboy工具用于生成各式各样的数据。
pytest-qt:提供为PyQt5和PySide2应用程序编写测试。
pytest-asyncio:用于使用pytest测试异步代码。
pytest-bdd:实现了Gherkin语言的子集,以实现自动化项目需求测试并促进行为驱动的开发。
pytest-watch:为pytest提供一套快捷CLI工具。
pytest-testmon:可以自动选择并重新执行仅受最近更改影响的测试。
pytest-assume:用于每个测试允许多次失败。
pytest-ordering:用于测试用例的排序功能。
作者:Leozhanggg
出处:https://www.cnblogs.com/leozhanggg/p/14041556.html
本文版权归作者和博客园共有,欢迎转载,但未经作者同意必须保留此段声明,且在文章页面明显位置给出原文连接,否则保留追究法律责任的权利。
Pytest自动化测试 - 必知必会的一些插件的更多相关文章
- 2015 前端[JS]工程师必知必会
2015 前端[JS]工程师必知必会 本文摘自:http://zhuanlan.zhihu.com/FrontendMagazine/20002850 ,因为好东东西暂时没看懂,所以暂时保留下来,供以 ...
- [ 学习路线 ] 2015 前端(JS)工程师必知必会 (2)
http://segmentfault.com/a/1190000002678515?utm_source=Weibo&utm_medium=shareLink&utm_campaig ...
- 读书笔记汇总 - SQL必知必会(第4版)
本系列记录并分享学习SQL的过程,主要内容为SQL的基础概念及练习过程. 书目信息 中文名:<SQL必知必会(第4版)> 英文名:<Sams Teach Yourself SQL i ...
- 读书笔记--SQL必知必会--建立练习环境
书目信息 中文名:<SQL必知必会(第4版)> 英文名:<Sams Teach Yourself SQL in 10 Minutes - Fourth Edition> MyS ...
- 读书笔记--SQL必知必会12--联结表
12.1 联结 联结(join),利用SQL的SELECT在数据查询的执行中联结表. 12.1.1 关系表 关系数据库中,关系表的设计是把信息分解成多个表,一类数据一个表,各表通过某些共同的值互相关联 ...
- 读书笔记--SQL必知必会18--视图
读书笔记--SQL必知必会18--视图 18.1 视图 视图是虚拟的表,只包含使用时动态检索数据的查询. 也就是说作为视图,它不包含任何列和数据,包含的是一个查询. 18.1.1 为什么使用视图 重用 ...
- 《MySQL 必知必会》读书总结
这是 <MySQL 必知必会> 的读书总结.也是自己整理的常用操作的参考手册. 使用 MySQL 连接到 MySQL shell>mysql -u root -p Enter pas ...
- 《SQL必知必会》学习笔记(一)
这两天看了<SQL必知必会>第四版这本书,并照着书上做了不少实验,也对以前的概念有得新的认识,也发现以前自己有得地方理解错了.我采用的数据库是SQL Server2012.数据库中有一张比 ...
- SQL 必知必会
本文介绍基本的 SQL 语句,包括查询.过滤.排序.分组.联结.视图.插入数据.创建操纵表等.入门系列,不足颇多,望诸君指点. 注意本文某些例子只能在特定的DBMS中实现(有的已标明,有的未标明),不 ...
- .NET程序员项目开发必知必会—Dev环境中的集成测试用例执行时上下文环境检查(实战)
Microsoft.NET 解决方案,项目开发必知必会. 从这篇文章开始我将分享一系列我认为在实际工作中很有必要的一些.NET项目开发的核心技术点,所以我称为必知必会.尽管这一系列是使用.NET/C# ...
随机推荐
- sql server DDL语句 建立数据库 定义表 修改字段等
一.数据库:1.建立数据库 create database 数据库名;use 数据库名; create database exp1;use exp1; mysql同样 2.删除数据库 drop dat ...
- python机器学习之支持向量机SVM
支持向量机SVM(Support Vector Machine) 关注公众号"轻松学编程"了解更多. [关键词]支持向量,最大几何间隔,拉格朗日乘子法 一.支持向量机的原理 Sup ...
- ssh 和scp 非22端口
ssh :(命令中的 p 小写) ssh -p 端口号 root@服务器ip scp: (命令中的 P 大写)(-r表示将目录下的目录递归拷贝.".*"是将所有文件包括隐藏文件.) ...
- JUC 包下工具类,它的名字叫 LockSupport !你造么?
前言 LockSupport 是 JUC 中常用的一个工具类,主要作用是挂起和唤醒线程.在阅读 JUC 源码中经常看到,所以很有必要了解一下. 公众号:liuzhihangs ,记录工作学习中的技术. ...
- c++11-17 模板核心知识(二)—— 类模板
类模板声明.实现与使用 Class Instantiation 使用类模板的部分成员函数 Concept 友元 方式一 方式二 类模板的全特化 类模板的偏特化 多模板参数的偏特化 默认模板参数 Typ ...
- System.Net邮件发送功能踩过的坑
System.Net邮件发送功能踩过的坑 目录 System.Net邮件发送功能踩过的坑 1.EazyEmail邮件发送类库 2.邮件发送授权码与邮件密码 3.通过邮件密码来发送邮件 4.Wiresh ...
- python动态规划
动态规划: 动态规划表面上很难,其实存在很简单的套路:当求解的问题满足以下两个条件时, 就应该使用动态规划: 主问题的答案 包含了 可分解的子问题答案 (也就是说,问题可以被递归的思想求 ...
- java实现KFC点餐系统
这篇文章主要为大家详细介绍了java实现KFC点餐系统,模拟肯德基快餐店的收银系统,具有一定的参考价值,感兴趣的小伙伴们可以参考一下 同学们应该都去麦当劳或肯德基吃过快餐吧?请同学们参考肯德基官网的信 ...
- Manacher (马拉车) 算法:解决最长回文子串的利器
最长回文子串 回文串就是原串和反转字符串相同的字符串.比如 aba,acca.前一个是奇数长度的回文串,后一个是偶数长度的回文串. 最长回文子串就是一个字符串的所有子串中,是回文串且长度最长的子串. ...
- 是什么让我节省了60%的编码时间?使用MBG
MyBatis Generator简介 业务需求不断变更,数据库表结构不断修改,是我们逃不出的宿命.工欲善其事,必先利其器,是时候祭出神器了:MyBatis Generator(简称:MBG),它是一 ...