Redhat FreeIPA Server 安装服务端和客户端 (实验:VMware环境下)
实验环境:windows7 + vmware 15 + redhat 7
1:准备2台虚拟机:
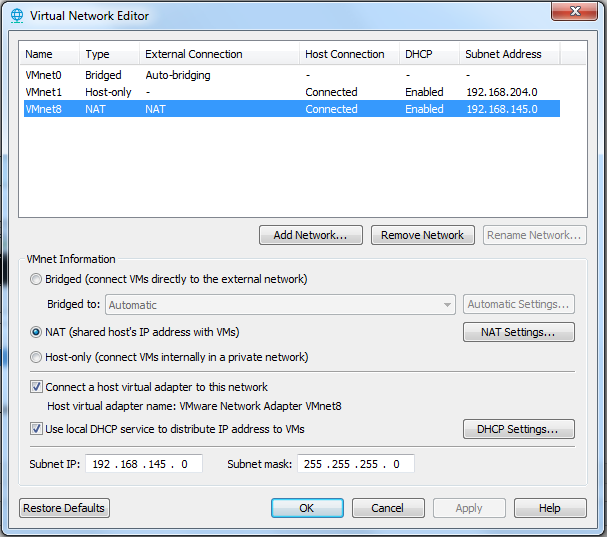
虚拟机VMnet8,Subnet IP:192.168.145.0
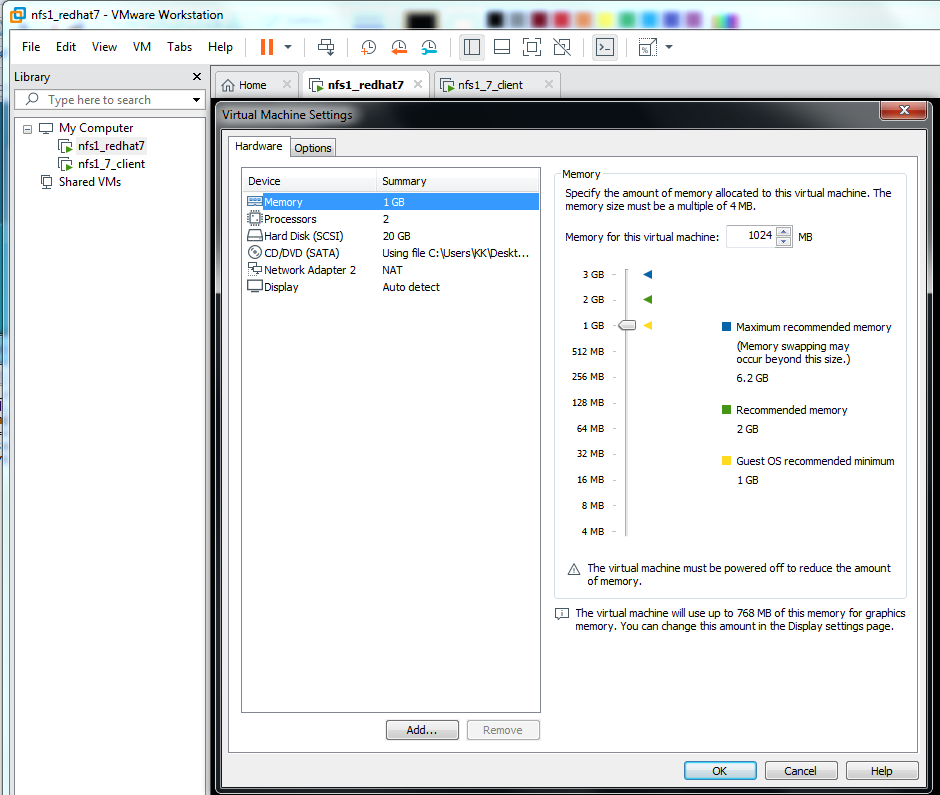
Redhat 7(Server With GUI),1-2G内存
网络配置如下:
服务端:ipa.nfs1.example.com 192.168.145.134
客户端:client.nfs1.example.com 192.168.145.138
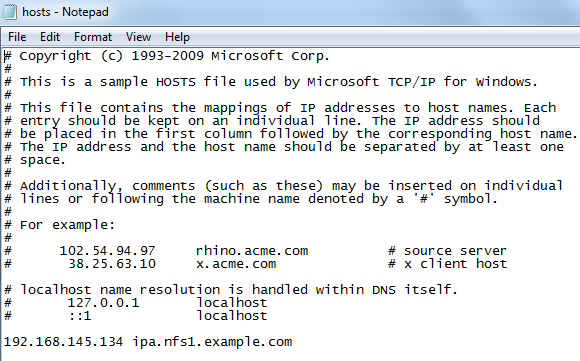
2:在Windows7的C:\Windows\System32\drivers\etc\hosts中加入:
192.168.145.134 ipa.nfs1.example.com
IPA成功配置后,可以在windows浏览器下操作。
========================================================================================
服务端 客户端都要做的步骤:
[确定iso已经挂载到VMware],*****将没有注册的redhat 7中将repo 指向DVD*****
#mount #检查
#umount /dev/sr0 #卸载iso
#mount /dev/sr0 /mnt #挂载iso到mnt
#cd /mnt
#rpm --import RPM-GPG-KEY-redhat-release
#cd Packages/
#rpm -ivh createrepo-0.9.9-23.el7.noarch.rpm
#vi /etc/yum.repos.d/file.repo #编辑repo
[DVDRepo]
name=DVD Repository
baseurl=file:///mnt/
enabled=1
gpgcheck=0
:wq
#cd
#yum clean all
#yum list all
====================================================================
服务端安装
#yum install ipa-server bind dns-ldap bind-dyndb-ldap
#nmtui #依次设置网络
Addresses 192.168.145.134
Gateway 192.168.145.2
DNS servers 192.168.145.2
Search domains nfs1.example.com
hostname ipa.nfs1.example.com
exit #退出
#vi /etc/resolv.conf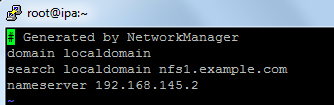
#vi /etc/hosts

#systemctl stop chronyd.service
#systemctl disable chronyd.service
#systemctl restart network
ipa-server-install --setup-dns #开始配置IPA(下面是过程主要内容)
**********************************************************************************
Existing BIND configuration detected, overwrite? [no]:yes
Server host name [ipa.nfs1.example.com]: ipa.nfs1.example.com
Please confirm the domain name [nfs1.example.com]:
Please provide a realm name [NFS1.EXAMPLE.COM]:
Directory Manager password:
IPA admin password:
The IPA Master Server will be configured with:
Hostname: ipa.nfs1.example.com
IP address: 192.168.145.134
Domain name: nfs1.example.com
Realm name: NFS1.EXAMPLE.COM
BIND DNS server will be configured to serve IPA domain with:
Forwarders: 8.8.8.8
Reverse zone: 145.168.192.in-addr.arpa.
Global DNS configuration in LDAP server is empty
You can use 'dnsconfig-mod' command to set global DNS options that
would override settings in local named.conf files
Restarting the web server
Setup complete
Next steps:
1. You must make sure these network ports are open:
TCP Ports:
* 80, 443: HTTP/HTTPS
* 389, 636: LDAP/LDAPS
* 88, 464: kerberos
* 53: bind
UDP Ports:
* 88, 464: kerberos
* 53: bind
* 123: ntp
2. You can now obtain a kerberos ticket using the command: 'kinit admin'
This ticket will allow you to use the IPA tools (e.g., ipa user-add)
and the web user interface.
Be sure to back up the CA certificate stored in /root/cacert.p12
This file is required to create replicas. The password for this
file is the Directory Manager password
*****************************************************************************
DM_password 是kerberos的管理员密码
admin_password 是389-ds的管理员密码
按结束语中的要求修改防火墙:
#firewall-cmd --permanent --add-service=http
#firewall-cmd --permanent --add-service=https
#firewall-cmd --permanent --add-service=ldap
#firewall-cmd --permanent --add-service=ldaps
#firewall-cmd --permanent --add-service=kerberos
#firewall-cmd --permanent --add-port=53/tcp
#firewall-cmd --permanent --add-port=53/udp
#firewall-cmd --permanent --add-port=88/udp
#firewall-cmd --permanent --add-port=123/udp
#firewall-cmd --reload
#firewall-cmd --list
#firewall-cmd --list-all
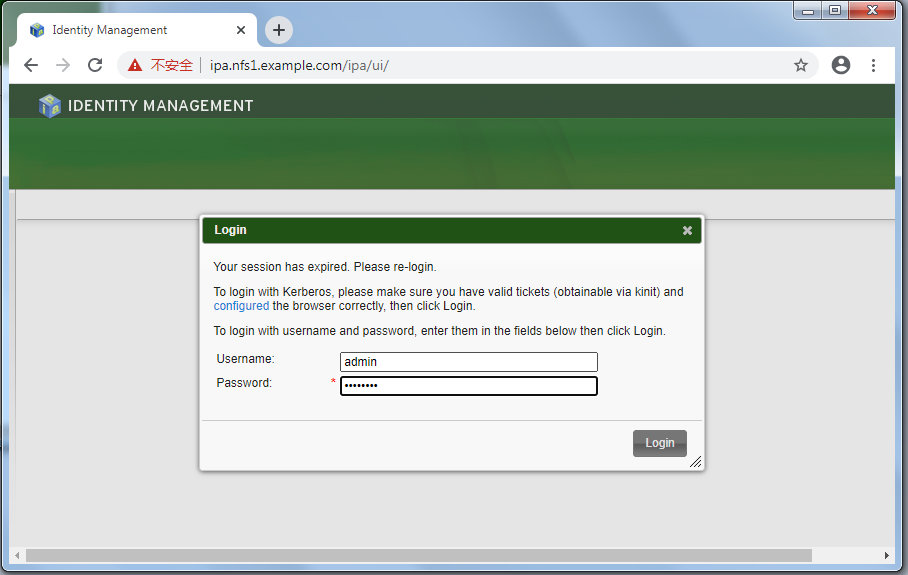
这时可以在Windows下浏览器打开https://ipa.nfs1.example.com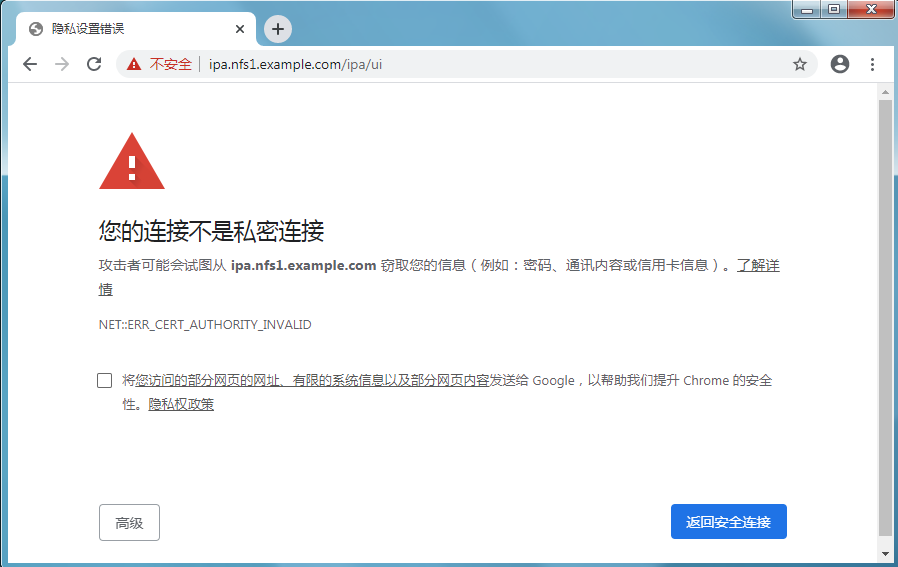

不同浏览器可能略有不同
****************************************************************************************************************************************************************************************************************************
客户端安装
#nmtui
ip:192.168.145.138
gateway:192.168.145.134 (请特别留意此项)
search domain:nfs1.example.com
hostname: client.nfs1.example.com
#vi /etc/resolv.conf
nameserver 192.168.145.134 (请特别留意此项)
#vi /etc/hosts
192.168.145.138 client.nfs1.example.com (请特别留意此项)
#systemctl restart network
#yum install nss-pam-ldapd pam_krg5 ipa-client
#ipa-client-install #开始配置IPA客户端(下面是过程主要内容)
=======================================================================
WARNING: ntpd time&date synchronization service will not be configured as
conflicting service (chronyd) is enabled
Use --force-ntpd option to disable it and force configuration of ntpd
Discovery was successful!
Hostname: client.nfs1.example.com
Realm: NFS1.EXAMPLE.COM
DNS Domain: nfs1.example.com
IPA Server: ipa.nfs1.example.com
BaseDN: dc=nfs1,dc=example,dc=com
Continue to configure the system with these values? [no]: yes
User authorized to enroll computers: admin
Synchronizing time with KDC...
Password for admin@NFS1.EXAMPLE.COM:
Successfully retrieved CA cert
Subject: CN=Certificate Authority,O=NFS1.EXAMPLE.COM
Issuer: CN=Certificate Authority,O=NFS1.EXAMPLE.COM
Valid From: Wed Jun 24 03:23:40 2020 UTC
Valid Until: Sun Jun 24 03:23:40 2040 UTC
Enrolled in IPA realm NFS1.EXAMPLE.COM
Created /etc/ipa/default.conf
New SSSD config will be created
Configured /etc/sssd/sssd.conf
Configured /etc/krb5.conf for IPA realm NFS1.EXAMPLE.COM
trying https://ipa.nfs1.example.com/ipa/xml
Forwarding 'ping' to server 'https://ipa.nfs1.example.com/ipa/xml'
Forwarding 'env' to server 'https://ipa.nfs1.example.com/ipa/xml'
Hostname (client.nfs1.example.com) not found in DNS
DNS server record set to: client.nfs1.example.com -> 192.168.145.138
Adding SSH public key from /etc/ssh/ssh_host_rsa_key.pub
Adding SSH public key from /etc/ssh/ssh_host_ecdsa_key.pub
Forwarding 'host_mod' to server 'https://ipa.nfs1.example.com/ipa/xml'
SSSD enabled
Configured /etc/openldap/ldap.conf
Configured /etc/ssh/ssh_config
Configured /etc/ssh/sshd_config
Client configuration complete.
==========================================================================
systemctl stop chronyd.service
systemctl disable chronyd.service
这时client.nfs1.example.com 成功加入IPA的管理中。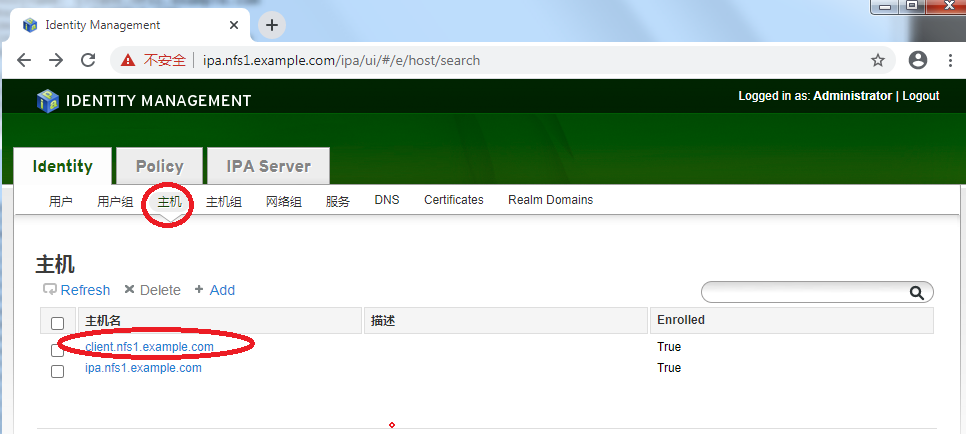
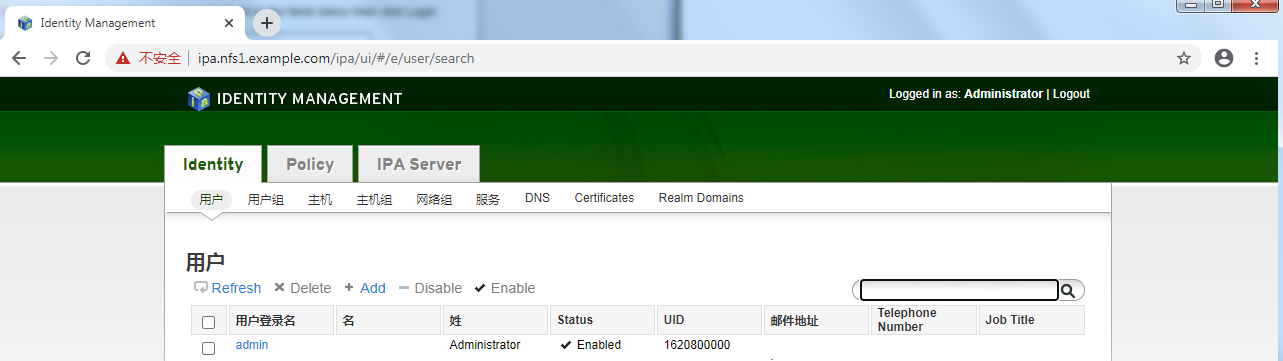
如果在管理器中添加用户,相当于添加了一个域用户。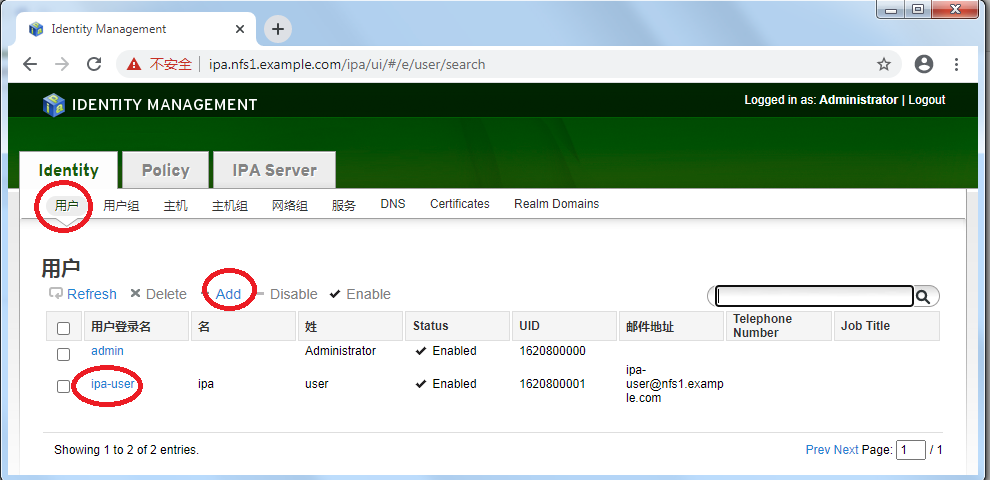
账户ipa-user可以登入nfs.example.com中所有登记的主机

(终)
Redhat FreeIPA Server 安装服务端和客户端 (实验:VMware环境下)的更多相关文章
- [企业化NET]Window Server 2008 R2[2]-SVN 服务端 和 客户端 安装
1. 服务器基本安装即问题解决记录 √ 2. SVN环境搭建和客户端使用 2.1 服务端 和 客户端 安装 √ 2.2 项目建立与基本使用 √ 2.3 基本冲突解决, ...
- (转)SVN 服务端、客户端安装及配置、导入导出项目
SVN服务器搭建和使用(一) Subversion是优秀的版本控制工具,其具体的的优点和详细介绍,这里就不再多说. 首先来下载和搭建SVN服务器. 现在Subversion已经迁移到apache网站上 ...
- SVN服务端和客户端的安装与搭建
版权声明:本文为博主原创文章,转载请注明原文出处. https://blog.csdn.net/zzfenglin/article/details/50931462 SVN简介 SVN全名Subver ...
- linux(centos 6.4)下安装php memcache服务端及其客户端(详细教程)
前言 在搭建个人博客时,由于没有使用任何框架,纯手工code前台和后台,导致遇到许多问题,其中一个问题就是mysql连接导致的页面相应速度异常低.在查询各种途径后,只能考虑使用memcache缓存.在 ...
- suse安装svn服务端和客户端的使用
suse安装svn服务端 一. 安装服务端 配置网络安装源(suse11sp1为例) 新建11.1.repo11.1为软件源名称,可自定义文件并添加如下内容后保存 linux-e0xg:/etc/zy ...
- [企业化NET]Window Server 2008 R2[3]-SVN 服务端 和 客户端 基本使用
1. 服务器基本安装即问题解决记录 √ 2. SVN环境搭建和客户端使用 2.1 服务端 和 客户端 安装 √ 2.2 项目建立与基本使用 √ 2.3 基本冲突解决, ...
- SVN1.6服务端和客户端安装配置指导
本节向大家描述SVN1.6服务端和客户端安装配置步骤,随着SVN的快速发展,版本也进行了升级更新,本节就和大家一起学习一下SVN1.6服务端和客户端安装配置步骤,欢迎大家一起来学习.下面是具体介绍.1 ...
- 安装lanproxy服务端、客户端以及小问题解决
准备 我们这里使用java客户端与服务端连接 1.一台公网服务器(运行proxy-server).2.一台内网客户端(运行proxy-client). 下载地址:https://seafile.cdj ...
- Windows10配置NFS服务端和客户端
环境:Windows10企业版x64 安装服务端 安装hane win nfs server,版本1169(官方最新版1223经试验不成功). 设置如下: 以管理员身份重启服务(注:软件界面上&quo ...
随机推荐
- eclipse中生成文档注释--javadoc的使用
1.针对于单一的JAVA文件,在终端窗口中,使用 javadoc 文件名.java 即可生成文档注释: 2.在eclipse中生成文档注释: ①单击eclipse菜单栏中的[Project]菜单,该菜 ...
- Nexus Repository Manager 3(CVE-2019-7238) 远程代码执行漏洞复现
0x00 漏洞背景 Nexus Repository Manager 3是一款软件仓库,可以用来存储和分发Maven,NuGET等软件源仓库.其3.14.0及之前版本中,存在一处基于OrientDB自 ...
- js匿名函数和date对象,math对象
匿名函数: <script type="text/javascript"> function (参数列表){ 要执行的语句块; } </script> 对象 ...
- JavaScript (四) js的基本语法 - - 函数练习、arguments、函数定义、作用域、预解析
个人博客网:https://wushaopei.github.io/ (你想要这里多有) 一.函数练习 1.求最值 // - 求2个数中的最大值 function getMax(num1, nu ...
- Java实现 LeetCode 667 优美的排列 II(暴力)
667. 优美的排列 II 给定两个整数 n 和 k,你需要实现一个数组,这个数组包含从 1 到 n 的 n 个不同整数,同时满足以下条件: ① 如果这个数组是 [a1, a2, a3, - , an ...
- JavaScript实现登录滑动验证
来自于GitHub, 如何快速访问GitHub 先附上效果图 划到一半停止回自己回去的 PS: 附上代码,有需要自己更改, <!DOCTYPE html> <html lang=&q ...
- CMAKE工具学习
最近在学习各大物联网平台的SDK包,发现其工程都使用了一种叫cmake的工具在管理代码.于是花了一天时间简单学习了解了cmake工具,其目的是让自己能读懂使用该工具管理的代码,并能简单使用该工具管理我 ...
- 指定web默认首页,导致访问路径的问题
今天写了一个登陆页面,登陆成功跳转时,url中的路径不对 这是目录结构 |-web |---login |-----login.jsp |---success |-----success.jsp 这是 ...
- 2020/06/06 JavaScript高级程序设计 面向对象的程序设计
ECMAScript虽然是一种面向对象的语言,但是他没有类的概念.所以他的对象也与其他语言中的对象有所不同. ECMA-262定义对象:一组没有特定顺序的值. 6.1 理解对象 创建对象的方法: 1. ...
- CSS布局之Flex布局
Flex布局,可以简便.完整.响应式地实现各种页面布局. 浏览器支持:得到所有浏览器的支持.(注:Flex布局将成为未来布局的首选方案) 一. Flex布局的概念 Flex是Flexible Bo ...