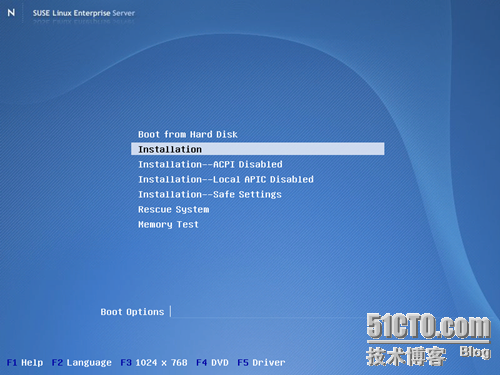
SuSe Linux Enterprise Server 10 With Sp2 安装过程图解
![]() 650) this.width=650;" style="border-right- 0px; border-top-width: 0px; border-bottom-width: 0px; border-left-width: 0px" border="0" alt="image001" src="http://img1.51cto.com/attachment/200812/30/350944_1230607710nPGe.png" width="504" height="379" />
650) this.width=650;" style="border-right- 0px; border-top-width: 0px; border-bottom-width: 0px; border-left-width: 0px" border="0" alt="image001" src="http://img1.51cto.com/attachment/200812/30/350944_1230607710nPGe.png" width="504" height="379" />
![]() 650) this.width=650;" style="border-right- 0px; border-top-width: 0px; border-bottom-width: 0px; border-left-width: 0px" border="0" alt="image002" src="http://img1.51cto.com/attachment/200812/30/350944_1230607755rtM2.png" width="504" height="379" />
650) this.width=650;" style="border-right- 0px; border-top-width: 0px; border-bottom-width: 0px; border-left-width: 0px" border="0" alt="image002" src="http://img1.51cto.com/attachment/200812/30/350944_1230607755rtM2.png" width="504" height="379" />
下一步接受许可协议
![]() 650) this.width=650;" style="border-right- 0px; border-top-width: 0px; border-bottom-width: 0px; border-left-width: 0px" border="0" alt="image003" src="http://img1.51cto.com/attachment/200812/30/350944_1230607757IFDP.png" width="504" height="379" />
650) this.width=650;" style="border-right- 0px; border-top-width: 0px; border-bottom-width: 0px; border-left-width: 0px" border="0" alt="image003" src="http://img1.51cto.com/attachment/200812/30/350944_1230607757IFDP.png" width="504" height="379" />
![]() 650) this.width=650;" style="border-right- 0px; border-top-width: 0px; border-bottom-width: 0px; border-left-width: 0px" border="0" alt="image004" src="http://img1.51cto.com/attachment/200812/30/350944_1230607760V3CL.png" width="504" height="379" />
650) this.width=650;" style="border-right- 0px; border-top-width: 0px; border-bottom-width: 0px; border-left-width: 0px" border="0" alt="image004" src="http://img1.51cto.com/attachment/200812/30/350944_1230607760V3CL.png" width="504" height="379" />
![]() 650) this.width=650;" style="border-right- 0px; border-top-width: 0px; border-bottom-width: 0px; border-left-width: 0px" border="0" alt="image005" src="http://img1.51cto.com/attachment/200812/30/350944_1230607776eiDu.png" width="504" height="379" />
650) this.width=650;" style="border-right- 0px; border-top-width: 0px; border-bottom-width: 0px; border-left-width: 0px" border="0" alt="image005" src="http://img1.51cto.com/attachment/200812/30/350944_1230607776eiDu.png" width="504" height="379" />
![]() 650) this.width=650;" style="border-right- 0px; border-top-width: 0px; border-bottom-width: 0px; border-left-width: 0px" border="0" alt="image006" src="http://img1.51cto.com/attachment/200812/30/350944_12306077801vuy.png" width="504" height="379" />
650) this.width=650;" style="border-right- 0px; border-top-width: 0px; border-bottom-width: 0px; border-left-width: 0px" border="0" alt="image006" src="http://img1.51cto.com/attachment/200812/30/350944_12306077801vuy.png" width="504" height="379" />
这时我们选择“专家”模式。
如果在这个安装过程中出现断电也不会从新安装会接着进行安装。
![]() 650) this.width=650;" style="border-right- 0px; border-top-width: 0px; border-bottom-width: 0px; border-left-width: 0px" border="0" alt="image007" src="http://img1.51cto.com/attachment/200812/30/350944_1230607782CJYO.png" width="504" height="379" />
650) this.width=650;" style="border-right- 0px; border-top-width: 0px; border-bottom-width: 0px; border-left-width: 0px" border="0" alt="image007" src="http://img1.51cto.com/attachment/200812/30/350944_1230607782CJYO.png" width="504" height="379" />
![]() 650) this.width=650;" style="border-right- 0px; border-top-width: 0px; border-bottom-width: 0px; border-left-width: 0px" border="0" alt="image008" src="http://img1.51cto.com/attachment/200812/30/350944_1230607786QDu1.png" width="504" height="379" />
650) this.width=650;" style="border-right- 0px; border-top-width: 0px; border-bottom-width: 0px; border-left-width: 0px" border="0" alt="image008" src="http://img1.51cto.com/attachment/200812/30/350944_1230607786QDu1.png" width="504" height="379" />
DES是linux默认的加密类型,它适用于所有网络环境,但它限制密码长度不能超过8个字符,Md5允许使用较长的密码,但某些网络协议不支持,例如在NIST中使用会出问题。
![]() 650) this.width=650;" style="border-right- 0px; border-top-width: 0px; border-bottom-width: 0px; border-left-width: 0px" border="0" alt="image009" src="http://img1.51cto.com/attachment/200812/30/350944_1230607790QW5u.png" width="504" height="379" />
650) this.width=650;" style="border-right- 0px; border-top-width: 0px; border-bottom-width: 0px; border-left-width: 0px" border="0" alt="image009" src="http://img1.51cto.com/attachment/200812/30/350944_1230607790QW5u.png" width="504" height="379" />
![]() 650) this.width=650;" style="border-right- 0px; border-top-width: 0px; border-bottom-width: 0px; border-left-width: 0px" border="0" alt="image010" src="http://img1.51cto.com/attachment/200812/30/350944_1230607797cuas.png" width="504" height="379" />
650) this.width=650;" style="border-right- 0px; border-top-width: 0px; border-bottom-width: 0px; border-left-width: 0px" border="0" alt="image010" src="http://img1.51cto.com/attachment/200812/30/350944_1230607797cuas.png" width="504" height="379" />
![]() 650) this.width=650;" style="border-right- 0px; border-top-width: 0px; border-bottom-width: 0px; border-left-width: 0px" border="0" alt="image011" src="http://img1.51cto.com/attachment/200812/30/350944_1230607823d3oc.png" width="504" height="379" />
650) this.width=650;" style="border-right- 0px; border-top-width: 0px; border-bottom-width: 0px; border-left-width: 0px" border="0" alt="image011" src="http://img1.51cto.com/attachment/200812/30/350944_1230607823d3oc.png" width="504" height="379" />
在网卡概述界面里点击“编辑”按钮,即出现如下网络地址配置界面
一、常规
防火墙区域:
1. 无区域
2. 阻塞所有通道
3. 内部区域(无保护的)
4. 隔离区域
5. 外部区域
设备激活方式:
1. 在引导时
2. 在电缆连接时 (监视接口是否存在物理网路连接)
3. 在热插拔时
4. 手动(通过ifup或kinternef手动控制接口)
5. 不启动
6. 通过NFSroot
二、地址
![]() 650) this.width=650;" style="border-right- 0px; border-top-width: 0px; border-bottom-width: 0px; border-left-width: 0px" border="0" alt="image012" src="http://img1.51cto.com/attachment/200812/30/350944_1230607829shnN.png" width="504" height="379" />
650) this.width=650;" style="border-right- 0px; border-top-width: 0px; border-bottom-width: 0px; border-left-width: 0px" border="0" alt="image012" src="http://img1.51cto.com/attachment/200812/30/350944_1230607829shnN.png" width="504" height="379" />
下面我们进行详细设置
![]() 650) this.width=650;" style="border-right- 0px; border-top-width: 0px; border-bottom-width: 0px; border-left-width: 0px" border="0" alt="image013" src="http://img1.51cto.com/attachment/200812/30/350944_123060783689Wu.png" width="504" height="379" />
650) this.width=650;" style="border-right- 0px; border-top-width: 0px; border-bottom-width: 0px; border-left-width: 0px" border="0" alt="image013" src="http://img1.51cto.com/attachment/200812/30/350944_123060783689Wu.png" width="504" height="379" />
![]() 650) this.width=650;" style="border-right- 0px; border-top-width: 0px; border-bottom-width: 0px; border-left-width: 0px" border="0" alt="image014" src="http://img1.51cto.com/attachment/200812/30/350944_1230607859yMMD.png" width="504" height="379" />
650) this.width=650;" style="border-right- 0px; border-top-width: 0px; border-bottom-width: 0px; border-left-width: 0px" border="0" alt="image014" src="http://img1.51cto.com/attachment/200812/30/350944_1230607859yMMD.png" width="504" height="379" />
手工配置网卡硬件地址:
![]() 650) this.width=650;" style="border-right- 0px; border-top-width: 0px; border-bottom-width: 0px; border-left-width: 0px" border="0" alt="image015" src="http://img1.51cto.com/attachment/200812/30/350944_1230607863hlrH.png" width="504" height="379" />
650) this.width=650;" style="border-right- 0px; border-top-width: 0px; border-bottom-width: 0px; border-left-width: 0px" border="0" alt="image015" src="http://img1.51cto.com/attachment/200812/30/350944_1230607863hlrH.png" width="504" height="379" />
点击下一步会保存网络配置
![]() 650) this.width=650;" style="border-right- 0px; border-top-width: 0px; border-bottom-width: 0px; border-left-width: 0px" border="0" alt="image016" src="http://img1.51cto.com/attachment/200812/30/350944_12306078671Qfq.png" width="504" height="379" />
650) this.width=650;" style="border-right- 0px; border-top-width: 0px; border-bottom-width: 0px; border-left-width: 0px" border="0" alt="image016" src="http://img1.51cto.com/attachment/200812/30/350944_12306078671Qfq.png" width="504" height="379" />
![]() 650) this.width=650;" style="border-right- 0px; border-top-width: 0px; border-bottom-width: 0px; border-left-width: 0px" border="0" alt="image017" src="http://img1.51cto.com/attachment/200812/30/350944_12306078713oY6.png" width="504" height="379" />
650) this.width=650;" style="border-right- 0px; border-top-width: 0px; border-bottom-width: 0px; border-left-width: 0px" border="0" alt="image017" src="http://img1.51cto.com/attachment/200812/30/350944_12306078713oY6.png" width="504" height="379" />
大家注意,网络模式中如果选择了带有NetworkManager小程序的用户控制的接口模式
服务配置
![]() 650) this.width=650;" style="border-right- 0px; border-top-width: 0px; border-bottom-width: 0px; border-left-width: 0px" border="0" alt="image018" src="http://img1.51cto.com/attachment/200812/30/350944_1230607876eYty.png" width="504" height="379" />
650) this.width=650;" style="border-right- 0px; border-top-width: 0px; border-bottom-width: 0px; border-left-width: 0px" border="0" alt="image018" src="http://img1.51cto.com/attachment/200812/30/350944_1230607876eYty.png" width="504" height="379" />
点击下一步系统会创建CA证书
![]() 650) this.width=650;" style="border-right- 0px; border-top-width: 0px; border-bottom-width: 0px; border-left-width: 0px" border="0" alt="image019" src="http://img1.51cto.com/attachment/200812/30/350944_1230607886jR1h.png" width="504" height="379" />
650) this.width=650;" style="border-right- 0px; border-top-width: 0px; border-bottom-width: 0px; border-left-width: 0px" border="0" alt="image019" src="http://img1.51cto.com/attachment/200812/30/350944_1230607886jR1h.png" width="504" height="379" />
![]() 650) this.width=650;" style="border-right- 0px; border-top-width: 0px; border-bottom-width: 0px; border-left-width: 0px" border="0" alt="image020" src="http://img1.51cto.com/attachment/200812/30/350944_12306078939aHF.png" width="504" height="379" />
650) this.width=650;" style="border-right- 0px; border-top-width: 0px; border-bottom-width: 0px; border-left-width: 0px" border="0" alt="image020" src="http://img1.51cto.com/attachment/200812/30/350944_12306078939aHF.png" width="504" height="379" />
![]() 650) this.width=650;" style="border-right- 0px; border-top-width: 0px; border-bottom-width: 0px; border-left-width: 0px" border="0" alt="image021" src="http://img1.51cto.com/attachment/200812/30/350944_1230607898dZAa.png" width="504" height="379" />
650) this.width=650;" style="border-right- 0px; border-top-width: 0px; border-bottom-width: 0px; border-left-width: 0px" border="0" alt="image021" src="http://img1.51cto.com/attachment/200812/30/350944_1230607898dZAa.png" width="504" height="379" />
身份验证方法如果选择LDAP认证,则显示
![]() 650) this.width=650;" style="border-right- 0px; border-top-width: 0px; border-bottom-width: 0px; border-left-width: 0px" border="0" alt="image022" src="http://img1.51cto.com/attachment/200812/30/350944_1230607906dxZB.png" width="504" height="379" />
650) this.width=650;" style="border-right- 0px; border-top-width: 0px; border-bottom-width: 0px; border-left-width: 0px" border="0" alt="image022" src="http://img1.51cto.com/attachment/200812/30/350944_1230607906dxZB.png" width="504" height="379" />
如果选择Windows域验证Linux用户则显示
![]() 650) this.width=650;" style="border-right- 0px; border-top-width: 0px; border-bottom-width: 0px; border-left-width: 0px" border="0" alt="image023" src="http://img1.51cto.com/attachment/200812/30/350944_1230607909OxhE.png" width="504" height="379" />
650) this.width=650;" style="border-right- 0px; border-top-width: 0px; border-bottom-width: 0px; border-left-width: 0px" border="0" alt="image023" src="http://img1.51cto.com/attachment/200812/30/350944_1230607909OxhE.png" width="504" height="379" />
![]() 650) this.width=650;" style="border-right- 0px; border-top-width: 0px; border-bottom-width: 0px; border-left-width: 0px" border="0" alt="image024" src="http://img1.51cto.com/attachment/200812/30/350944_1230607918B7rR.png" width="504" height="379" />
650) this.width=650;" style="border-right- 0px; border-top-width: 0px; border-bottom-width: 0px; border-left-width: 0px" border="0" alt="image024" src="http://img1.51cto.com/attachment/200812/30/350944_1230607918B7rR.png" width="504" height="379" />
所有配置完毕后显示release notes
![]() 650) this.width=650;" style="border-right- 0px; border-top-width: 0px; border-bottom-width: 0px; border-left-width: 0px" border="0" alt="image025" src="http://img1.51cto.com/attachment/200812/30/350944_1230607923ojuJ.png" width="504" height="379" />
650) this.width=650;" style="border-right- 0px; border-top-width: 0px; border-bottom-width: 0px; border-left-width: 0px" border="0" alt="image025" src="http://img1.51cto.com/attachment/200812/30/350944_1230607923ojuJ.png" width="504" height="379" />
![]() 650) this.width=650;" style="border-right- 0px; border-top-width: 0px; border-bottom-width: 0px; border-left-width: 0px" border="0" alt="image026" src="http://img1.51cto.com/attachment/200812/30/350944_1230607926biGP.png" width="504" height="379" />
650) this.width=650;" style="border-right- 0px; border-top-width: 0px; border-bottom-width: 0px; border-left-width: 0px" border="0" alt="image026" src="http://img1.51cto.com/attachment/200812/30/350944_1230607926biGP.png" width="504" height="379" />
点击下一步后,进行声卡配置保存。
![]() 650) this.width=650;" style="border-bottom: 0px; border-left: 0px; border-top: 0px; border-right: 0px" border="0" alt="image027" src="http://img1.51cto.com/attachment/200812/30/350944_1230607929QleM.png" "504" height="379" />
650) this.width=650;" style="border-bottom: 0px; border-left: 0px; border-top: 0px; border-right: 0px" border="0" alt="image027" src="http://img1.51cto.com/attachment/200812/30/350944_1230607929QleM.png" "504" height="379" />
![]() 650) this.width=650;" style="border-bottom: 0px; border-left: 0px; border-top: 0px; border-right: 0px" border="0" alt="image028" src="http://img1.51cto.com/attachment/200812/30/350944_1230607933PmPz.png" "504" height="379" />
650) this.width=650;" style="border-bottom: 0px; border-left: 0px; border-top: 0px; border-right: 0px" border="0" alt="image028" src="http://img1.51cto.com/attachment/200812/30/350944_1230607933PmPz.png" "504" height="379" />
![]() 650) this.width=650;" style="border-bottom: 0px; border-left: 0px; border-top: 0px; border-right: 0px" border="0" alt="image029" src="http://img1.51cto.com/attachment/200812/30/350944_1230607938L9nU.png" "504" height="379" />
650) this.width=650;" style="border-bottom: 0px; border-left: 0px; border-top: 0px; border-right: 0px" border="0" alt="image029" src="http://img1.51cto.com/attachment/200812/30/350944_1230607938L9nU.png" "504" height="379" />
![]() 650) this.width=650;" style="border-bottom: 0px; border-left: 0px; border-top: 0px; border-right: 0px" border="0" alt="image030" src="http://img1.51cto.com/attachment/200812/30/350944_1230607941yd90.jpg" "504" height="379" />
650) this.width=650;" style="border-bottom: 0px; border-left: 0px; border-top: 0px; border-right: 0px" border="0" alt="image030" src="http://img1.51cto.com/attachment/200812/30/350944_1230607941yd90.jpg" "504" height="379" />
- SUSE Linux Enterprise Server 12 使用二进制文件安装docker
Docker-CE in SUSE 虽然使用zypper添加源也能安装,不过我在SLES 12sp5 上安装时发现好多命令还需要自己手动软连接,干脆网上找了找文档,再自己小改下,用二进制部署,也是可以 ...
- SUSE Linux Enterprise Server 11 SP1安装图解教程
一.说明:操作系统:SUSE Linux Enterprise Server 11 SP1下载地址:需要注册才能下载二.安装系统 用启动盘成功引导之后,出现下面的界面 系统运维 温馨提醒:qihang ...
- windows安装SUSE Linux Enterprise Server 12
一:打开“开发人员模式” 点击开始菜单按钮,选择“设置” 在设置中选择“更新和安全” 在菜单中选择“针对开发人员”,在三个选项中,选中“开发人员模式” 在弹出的警告框中点击“是” 这样开发人员模式就打 ...
- SUSE Linux Enterprise Server 11 64T 安装(带清晰视频)
SUSE Linux Enterprise Server 11 64T 安装实录 650) this.width=650;" onclick='window.open("http: ...
- Welcome Docker to SUSE Linux Enterprise Server【水平有限,中英对比,求纠错】
原文:Welcome Docker to SUSE Linux Enterprise Server Lightweight virtualization is a hot topic these ...
- ASP .Net Core系统部署到SUSE Linux Enterprise Server 12 SP3 64 具体方案
.Net Core 部署到 SUSE Linux Enterprise Server 12 SP3 64 位中的步骤 1.安装工具 1.apache 2..Net Core(dotnet-sdk-2. ...
- 安装MySQL -- SuSE Linux Enterprise Server 11 SP3
1.准备工作从MySQL官网上分别下载mysql服务器端于客户端包: MySQL-server-5.5.49-1.sles11.x86.rpm MySQL-client-5.5.49-1.sles11 ...
- 使用 Visual Studio 部署 .NET Core 应用 ——.Net Core 部署到SUSE Linux Enterprise Server 12 SP2 64 位(GNOME 版本3.20.2)
SUSE Linux安装 apache 命令:sudo zypper in apache 设置apache 服务可用 命令:sudo systemctl enable apache2.service启 ...
- SUSE Linux Enterprise Server 设置IP地址、网关、DNS
说明: ip:192.168.21.172 子网掩码:255.255.255.0 网关:192.168.21.2 dns:8.8.8.8 8.8.4.4 1.设置ip地址 vi /etc/syscon ...
随机推荐
- iOS开发下对MVVM的理解
最近看到新浪微博上以及iOS开发的论坛里面谈到MVVM设计模式,所谓MVVM就是Model-View-ViewModel的缩写,关于MVVM的概念,这里我不想过多的介绍,有很多介绍的很详细的博文,这里 ...
- js数组的操作 Full
js数组的操作 用 js有很久了,但都没有深究过js的数组形式.偶尔用用也就是简单的string.split(char).这段时间做的一个项目,用到数组的地方很多,自以为js高手的自己居然无从下手,一 ...
- 四 numpy操作数组输出图片
一.读取一张图片,修改颜色通道后输出 # -*- coding=GBK -*- import cv2 as cv import numpy as np #numpy数组操作 def access_pi ...
- nginx的Rewrite重写
location /{ if ($remote_addr=192.168.1.100){ //禁止此 ip 访问 ...
- 微信小程序 获取数组长度
wxml中直接 {{array.length}} js中 array.length 小程序调用API返回的数据全部都是异步的:所以前提是要确保array中的数据,是存在的
- 装了ubuntu后笔记本电脑的无线网卡用不了,怎么设置?
百度经验的一篇文章 http://jingyan.baidu.com/article/ca2d939dd4f1b4eb6c31ce09.html 点击右上角的齿轮,选择“系统设置” 点击“软件和更 ...
- Android组件Activity初探
1.Activity是什么 Activity是Android系统中的四大组件之一,在MVC模式中属于C控制层 M(Model 模型):Model是应用程序的主体对象. V(View 视图) ...
- js 异步加载的方式
js 异步加载的方式 渲染引擎遇到 script 标签会停下来,等到执行完脚本,继续向下渲染 defer 是“渲染完再执行”,async 是“下载完就执行”,defer 如果有多个脚本,会按照在页面中 ...
- Java Web乱码分析及解决方式(二)——POST请求乱码
引言 GET请求的本质表现是将请求參数放在URL地址栏中.form表单的Method为GET的情况.參数会被浏览器默认编码,所以乱码处理方案是一样的. 对于POST请求乱码.解决起来要比GET简单.我 ...
- 【图像配准】基于互信息的图像配准算法:MI、EMI、ECC算法
简单介绍: 基于互信息的图像配准算法以其较高的配准精度和广泛的适用性而成为图像配准领域研究的热点之中的一个.而基于互信息的医学图像配准方法被觉得是最好的配准方法之中的一个.基于此.本文将介绍简单的基于 ...
 650) this.width=650;" style="border-right- 0px; border-top-width: 0px; border-bottom-width: 0px; border-left-width: 0px" border="0" alt="image001" src="http://img1.51cto.com/attachment/200812/30/350944_1230607710nPGe.png" width="504" height="379" />
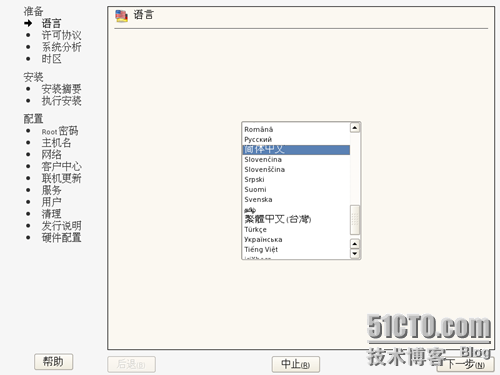 650) this.width=650;" style="border-right- 0px; border-top-width: 0px; border-bottom-width: 0px; border-left-width: 0px" border="0" alt="image002" src="http://img1.51cto.com/attachment/200812/30/350944_1230607755rtM2.png" width="504" height="379" />
 650) this.width=650;" style="border-right- 0px; border-top-width: 0px; border-bottom-width: 0px; border-left-width: 0px" border="0" alt="image003" src="http://img1.51cto.com/attachment/200812/30/350944_1230607757IFDP.png" width="504" height="379" />
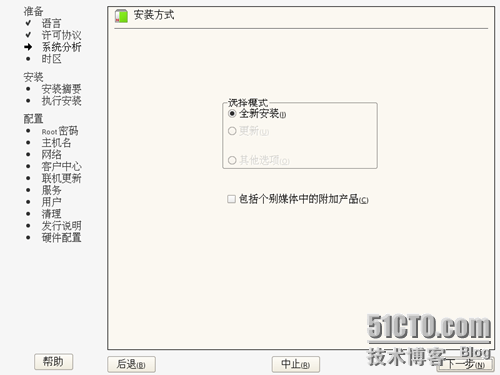 650) this.width=650;" style="border-right- 0px; border-top-width: 0px; border-bottom-width: 0px; border-left-width: 0px" border="0" alt="image004" src="http://img1.51cto.com/attachment/200812/30/350944_1230607760V3CL.png" width="504" height="379" />
 650) this.width=650;" style="border-right- 0px; border-top-width: 0px; border-bottom-width: 0px; border-left-width: 0px" border="0" alt="image005" src="http://img1.51cto.com/attachment/200812/30/350944_1230607776eiDu.png" width="504" height="379" />
 650) this.width=650;" style="border-right- 0px; border-top-width: 0px; border-bottom-width: 0px; border-left-width: 0px" border="0" alt="image006" src="http://img1.51cto.com/attachment/200812/30/350944_12306077801vuy.png" width="504" height="379" />
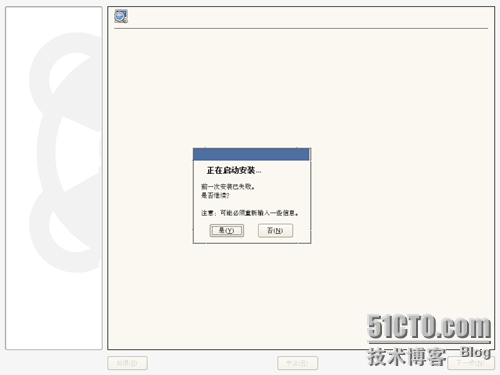 650) this.width=650;" style="border-right- 0px; border-top-width: 0px; border-bottom-width: 0px; border-left-width: 0px" border="0" alt="image007" src="http://img1.51cto.com/attachment/200812/30/350944_1230607782CJYO.png" width="504" height="379" />
 650) this.width=650;" style="border-right- 0px; border-top-width: 0px; border-bottom-width: 0px; border-left-width: 0px" border="0" alt="image008" src="http://img1.51cto.com/attachment/200812/30/350944_1230607786QDu1.png" width="504" height="379" />
 650) this.width=650;" style="border-right- 0px; border-top-width: 0px; border-bottom-width: 0px; border-left-width: 0px" border="0" alt="image009" src="http://img1.51cto.com/attachment/200812/30/350944_1230607790QW5u.png" width="504" height="379" />
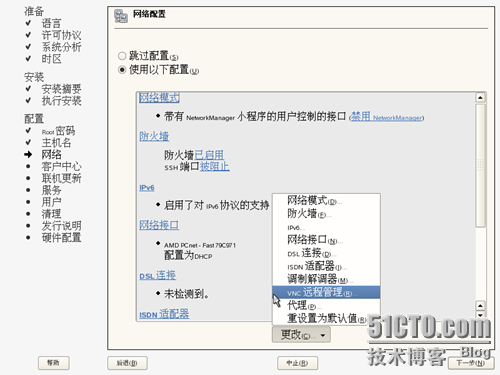 650) this.width=650;" style="border-right- 0px; border-top-width: 0px; border-bottom-width: 0px; border-left-width: 0px" border="0" alt="image010" src="http://img1.51cto.com/attachment/200812/30/350944_1230607797cuas.png" width="504" height="379" />
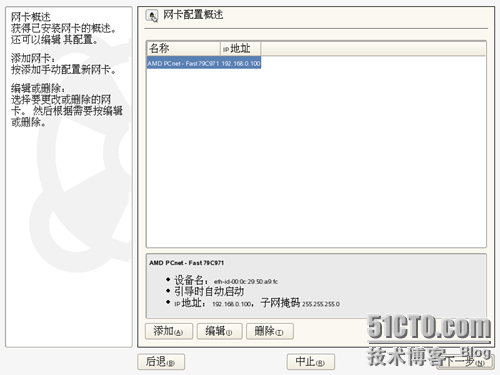 650) this.width=650;" style="border-right- 0px; border-top-width: 0px; border-bottom-width: 0px; border-left-width: 0px" border="0" alt="image011" src="http://img1.51cto.com/attachment/200812/30/350944_1230607823d3oc.png" width="504" height="379" />
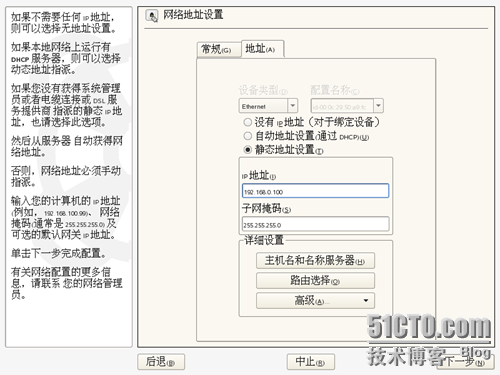 650) this.width=650;" style="border-right- 0px; border-top-width: 0px; border-bottom-width: 0px; border-left-width: 0px" border="0" alt="image012" src="http://img1.51cto.com/attachment/200812/30/350944_1230607829shnN.png" width="504" height="379" />
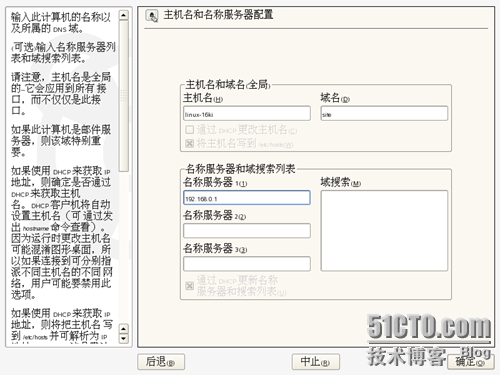 650) this.width=650;" style="border-right- 0px; border-top-width: 0px; border-bottom-width: 0px; border-left-width: 0px" border="0" alt="image013" src="http://img1.51cto.com/attachment/200812/30/350944_123060783689Wu.png" width="504" height="379" />
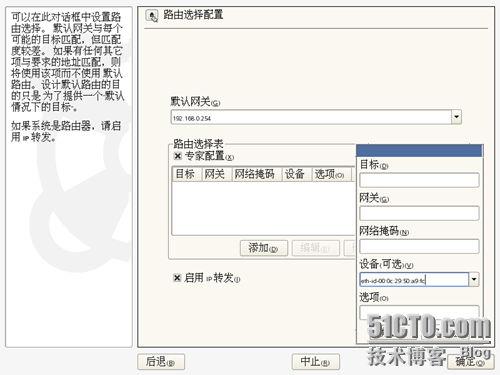 650) this.width=650;" style="border-right- 0px; border-top-width: 0px; border-bottom-width: 0px; border-left-width: 0px" border="0" alt="image014" src="http://img1.51cto.com/attachment/200812/30/350944_1230607859yMMD.png" width="504" height="379" />
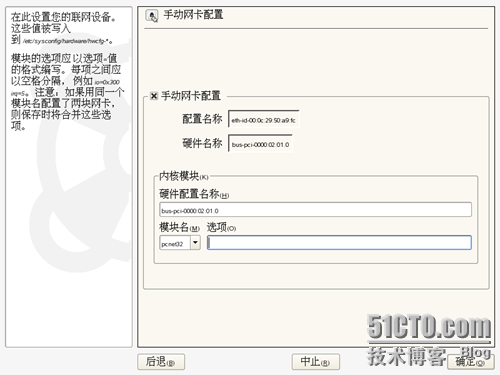 650) this.width=650;" style="border-right- 0px; border-top-width: 0px; border-bottom-width: 0px; border-left-width: 0px" border="0" alt="image015" src="http://img1.51cto.com/attachment/200812/30/350944_1230607863hlrH.png" width="504" height="379" />
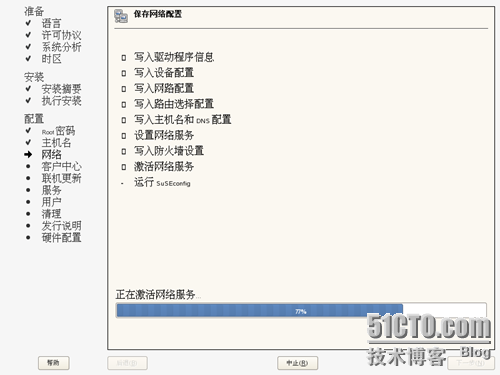 650) this.width=650;" style="border-right- 0px; border-top-width: 0px; border-bottom-width: 0px; border-left-width: 0px" border="0" alt="image016" src="http://img1.51cto.com/attachment/200812/30/350944_12306078671Qfq.png" width="504" height="379" />
 650) this.width=650;" style="border-right- 0px; border-top-width: 0px; border-bottom-width: 0px; border-left-width: 0px" border="0" alt="image017" src="http://img1.51cto.com/attachment/200812/30/350944_12306078713oY6.png" width="504" height="379" />
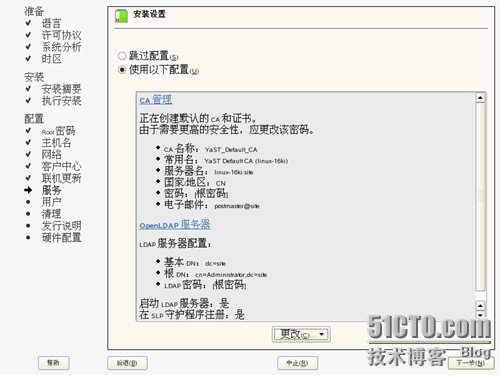 650) this.width=650;" style="border-right- 0px; border-top-width: 0px; border-bottom-width: 0px; border-left-width: 0px" border="0" alt="image018" src="http://img1.51cto.com/attachment/200812/30/350944_1230607876eYty.png" width="504" height="379" />
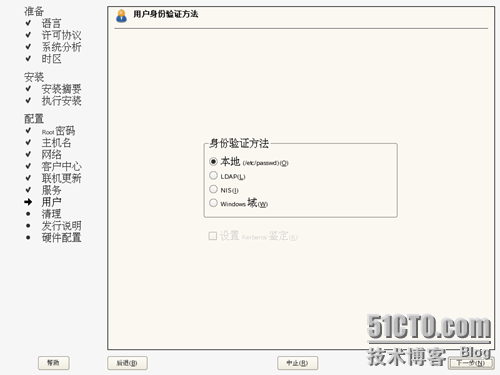 650) this.width=650;" style="border-right- 0px; border-top-width: 0px; border-bottom-width: 0px; border-left-width: 0px" border="0" alt="image019" src="http://img1.51cto.com/attachment/200812/30/350944_1230607886jR1h.png" width="504" height="379" />
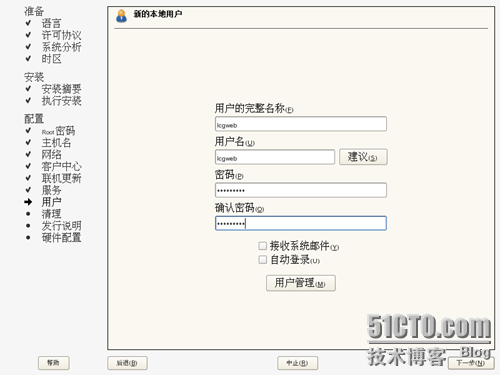 650) this.width=650;" style="border-right- 0px; border-top-width: 0px; border-bottom-width: 0px; border-left-width: 0px" border="0" alt="image020" src="http://img1.51cto.com/attachment/200812/30/350944_12306078939aHF.png" width="504" height="379" />
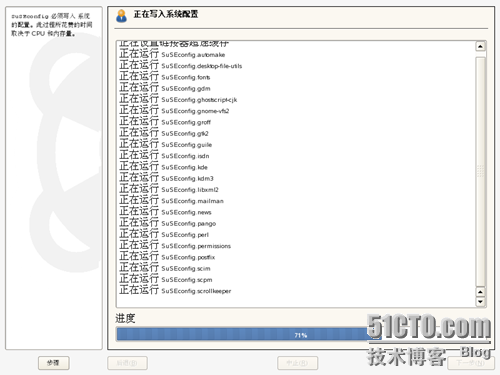 650) this.width=650;" style="border-right- 0px; border-top-width: 0px; border-bottom-width: 0px; border-left-width: 0px" border="0" alt="image021" src="http://img1.51cto.com/attachment/200812/30/350944_1230607898dZAa.png" width="504" height="379" />
 650) this.width=650;" style="border-right- 0px; border-top-width: 0px; border-bottom-width: 0px; border-left-width: 0px" border="0" alt="image022" src="http://img1.51cto.com/attachment/200812/30/350944_1230607906dxZB.png" width="504" height="379" />
 650) this.width=650;" style="border-right- 0px; border-top-width: 0px; border-bottom-width: 0px; border-left-width: 0px" border="0" alt="image023" src="http://img1.51cto.com/attachment/200812/30/350944_1230607909OxhE.png" width="504" height="379" />
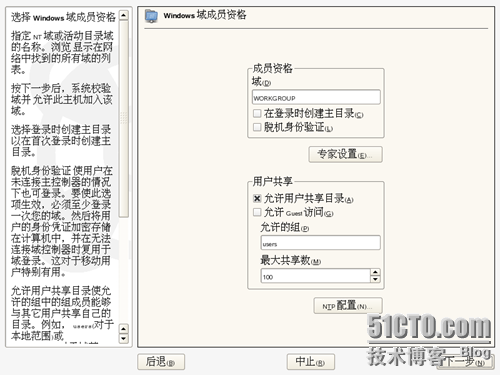 650) this.width=650;" style="border-right- 0px; border-top-width: 0px; border-bottom-width: 0px; border-left-width: 0px" border="0" alt="image024" src="http://img1.51cto.com/attachment/200812/30/350944_1230607918B7rR.png" width="504" height="379" />
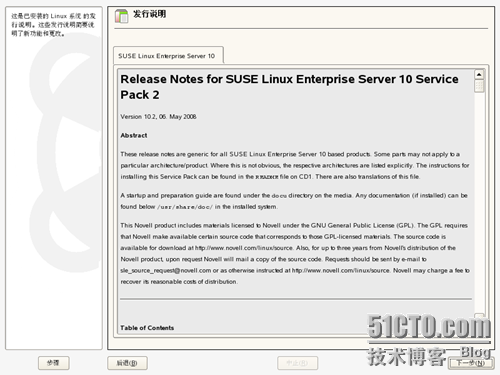 650) this.width=650;" style="border-right- 0px; border-top-width: 0px; border-bottom-width: 0px; border-left-width: 0px" border="0" alt="image025" src="http://img1.51cto.com/attachment/200812/30/350944_1230607923ojuJ.png" width="504" height="379" />
 650) this.width=650;" style="border-right- 0px; border-top-width: 0px; border-bottom-width: 0px; border-left-width: 0px" border="0" alt="image026" src="http://img1.51cto.com/attachment/200812/30/350944_1230607926biGP.png" width="504" height="379" />
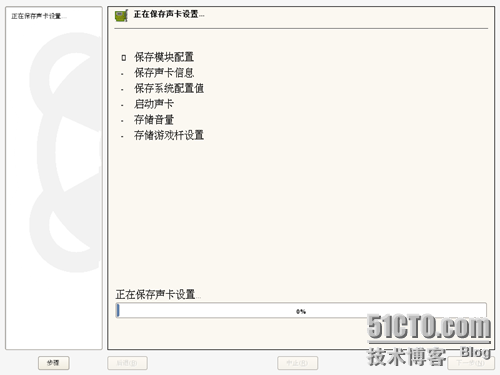 650) this.width=650;" style="border-bottom: 0px; border-left: 0px; border-top: 0px; border-right: 0px" border="0" alt="image027" src="http://img1.51cto.com/attachment/200812/30/350944_1230607929QleM.png" "504" height="379" />
 650) this.width=650;" style="border-bottom: 0px; border-left: 0px; border-top: 0px; border-right: 0px" border="0" alt="image028" src="http://img1.51cto.com/attachment/200812/30/350944_1230607933PmPz.png" "504" height="379" />
 650) this.width=650;" style="border-bottom: 0px; border-left: 0px; border-top: 0px; border-right: 0px" border="0" alt="image029" src="http://img1.51cto.com/attachment/200812/30/350944_1230607938L9nU.png" "504" height="379" />
 650) this.width=650;" style="border-bottom: 0px; border-left: 0px; border-top: 0px; border-right: 0px" border="0" alt="image030" src="http://img1.51cto.com/attachment/200812/30/350944_1230607941yd90.jpg" "504" height="379" />