
Linux架构之Nginx 常见问题
第54章 Nginx常见问题
一、Nginx多Sever优先级
在开始处理一个http请求时,nginx会取出header头中的Host变量,与nginx.conf中每个server的server_name进行匹配,由此决定到底由哪一个server来处理这个请求。但如果nginx配置多个相同的server_name,会导致server_name出现优先级访问冲突。
[root@web01 conf.d]# cd ~
[root@web01 ~]# cd /etc/nginx/conf.d/
1、#配置nginx(server1.conf)
[root@web01 conf.d]# vim server1.conf
server {
listen 80;
server_name localhost server1.com;
location / {
root /code/test1;
index index.html;
}
}
#配置nginx(server2.conf)
[root@web01 conf.d]# vim server2.conf
server {
listen 80;
server_name localhost server2.com;
location / {
root /code/test2;
index index.html;
}
}
#配置nginx(server3.conf)
[root@web01 conf.d]# vim server3.conf
server {
listen 80;
server_name localhost server3.com;
location / {
root /code/test3;
index index.html;
}
}
2、#准备站点目录
[root@web01 conf.d]# mkdir /code/test{1..3}
[root@web01 conf.d]# echo test1 > /code/test1/index.html
[root@web01 conf.d]# echo test2 > /code/test2/index.html
[root@web01 conf.d]# echo test3 > /code/test3/index.html
3、#检查语法提示冲突,忽略并重启
[root@web01 conf.d]# nginx -t
nginx: [warn] conflicting server name "localhost" on 0.0.0.0:80, ignored
nginx: [warn] conflicting server name "localhost" on 0.0.0.0:80, ignored
nginx: [warn] conflicting server name "localhost" on 0.0.0.0:80, ignored
nginx: the configuration file /etc/nginx/nginx.conf syntax is ok
nginx: configuration file /etc/nginx/nginx.conf test is successful
[root@web01 conf.d]# nginx -s reload
在/etc/nginx/conf.d中,把其他conf文件都打包一下,只留server1.conf、server2.conf、server3.conf。
4、#根据ip访问
#1. 用户第一次访问,读取server1.conf配置返回结果
[root@web01 code]# curl 10.0.0.7
test1
5、#此时将server1.conf修改为server4.conf重启nginx
[root@web01 code]# cd /etc/nginx/conf.d/
[root@lb01 conf.d]# mv server1.conf server4.conf
[root@lb01 conf.d]# nginx -s reload
6、#windows键+R,输入drivers,找到etc目录,进入etc目录,找到host域名解析文件,
修改内容如下:10.0.0.7 server1.com server2.com server3.com
7、#检查并重启nginx
[root@web01 conf.d]# nginx -t
nginx: [warn] conflicting server name "localhost" on 0.0.0.0:80, ignored
nginx: [warn] conflicting server name "localhost" on 0.0.0.0:80, ignored
nginx: [warn] conflicting server name "localhost" on 0.0.0.0:80, ignored
nginx: the configuration file /etc/nginx/nginx.conf syntax is ok
nginx: configuration file /etc/nginx/nginx.conf test is successful
[root@web01 conf.d]# nginx -s reload
8、#再次访问时,读取server2.conf配置返回结果
[root@web01 conf.d]# curl 10.0.0.7
test2
测试访问效果,打开浏览器,输入server1.com


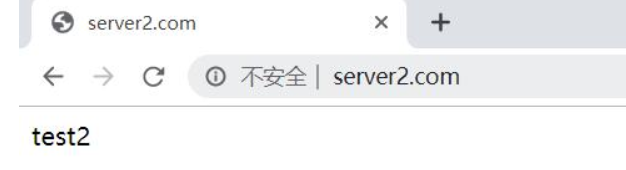
将server1.conf修改为server4.conf重启nginx,测试访问效果,打开浏览器,输入server2.com

多Server_name优先级总结
再开始处理一个HTTP请求时,Nginx会读取header(请求头)中的host,与每个server中的server_name进行匹配,来决定用哪一个server标签来完成处理这个请求,有可能一个Host与多个server中的server_name都匹配,这个时候就会根据匹配优先级来选择实际处理的server。优先级匹配结果如下:
1.首先选择所有的字符串完全匹配的server_name。(完全匹配)
2.选择通配符在前面的server_name,如.haoda.com www.haoda.com
3.选择通配符在后面的server_name,如bgx.* haoda.com haoda.cn
4.最后选择使用正则表达式匹配的server_name
5.如果全部都没有匹配到,那么将选择在listen配置项后加入[default_server]的server块
6.如果没写,那么就找到匹配listen端口的第一个Server块的配置文件
注意:当出现多个相同的server_name情况下,配置文件排序优先使用则会被调用,所以建议配置相同端口,不同域名,这样不会出现域名访问冲突。
===========================================================
二、Nginx禁止IP直接访问
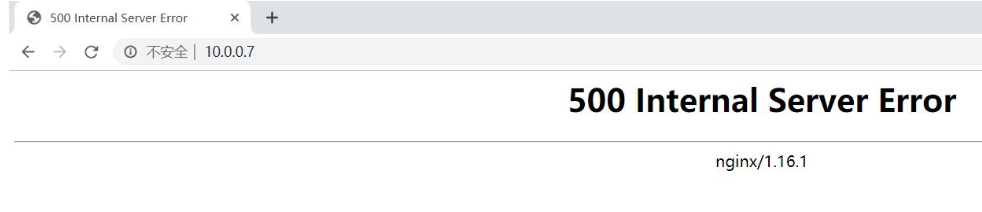
当用户通过访问IP或者未知域名访问你得网站的时候,你希望禁止显示任何有效内容,可以给他返回500,目前国内很多机房都要求网站关闭空主机头,防止未备案的域名指向过来造成麻烦。
方式1:Nginx禁止IP访问
#配置nginx
[root@web01 conf.d]# cd /etc/nginx/conf.d/
[root@web01 conf.d]# vim server4.conf
server {
listen 80 default_server; #默认优先返回;
server_name _; #空主机头或者IP;
return 500; #直接返回500错误;
}
#windows键+R,输入drivers,找到etc目录,进入etc目录,找到host域名解析文件,
注释内容如下:10.0.0.7 server1.com server2.com server3.com
#检查并重启nginx
[root@web01 conf.d]# nginx -t
nginx: [warn] conflicting server name "localhost" on 0.0.0.0:80, ignored
nginx: [warn] conflicting server name "localhost" on 0.0.0.0:80, ignored
nginx: the configuration file /etc/nginx/nginx.conf syntax is ok
nginx: configuration file /etc/nginx/nginx.conf test is successful
[root@web01 conf.d]# nginx -s reload
nginx: [warn] conflicting server name "localhost" on 0.0.0.0:80, ignored
nginx: [warn] conflicting server name "localhost" on 0.0.0.0:80, ignored
测试访问效果,打开浏览器,输入10.0.0.7

方式2:通过引流的方式将访问的IP直接跳转主站域名
#配置nginx
[root@web01 conf.d]# cd /etc/nginx/conf.d/
[root@web01 conf.d]# vim server4.conf
server {
listen 80 default_server;
server_name _;
return 302 http://server1.com;
}
[root@web01 conf.d]# mkdir /code/test1
[root@web01 conf.d]# echo test1 > /code/test1/index.html
#windows键+R,输入drivers,找到etc目录,进入etc目录,找到host域名解析文件,
输入内容如下:10.0.0.7 server1.com
[root@web01 conf.d]# nginx -t
nginx: [warn] conflicting server name "localhost" on 0.0.0.0:80, ignored
nginx: [warn] conflicting server name "localhost" on 0.0.0.0:80, ignored
nginx: the configuration file /etc/nginx/nginx.conf syntax is ok
nginx: configuration file /etc/nginx/nginx.conf test is successful
[root@web01 conf.d]# nginx -s reload
nginx: [warn] conflicting server name "localhost" on 0.0.0.0:80, ignored
nginx: [warn] conflicting server name "localhost" on 0.0.0.0:80, ignored
测试访问效果,打开浏览器,输入10.0.0.7


===========================================================
三、Nginx路径root与alias
root与alias路径匹配主要区别在于nginx如何解释location后面的uri,这会使两者分别以不同的方式将请求映射到服务器文件上,alias是一个目录别名的定义,root则是最上层目录的定义。
root的处理结果是:root路径+location路径
alias的处理结果是:使用alias定义的路径
3.1)使用root时,
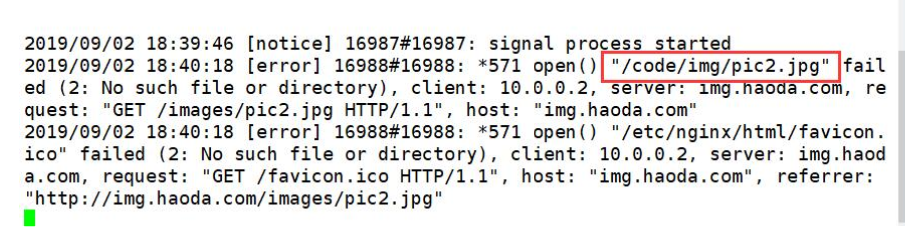
用户访问img.haoda.com/images/pic2.jpg时,实际上Nginx会到/code/img/目录下找pic2.jpg文件
#配置nginx
[root@web01 conf.d]# cd /etc/nginx/conf.d/
[root@web01 conf.d]# vim img.conf
server{
listen 80;
server_name img.haoda.com;
location /images {
root /code/img/;
}
}
#在code目录下创建img目录
[root@web01 code]# cd ~
[root@web01 ~]# mkdir -p /code/img/
#在img目录下上传图片
[root@web01 code]# cd img
[root@web01 img]# rz -E
rz waiting to receive.
#windows键+R,输入drivers,找到etc目录,进入etc目录,找到host域名解析文件,
输入内容如下:10.0.0.7 img.haoda.com
#检查并重启nginx
[root@web01 img]# nginx -t
nginx: the configuration file /etc/nginx/nginx.conf syntax is ok
nginx: configuration file /etc/nginx/nginx.conf test is successful
[root@web01 img]# nginx -s reload
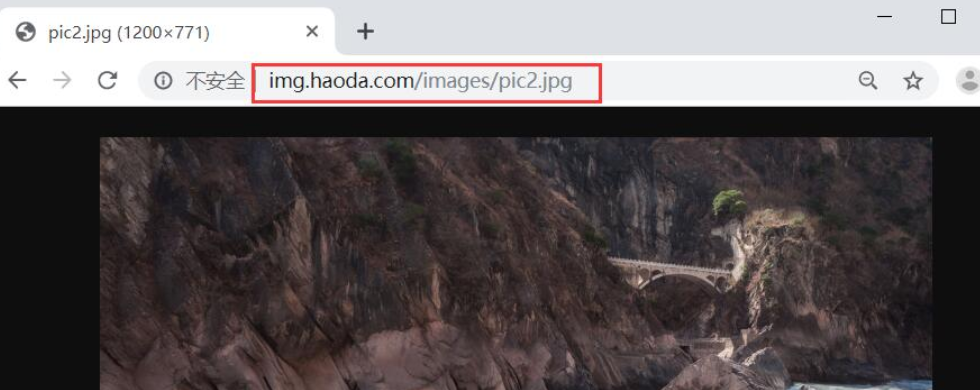
打开浏览器,输入http://img.haoda.com/images/pic2.jpg


监控错误日志([root@web01 img]# tail -f /var/log/nginx/error.log),可以看到图片实际上存放的路径

解决方案:在/code/img目录下创建images目录,将img目录下的图片移至images
[root@web01 img]# mkdir -p /code/img/images/
[root@web01 images]# rz -E
rz waiting to receive.
#windows键+R,输入drivers,找到etc目录,进入etc目录,找到host域名解析文件,
输入内容如下:10.0.0.7 img.haoda.com
#检查并重启nginx
[root@web01 img]# nginx -t
nginx: the configuration file /etc/nginx/nginx.conf syntax is ok
nginx: configuration file /etc/nginx/nginx.conf test is successful
[root@web01 img]# nginx -s reload
打开浏览器,输入http://img.haoda.com/images/pic2.jpg


使用alias,线上一般使用alias
#使用alias,即/images等价于/code/img
server{
listen 80;
server_name img.haoda.com;
location /images {
alias /code/img;
}
}
#在/code/img目录下存在图片
#windows键+R,输入drivers,找到etc目录,进入etc目录,找到host域名解析文件,
输入内容如下:10.0.0.7 img.haoda.com
#检查并重启nginx
[root@web01 img]# nginx -t
nginx: the configuration file /etc/nginx/nginx.conf syntax is ok
nginx: configuration file /etc/nginx/nginx.conf test is successful
[root@web01 img]# nginx -s reload
打开浏览器,输入http://img.haoda.com/images/pic2.jpg

===========================================================
四、Nginx try_file路径匹配
nginx的try_file路径匹配,Nginx会按顺序检查文件及目录是否存在(根据 root 和 alias 指令设置的参数构造完整的文件路径),并用找到的第一个文件提供服务。在元素名后面添加斜杠 / 表示这个是目录。如果文件和目录都不存在,Nginx会执行内部重定向,跳转到命令的最后一个 uri 参数定义的 URI 中。
4.1)Nginx try_file配置示例1
#1.配置nginx
[root@web01 img]# cd /etc/nginx/conf.d/
[root@web01 conf.d]# vim try.conf
server {
listen 80;
server_name try.haoda.com;
root /code;
index index.html;
location / {
try_files $uri /404.html;
}
}
#2. 创建实例目录与文件
[root@web01 conf.d]# echo try111 > /code/index.html
[root@lb01 conf.d]# echo '404 404 404' > /code/404.html
#3.windows键+R,输入drivers,找到etc目录,进入etc目录,找到host域名解析文件,
输入内容如下:10.0.0.7 try.haoda.com
#4.检查并重启nginx
[root@web01 img]# nginx -t
nginx: the configuration file /etc/nginx/nginx.conf syntax is ok
nginx: configuration file /etc/nginx/nginx.conf test is successful
[root@web01 img]# nginx -s reload
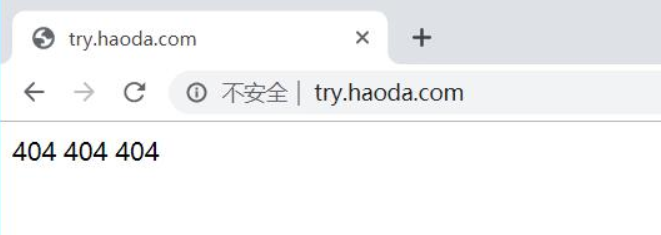
打开浏览器,输入try.haoda.com
(显示结果的解释:由于访问的是try.haoda.com,而$uri取得是域名后面我们写的内容,由于输入信息时域名后面没有内容,它找不到,所以返回$uri中后面的内容,即404.html)

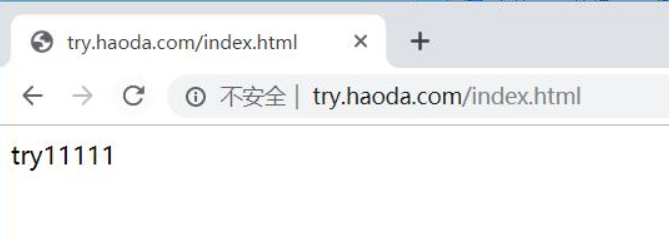
打开浏览器,输入try.haoda.com/index.html
(显示结果的解释:由于访问的是try.haoda.com/index.html,而$uri取到了index.html所以返回/code/index.html的内容)

#此时修改配置文件
server {
listen 80;
server_name try.haoda.com;
root /code;
index index.html;
location / {
try_files $uri $uri/ /404.html;
}
}
#windows键+R,输入drivers,找到etc目录,进入etc目录,找到host域名解析文件,
输入内容如下:10.0.0.7 try.haoda.com
#检查并重启nginx
[root@web01 img]# nginx -t
nginx: the configuration file /etc/nginx/nginx.conf syntax is ok
nginx: configuration file /etc/nginx/nginx.conf test is successful
[root@web01 img]# nginx -s reload
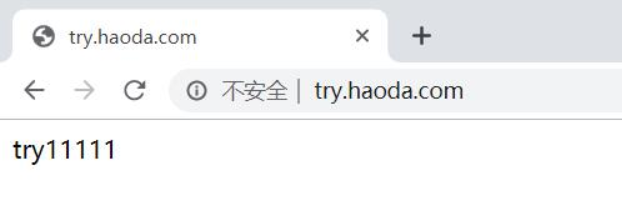
打开浏览器,输入try.haoda.com
(我们访问的是try.haoda.com,而$uri是域名后面的内容,我们在输入域名信息时,域名后面没有写任何内容,因此没有匹配到第一个$uri,于是第二个$uri就是“空/”,他访问的便是“空/”,也就是我们在浏览器中输入try.haoda.com/,跳转index页面,进的是根,就是root,即匹配到/code/index.html)

===========================================================
4.2)Nginx try_file配置示例2
#1. 配置nginx
[root@web01 conf.d]# vim try.conf
server {
listen 80;
server_name try.haoda.com;
root /code;
index index.html;
location / {
try_files $uri $uri/ @java; #当$uri和$uri/都匹配不到时,由后端的java来进行处理,名字可自定义,但一定要加@
}
location @java {
proxy_pass http://172.16.1.8:8080; #配置后端tomcat
}
}
#2. 在web02上配置后端tomcat
[root@web02 ~]# cd /usr/share/tomcat/webapps/ROOT
[root@web02 ROOT]# echo 'i am tomcat' > index.html
[root@web02 ROOT]# systemctl start tomcat
#3. 把文件都挪走
[root@lb01 code]# mv index.html index1.html /tmp/
#4.检查并重启nginx
[root@web01 code]# nginx -t
nginx: the configuration file /etc/nginx/nginx.conf syntax is ok
nginx: configuration file /etc/nginx/nginx.conf test is successful
[root@web01 code]# nginx -s reload
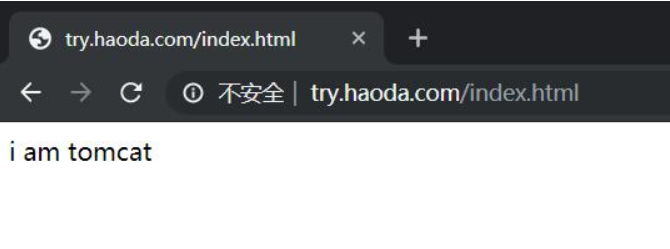
#5. 测试访问
[root@lb01 code]# curl http://try.haoda.com/index.html
i am tomcat


===========================================================
五、Nginx优雅显示错误页面
error_page错误日志
5.1)第一种配置情况1(跳转网络地址)
#配置nginx
[root@web01 code]# cd /etc/nginx/conf.d/
[root@web01 conf.d]# vim error.conf
server {
listen 80;
server_name www.haoda.com;
root /code;
location / {
index index.html;
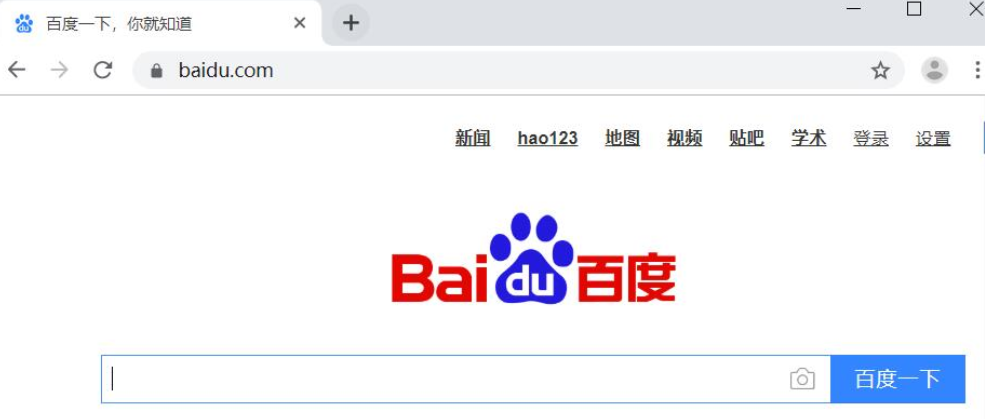
error_page 404 http://www.baidu.com;
}
}
恢复/code目录下index.html,使得该文件没被压缩
#windows键+R,输入drivers,找到etc目录,进入etc目录,找到host域名解析文件,
输入内容如下:10.0.0.7 www.haoda.com
#检查并重启nginx
[root@web01 code]# nginx -t
nginx: the configuration file /etc/nginx/nginx.conf syntax is ok
nginx: configuration file /etc/nginx/nginx.conf test is successful
[root@web01 code]# nginx -s reload
打开浏览器,输入error.haoda.com/11,页面自动跳转到百度首页

5.2)第二种配置情况1(跳转404图片)
#配置nginx
[root@web01 code]# cd /etc/nginx/conf.d/
[root@web01 conf.d]# vim error.conf
server {
listen 80;
server_name error.haoda.com;
root /code;
location / {
index index.html;
}
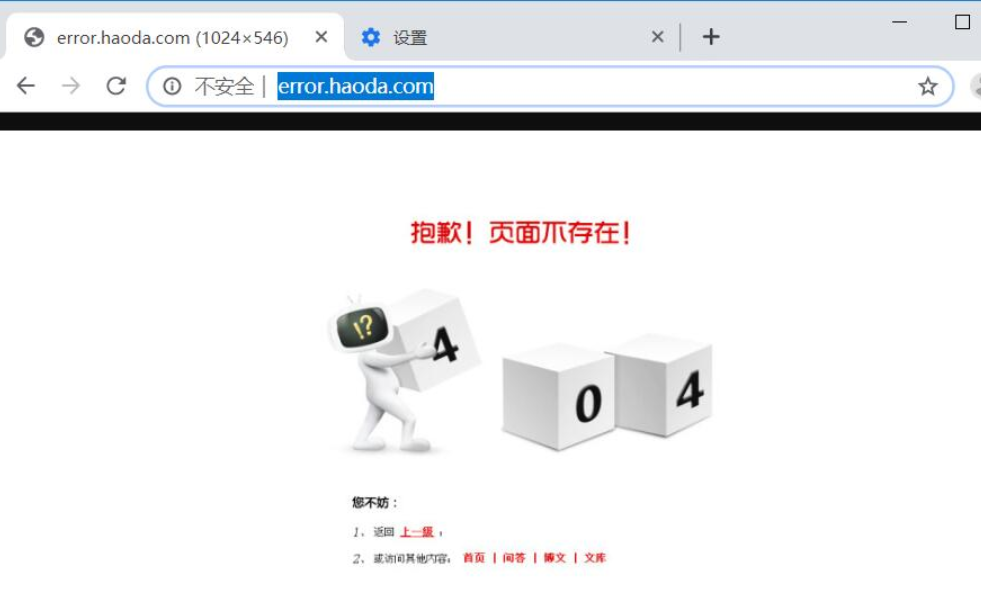
error_page 404 403 /404.jpg;
}
#在code目录下上传404.jpg
[root@web01 conf.d]# cd /code
[root@web01 code]# ll
total 80212
-rw-r--r-- 1 root root 12 Sep 2 19:11 404.html
-rw-r--r-- 1 root root 29239 Sep 2 20:30 404.jpg
#windows键+R,输入drivers,找到etc目录,进入etc目录,找到host域名解析文件,
输入内容如下:10.0.0.7 error.haoda.com
#检查并重启nginx
[root@web01 code]# nginx -t
nginx: the configuration file /etc/nginx/nginx.conf syntax is ok
nginx: configuration file /etc/nginx/nginx.conf test is successful
[root@web01 code]# nginx -s reload
打开浏览器,输入error.haoda.com,显示404图片

5.3)第二种配置情况2(跳转本地地址)
#配置nginx
[root@web01 code]# cd /etc/nginx/conf.d/
[root@web01 conf.d]# vim error.conf
server {
listen 80;
server_name error.haoda.com;
root /code;
location / {
index index.html;
}
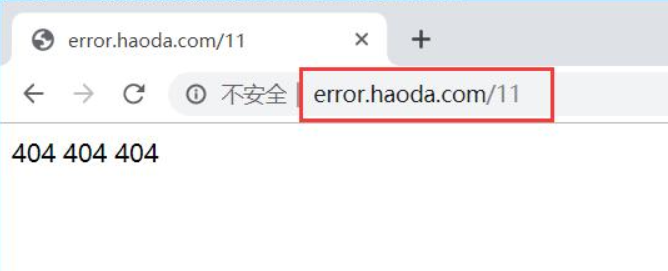
error_page 403 404 /404.html;
location = /404.html {
root /code;
index index.html;
}
}
#windows键+R,输入drivers,找到etc目录,进入etc目录,找到host域名解析文件,
输入内容如下:10.0.0.7 error.haoda.com
[root@web01 code]# cat 404.html
404 404 404
[root@web01 code]# cat index.html
try111
#检查并重启nginx
[root@web01 code]# nginx -t
nginx: the configuration file /etc/nginx/nginx.conf syntax is ok
nginx: configuration file /etc/nginx/nginx.conf test is successful
[root@web01 code]# nginx -s reload
打开浏览器,输入error.haoda.com,显示404.html页面
Linux架构之Nginx 常见问题的更多相关文章
- Linux架构之Nginx Web基础1
第41章 Nginx Web基础入门 41.1 Nginx部署 41.1.1 Nginx的安装方式 源码编译 官方仓库 epel仓库 优点 规范 安装简单 安装简单 便于管理 配置易读 缺 ...
- Linux架构之Nginx之HTTPS
第52章 Nginx之HTTPS 第52章 Nginx之HTTPS 1.HTTPS安全证书基本概述 1.1 模拟服务器篡改内容 1.1.1 配置目标网站nginx 1.1.2 配置网页 1.1.3 访 ...
- Linux架构之Nginx 高可用
第53章 Nginx之高可用Keepalived 一.Keepalived高可用基本概述 1.1)什么是高可用 一般是指2台机器启动着完全相同的业务系统,当有一台机器down机了,另外一台服务器就能快 ...
- Linux架构之Nginx 七层负载均衡
第50章 Nginx七层负载均衡 一.Nginx负载均衡基本概述 1)为什么要使用负载均衡 当我们的Web服务器直接面向用户,往往要承载大量并发请求,单台服务器难以负荷.使用多台Web服务器组成集群, ...
- Linux架构之Nginx 动静分离
案例No.51:Nginx动静分离 1.web01配置静态资源 [root@web01 ~]# cd /etc/nginx/conf.d/#配置静态资源[root@web01 conf.d]# cat ...
- Linux架构之Nginx 负载均衡会话保持
案例No.50:Nginx负载均衡会话保持 前期准备环境 web01.web02 (web01.web02.db01.nfs01都要优化基本源)[root@web01 ~]# vim /etc/yum ...
- Linux架构之Nginx 配置文件
第42章 nginx相关配置文件 1.Nginx主配置文件 路径 类型 作用 /etc/nginx/nginx.conf 配置文件 nginx主配置文件 /etc/nginx/conf.d/def ...
- linux nginx常见问题及优化,压力测试,tomcat服务器优化
nginx常见问题 nginx优化全局配置优化[root@web2 nginx]# vim conf/nginx.confuser nobody;worker_processes 1;(与cpu核心数 ...
- Linux下利用nginx实现负载均衡
linux下利用nginx实现负载均衡 前提条件: 1,安装好jdk 2,安装好tomcat和nginx(可以参考我前两篇文章) 满足前提条件后,要用nginx实现负载均衡,主要是靠配置nginx的配 ...
随机推荐
- [CSP-S模拟测试]:旅行计划(分块+DP)
题目传送门(内部题83) 输入格式 第一行两个整数$n,m$ 接下来$m$行,每行三个整数,$u,v,w$,表示从$u$到$v$有一条权值为$w$的边 接下来一行有一个整数$q$,表示$q$天 接下来 ...
- Java日期时间格式转换
1.Date转String 将日期格式化成指定的格式 public static String stampToDate(Date date) { SimpleDateFormat simpleDate ...
- multiple users to one ec2 instance setup
http://docs.aws.amazon.com/AWSEC2/latest/UserGuide/managing-users.html usually when use pem file as ...
- [python] Pythonic语法笔记
Pythonic语法笔记 __new__ 在类实例化之前执行的,也就是在init之前执行,可以为这个类写操作.接受的参数不是self而是cls.只有在new方法里返回类才会执行init操作,需要返回父 ...
- 2、maven仓库位置设置
根据我们maven的安装目录找到config文件夹,并找到下面的setting.xml文件,在该文件里面添加下面的代码: <localRepository>F:\apache-maven- ...
- Win7上防火墙开放FTP服务以及ping解决方案
1.windows 防火墙开放ftp服务 The following 4 steps will allow both non-secure and SSL FTP traffic through fi ...
- for...in 、Object.keys 、 Object.getOwnPropertyNames
个人总结: 1.for...in 遍历的是对象的可枚举,非Symbol属性(包括自身和原型上的) 2.Object.keys 返回一个数组,是对象自身的可枚举属性 (非Symbol) 3.Object ...
- App测试工具选择
一.功能测试自动化 a) 轻量接口自动化测试: jmeter, b) APP UI层面的自动化 android:UI Automator Viewer,Android Junit,Instrument ...
- 手把手教你搭建一个 Elasticsearch 集群
为何要搭建 Elasticsearch 集群 凡事都要讲究个为什么.在搭建集群之前,我们首先先问一句,为什么我们需要搭建集群?它有什么优势呢? 高可用性 Elasticsearch 作为一个搜索引擎, ...
- Jackson常用注解及用法
最近写项目,用到Jackson的一些注解,总结一下,帮助自己记忆. 1.@JsonIgnore 和 @JsonIgnoreProperties 两个注解可以对照比较后选择使用: @JsonIgnore ...