
tableau单机版安装
wget https://downloads.tableau-china.com/esdalt/2019.3.0/tableau-server-2019-3-0.x86_64.rpm
sudo yum update
//执行“初始化tsm”脚本(initialize-tsm)
Creating directories and setting permissions...
Using '/var/opt/tableau/tableau_server' as the data directory.
Adding user 'tableau' to group 'tableau'... //把用户tableau加入群组tableau
Adding user 'tableau' to group 'tsmadmin'... //把用户tableau加入群组tsmadmin
Added. Note: These group membership changes do not take effect in shells already open. For these to take effect, log out of the shell and log back in.
//提醒:上述更改在其他已经打开的shell中无效,退出终端重新登录即可。
Tableau Server runs best with at least 50 GB of free disk space,
but found only 38 GB for the data directory '/var/opt/tableau/tableau_server'.
//硬盘空间不足提醒
Continuing. //继续初始化
Creating environment file... //创建环境文件
Starting TSM services... //启动tsm服务
正在更新 Tableau Server 协调服务中的存储库版本。
TSM services started successfully //TSM服务成功启动
Use the 'tsm' command to continue setting up Tableau Server. //使用tsm命令继续配置server(注册和激活、配置存储策略等)
>> Tableau binary directory will be added to PATH for new shells. To get the
>> updated path, either start a new session, or for bash users run:
>> source /etc/profile.d/tableau_server.sh
// 环境变量已经添加
The TSM administrative web interface (and REST API) is now available at
https://localhost.localdomain:8850
You can continue the configuration and initialization of Tableau server using either the TSM command line interface,
or the web interface.
// TSM管理接口已经可用(8850端口),可以继续使用终端命令配置,或者使用web接口配置
You will be prompted to authenticate, or can log in using the username 'tableau', with the same password you used to log into this session. You could also use any username, with its password, from the administrative group in the domain.
//系统将提示验证,或者继续使用tableau(配置的用户)登陆。也可以使用同一个域中管理组的其他成员登陆
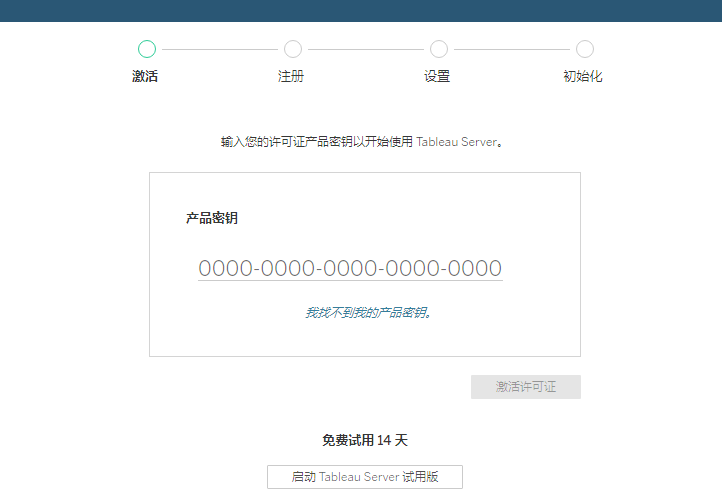
最后一步回到命令界面:
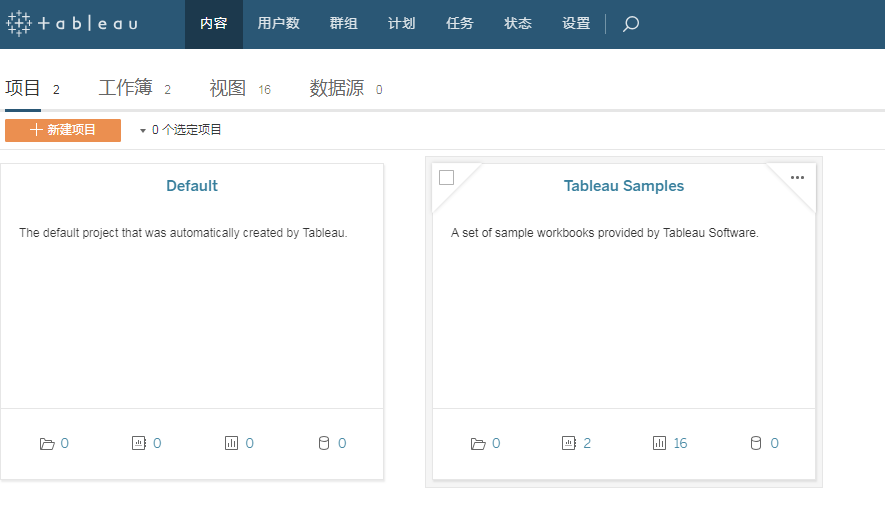
tsm查看:
[admin@bi-tableau-1 ~]$ tsm status
Logging in as user 'admin' since no --username flag was given.
Password:
Status: RUNNING
[admin@bi-tableau-1 ~]$ tsm version
tableau单机版安装的更多相关文章
- Oracle Primavera P6 R84单机版安装教程
本教程用于指导Oracle Primavera P6 R84版本的单机版安装过程.P6 R84版本于2014年9月30日发布.其功能较之前版本有较大提升.单机版的安装方式也发生了很大的变化.P6 R8 ...
- SQL Server 2008 (R2) 单机版安装的先决条件
原文:SQL Server 2008 (R2) 单机版安装的先决条件 出自:http://blogs.msdn.com/b/apgcdsd/archive/2012/03/07/sql-server- ...
- hadoop单机版安装及基本功能演示
本文所使用的Linux发行版本为:CentOS Linux release 7.4.1708 (Core) hadoop单机版安装 准备工作 创建用户 useradd -m hadoop passwd ...
- Redis单机版安装
1.工具简单介绍 1.博主使用的是Xshell工具 ps:需要设置端口和连接名称,端口一般默认为22,需要的童鞋可以自行百度 2.Redis单机版安装 第一步:安装gcc编译环境 yum instal ...
- 【HBase】HBase 单机版安装及使用
HBase介绍 HBase是一个分布式的.面向列的开源数据库,该技术来源于 Fay Chang 所撰写的Google论文“Bigtable:一个结构化数据的分布式存储系统”.就像Bigtable利用了 ...
- hbase单机版安装
hbase单机版安装 1. hbase单机版安装 HBase的安装也有三种模式:单机模式.伪分布模式和完全分布式模式. hbase依赖于Hadoop和Zookeeper. 这里安装的是单机版 ...
- Hadoop单机版安装,配置,运行
Hadoop是最近非常流行的东东啦,但是乍一看都觉得是集群的东东,其实在单机版上安装Hadoop也是可以的,并且安装好以后可以很方便的进行程序的调试,调试好程序以后再丢到集群中,放心的算吧,呵呵.. ...
- solr单机版安装与基本部署
安装solr准备工作: linux/tomcat/jdk solr单机版的安装 1.解压缩tomcat安装包 tar -zxf tomcat-xxx.tar.gz 2.创建文件夹:mkdir /usr ...
- hbase 单机版安装
1.安装jdk参见http://www.cnblogs.com/lvlv/p/4337863.html 安装路径:/usr/java/jdk1.7.0_79 2.下载hbase http://mi ...
随机推荐
- 27. ClustrixDB 分布式架构/一致性、容错和可用性
一致性 许多分布式数据库都采用最终一致性而不是强一致性来实现可伸缩性.但是,最终的一致性会增加应用程序开发人员的复杂性,他们必须针对可能出现的数据不一致的异常进行开发. ClustrixDB提供了一个 ...
- ubuntu1804 安装Nvidia驱动-nvidia-docker
操作 看显卡 lspci | grep N 01:00.0 3D controller: NVIDIA Corporation GM107M [GeForce GTX 960M] (rev a2) 0 ...
- C语言写数据库(一)
/*** connect.c ***/ #include<stdio.h> #include<stdlib.h> #include"mysql.h" int ...
- [笔记]makefile编写
makefile的隐含规则默认处理第一个目标 函数:wildcard可以进行文本匹配 patsubst内容替换 变量: $@代表目标 $^ 代表全部依赖 $< 第一个依赖 $? 第一个变 ...
- 微信小程序_(组件)canvas画布
canvas画布效果 官方文档:传送门 Page({ canvasIdErrorCallback: function (e) { console.error(e.detail.errMsg) }, o ...
- [JZOJ5399]:Confess(随机化)
题目描述 小$w$隐藏的心绪已经难以再隐藏下去了. 小$w$有$n+1$(保证$n$为偶数)个心绪,每个都包含了$[1,2n]$的一个大小为$n$的子集. 现在他要找到隐藏的任意两个心绪,使得他们的交 ...
- LeetCode 15. 三数之和(3Sum)
题目描述 给定一个包含 n 个整数的数组 nums,判断 nums 中是否存在三个元素 a,b,c ,使得 a + b + c = 0 ?找出所有满足条件且不重复的三元组. 注意:答案中不可以包含重复 ...
- vim 配置 scala 语法高亮
第一步:执行下面这个命令: mkdir -p ~/.vim/{ftdetect,indent,syntax}for d in ftdetect indent syntax ; do curl -o ~ ...
- 全面解读PHP-数据结构
一.常见数据结构 1.Array 数组 最简单且应用最广泛的数据结构之一 特性:使用连续的内存来存储,数组中的所有元素必须是相同的类型或类型的衍生(同质数据结构),元素可以通过下标直接访问. 2.Li ...
- 【转】数组指针&指针数组
转自:https://www.cnblogs.com/mq0036/p/3382732.html 数组指针和指针数组的区别 数组指针(也称行指针)定义 int (*p)[n];()优先级高,首先说明p ...