flume【源码分析】分析Flume的启动过程
前言
之前一直在用flume收集数据,也做了一些插件开发,但是一直没整理相关的知识,最近感觉老是有一种知其然不知其所以然的感觉,所以从源码入手希望能更透彻一点吧,越来越感觉会用不能掌握啊!别人几个为啥就low了!
1.启动入口
估计没人关注过启动入口在什么地方吧?启动不报错就可以直接去用了吧!
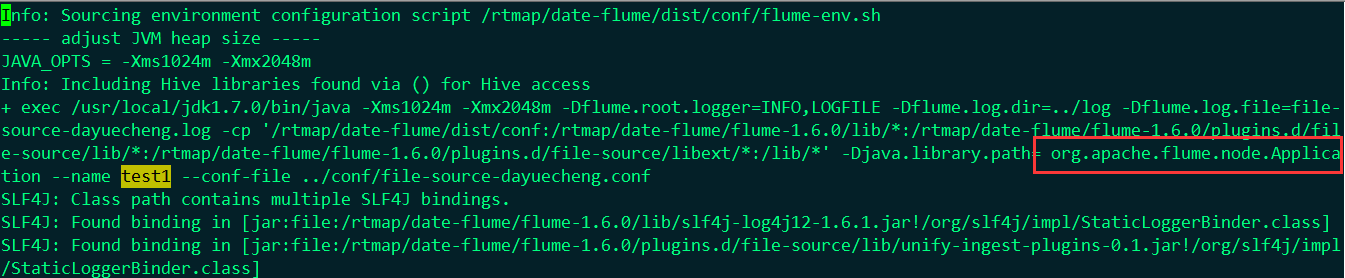
从这里可以看出flume的启动入口是:org.apache.flume.node.Application 注意:记得用maven 安装flume-ng-node 不然你找不到!因为有的开发用不到也就不装了!
下面我们就来看该入口程序是如何来运行的:
try {

      boolean isZkConfigured = false;

      Options options = new Options();

      Option option = new Option("n", "name", true, "the name of this agent");

      option.setRequired(true);

      options.addOption(option);

      option = new Option("f", "conf-file", true,

          "specify a config file (required if -z missing)");

      option.setRequired(false);

      options.addOption(option);

      option = new Option(null, "no-reload-conf", false,

          "do not reload config file if changed");

      options.addOption(option);

      // Options for Zookeeper

      option = new Option("z", "zkConnString", true,

          "specify the ZooKeeper connection to use (required if -f missing)");

      option.setRequired(false);

      options.addOption(option);

      option = new Option("p", "zkBasePath", true,

          "specify the base path in ZooKeeper for agent configs");

      option.setRequired(false);

      options.addOption(option);

      option = new Option("h", "help", false, "display help text");

      options.addOption(option);

      CommandLineParser parser = new GnuParser();

      CommandLine commandLine = parser.parse(options, args);

      if (commandLine.hasOption('h')) {

        new HelpFormatter().printHelp("flume-ng agent", options, true);

        return;

      }

      String agentName = commandLine.getOptionValue('n');

      boolean reload = !commandLine.hasOption("no-reload-conf");

      if (commandLine.hasOption('z') || commandLine.hasOption("zkConnString")) {

        isZkConfigured = true;

      }

      Application application = null;

      if (isZkConfigured) {

        // get options

        String zkConnectionStr = commandLine.getOptionValue('z');

        String baseZkPath = commandLine.getOptionValue('p');

        if (reload) {

          EventBus eventBus = new EventBus(agentName + "-event-bus");

          List<LifecycleAware> components = Lists.newArrayList();

          PollingZooKeeperConfigurationProvider zookeeperConfigurationProvider =

            new PollingZooKeeperConfigurationProvider(

              agentName, zkConnectionStr, baseZkPath, eventBus);

          components.add(zookeeperConfigurationProvider);

          application = new Application(components);

          eventBus.register(application);

        } else {

          StaticZooKeeperConfigurationProvider zookeeperConfigurationProvider =

            new StaticZooKeeperConfigurationProvider(

              agentName, zkConnectionStr, baseZkPath);

          application = new Application();

          application.handleConfigurationEvent(zookeeperConfigurationProvider

            .getConfiguration());

        }

      } else {

        File configurationFile = new File(commandLine.getOptionValue('f'));

        /*

         * The following is to ensure that by default the agent will fail on

         * startup if the file does not exist.

         */

        if (!configurationFile.exists()) {

          // If command line invocation, then need to fail fast

          if (System.getProperty(Constants.SYSPROP_CALLED_FROM_SERVICE) ==

            null) {

            String path = configurationFile.getPath();

            try {

              path = configurationFile.getCanonicalPath();

            } catch (IOException ex) {

              logger.error("Failed to read canonical path for file: " + path,

                ex);

            }

            throw new ParseException(

              "The specified configuration file does not exist: " + path);

          }

        }

        List<LifecycleAware> components = Lists.newArrayList();

        if (reload) {

          EventBus eventBus = new EventBus(agentName + "-event-bus");

          PollingPropertiesFileConfigurationProvider configurationProvider =

            new PollingPropertiesFileConfigurationProvider(

              agentName, configurationFile, eventBus, 30);

          components.add(configurationProvider);

          application = new Application(components);

          eventBus.register(application);

        } else {

          PropertiesFileConfigurationProvider configurationProvider =

            new PropertiesFileConfigurationProvider(

              agentName, configurationFile);

          application = new Application();

          application.handleConfigurationEvent(configurationProvider

            .getConfiguration());

        }

      }

      application.start();

      final Application appReference = application;

      Runtime.getRuntime().addShutdownHook(new Thread("agent-shutdown-hook") {

        @Override

        public void run() {

          appReference.stop();

        }

      });

    } catch (Exception e) {

      logger.error("A fatal error occurred while running. Exception follows.",

          e);

    }

  }
启动main方法
附:flume每次启动都会先判断有没有与当前配置的三大组件同名的组件存在,存在的话先停掉该组件,顺序为source,sink,channel
其次是启动所有当前配置的组件,启动顺序为channel,sink,source
以上启动顺序来源如下:
public synchronized void handleConfigurationEvent(MaterializedConfiguration conf) {

    stopAllComponents();

    startAllComponents(conf);

  }
这个地方说几句:
1.前面一堆就是启动命令中一些参数的解析,如果真想了解自己去看看源码吧!
2.这里面有两种形式配置文件,一种是连接zk读取配置文件的,一种是读取配置文件,反正我经常用的也是读取配置文件的方式-f 那就说配置文件吧!
3.这里有一个机制,如果不带--no-reload-conf这个参数,flume会自动加载配置参数 默认是30秒,现在不用再傻傻的修改完配置文件去重启flume了吧!
        if (reload) {

          EventBus eventBus = new EventBus(agentName + "-event-bus");

          PollingPropertiesFileConfigurationProvider configurationProvider =

            new PollingPropertiesFileConfigurationProvider(

              agentName, configurationFile, eventBus, 30);

          components.add(configurationProvider);

          application = new Application(components);

          eventBus.register(application);

        } else {

          PropertiesFileConfigurationProvider configurationProvider =

            new PropertiesFileConfigurationProvider(

              agentName, configurationFile);

          application = new Application();

          application.handleConfigurationEvent(configurationProvider

            .getConfiguration());

        }
PollingPropertiesFileConfigurationProvider该类是一个轮询操作,每隔30秒会去检查conf配置文件。
这个地方如果不是轮训的方式,那么需要杀掉所有组件,在重启所有组件。调用这两个方法 stopAllComponents(); startAllComponents(conf);
configurationProvider.getConfiguration() 这个是重点好多配置,source 类型,source 和channel对接都在这个里面
1.请注意重点看一下loadxx方法
2.loadSources里面有个 SourceRunner.forSource(source)是指定source类型的:PollableSource,EventDrivenSourceRunner这个需要你在自己开发的时候根据需求自己继承吧!
  public static SourceRunner forSource(Source source) {

    SourceRunner runner = null;

    if (source instanceof PollableSource) {

      runner = new PollableSourceRunner();

      ((PollableSourceRunner) runner).setSource((PollableSource) source);

    } else if (source instanceof EventDrivenSource) {

      runner = new EventDrivenSourceRunner();

      ((EventDrivenSourceRunner) runner).setSource((EventDrivenSource) source);

    } else {

      throw new IllegalArgumentException("No known runner type for source "

          + source);

    }

    return runner;

  }
forSource
public MaterializedConfiguration getConfiguration() {

    MaterializedConfiguration conf = new SimpleMaterializedConfiguration();

    FlumeConfiguration fconfig = getFlumeConfiguration();

    AgentConfiguration agentConf = fconfig.getConfigurationFor(getAgentName());

    if (agentConf != null) {

      Map<String, ChannelComponent> channelComponentMap = Maps.newHashMap();

      Map<String, SourceRunner> sourceRunnerMap = Maps.newHashMap();

      Map<String, SinkRunner> sinkRunnerMap = Maps.newHashMap();

      try {

        loadChannels(agentConf, channelComponentMap);

        loadSources(agentConf, channelComponentMap, sourceRunnerMap);

        loadSinks(agentConf, channelComponentMap, sinkRunnerMap);

        Set<String> channelNames =

            new HashSet<String>(channelComponentMap.keySet());

        for(String channelName : channelNames) {

          ChannelComponent channelComponent = channelComponentMap.

              get(channelName);

          if(channelComponent.components.isEmpty()) {

            LOGGER.warn(String.format("Channel %s has no components connected" +

                " and has been removed.", channelName));

            channelComponentMap.remove(channelName);

            Map<String, Channel> nameChannelMap = channelCache.

                get(channelComponent.channel.getClass());

            if(nameChannelMap != null) {

              nameChannelMap.remove(channelName);

            }

          } else {

            LOGGER.info(String.format("Channel %s connected to %s",

                channelName, channelComponent.components.toString()));

            conf.addChannel(channelName, channelComponent.channel);

          }

        }

        for(Map.Entry<String, SourceRunner> entry : sourceRunnerMap.entrySet()) {

          conf.addSourceRunner(entry.getKey(), entry.getValue());

        }

        for(Map.Entry<String, SinkRunner> entry : sinkRunnerMap.entrySet()) {

          conf.addSinkRunner(entry.getKey(), entry.getValue());

        }

      } catch (InstantiationException ex) {

        LOGGER.error("Failed to instantiate component", ex);

      } finally {

        channelComponentMap.clear();

        sourceRunnerMap.clear();

        sinkRunnerMap.clear();

      }

    } else {

      LOGGER.warn("No configuration found for this host:{}", getAgentName());

    }

    return conf;

  }
getConfiguration
这里通过文件修改时间来判断是否配置文件被修改了,然后通过事件总线的post调用EventHandler,也就是被@Subscribe注解的方法:这个地方只需要添加这个注解就可以就会指定调用方法执行了。
@Subscribe

  public synchronized void handleConfigurationEvent(MaterializedConfiguration conf) {

    stopAllComponents();

    startAllComponents(conf);

  }
2.前面配置准备完后启动程序
启动程序:application.start();
  public synchronized void start() {

    for(LifecycleAware component : components) {

      supervisor.supervise(component,

          new SupervisorPolicy.AlwaysRestartPolicy(), LifecycleState.START);

    }

  }
这是对所有组件进行监督supervise,只有在flume启动或者配置发生更改的时候会调用此监督方法
MonitorRunnable monitorRunnable = new MonitorRunnable();

    monitorRunnable.lifecycleAware = lifecycleAware;

    monitorRunnable.supervisoree = process;

    monitorRunnable.monitorService = monitorService;

    supervisedProcesses.put(lifecycleAware, process);

    ScheduledFuture<?> future = monitorService.scheduleWithFixedDelay(

        monitorRunnable, 0, 3, TimeUnit.SECONDS);

    monitorFutures.put(lifecycleAware, future);
方法里将每个组件纳入了生命周期的管理中,每隔3秒会执行以下方法【在停止组件的时候,会调用unsupervisor方法,会给各个组件状态赋值】:
1、判断组件状态
2、如果组件当前状态不是组件预期的状态,那么就要对预期状态按照switch分支来执行相应的逻辑
MonitorRunnable 继承了Runnable接口,重写了run方法!
    @Override

    public void run() {

      logger.debug("checking process:{} supervisoree:{}", lifecycleAware,

          supervisoree);

      long now = System.currentTimeMillis();

      try {

        if (supervisoree.status.firstSeen == null) {

          logger.debug("first time seeing {}", lifecycleAware);

          supervisoree.status.firstSeen = now;

        }

        supervisoree.status.lastSeen = now;

        synchronized (lifecycleAware) {

          if (supervisoree.status.discard) {

            // Unsupervise has already been called on this.

            logger.info("Component has already been stopped {}", lifecycleAware);

            return;

          } else if (supervisoree.status.error) {

            logger.info("Component {} is in error state, and Flume will not"

                + "attempt to change its state", lifecycleAware);

            return;

          }

          supervisoree.status.lastSeenState = lifecycleAware.getLifecycleState();

          if (!lifecycleAware.getLifecycleState().equals(

              supervisoree.status.desiredState)) {

            logger.debug("Want to transition {} from {} to {} (failures:{})",

                new Object[] { lifecycleAware, supervisoree.status.lastSeenState,

                    supervisoree.status.desiredState,

                    supervisoree.status.failures });

            switch (supervisoree.status.desiredState) {

              case START:

                try {

                  lifecycleAware.start();

                } catch (Throwable e) {

                  logger.error("Unable to start " + lifecycleAware

                      + " - Exception follows.", e);

                  if (e instanceof Error) {

                    // This component can never recover, shut it down.

                    supervisoree.status.desiredState = LifecycleState.STOP;

                    try {

                      lifecycleAware.stop();

                      logger.warn("Component {} stopped, since it could not be"

                          + "successfully started due to missing dependencies",

                          lifecycleAware);

                    } catch (Throwable e1) {

                      logger.error("Unsuccessful attempt to "

                          + "shutdown component: {} due to missing dependencies."

                          + " Please shutdown the agent"

                          + "or disable this component, or the agent will be"

                          + "in an undefined state.", e1);

                      supervisoree.status.error = true;

                      if (e1 instanceof Error) {

                        throw (Error) e1;

                      }

                      // Set the state to stop, so that the conf poller can

                      // proceed.

                    }

                  }

                  supervisoree.status.failures++;

                }

                break;

              case STOP:

                try {

                  lifecycleAware.stop();

                } catch (Throwable e) {

                  logger.error("Unable to stop " + lifecycleAware

                      + " - Exception follows.", e);

                  if (e instanceof Error) {

                    throw (Error) e;

                  }

                  supervisoree.status.failures++;

                }

                break;

              default:

                logger.warn("I refuse to acknowledge {} as a desired state",

                    supervisoree.status.desiredState);

            }

            if (!supervisoree.policy.isValid(lifecycleAware, supervisoree.status)) {

              logger.error(

                  "Policy {} of {} has been violated - supervisor should exit!",

                  supervisoree.policy, lifecycleAware);

            }

          }

        }

      } catch(Throwable t) {

        logger.error("Unexpected error", t);

      }

      logger.debug("Status check complete");

    }
MonitorRunnable
注意:lifecycleAware.start(); 这个才是所有的核心,当判断状态后开始调用相关的start()方法。
flume【源码分析】分析Flume的启动过程的更多相关文章
- Hadoop源码:namenode格式化和启动过程实现
body { margin: 0 auto; font: 13px / 1 Helvetica, Arial, sans-serif; color: rgba(68, 68, 68, 1); padd ...
- Fabric1.4源码解析:Peer节点启动过程
看一下Peer节点的启动过程,通常在Fabric网络中,Peer节点的启动方式有两种,通过Docker容器启动,或者是通过执行命令直接启动. 一般情况下,我们都是执行docker-compose -f ...
- Flink 源码解析 —— Standalone Session Cluster 启动流程深度分析之 Job Manager 启动
Job Manager 启动 https://t.zsxq.com/AurR3rN 博客 1.Flink 从0到1学习 -- Apache Flink 介绍 2.Flink 从0到1学习 -- Mac ...
- Flink 源码解析 —— Standalone Session Cluster 启动流程深度分析之 Task Manager 启动
Task Manager 启动 https://t.zsxq.com/qjEUFau 博客 1.Flink 从0到1学习 -- Apache Flink 介绍 2.Flink 从0到1学习 -- Ma ...
- TaskTracker任务初始化及启动task源码级分析
在监听器初始化Job.JobTracker相应TaskTracker心跳.调度器分配task源码级分析中我们分析的Tasktracker发送心跳的机制,这一节我们分析TaskTracker接受JobT ...
- SpringBoot源码分析之SpringBoot的启动过程
SpringBoot源码分析之SpringBoot的启动过程 发表于 2017-04-30 | 分类于 springboot | 0 Comments | 阅读次数 SpringB ...
- Envoy 源码分析--程序启动过程
目录 Envoy 源码分析--程序启动过程 初始化 main 入口 MainCommon 初始化 服务 InstanceImpl 初始化 启动 main 启动入口 服务启动流程 LDS 服务启动流程 ...
- Spring源码分析专题 —— IOC容器启动过程(上篇)
声明 1.建议先阅读<Spring源码分析专题 -- 阅读指引> 2.强烈建议阅读过程中要参照调用过程图,每篇都有其对应的调用过程图 3.写文不易,转载请标明出处 前言 关于 IOC 容器 ...
- [从源码学设计] Flume 之 memory channel
[从源码学设计] Flume 之 memory channel 目录 [从源码学设计] Flume 之 memory channel 0x00 摘要 0x01 业务范畴 1.1 用途和特点 1.2 C ...
- MapReduce的ReduceTask任务的运行源码级分析
MapReduce的MapTask任务的运行源码级分析 这篇文章好不容易恢复了...谢天谢地...这篇文章讲了MapTask的执行流程.咱们这一节讲解ReduceTask的执行流程.ReduceTas ...
随机推荐
- 服务器放在不同省份的IDC机房,数据如何同步?一个域名如何动态解析到不同IP的服务器
服务器放在不同省份的IDC机房,数据如何同步?淘宝的做法是不同IDC机房之间拉光纤,异地容灾和性能无关,异地容灾是应对断电.地震这种不可抗拒因素的 同城分流,异地容灾 是什么意思?你比如说公司的业务涉 ...
- android系统的图片资源
使用系统的图片资源的好处有,一个是美工不需要重复的做一份已有的图片了,可以节约不少工时:另一个是能保证我们的应用程序的风格与系统一致. 1.引用方式 在源代码*.Java中可以进入如下方式引用: my ...
- Linux Ubuntu download
下载地址:http://www.ubuntu.com/download/ Ubuntu桌面用户版 符合用户个性的版本
- CreateThread简单那多线程编程
CreateThread简单那多线程编程 作者:vpoet mail:vpoet_sir@163.com 在进行多任务处理的时候我们往往会用到多线程技术,多线程理论上是多个线程同事处理不同的工作,但是 ...
- Linux 时间定时同步操作
Yum –y install ntp安装时钟同步服务加入开机启动Chkcongfig ntpd on添加自动校对时间,每十分钟校对一次Crontab –e */10 * * * * /usr/sbin ...
- html&CSS初学
<link href="https://fonts.gdgdocs.org/css?family=Lobster" rel="stylesheet" ty ...
- javax.mail用smtp服务器发送带附件的邮件
jar包: javax.mail-1.5.5.jar maven配置: <dependency> <groupId>com.sun.mail</groupId> & ...
- Capture the Flag(模拟)
Capture the Flag Time Limit: 2 Seconds Memory Limit: 65536 KB Special Judge In computer se ...
- sqlplus常用操作命令2
常用编辑命令:A[ppend] text 将text附加到当前行之后C[hange] /old /new 将当前行中的old替换为newCLear] buff[er] 清除缓冲区中的所有行DEL 删除 ...
- ThreadPoolExecutor详解
线程池类为 java.util.concurrent.ThreadPoolExecutor,常用构造方法为: ThreadPoolExecutor(int corePoolSize, int maxi ...