apache zookeeper的安装
original article:http://zookeeper.praveendeshmane.co.in/zookeeper/zookeeper-3-4-6-single-server-setup-on-ubuntu-14-04.jsp
---------------------------------------------------------
Apache ZooKeeper is a software project of the Apache Software Foundation. It is essentially a distributed hierarchical key-value store, which is used to provide a distributed configuration service, synchronization service, and naming registry for large distributed systems. ZooKeeper was a sub-project of Hadoop but is now a top-level project in its own right.
ZooKeeper's architecture supports high availability through redundant services. The clients can thus ask another ZooKeeper leader if the first fails to answer. ZooKeeper nodes store their data in a hierarchical name space, much like a file system or a tree data structure. Clients can read from and write to the nodes and in this way have a shared configuration service. Updates are totally ordered.
Pre Requirements
1) A machine with Ubuntu 14.04 LTS operating system
2) Apache Hadoop 2.6.4 pre installed (How to install Hadoop on Ubuntu 14.04)
3) Apache ZooKeeper 3.4.6 software (Download Here)
ZooKeeper 3.4.6 Single Server setup on Ubuntu
Installation Steps
Step 1 - Update. Open a terminal (CTRL + ALT + T) and type the following sudo command. It is advisable to run this before installing any package, and necessary to run it to install the latest updates, even if you have not added or removed any Software Sources.
$ sudo apt-get update
Step 2 - Installing Java 7.
$ sudo apt-get install openjdk-7-jdk
Step 3 - Edit $HOME/.bashrc file by adding the java path.
$ sudo gedit $HOME/.bashrc
$HOME/.bashrc file. Add the following lines
export JAVA_HOME=/usr/lib/jvm/java-7-openjdk-amd64
Step 4 - Reload your changed $HOME/.bashrc settings
$ source $HOME/.bashrc
Step 5 - Creating zookeeper directory.
$ sudo mkdir /usr/local/zookeeper
Step 6 - Change the ownership and permissions of the directory /usr/local/zookeeper. Here 'hduser' is an Ubuntu username.
$ sudo chown -R hduser /usr/local/zookeeper
$ sudo chmod -R 755 /usr/local/zookeeper
Step 7 - Creating /zookeeper/data directory.
$ sudo mkdir /usr/local/zookeeper/data
Step 8 - Change the ownership and permissions of the directory /usr/local/zookeeper/data. Here 'hduser' is an Ubuntu username.
$ sudo chown -R hduser /usr/local/zookeeper/data
$ sudo chmod -R 755 /usr/local/zookeeper/data
Step 9 - Creating /zookeeper/log directory.
$ sudo mkdir /usr/local/zookeeper/log
Step 10 - Change the ownership and permissions of the directory /usr/local/zookeeper/log. Here 'hduser' is an Ubuntu username.
$ sudo chown -R hduser /usr/local/zookeeper/log
$ sudo chmod -R 755 /usr/local/zookeeper/log
Step 11 - Change the directory to /home/hduser/Desktop , In my case the downloaded zookeeper-3.4.6.tar.gz file is in /home/hduser/Desktop folder. For you it might be in /downloads folder check it.
$ cd /home/hduser/Desktop/
Step 12 - Untar the zookeeper-3.4.6.tar.gz file.
$ tar xzf zookeeper-3.4.6.tar.gz
Step 13 - Move the contents of zookeeper-3.4.6 folder to /usr/local/zookeeper
$ mv zookeeper-3.4.6/* /usr/local/zookeeper
Step 14 - Change the directory to /usr/local/zookeeper/conf
$ cd /usr/local/zookeeper/conf
Step 15 - Edit zoo.cfg file. If this file doesn't exists it will create one for you and it ll open for you to edit.
$ gedit zoo.cfg
Step 16 - Add following lines to zoo.cfg file. Save and close.
tickTime=2000

dataDir=/usr/local/zookeeper/data

dataLogDir=/usr/local/zookeeper/log

clientPort=2181

initLimit=5

syncLimit=2
Step 17 - Change the directory to /usr/local/zookeeper/bin
$ cd /usr/local/zookeeper/bin
Step 18 - Start zookeeper server
$ ./zkServer.sh start

Step 19 - Start client
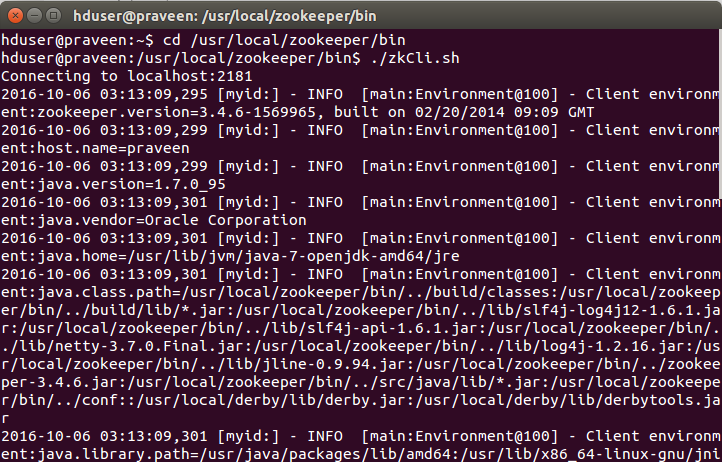
$ ./zkCli.sh -server 127.0.0.1:2181
Step 20 - Stop zookeeper server
$ ./zkServer.sh stop

Please share this blog post and follow me for latest updates on
apache zookeeper的安装的更多相关文章
- Apache Zookeeper 使用-安装
Apache Zookeeper 使用-安装 官方网站 https://zookeeper.apache.org/ 官方文档 下载地址 Zookeeper 是什么? ZooKeeper is a ce ...
- 决战大数据之三-Apache ZooKeeper Standalone及复制模式安装及测试
决战大数据之三-Apache ZooKeeper Standalone及复制模式安装及测试 [TOC] Apache ZooKeeper 单机模式安装 创建hadoop用户&赋予sudo权限, ...
- windows下安装apache zookeeper
ZooKeeper是一个分布式的,开放源码的分布式应用程序协调服务,是Google的Chubby一个开源的实现,是Hadoop和Hbase的重要组件.它是一个为分布式应用提供一致性服务的软件,提供的功 ...
- 在 Linux 多节点安装配置 Apache Zookeeper 分布式集群
规划: 三台物理服务器就形成了(法定人数).对于高可用性集群,您可以使用高于3的任何奇数.例如,如果设置5台服务器,则集群可以处理两个故障节点等. 物理服务器需要开启的端口 2888 , 3888 和 ...
- zookeeper-3.5.5安装报错:找不到或无法加载主类 org.apache.zookeeper.server.quorum.QuorumPeerMain
版权声明:本文为博主原创文章,遵循 CC 4.0 BY-SA 版权协议,转载请附上原文出处链接和本声明.本文链接:https://blog.csdn.net/jiangxiulilinux/artic ...
- (原) 1.1 Zookeeper单机安装
本文为原创文章,转载请注明出处,谢谢 zookeeper 单机安装配置 1.安装前准备 linux系统(此文环境为Centos6.5) Zookeeper安装包,官网https://zookeeper ...
- 初识zookeeper(一)之zookeeper的安装及配置
1.简要介绍 zookeeper是一个分布式的应用程序协调服务,是Hadoop和Hbase的重要组件,是一个树型的目录服务,支持变更推送.除此还可以用作dubbo服务的注册中心. 2.安装 2.1 下 ...
- zookeeper[4] 安装windows zookeeper,及问题处理
安装步骤: 1.在如下路径下载zookeeper-3.4.7.tar.gz http://mirrors.cnnic.cn/apache/zookeeper/stable/ 2.解压zookeeper ...
- ZooKeeper的安装、配置、启动和使用(一)——单机模式
ZooKeeper的安装.配置.启动和使用(一)——单机模式 ZooKeeper的安装非常简单,它的工作模式分为单机模式.集群模式和伪集群模式,本博客旨在总结ZooKeeper单机模式下如何安装.配置 ...
随机推荐
- IT架构师介绍-软件架构设计学习第一天(非原创)
文章大纲 一.架构师定义二.架构师分类与具备能力三.研发人员发展的技术路线四.架构师知识体系五.参考文章 一.架构师定义 什么是架构师,这个聊架构话题时永恒的问题.每个公司对架构师的定位也有所 ...
- jQuery使用手册,【新手必备】
jQuery是一款同prototype一样优秀js开发库类,特别是对css和XPath的支持,使我们写js变得更加方便!如果你不是个js高手又想写出优 秀的js效果,jQuery可以帮你达到目的! ...
- iOS- Size Class使用教程
1:它引入了一种新的概念,抛弃传统意义上我们适配时所谓的具体宽高尺寸,把屏幕的宽和高分别分成两种情况:Compact-紧凑, Regular-正常(Any-任意,其实就是这2种的组合,所以我没分成3种 ...
- python算数运算符
---恢复内容开始--- 加减乘除 >>> 1+1 2 >>> 4-2 2 >>> 2*5 10 >>> 8/2 4.0 > ...
- [转][IPC通信]基于管道的popen和pclose函数
标准I/O函数库提供了popen函数,它启动另外一个进程去执行一个shell命令行. 这里我们称调用popen的进程为父进程,由popen启动的进程称为子进程. popen函数还创建一个管道用于父子进 ...
- BZOJ 2096: [Poi2010]Pilots 单调队列
Code: #include<bits/stdc++.h> #define maxn 4000000 using namespace std; void setIO(string s) { ...
- Python3:numpy模块中的argsort()函数
Python3:numpy模块中的argsort()函数 argsort函数是Numpy模块中的函数: >>> import numpy >>> help(nu ...
- 1.Linux入门介绍
1.1 Linux概述 1.1.1 Linux简要介绍 Linux的由来: Linux的内核最初是由芬兰人李纳斯·托瓦茨在上大学的时候编写的一个内核,它是基于Unix操作系统编写的 大多服务器使用的是 ...
- NOIWC2019 冬眠记
冬眠 由于THUWC考太差了没啥心情做事…… Day -1 报到日前一天晚上去看了看宿舍表,发现周围全是集训队,隔壁就是栋爷.高队和lca,再隔壁是zzq和wxh……吓傻了(本校buff这么好吗) D ...
- Luogu P2298 Mzc和男家丁的游戏
Mzc和男家丁的游戏 题目背景 mzc与djn的第二弹. 题目描述 mzc家很有钱(开玩笑),他家有n个男家丁(做过上一弹的都知道).他把她们召集在了一起,他们决定玩捉迷藏.现在mzc要来寻找他的男家 ...