使用tensorflow进行mnist数字识别【模型训练+预测+模型保存+模型恢复】
import sys,os
sys.path.append(os.pardir)
import numpy as np
from tensorflow.examples.tutorials.mnist import input_data
from PIL import Image
import tensorflow as tf
def predict():
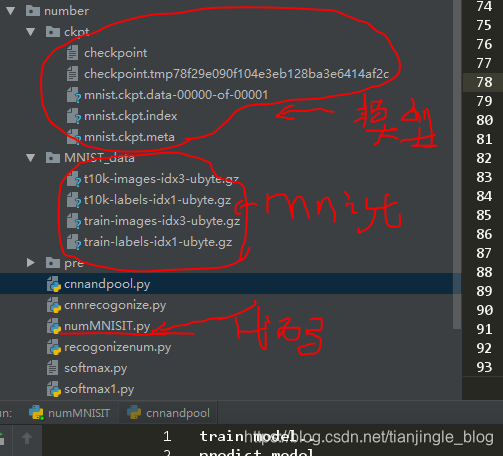
meta_path = 'ckpt/mnist.ckpt.meta'
model_path = 'ckpt/mnist.ckpt'
sess = tf.InteractiveSession ()
saver = tf.train.import_meta_graph (meta_path)
saver.restore (sess, model_path)
graph = tf.get_default_graph ()
W = graph.get_tensor_by_name ("w:0")
b = graph.get_tensor_by_name ("b:0")
x = tf.placeholder (tf.float32, [None, 784])
y = tf.nn.softmax (tf.matmul (x, W) + b)
keep_prob = tf.placeholder (tf.float32)
batch_xs, batch_ys=mnist.train.next_batch (100)
one_img = batch_xs[0].reshape ((1, 784))
one_num = batch_ys[0].reshape ((1, 10))
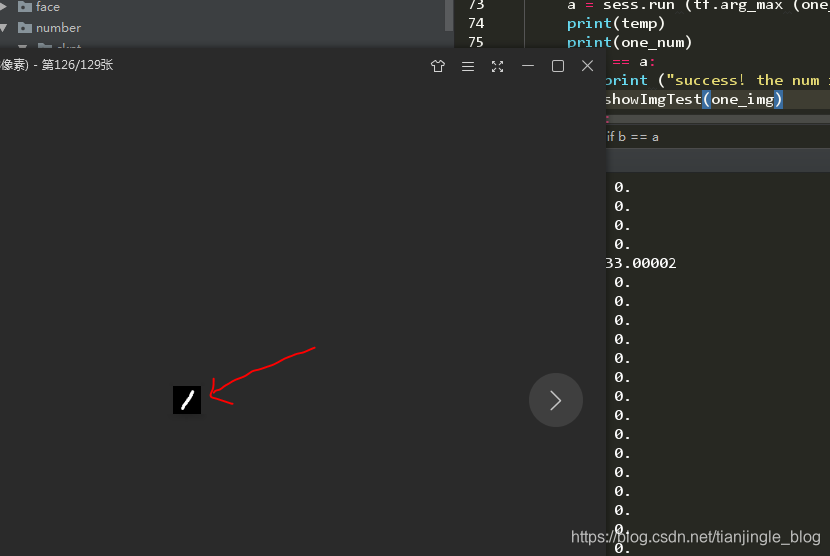
temp = sess.run (y, feed_dict={x: one_img, keep_prob: 1.0})
b = sess.run (tf.argmax (temp, 1))
a = sess.run (tf.arg_max (one_num, 1))
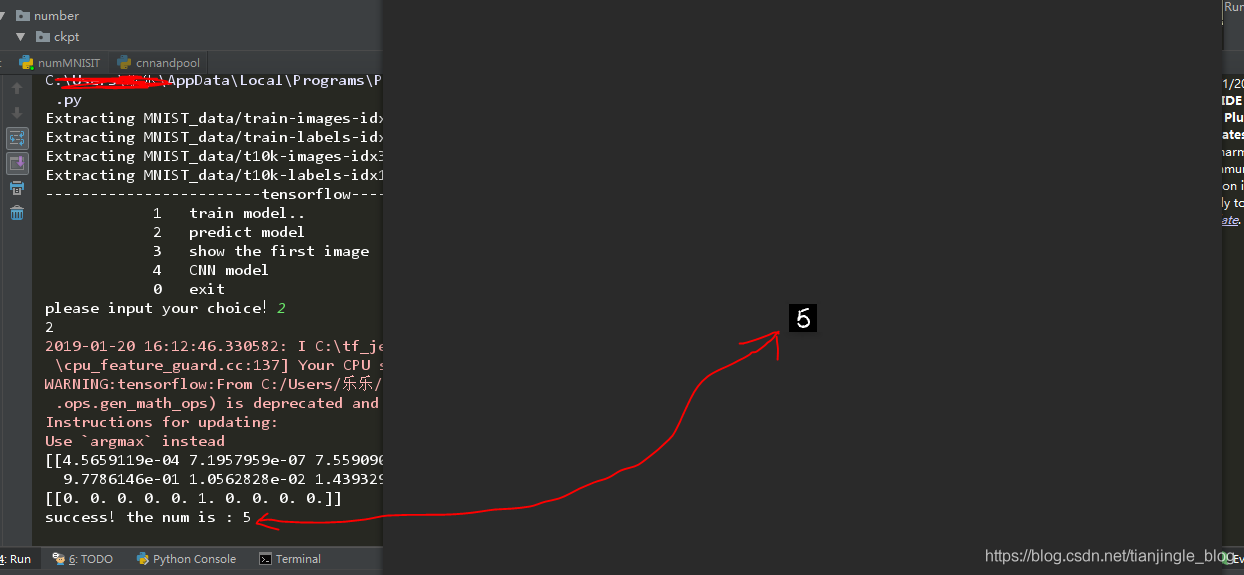
print(temp)
print(one_num)
if b == a:
print ("success! the num is :", (b[0]))
showImgTest(one_img)
else:
print ("mistakes predict.")
def trainNet():
x = tf.placeholder (tf.float32, [None, 784])
W = tf.Variable (tf.zeros ([784, 10]),name="w")
b = tf.Variable (tf.zeros ([10]),name="b")
y = tf.nn.softmax (tf.matmul (x, W) + b)
y_ = tf.placeholder (tf.float32, [None, 10])
keep_prob = tf.placeholder (tf.float32)
# 定义测试的准确率
correct_prediction = tf.equal (tf.argmax (y, 1), tf.argmax (y_, 1))
accuracy = tf.reduce_mean (tf.cast (correct_prediction, tf.float32))
#
saver = tf.train.Saver (max_to_keep=1)
max_acc = 0
train_accuracy = 0
#交叉熵
cross_entropy = tf.reduce_mean (-tf.reduce_sum (y_ * tf.log (y)))
# cross_error=cross_entropy_error_batch(y,y_)
train_step = tf.train.GradientDescentOptimizer (0.01).minimize (cross_entropy)
sess = tf.InteractiveSession ()
tf.global_variables_initializer ().run ()
for i in range (1000):
batch_xs, batch_ys = mnist.train.next_batch (100)
sess.run (train_step, feed_dict={x: batch_xs, y_: batch_ys, keep_prob: 1.0})
if i % 100 == 0:
train_accuracy = accuracy.eval (feed_dict={x: batch_xs, y_: batch_ys, keep_prob: 1.0})
print ("step %d, training accuracy %g" % (i, train_accuracy))
if train_accuracy > max_acc:
max_acc = train_accuracy
saver.save (sess, 'ckpt/mnist.ckpt')
if __name__ == '__main__':
mnist = input_data.read_data_sets ("MNIST_data/", one_hot=True)
choice=0
while choice == 0:
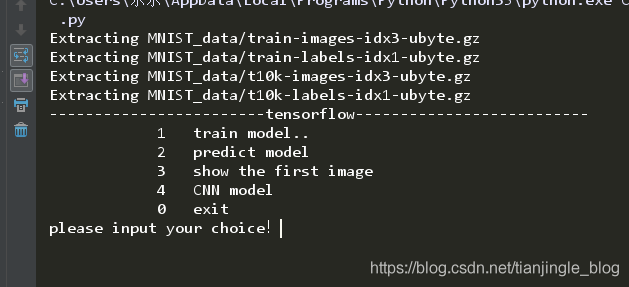
print ("------------------------tensorflow--------------------------")
print ("\t\t\t1\ttrain model..")
print("\t\t\t2\tpredict model")
print("\t\t\t3\tshow the first image")
print ("\t\t\t0\texit")
choice = input ("please input your choice!")
print(choice)
if choice == "1":
print("start train...")
trainNet()
if choice=="2":
predict()
if choice=="3":
showImg()

注:正在学习CNN,选项4还没有来的及做。后面补上
使用tensorflow进行mnist数字识别【模型训练+预测+模型保存+模型恢复】的更多相关文章
- TensorFlow学习笔记(三)MNIST数字识别问题
一.MNSIT数据处理 MNSIT是一个非常有名的手写体数字识别数据集.包含60000张训练图片,10000张测试图片.每张图片是28X28的数字. TonserFlow提供了一个类来处理 MNSIT ...
- 一个简单的TensorFlow可视化MNIST数据集识别程序
下面是TensorFlow可视化MNIST数据集识别程序,可视化内容是,TensorFlow计算图,表(loss, 直方图, 标准差(stddev)) # -*- coding: utf-8 -*- ...
- MNIST数字识别问题
摘自<Tensorflow:实战Google深度学习框架> import tensorflow as tf from tensorflow.examples.tutorials.mnist ...
- Pytorch CNN网络MNIST数字识别 [超详细记录] 学习笔记(三)
目录 1. 准备数据集 1.1 MNIST数据集获取: 1.2 程序部分 2. 设计网络结构 2.1 网络设计 2.2 程序部分 3. 迭代训练 4. 测试集预测部分 5. 全部代码 1. 准备数据集 ...
- Tensorflow手写数字识别训练(梯度下降法)
# coding: utf-8 import tensorflow as tffrom tensorflow.examples.tutorials.mnist import input_data #p ...
- TensorFlow深度学习实战---MNIST数字识别问题
1.滑动平均模型: 用途:用于控制变量的更新幅度,使得模型在训练初期参数更新较快,在接近最优值处参数更新较慢,幅度较小 方式:主要通过不断更新衰减率来控制变量的更新幅度. 衰减率计算公式 : deca ...
- 吴裕雄 python 神经网络——TensorFlow实现回归模型训练预测MNIST手写数据集
import tensorflow as tf from tensorflow.examples.tutorials.mnist import input_data mnist = input_dat ...
- Tensorflow手写数字识别---MNIST
MNIST数据集:包含数字0-9的灰度图, 图片size为28x28.训练样本:55000,测试样本:10000,验证集:5000
- Tensorflow手写数字识别(交叉熵)练习
# coding: utf-8import tensorflow as tffrom tensorflow.examples.tutorials.mnist import input_data #pr ...
随机推荐
- @objc vs @objc dynamic官方解释
Some Objective-C APIs—like target-action—accept method or property names as parameters, then use tho ...
- C. Serval and Parenthesis Sequence 【括号匹配】 Codeforces Round #551 (Div. 2)
冲鸭,去刷题:http://codeforces.com/contest/1153/problem/C C. Serval and Parenthesis Sequence time limit pe ...
- Python之Flask框架使用
Flask和Django.Bottle号称Python中的强大又简单的Web框架. Flask是一个使用Python编写的轻量级Web应用框架.基于Werkzeug WSGI工具箱和Jinja2 模板 ...
- windows7使用Sphinx+PHP+MySQL详细介绍
安装(Windows) 1.官方下载 Sphinx下载地址: 下载 2.解压并重命名 此处下载版本为3.0.3,将 sphinx 文件夹命名为sphinx 3.文件夹目录介绍 sphinx --api ...
- zookeeper 集群安装与配置
Zookeeper安装和配置 准备工作 安装 JDK,此步略. 下载 zookeeper wget http://archive.apache.org/dist/zookeeper/zookeeper ...
- Target Audiences在弹出的people picker中不显示Alias列有空的项目
[客户需求] 当编辑webpart时,Target Audiences在弹出的people picker搜索时候,Alias列有空的项目,客户要求不显示Alias列有空的项目. [分析] 首先这个“D ...
- centos7.4安装redis以及配置外网访问
一.安装redis 第一步:下载redis安装包 wget http://download.redis.io/releases/redis-4.0.6.tar.gz [root@VM_34_108_c ...
- SparkSQL与Hive的整合
其他的配置hive基本配置就不记录了!! 1. 拷贝$HIVE_HOME/conf/hive-site.xml $SPARK_HOME/conf/2. 在$SPARK_HOME/conf/目录中,修改 ...
- 大数据入门第八天——MapReduce详解(三)MR的shuffer、combiner与Yarn集群分析
/mr的combiner /mr的排序 /mr的shuffle /mr与yarn /mr运行模式 /mr实现join /mr全局图 /mr的压缩 今日提纲 一.流量汇总排序的实现 1.需求 对日志数据 ...
- Android初学-AsyncTask下载网络图片
AsyncTask 异步处理: mainfest: 注意添加的: -------------------- <uses-permission android:name="android ...