【归纳】springboot中的IOC注解:注册bean和使用bean
目前了解的springboot中IOC注解主要分为两类:
1. 注册bean:@Component和@Repository、@Service、@Controller 、@Configuration
共同之处:这些注解都使用在类上,将类标识为Bean,由Spring扫描到后会生成一个单例bean放到容器中。
不同之处在于:
- @Component是一个泛化的概念,仅仅表示一个组件 (Bean) ,可以作用在任何层;
- @Repository、@Service、@Controller 都包含@Component注解:
| @Repository | 一般修饰持久层——Dao层 |
| @Service | 一般修饰服务层(或业务层)——Service层 |
| @Controller | 通常作用在控制层——Controller层 |
- @Configuration,在@Component的基础上,会对修饰的类做一个增强(利用CGLIB动态代理)。它一般用来修饰配置类——Configuration文件夹。
注:在类上使用以上注解后,还可以用@Bean注解修饰方法,它很明确地告诉被注释的方法产生一个Bean,然后交给Spring容器
2. 使用bean:@Autowired、@Resource
- @Autowired与@Resource都可以用来装配bean, 都可以写在字段上,或写在setter方法上
- @Autowired默认以Type方式注入
- @Resource默认以Name方式注入,但它可以指定为Type方式(传Type值即可),也可以指定为Name和Type同时皆有的方式(那么必须找到一个Bean,它的Name和Type同时满足才可以注入)
示例:
注册bean
@Configuration
public class MyBeans {

    @Bean("autowire")

    public Integer autowire_bean(){

        return 1;

    }

    @Bean("resource_name1")

    public String resource_bean1(){

        return "this is resource_bean1";

    }

    @Bean("resource_name2")

    public String resource_bean2(){

        return "this is resource_bean2";

    }

}
使用bean:
@RestController //@RestController与@Controller有关
public class MyController { //@Autowired默认按类型注入,如果同一类型有多个bean就报错
@Autowired
private Integer autowire_bean; //@Resource支持name注入或type注入,或同时指定两者注入(需同时满足name和type)
@Resource(name = "resource_name1")
private String resource_bean1; @Resource(name = "resource_name2",type = String.class)
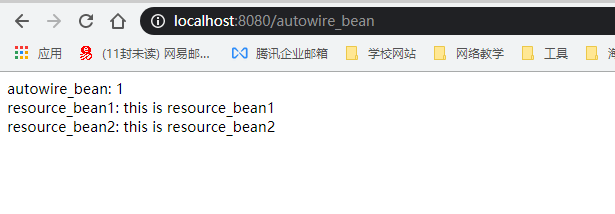
private String resource_bean2; @GetMapping("/autowire_bean")
public String getAutowire_bean(){
return "autowire_bean: " + autowire_bean + "<br>resource_bean1: "
+ resource_bean1 + "<br>resource_bean2: " + resource_bean2;
} }
结果:
【归纳】springboot中的IOC注解:注册bean和使用bean的更多相关文章
- springboot中的常用注解
springboot中的常用注解个人觉得springboor中常用的注解主要可以分为三种:放入容器型注解.从容器中取出型注解和功能型注解.其中的放入容器型和从容器中取出型就是我们平时所说的控制反转和依 ...
- springboot中的controller注解没有生效
springboot中的controller注解没有生效 , 启动的Application类没有在controller的父目录或同级目录
- springboot中有用的几个有用aware以及bean操作和数据源操作
本文参考了: https://blog.csdn.net/derrantcm/article/details/76652951 https://blog.csdn.net/derrantcm/arti ...
- SpringBoot 中使用shiro注解使之生效
在shiroConfig配置类中增加如下代码: /** * 开启Shiro的注解(如@RequiresRoles,@RequiresPermissions),需借助SpringAOP扫描使用Shiro ...
- SpringBoot 中定时执行注解(@Scheduled、@EnableScheduling)
项目开发中经常需要执行一些定时任务,比如需要在每天凌晨时候,分析一次前一天的日志信息.Spring为我们提供了异步执行任务调度的方式,提供TaskExecutor .TaskScheduler 接口. ...
- Spring-boot中使用@ConditionalOnExpression注解,在特定情况下初始化bean
想要实现的功能: 我想在配置文件中设置一个开关,enabled,在开关为true的时候才实例化bean,进行相关业务逻辑的操作. 具体实现: 1:要实例化的bean 2. 配置类 代码: 想要实例化的 ...
- springboot中使用自定义注解实现策略模式,去除工厂模式的switch或ifelse,实现新增策略代码零修改
前言 思路与模拟业务 源码地址 https://gitee.com/houzheng1216/springboot 整体思路就是通过注解在策略类上指定约定好的type,项目启动之后将所有有注解的typ ...
- springboot中添加事务注解
1.首先在service层中的方法前添加@Transactional @Service public class UserService { @Autowired private UserMapper ...
- Springboot中如何自定义注解以及使用2例
不说废话,直接进入正题: java自定义注解主要有3步:1.编写@interface接口2.编写@interface对应的处理方法进行处理3.调用处理方法 示例一:判断奇偶:比如有一个字段no要判断奇 ...
随机推荐
- BigDecimal 算数
BigDecimal big=new BigDecimal("22.233"); BigDecimal big1=new BigDecimal("12.233" ...
- 为什么单个binlog会大于max_binlog_size设置
查看参数设置mysql> show global variables like '%max_binlog_size%';+-----------------+------------+| Var ...
- 理解Java构造器中的"this"
Calling Another Constructor if the first statement of a constructor has the form this(...), then the ...
- yield关键字详解与三种用法
本篇文章比较硬核, 适合有一定Python基础的读者阅读, 如果您对Python还不甚了解可以先关注我哦, 我会持续更新Python技术文章 yield详解 yield与return相同每次调用都会返 ...
- 51nod 1122:机器人走方格 V4 (矩阵快速幂)
题目链接 昨天上随机信号分析讲马氏链的时候突然想到这题的解法,今天写一下 定义矩阵A,Ans=A^n,令A[i][j]表示,经过1次变换后,第i个位置上的机器人位于第j个位置的情况数,则Ans[i][ ...
- Redis缓存在django中的配置
django settings中的配置 # 缓存 CACHES = { "default": { "BACKEND": "django_redis. ...
- Hadoop编程调用HDFS(JAVA)
1.运行环境 开发工具:intellij idea JDK版本:1.8 项目管理工具:Maven 4.0.0 Hadoop环境: Cloudera QuickStart 2.GITHUB地址 http ...
- 51单片机的idata,xdata,pdata,data的详解
data: 固定指前面0x00-0x7f的128个RAM,可以用acc直接读写的,速度最快,生成的代码也最小. bit :是指0x20-0x2f的可位寻址区idata:固定指前面0x00-0xff的2 ...
- sudo su 和sudo -s的区别
sudo su 和 sudo -s都是切换到root用户,不同的是: sudo su 环境用的是目标用户(root)的环境 sudo -s 环境用的是当前用户本身的环境
- C++的指针偏移
假设一个类的定义如下:class Ob{public:Ob() : a(1), b(10) {}int a;private:int b; };