c++第三次实验
第一题:
先把代码贴上来
main.cpp
 #include <iostream>

 #include <cstdlib>

 #include<conio.h>

 #include "canvas.h"

 #include "Ball.h"

 using namespace std;

 int main() {

     Canvas canvas;

     char ch;

     Ball ball1(,);

     system("pause");

     /*ball1.left(5);

     system("pause");

     ball1.up(20);

     system("pause");*/

     while(cin>>ch)

     {

         cout<<"如果想退出请按q";

         switch(ch)

         {

             case 'w':ball1.up();break;

             case 's':ball1.down();break;

             case 'a':ball1.left();break;

             case 'd':ball1.right();break;

             default :break;

         }

         if(ch=='q')break;

     }

     canvas.changeCanvasFg("E");  // 更新画布前景色

     system("pause");

     canvas.changeCanvasBg("D");  // 更新画布背景色

     system("pause");

     return ;

 }
canvas.h
 #ifndef CANVAS_H

 #define CANVAS_H

 #include <string>

 using std::string;

 class Canvas {

     public:

         Canvas(string bg0="", string fg0="A");

         void changeCanvasBg(string bg0);

         void changeCanvasFg(string fg0);

         void changeCanvasColor(string bg0, string fg0);

     private:

         string bg; // background color

         string fg; // foreground color

 };

 #endif
ball.h
 #ifndef BALL_H

 #define BALL_H

 class Ball {

     public:

         Ball(int x0=, int y0=);   // 在坐标(x,y)处构造一个小球(小球用字符O表示)

         void  left(int step=);        // 左移step

         //void left(char step);

         void  right(int step=);        // 右移step

     //    void right(int step=1);

         void  up(int step=);        // 上移step

         //void up(int step=1);

         void down(int step=);         // 下移step

         //void down(int step=1);

     private:

         int x;    // x坐标

         int y;  // y坐标

 };

 #endif
ball.cpp
 #include "ball.h"

 #include <iostream>

 #include <cstdlib>  // 因为使用了system("cls"); 所以需要包含这个头文件

 using std::cout;

 using std::endl;

 const int SIZE_X=;   // 小球x轴移动范围0~SIZE_X

 const int SIZE_Y=;   // 小球y轴移动范围0~SIZE_Y

 void printline(int n)

 {

     int i;

     for(i=; i <= n-; i ++)

         cout << endl;

 }

 void printspace(int n)

 {

     int i;

     for(int i=; i <= n-; i ++)

         cout << " ";

 }

 Ball::Ball(int x0, int y0):x(x0), y(y0) {

     // 打印y0-1行空行

     printline( y0);

     //for(int line=1; line <= y0-1; line++)

         //cout << endl;

     // 打印x0-1个空格

     printspace( x0);

     //for(int col=1; col <= x0-1; col++)

         //cout << " ";    printspace(int y0);

     // 打印小球

     cout << "O" << endl;

 }

 void Ball::left(int step) {

     x = x-step;

     if(x <= )

         x=;

     // 清屏

     system("cls");

     // 打印y-1行空行

         printline( y);

     //for(int line=1; line <= y-1; line++)

         //cout << endl;

     // 打印x-1个空格

         printspace( x);

     //for(int col=1; col <= x-1; col++)

         //cout << " ";

     // 打印小球

     cout << "O" << endl;

 }

 void Ball::right(int step) {

     x = x+step;

     if(x >= SIZE_X)

         x=SIZE_X;

     // 清屏

     system("cls");

     // 打印y-1行空行

         printline( y);

     //for(int line=1; line <= y-1; line++)

         //cout << endl;

     // 打印x-1个空格

         printspace( x);

     //for(int col=1; col <= x-1; col++)

         //cout << " ";

     // 打印小球

     cout << "O" << endl;

 }

 void Ball::up(int step) {

     y = y-step;

     if(y <= )

         y=;

     // 清屏

     system("cls");

     // 打印y-1行空行

         printline( y);

     //for(int line=1; line <= y-1; line++)

         //cout << endl;

     // 打印x-1个空格

         printspace( x);

     //for(int col=1; col <= x-1; col++)

         //cout << " ";

     // 打印小球

     cout << "O" << endl;

 }

 void Ball::down(int step) {

     y = y+step;

     if(y >= SIZE_Y)

         y = SIZE_Y;

     // 清屏

     system("cls");

     // 打印y-1行空行

         printline( y);

     //for(int line=1; line <= y-1; line++)

         //cout << endl;

     // 打印x-1个空格

         printspace( x);

     //for(int col=1; col <= x-1; col++)

         //cout << " ";

     // 打印小球

     cout << "O" << endl;

 }

 // 思考:

 // Ball类的成员函数实现中,包含大量重复的代码

 // 利用所学知识对代码改进优化,使代码更简洁,同时,保持逻辑清晰
canvas.cpp
 #include "canvas.h"

 #include <cstdlib>

 Canvas::Canvas(string bg0, string fg0):bg(bg0), fg(fg0) {

     string color = "color ";

     color += bg0;

     color += fg0;

     system(color.c_str());

 }

 void Canvas::changeCanvasBg(string bg0) {

     bg = bg0; // 更新画布背景色

     string color = "color ";

     color += bg;

     color += fg;

     system(color.c_str());

 }

 void Canvas::changeCanvasFg(string fg0) {

     fg = fg0; // 更新画布前景色

     string color = "color ";

     color += bg;

     color += fg;

     system(color.c_str());

 }

 void Canvas::changeCanvasColor(string bg0, string fg0){

     bg = bg0;  // 更新画布背景色

     fg = fg0;   // 更新画布前景色

     string color = "color ";

     color += bg;

     color += fg;

     system(color.c_str());

 }

 // 1. 说明

 // system("color ××");

 // 可以用于改变屏幕的前景色和背景色

 // 这里画布类Canvas的默认画布颜色及修改就是利用这个函数实现的

 // 由于sysmtem()要求参数必须是const char*类型

 // 因此,这里借助string类成员函数c_str完成从string类到const char*类型的转换

 // c++标准库中tring类虽然是对char *类的封装,以此实现对字符串更便捷、丰富的操作,但是,仍然是有区别的。

 // 2. 思考

 // Canvas类成员函数的实现中,有大量重复的代码

 // 思考如何进一步优化代码,同时又能保持代码的可读性和简洁、逻辑清晰
我对canvas中的重复代码利用函数简化。
添加了基于WASD控制上下左右的功能。
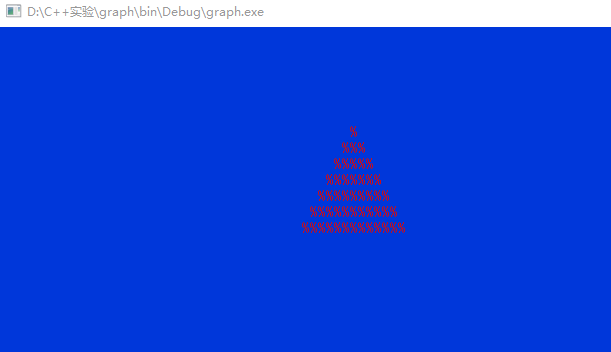
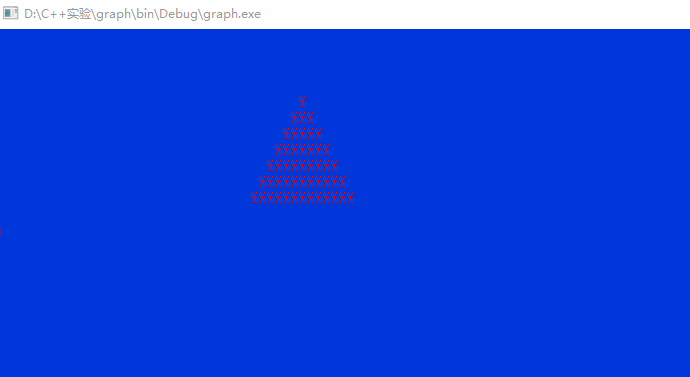
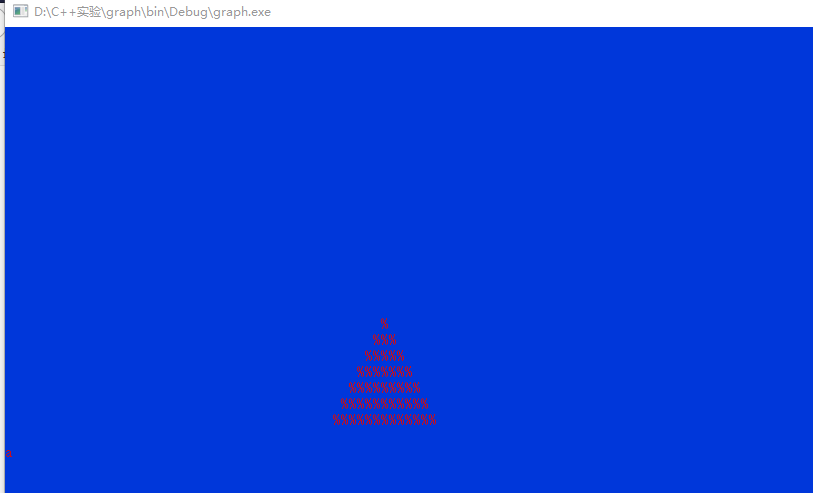
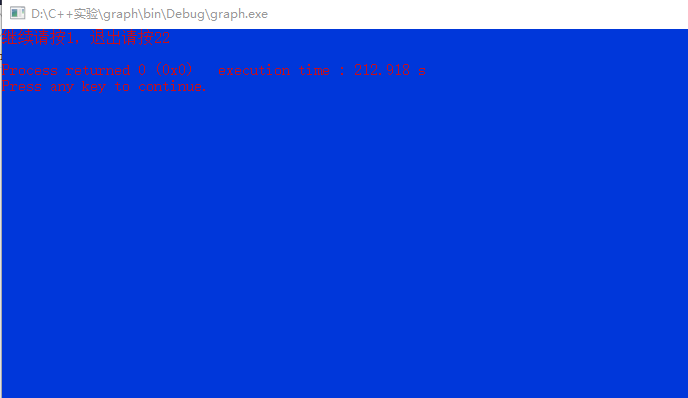
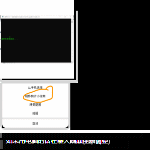 图片有点糊 但是还是能看出来。
第二题:
还是先贴代码为敬
main.cpp
#include <iostream>
#include <cstdlib>
#include <string>
#include "graph.h"
#include "canvas2.h"
using namespace std; int main() {
char ss,ch;
int flag,ll;
string bg0,fg0;
Canvas canvas;
Graph graph1('*',);
graph1.draw(); system("pause");
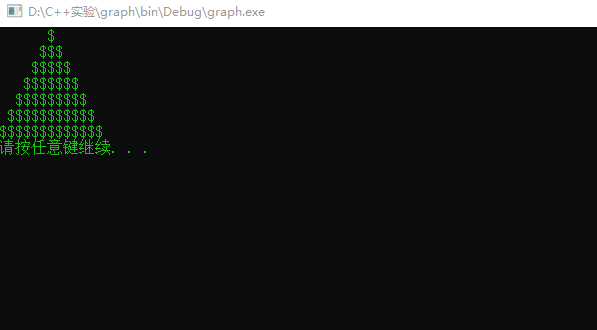
system("cls"); Graph graph2('$',);
graph2.draw();
system("pause");
system("cls");
while()
{
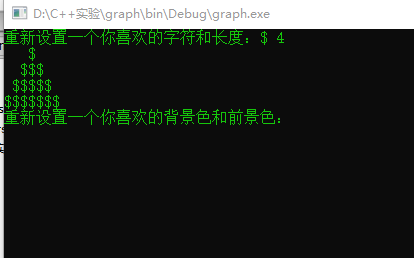
cout<<"重新设置一个你喜欢的字符和长度:";
cin>>ss>>ll;
//cout<<ll;
Graph graph3(ss,ll);
graph3.draw();
cout<<"重新设置一个你喜欢的背景色和前景色:";
cin>>bg0>>fg0;
canvas.changeCanvasColor(bg0,fg0);
cout<<"如果想退出请按q";
while(cin>>ch)
{ switch(ch)
{ case 'w':graph3.up();break;
case 's':graph3.down();break;
case 'a':graph3.left();break;
case 'd':graph3.right();break;
default :break; }
if(ch=='q')break;
}
system("pause");
system("cls");
cout<<"继续请按1,退出请按2";
cin>>flag;
if(flag==)continue;
else if(flag==)break;
} return ;
}
graph.h
 #ifndef GRAPH_H

 #define GRAPH_H

 // 类Graph的声明

 class Graph {

     public:

         Graph(char ch, int n);   // 带有参数的构造函数

         void draw();     // 绘制图形

         void  left(int step=);

         void  right(int step=);

         void  up(int step=);

         void  down(int step=);

     private:

         char symbol;

         int size;

         int x;

         int y;

 };

 #endif
canvas2.h
 #ifndef CANVAS2_H

 #define CANVAS2_H

 #include <string>

 using std::string;

 class Canvas {

     public:

         Canvas(string bg0="", string fg0="A");

         void changeCanvasBg(string bg0);

         void changeCanvasFg(string fg0);

         void changeCanvasColor(string bg0, string fg0);

     private:

         string bg; // background color

         string fg; // foreground color

 };

 #endif
graph.cpp
 // 类graph的实现

 #include "graph.h"

 #include <iostream>

 #include <cstdlib>  // 因为使用了system("cls"); 所以需要包含这个头文件

 using namespace std;

 const int SIZE_X=;   // 小球x轴移动范围0~SIZE_X

 const int SIZE_Y=;   // 小球y轴移动范围0~SIZE_Y

 // 带参数的构造函数的实现

 Graph::Graph(char ch, int n): symbol(ch), size(n) {

     x=;

     y=;

 }

 // 成员函数draw()的实现

 void Graph::draw()

 {

     int i,j,k,sum;

     sum=*size-;   //计算列数

     for(i=;i<=size;i++)

     {

         for(j=;j<=size-i;j++)

             cout<<' ';//每一行先打印出(size-行数)个空格

         for(k=size-i+;k<=sum-j+;k++)

             cout<<symbol;//再打印出剩下的字符

         cout<<endl;

     }

 }

 // 功能:绘制size行,显示字符为symbol的指定图形样式

 void printline(int n)

 {

     int i;

     for(i=; i <= n-; i ++)

         cout << endl;

 }

 void printspace(int n)

 {

     int i;

     for( i=; i <= n-; i ++)

         cout << " ";

 }

 void Graph::left(int step)

 {

     int i,j,k,sum;

     x = x-step;

     if(x <= )

         x=;

     system("cls");

         printline(y);

     sum=*size-;

     for(i=;i<=size;i++)

     {

         printspace(x);

         for(j=;j<=size-i;j++)

             cout<<' ';

         for(k=size-i+;k<=sum-j+;k++)

             cout<<symbol;

         cout<<endl;

     }

 }

 void Graph::right(int step)

 {

     int i,j,k,sum;

     x = x+step;

     if(x >= SIZE_X)

         x=SIZE_X;

     system("cls");

         printline(y);

          sum=*size-;

     for(i=;i<=size;i++)

     {

         printspace(x);

         for(j=;j<=size-i;j++)

             cout<<' ';

         for(k=size-i+;k<=sum-j+;k++)

             cout<<symbol;

         cout<<endl;

     }

 }

 void Graph::up(int step)

 {

     int i,j,k,sum;

    y = y-step;

     if(y <= )

         y=;

     system("cls");

         printline(y);

          sum=*size-;

     for(i=;i<=size;i++)

     {

         printspace(x);

         for(j=;j<=size-i;j++)

             cout<<' ';

         for(k=size-i+;k<=sum-j+;k++)

             cout<<symbol;

         cout<<endl;

     }

 }

 void Graph::down(int step)

 {

     int i,j,k,sum;

     y = y+step;

     if(y >= SIZE_Y)

         y = SIZE_Y;

     system("cls");

         printline(y);

         for(i=;i<=size;i++)

     {

         printspace(x);

         for(j=;j<=size-i;j++)

             cout<<' ';

         for(k=size-i+;k<=sum-j+;k++)

             cout<<symbol;

         cout<<endl;

     }

 }
canvas2.cpp
 #include "canvas2.h"

 #include <cstdlib>

 Canvas::Canvas(string bg0, string fg0):bg(bg0), fg(fg0) {

     string color = "color ";

     color += bg0;

     color += fg0;

     system(color.c_str());

 }

 void Canvas::changeCanvasBg(string bg0) {

     bg = bg0; // 更新画布背景色

     string color = "color ";

     color += bg;

     color += fg;

     system(color.c_str());

 }

 void Canvas::changeCanvasFg(string fg0) {

     fg = fg0; // 更新画布前景色

     string color = "color ";

     color += bg;

     color += fg;

     system(color.c_str());

 }

 void Canvas::changeCanvasColor(string bg0, string fg0){

     bg = bg0;  // 更新画布背景色

     fg = fg0;   // 更新画布前景色

     string color = "color ";

     color += bg;

     color += fg;

     system(color.c_str());

 }

 // 1. 说明

 // system("color ××");

 // 可以用于改变屏幕的前景色和背景色

 // 这里画布类Canvas的默认画布颜色及修改就是利用这个函数实现的

 // 由于sysmtem()要求参数必须是const char*类型

 // 因此,这里借助string类成员函数c_str完成从string类到const char*类型的转换

 // c++标准库中tring类虽然是对char *类的封装,以此实现对字符串更便捷、丰富的操作,但是,仍然是有区别的。

 // 2. 思考

 // Canvas类成员函数的实现中,有大量重复的代码

 // 思考如何进一步优化代码,同时又能保持代码的可读性和简洁、逻辑清晰
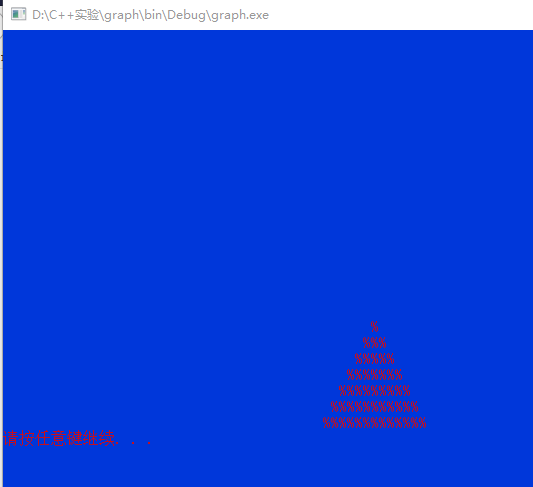
程序运行之后,先显示 Graph graph1('*',5);和Graph graph2('$',7);这两条语句下的图案。按任意键继续后可以输入自定义的字符和行数
然后可以选择前背景色和后背景色。然后想要退出可以按q,不退出就按其他的键进入图形移动界面。
如果想要退出按q即可。如果想再次设置会弹出选择,按1继续,按2退出整个程序。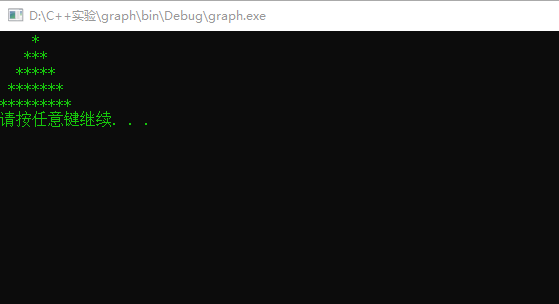

第三题:
main.cpp
 #include <iostream>

 #include "fraction.h"

 using namespace std;

 int main ()

 {

     Fraction a(,);

     cout<<"a:";

     a.print(a);

     Fraction b(,);

     cout<<"b:";

     b.print(b);

     Fraction c();

     cout<<"c:";

     a.print(c);

     Fraction d;

     d=d.add(a,b);

     cout<<"a+b=";

     a.print(d);

     a.mytransform(d);

     d=d.minus(a,b);

     cout<<"a-b=";

     a.print(d);

     d=d.product(a,b);

     cout<<"a*b=";

     a.print(d);

     d=d.division(a,b);

     cout<<"a/b=";

     a.print(d);

     cout<<"当分数分母为0时:";

     Fraction e(,);

     cout<<"e:";

     a.print(e);

     cout<<"比较b和c:";

     a.compare(b,c);

     return ;

 }
fraction.h
 #ifndef FRACTION_H

 #define FRACTION_H

 class Fraction

 {

     public:

         Fraction(int a=,int b=);

         Fraction(Fraction &p);

         Fraction add(Fraction p1,Fraction p2);

         Fraction minus(Fraction p1,Fraction p2);

         Fraction product(Fraction p1,Fraction p2);

         Fraction division(Fraction p1,Fraction p2);

         void compare(Fraction p1,Fraction p2);

         void print(Fraction p);

         void standard(int &top,int &bottom);

         void mytransform(Fraction p);

         int yueshu(int a,int b);

         int jueduizhi(int a);

     private:

         int top;

         int bottom;

 };

 #endif  FRACTION_H
fraction.cpp
 #include "fraction.h"

 #include <iostream>

 using namespace std;

 void Fraction::mytransform(Fraction p)

 {

     cout<<"转换成小数输出:"<<static_cast<double>(p.top)/static_cast<double>(p.bottom)<<endl;

 }

 int Fraction::yueshu(int a,int b)

 {

     if(b==)return a;

     else

         return yueshu(b,a%b);

 }

 int Fraction::jueduizhi(int a)

 {

     if(a<)return -a;

     else return a;

 }

 void Fraction::standard(int &top,int &bottom)

 {

     int gongyueshu;

     if(top<&&bottom<)

     {

         top=-top;

         bottom=-bottom;

     }

     else if(top<||bottom<)

     {

         if(top>)

         {

             top=-top;

             bottom=-bottom;

         }

     }

     gongyueshu=yueshu(jueduizhi(top),jueduizhi(bottom));

     top/=gongyueshu;

     bottom/=gongyueshu;

 }

 Fraction::Fraction (int a,int b):top(a),bottom(b)

 {

     if(b==)

     {

         cout<<"分母不能为零!分数默认为0/1"<<endl;

         top=;

         bottom=;

     }

 }

 Fraction::Fraction (Fraction &p)

 {

     top=p.top;

     bottom=p.bottom;

 }

 Fraction Fraction::add(Fraction p1,Fraction p2)

 {

     Fraction p3;

     p3.bottom=p1.bottom*p2.bottom;

     p3.top=p1.top*p2.bottom+p2.top*p1.bottom;

     //cout<<p3.top<<p3.bottom<<endl;

     standard(p3.top,p3.bottom);

    // cout<<p3.top<<p3.bottom<<endl;

     return p3;

 }

 Fraction Fraction::minus(Fraction p1,Fraction p2)

 {

     Fraction p3;

     p3.bottom=p1.bottom*p2.bottom;

     p3.top=p1.top*p2.bottom-p2.top*p1.bottom;

     standard(p3.top,p3.bottom);

     return p3;

 }

 Fraction Fraction::product(Fraction p1,Fraction p2)

 {

     Fraction p3;

     p3.bottom=p1.bottom*p2.bottom;

     p3.top=p1.top*p2.top;

     standard(p3.top,p3.bottom);

     return p3;

 }

 Fraction Fraction::division(Fraction p1,Fraction p2)

 {

     Fraction p3;

     p3.bottom=p1.bottom*p2.top;

     p3.top=p1.top*p2.bottom;

     standard(p3.top,p3.bottom);

     return p3;

 }

 void Fraction::compare(Fraction p1,Fraction p2)

 {

     int m,n;

     m=p1.top*p2.bottom;

     n=p1.bottom*p2.top;

     if(m/n>)cout<<p1.top<<'/'<<p1.bottom<<'>'<<p2.top<<'/'<<p2.bottom<<endl;

     else if(m/n==)cout<<p1.top<<'/'<<p1.bottom<<'='<<p2.top<<'/'<<p2.bottom<<endl;

     else cout<<p1.top<<'/'<<p1.bottom<<'<'<<p2.top<<'/'<<p2.bottom<<endl;

 }

 void Fraction::print(Fraction p)

 {

     cout<<p.top<<'/'

         <<p.bottom<<endl;

 }
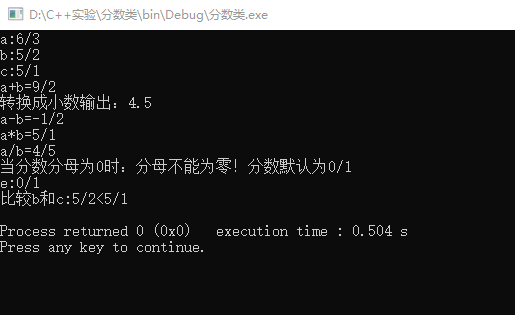
我的程序当创建一个对象没有赋予初值时是0/1,可以进行加减乘除运算,可以将分数转换为小数,当输入的分母为零时提醒错误并改为默认的0/1,可以两个分数进行比较大小。当分数为负数时,负号在分子上。当分子分母不是最简时,进行约分。
实验总结:
1.初步了解了多文件结构的使用方法和运行机制。
2.对类的定义实现和调用加深了理解。
3.了解了简单的用字符控制输出的方法。
c++第三次实验的更多相关文章
- 20145224&20145238 《信息安全系统设计基础》 第三次实验
20145224&20145238 <信息安全系统设计基础>第三次实验 课程:信息安全系统设计基础 班级:1452 姓名:陈颢文 荆玉茗 学号:20145224 20145238 ...
- 20145330Java程序设计第三次实验
20145330<Java程序设计>第三次实验报告 实验三 敏捷开发与XP实践 实验内容 1.使用git上传代码 2.使用git实现代码开发实践 3.实现代码的重载 实验步骤 使用git上 ...
- 20145320《Java程序设计》第三次实验报告
20145320<Java程序设计>第三次实验报告 北京电子科技学院(BESTI)实验报告 课程:Java程序设计 班级:1453 指导教师:娄嘉鹏 实验日期:2016.04.22 15: ...
- Linux第三次实验报告
北京电子科技学院(BESTI) 实 验 报 告 课程:信息安全系统设计基础 班级:201352 姓名:池彬宁 贺邦 学号:20135212 2013520 ...
- 南京邮电大学java第三次实验报告
实 验 报 告 ( 2017 / 2018学年 第2学期) 课程名称 JAVA语言程序设计 实验名称 Java集成开发环境的安装与使用. Java变量.表达式与控制结构 实验时间 2018 年 4 月 ...
- Java第三次实验敏捷开发与XP实验
实验三-1 1.实验要求: 实验三 敏捷开发与XP实践 http://www.cnblogs.com/rocedu/p/4795776.html, Eclipse的内容替换成IDEA 参考 http: ...
- java第三次实验报告
北京电子科技学院(BESTI) 实验报告 课程: Java程序设计 班级: 1352 姓名: 池彬宁 学号: 20135212 成绩: 指导教师: 娄嘉鹏 实验日期: 2015.6.3 实验密级: 无 ...
- 20162327WJH第三次实验——查找与排序2
20162327WJH第三次实验--查找与排序2 实 验 报 告 课程:程序设计与数据结构 班级: 1623 姓名: 王旌含 学号:20162327 成绩: 指导教师:娄嘉鹏 王志强 实验日期:11月 ...
- 20155210 潘滢昊 Java第三次实验
Java第三次实验 实验内容 在IDEA中使用工具(Code->Reformate Code)把代码重新格式化 在码云上把自己的学习搭档加入自己的项目中,确认搭档的项目加入自己后,下载搭档实验二 ...
- 20155217 《Java程序设计》第三次实验报告
20155217 <Java程序设计>第三次实验报告 实验内容 XP基础 XP核心实践 相关工具 实验要求 没有Linux基础的同学建议先学习<Linux基础入门(新版)>&l ...
随机推荐
- DCM、PLL、PMCD、MMCM相关
摘自网上 : http://xilinx.eetop.cn/viewnews-1482 The DCM is a Digital Clock Manager - at its heart it is ...
- C++设计模式——模板方法模式
模板方法模式 在GOF的<设计模式:可复用面向对象软件的基础>一书中对模板方法模式是这样说的:定义一个操作中的算法骨架,而将一些步骤延迟到子类中.TemplateMethod使得子类可以不 ...
- C# 最牛逼的Utility工具类
完整代码: using System; using System.Collections.Specialized; using System.IO; using System.Net; using S ...
- python学习之Numpy.genfromtxt
Python 并没有提供数组功能,虽然列表 (list) 可以完成基本的数组功能,但它并不是真正的数组,而且在数据量较大时,使用列表的速度就会慢的让人难受.Numpy 提供了真正的数组功能,以及对数据 ...
- java---- XMLEncoder 和 XMLDecoder 和 xSteam工具使用
XMLEncoder: 将对象写入XML数据中 import org.dom4j.DocumentException; import java.beans.XMLEncoder; import jav ...
- Eclipse连接HBase 报错:org.apache.hadoop.hbase.PleaseHoldException: Master is initializing
在eclipse中连接到HBase报错org.apache.hadoop.hbase.PleaseHoldException: Master is initializing,搜索了好久,网上其它人说的 ...
- python之MySQL MySQLdb 推荐使用姿势,解决中文乱码
0.目录 2.setup(1) 安装步骤,可以顺带安装mysql administrator和mysql query browser(2) 安装完毕,修改 my.ini(3) 重启 mysql 服务: ...
- 02.Numpy
01.array # -*- coding: utf-8 -*- """ Numpy 패키지 특징 - 선형대수(벡터, 행렬) 연산에 효과적인 함수 제공 - lis ...
- Codeforces 1045E. Ancient civilizations 构造 计算几何 凸包
原文链接https://www.cnblogs.com/zhouzhendong/p/CF1045E.html 4K码量构造题,CF血腥残暴! 题解 首先,如果所有点颜色相同,那么直接连个菊花搞定. ...
- Noj - 在线强化训练3
状态 题号 竞赛题号 标题 1091 A 求解逆波兰表达式(Calculate the reverse Polish notation) 1017 B 数列 1323 C 穷举n位二进制数 ...