Proxypool代理池搭建
个人博客:点我
前言
项目地址 : https://github.com/jhao104/proxy_pool
这个项目是github上一个大佬基于python爬虫制作的定时获取免费可用代理并入池的代理池项目
我们来具体实现一下。
具体操作
1.安装配置redis
将自动爬取的代理入池需要redis数据库,首先就得安装redis。
redis官方建议我们在linux上安装,安装方式主要有两种,直接包获取或手动安装。
- 指令安装
apt-get install redis-server
- 手动安装
在官网下载最新redis安装包,导入Linux。
tar -zxvf redis-6.2.6.tar.gz

cd redis-6.2.6/

make

make install

cd /usr/local/bin

mkdir config

cp /opt/redis-6.2.6/redis.conf config		# 默认安装位置为/opt
配置文件修改
修改redis配置文件(注意两种安装方式的配置文件位置不同,自动安装在/etc/redis/redis.conf,手动安装在/opt/redis-6.2.6/redis.conf),进行如下修改:
daemonize yes		# 守护进程开启

protected-mode no   # 关闭保护模式

# bind 127.0.0.1 ::1			# 此条为仅允许本地访问,必须注释掉

port 6379			# redis 开放端口(如果是有防火墙的服务器需要开启该端口)
开启redis
redis-server config/redis.conf

redis-cli

如需停止:
shutdown

exit
2.拉取并使用脚本
根据项目文档,可以手动配置也可以使用docker部署(推荐)
docker 使用方法见另一篇博客
docker pull jhao104/proxy_pool

docker run --env DB_CONN=redis://:[password]@[ip]:[port]/[db] -p 5010:5010 jhao104/proxy_pool:latest
password 没有可为空
db 默认0
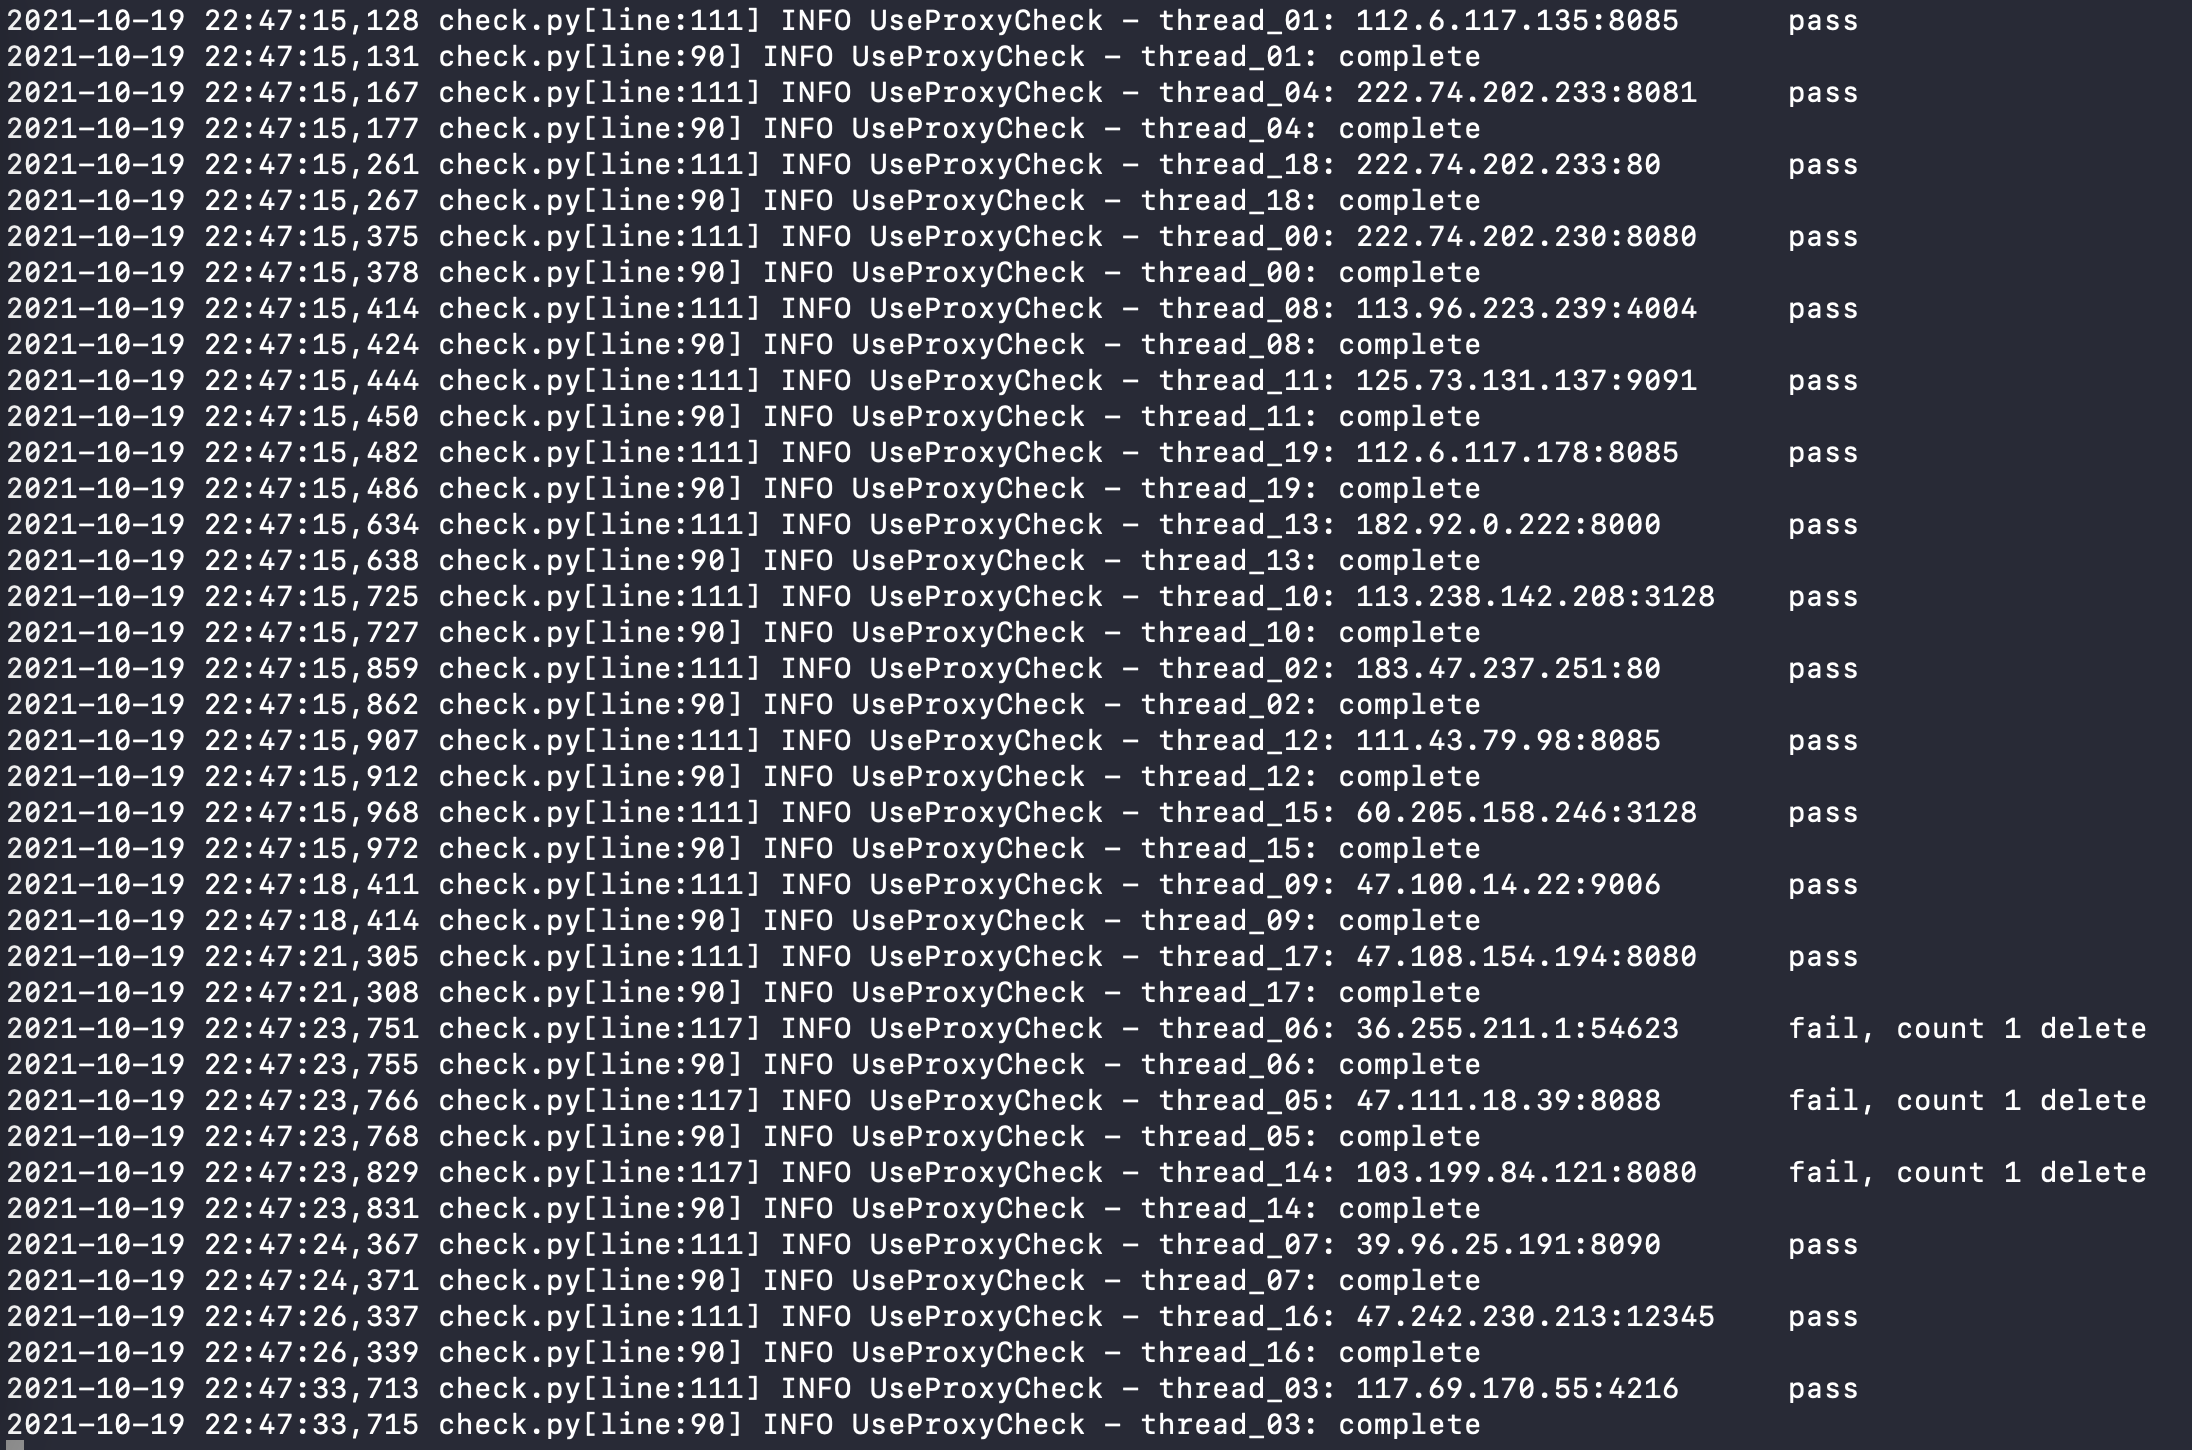
运行成功应如图:
3.生成配置文件并导入Proxyfier
首先pip安装redis包
pip install redis
编译以下代码,注意修改第8行的ip和port(redis)
# -*- coding:utf8 -*-

import redis

import json

from xml.etree import ElementTree

def RedisProxyGet():

    ConnectString = []

    pool = redis.ConnectionPool(host='[ip]', port=[port], db=0, decode_responses=True)

    use_proxy = redis.Redis(connection_pool=pool)

    key = use_proxy.hkeys('use_proxy')

    for temp in key:

        try:

            ConnectString.append(json.loads(use_proxy.hget('use_proxy',temp)))

        except json.JSONDecodeError: # JSON解析异常处理

            pass

    return ConnectString

def xmlOutputs(data):

    i = 101

    ProxyIDList = []

    ProxifierProfile = ElementTree.Element("ProxifierProfile")

    ProxifierProfile.set("version", str(i))

    ProxifierProfile.set("platform", "Windows")

    ProxifierProfile.set("product_id", "0")

    ProxifierProfile.set("product_minver", "310")

    Options = ElementTree.SubElement(ProxifierProfile, "Options")

    Resolve = ElementTree.SubElement(Options, "Resolve")

    AutoModeDetection = ElementTree.SubElement(Resolve, "AutoModeDetection")

    AutoModeDetection.set("enabled", "false")

    ViaProxy = ElementTree.SubElement(Resolve, "ViaProxy")

    ViaProxy.set("enabled", "false")

    TryLocalDnsFirst = ElementTree.SubElement(ViaProxy, "TryLocalDnsFirst")

    TryLocalDnsFirst.set("enabled", "false")

    ExclusionList = ElementTree.SubElement(Resolve, "ExclusionList")

    ExclusionList.text = "%ComputerName%; localhost; *.local"

    Encryption = ElementTree.SubElement(Options, "Encryption")

    Encryption.set("mode", 'basic')

    Encryption = ElementTree.SubElement(Options, "HttpProxiesSupport")

    Encryption.set("enabled", 'true')

    Encryption = ElementTree.SubElement(Options, "HandleDirectConnections")

    Encryption.set("enabled", 'false')

    Encryption = ElementTree.SubElement(Options, "ConnectionLoopDetection")

    Encryption.set("enabled", 'true')

    Encryption = ElementTree.SubElement(Options, "ProcessServices")

    Encryption.set("enabled", 'false')

    Encryption = ElementTree.SubElement(Options, "ProcessOtherUsers")

    Encryption.set("enabled", 'false')

    ProxyList = ElementTree.SubElement(ProxifierProfile, "ProxyList")

    for temp in data:

        i += 1  # 从101开始增加

        Proxy = ElementTree.SubElement(ProxyList, "Proxy")

        Proxy.set("id", str(i))

        if not temp['https']:

            Proxy.set("type", "HTTP")

        else:

            Proxy.set("type", "HTTPS")

            Proxy.text = str(i)

            ProxyIDList.append(i)

        Address = ElementTree.SubElement(Proxy, "Address")

        Address.text = temp['proxy'].split(":", 1)[0]

        Port = ElementTree.SubElement(Proxy, "Port")

        Port.text = temp['proxy'].split(":", 1)[1]

        Options = ElementTree.SubElement(Proxy, "Options")

        Options.text = "48"

    ChainList = ElementTree.SubElement(ProxifierProfile, "ChainList")

    Chain = ElementTree.SubElement(ChainList, "Chain")

    Chain.set("id", str(i))

    Chain.set("type", "simple")

    Name = ElementTree.SubElement(Chain, "Name")

    Name.text="AgentPool"

    for temp_id in ProxyIDList:

        Proxy = ElementTree.SubElement(Chain, "Proxy")

        Proxy.set("enabled", "true")

        Proxy.text=str(temp_id)

    RuleList = ElementTree.SubElement(ProxifierProfile, "RuleList")

    Rule = ElementTree.SubElement(RuleList, "Rule")

    Rule.set("enabled", "true")

    Name = ElementTree.SubElement(Rule,"Name")

    Applications = ElementTree.SubElement(Rule,"Applications")

    Action = ElementTree.SubElement(Rule,"Action")

    Name.text="御剑后台扫描工具.exe [auto-created]"

    Applications.text="御剑后台扫描工具.exe"

    Action.set("type","Direct")

    # Rule

    Rule = ElementTree.SubElement(RuleList, "Rule")

    Rule.set("enabled", "true")

    Name = ElementTree.SubElement(Rule,"Name")

    Targets = ElementTree.SubElement(Rule,"Targets")

    Action = ElementTree.SubElement(Rule,"Action")

    Name.text="Localhost"

    Targets.text="localhost; 127.0.0.1; %ComputerName%"

    Action.set("type", "Direct")

    # Rule

    Rule = ElementTree.SubElement(RuleList, "Rule")

    Rule.set("enabled", "true")

    Name = ElementTree.SubElement(Rule, "Name")

    Action = ElementTree.SubElement(Rule, "Action")

    Name.text = "Default"

    Action.text = "102"

    Action.set("type", "Proxy")

    tree = ElementTree.ElementTree(ProxifierProfile)

    tree.write("ProxifierConf.ppx", encoding="UTF-8", xml_declaration=True)

    if __name__ == '__main__':

    proxy_data = RedisProxyGet()

    xmlOutputs(proxy_data)

    print("ProxifierConf.ppx配置文件创建完成....")
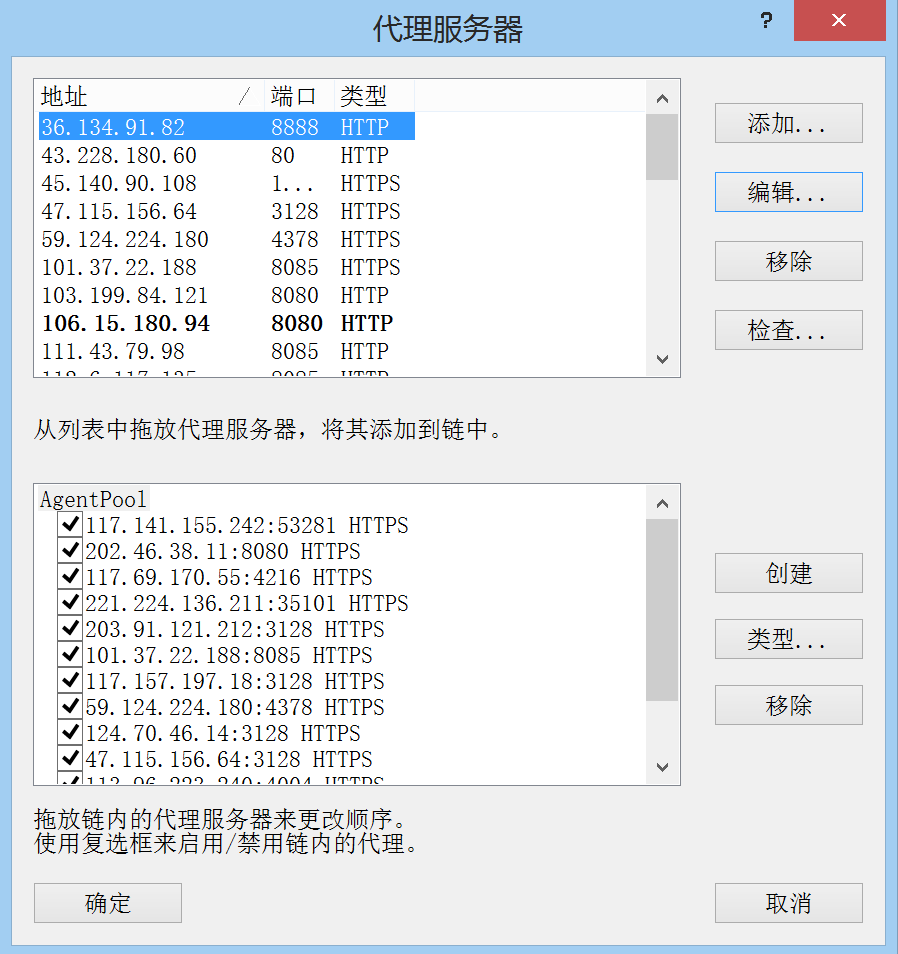
编译成功生成ProxyfierConf.ppx文件。双击导入proxyfier即可
这里proxyfier的版本不能太高,否则会报错,建议3.3.1
Proxypool代理池搭建的更多相关文章
- python爬虫redis-ip代理池搭建几十万的ip数据--可以使用
from bs4 import BeautifulSoupimport requests,os,sys,time,random,redisfrom lxml import etreeconn = re ...
- 【Python3爬虫】教你怎么利用免费代理搭建代理池
一.写在前面 有时候你的爬虫刚开始的时候可以正常运行,能够正常的爬取数据,但是过了一会,却出现了一个“403 Forbidden",或者是”您的IP访问频率太高“这样的提示,这就意味着你的I ...
- 反爬虫之搭建IP代理池
反爬虫之搭建IP代理池 听说你又被封 ip 了,你要学会伪装好自己,这次说说伪装你的头部.可惜加了header请求头,加了cookie 还是被限制爬取了.这时就得祭出IP代理池!!! 下面就是requ ...
- 进程线程协程补充、docker-compose一键部署项目、搭建代理池、requests超时设置、认证设置、异常处理、上传文件
今日内容概要 补充:进程,线程,协程 docker-compose一键部署演示 搭建代理池 requests超时设置 requests认证设置 requests异常处理 requests上传文件 内容 ...
- 配置个人Ip代理池
做爬虫最害怕的两件事一个是被封账户一个是被封IP地址,IP地址可以使用代理来解决,网上有许多做IP代理的服务,他们提供大量的IP地址,不过这些地址不一定都是全部可用,因为这些IP地址可能被其他人做爬虫 ...
- 介绍一种 Python 更方便的爬虫代理池实现方案
现在搞爬虫,代理是不可或缺的资源 很多人学习python,不知道从何学起.很多人学习python,掌握了基本语法过后,不知道在哪里寻找案例上手.很多已经做案例的人,却不知道如何去学习更加高深的知识.那 ...
- Python爬虫代理池
爬虫代理IP池 在公司做分布式深网爬虫,搭建了一套稳定的代理池服务,为上千个爬虫提供有效的代理,保证各个爬虫拿到的都是对应网站有效的代理IP,从而保证爬虫快速稳定的运行,当然在公司做的东西不能开源出来 ...
- Python实现的异步代理爬虫及代理池
使用python asyncio实现了一个异步代理池,根据规则爬取代理网站上的免费代理,在验证其有效后存入redis中,定期扩展代理的数量并检验池中代理的有效性,移除失效的代理.同时用aiohttp实 ...
- 记一次企业级爬虫系统升级改造(六):基于Redis实现免费的IP代理池
前言: 首先表示抱歉,春节后一直较忙,未及时更新该系列文章. 近期,由于监控的站源越来越多,就偶有站源做了反爬机制,造成我们的SupportYun系统小爬虫服务时常被封IP,不能进行数据采集. 这时候 ...
随机推荐
- linux 查看用户密码
2021-07-26 1.查看前三个密码 head -3 / etc / passwd # 注解 /etc/passwd 中一行记录对应着一个用户,每行记录又被冒号 (:) 分隔为 7 个字段,其格式 ...
- lsyncd替代inotify+rsync实现实时同步
因公司业务需要需要实时同步日志文件,刚一开始使用的是inotify+rsync来实现实时同步,但时间久而久之发现同步的速度越来越慢,往往延迟好几个小时.查了一下网上的inotify+rsync方案基本 ...
- 【Python机器学习实战】决策树与集成学习(五)——集成学习(3)GBDT应用实例
前面对GBDT的算法原理进行了描述,通过前文了解到GBDT是以回归树为基分类器的集成学习模型,既可以做分类,也可以做回归,由于GBDT设计很多CART决策树相关内容,就暂不对其算法流程进行实现,本节就 ...
- Docker小白到实战之Dockerfile解析及实战演示,果然顺手
前言 使用第三方镜像肯定不是学习Docker的最终目的,最想要的还是自己构建镜像:将自己的程序.文件.环境等构建成自己想要的应用镜像,方便后续部署.启动和维护:而Dockerfile就是专门做这个事的 ...
- uni-app中websocket的使用 断开重连、心跳机制
前言 最近关于H5和APP的开发中使用到了webSocket,由于web/app有时候会出现网络不稳定或者服务端主动断开,这时候导致消息推送不了的情况,需要客户端进行重连.查阅资料后发现了一个心跳机制 ...
- python 常用的文件操作命令
一.python中对文件.文件夹操作时经常用到的os模块和shutil模块常用方法. 1.得到当前工作目录,即当前Python脚本工作的目录路径: os.getcwd() 2.返回指定目录下的所有文件 ...
- Appium问题解决方案(2)- AttributeError:module 'appium.webdriver' has no attribute 'Remote'
背景 运行脚本的时候,就直接报这个错误了,然后去看了下 appium.webdriver 库 结果发现啥都没有,就知道有问题了,然后一步步排查 步骤一 检查Appium-Python-Client 和 ...
- 虚拟机使用scp传输文件提示“WARNING REMOTE HOST IDENTIFICATION HAS CHANGED”解决方式
虚拟机使用scp传输文件提示"WARNING REMOTE HOST IDENTIFICATION HAS CHANGED"解决方式 简单的说就是虚拟机里保存的认证密钥不正确了,需 ...
- 【第九篇】- Git 标签之Spring Cloud直播商城 b2b2c电子商务技术总结
Git 标签 如果你达到一个重要的阶段,并希望永远记住那个特别的提交快照,你可以使用 git tag 给它打上标签. 比如说,我们想为我们的 xxx 项目发布一个"1.0"版本. ...
- angularjs 文件上传
github连接地址:https://github.com/danialfarid/ng-file-upload 核心代码: html: <div class="form-group& ...