2 zabbix安装与部署
官方文档:https://www.zabbix.com/documentation/3.0/manual
中文文档 https://www.zabbix.com/documentation/3.4/zh/manual/quickstart/host
优秀的参考blog:https://www.cnblogs.com/clsn/p/7885990.html#auto_id_20
1、zabbix
1.zabbix
分布式开源的监控系统

. 支持多种采集方式

       几乎可以采集和处理所有类型的监控数据

.灵活的报警机制

        可实现各种自定义报警策略

. 强大的拓展,自定义监控项,图像,模板

.支持自动注册和发现

.丰富的api
2.为甚选择zabbix?
其他监控系统
cacti,nagios,ManageEngin_ApplicationsManager,lepus,smokeping,piwiki等
zabbix:简单!高效!灵活!
3、常见监控系统架构
数据采集---数据存储---数据分析、展示、告警

2、zabbix安装
1、选择版本
请看zabbix的发行版本和开发周期
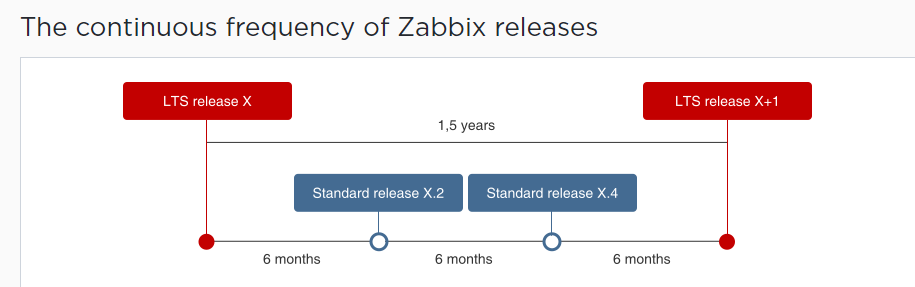
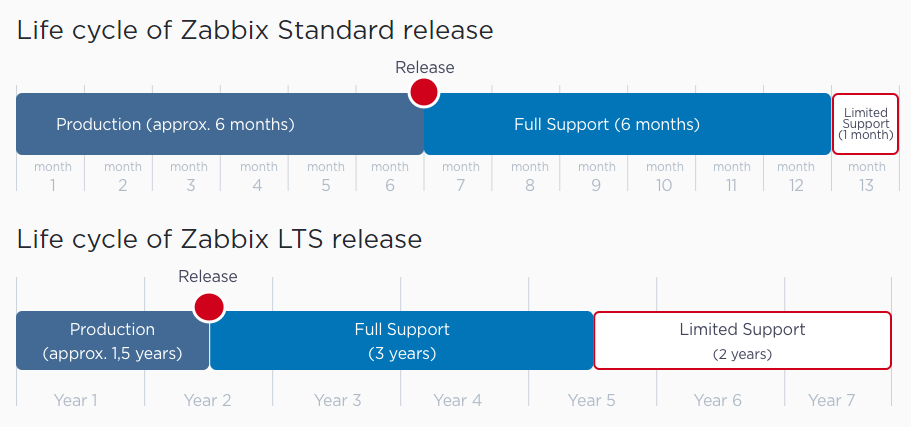
最终选择了:zabbix3.0LTS
2、时间同步
agent时间不同步会影响后续的操作
[root@linux-node1 ~]# yum install -y ntpdate

[root@linux-node1 ~]# vim /var/spool/cron/root

'* * * * * /usr/sbin/ntpdate ntp1.aliyun.com
3、最低要求
https://www.zabbix.com/documentation/3.0/manual/installation/requirements
3、安装和配置zabbix Server
官方文档:
https://www.zabbix.com/documentation/3.4/manual/installation/install_from_packages/rhel_centos
1. Install Zabbix repository
[root@linux-node1 /etc/yum.repos.d]#rpm -ivh http://repo.zabbix.com/zabbix/3.0/rhel/7/x86_64/zabbix-release-3.0-1.el7.noarch.rpm

[root@linux-node1 /etc/yum.repos.d]# yum clean all
# 卸载

[root@localhost /etc/yum.repos.d]# rpm -e zabbix-release-3.2-.el6.noarch

更好yum源 :地址aliyun
http://mirrors.aliyun.com/zabbix/zabbix/3.0/rhel/7/
http://mirrors.aliyun.com/zabbix/non-supported/rhel/7/
[root@linux-node1 ~]# vim /etc/yum.repos.d/zabbix.repo

[zabbix]

name=Zabbix Official Repository - $basearch

baseurl=http://mirrors.aliyun.com/zabbix/zabbix/3.0/rhel/7/$basearch/

enabled=

gpgcheck=

gpgkey=file:///etc/pki/rpm-gpg/RPM-GPG-KEY-ZABBIX

[zabbix-non-supported]

name=Zabbix Official Repository non-supported - $basearch

baseurl=http://mirrors.aliyun.com/zabbix/non-supported/rhel/7/$basearch/

enabled=

gpgkey=file:///etc/pki/rpm-gpg/RPM-GPG-KEY-ZABBIX

gpgcheck=
2. Install Zabbix server, frontend
zabbix-server-mysql # 包含mysql表数据
zabbix-web-mysql # web前端php代码
[root@localhost /etc/yum.repos.d]# yum install zabbix-server-mysql zabbix-web-mysql -y
3. Create initial database
安装mysql或者mariadb
[root@localhost ~]# yum install mariadb-server -y

[root@localhost ~]# systemctl enable mariadb

[root@localhost ~]# netstat -nlp|grep mysql
设置密码

[root@localhost ~]# mysql_secure_installation
授权
# mysql -uroot -p

password

MariaDB [(none)]> create database zabbix character set utf8 collate utf8_bin;

Query OK,  row affected (0.01 sec)

MariaDB [(none)]> grant all on zabbix.* to zabbix@'localhost' identified by 'zabbix';

Query OK,  rows affected (0.02 sec)

MariaDB [(none)]> flush privileges;
导入mysql数据
查看安装包释放的文件
[root@localhost ~]# rpm -ql zabbix-server-mysql

...

/usr/share/doc/zabbix-server-mysql-3.0./create.sql.gz

...
查看表

[root@localhost ~]# mysql -uroot -proot

MariaDB [(none)]> use zabbix

MariaDB [zabbix]> show tables;

4. Start Zabbix server httpd
启动httpd服务
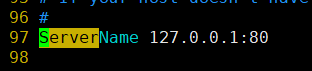
[root@localhost ~]# vim /etc/httpd/conf/httpd.conf

ServerName 127.0.0.1:80

[root@localhost ~]# systemctl enable httpd.service

[root@localhost ~]# systemctl restart httpd.service

[root@localhost ~]# netstat -nlp |grep
zabbix server 服务
配置文件

[root@linux-node1 ~]# vim /etc/zabbix/zabbix_server.conf

启动

[root@linux-node1 ~]# systemctl enable zabbix-server

[root@linux-node1 ~]# systemctl restart zabbix-server
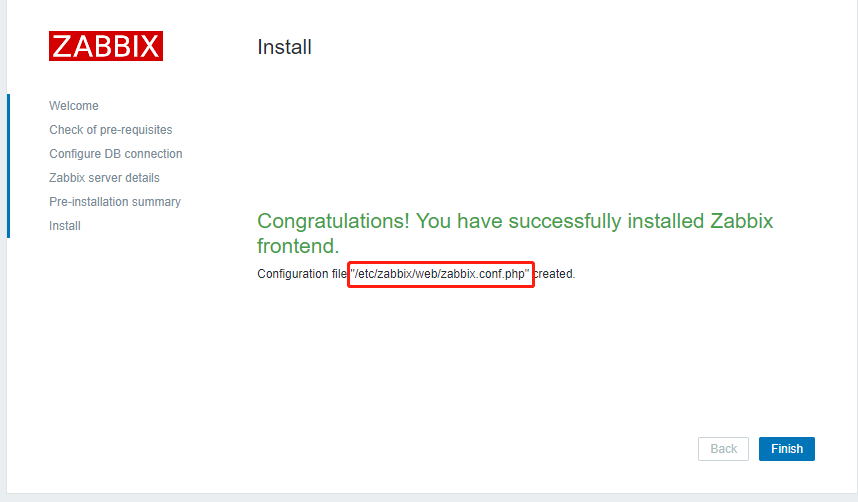
5.web页面安装
Installing frontend官方文档:https://www.zabbix.com/documentation/3.0/manual/installation/install#installing_frontend
地址: http://192.168.194.131/zabbix/setup.php
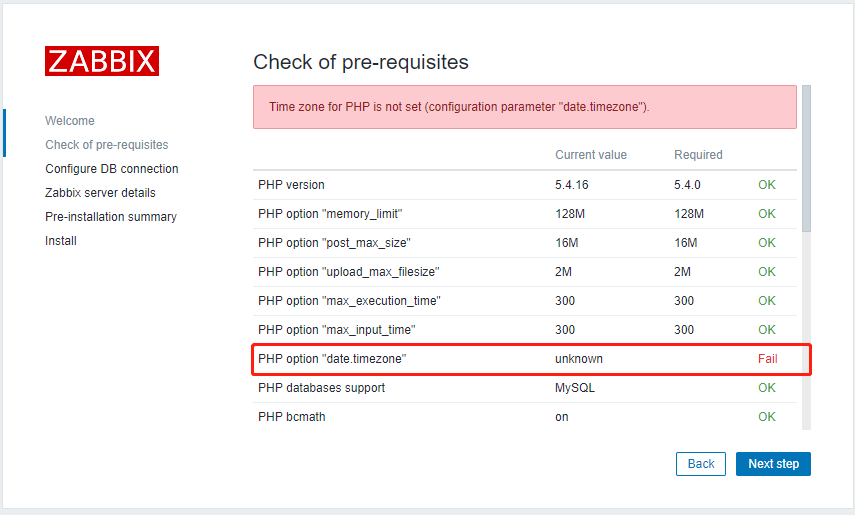
1. Configure PHP for Zabbix frontend
修改时区
[root@linux-node1 ~]# vim /etc/httpd/conf.d/zabbix.conf

        php_value date.timezone Asia/Shanghai

[root@linux-node1 ~]# systemctl restart httpd

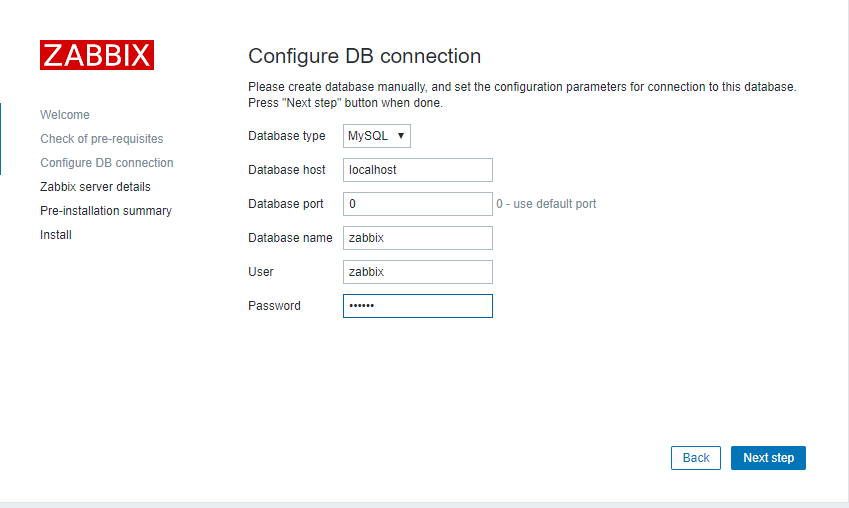
2.填写zabbix server

3.Configuration file "/etc/zabbix/web/zabbix.conf.php" created.
4、登录

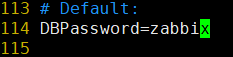
5. Configure the database for Zabbix server
Edit file /etc/zabbix/zabbix_server.conf
[root@localhost ~]# vim /etc/zabbix/zabbix_server.conf

DBPassword=zabbix

[root@localhost ~]# systemctl restart zabbix-server

[root@localhost ~]# netstat -nltp

tcp               192.168.194.131:      0.0.0.0:*               LISTEN      /httpd

tcp6              :::                :::*                    LISTEN      /zabbix_server
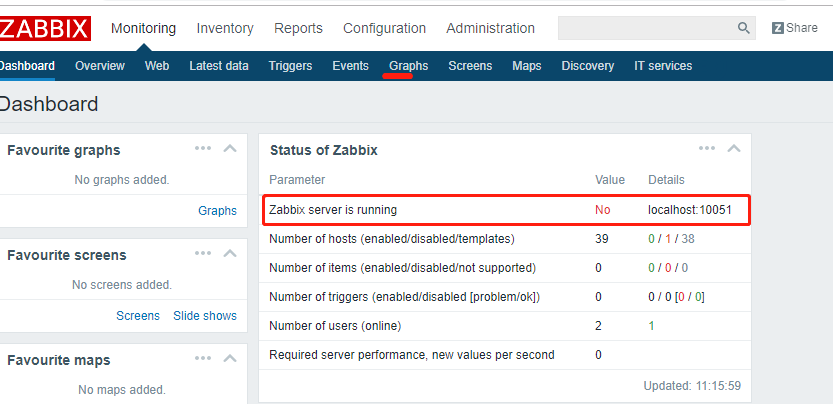
6、启用
查看日志
[root@localhost ~]# tail -f /var/log/zabbix/zabbix_server.log


4、zabbix agent部署安装
监控别人,也可以监控自己
1、node1
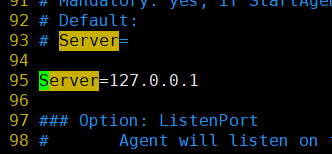
配置ip为127.0.0.1即可,配置其他error
[root@localhost ~]# yum install zabbix-agent -y
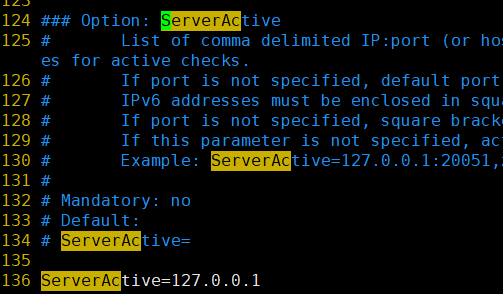
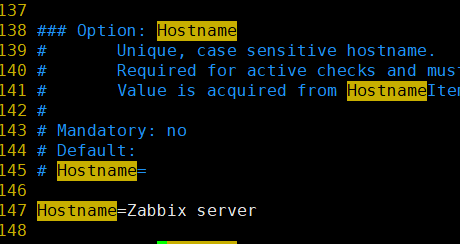
[root@localhost ~]# cat /etc/zabbix/zabbix_agentd.conf
# 需要关注的
server:zabbix server的ip
serverActive 活动的,运行的ip
Hostname=Zabbix server 该主机对应的hostname,唯一标识
[root@localhost ~]# systemctl enable zabbix-agent

[root@localhost ~]# systemctl restart zabbix-agent

[root@localhost ~]# netstat -nltp

tcp               0.0.0.0:            0.0.0.0:*               LISTEN      /mysqld

tcp               192.168.194.131:      0.0.0.0:*               LISTEN      /httpd

tcp6              :::                :::*                    LISTEN      /zabbix_agentd

tcp6              :::                :::*                    LISTEN      /zabbix_server
2、node2
安装repo
修改yum
安装agent
[root@localhost ~]# yum install zabbix-agent -y
[root@localhost ~]# cat /etc/zabbix/zabbix_agentd.conf
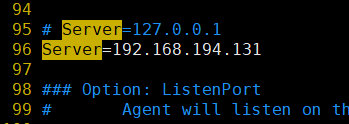
Server=192.168.194.131
ServerActive=192.168.194.131
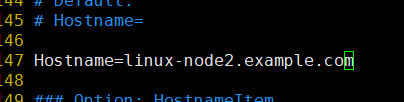
Hostname=linux-node2.example.com

[root@localhost ~]# systemctl enable zabbix-agent
[root@localhost ~]# systemctl restart zabbix-agent
[root@localhost ~]# netstat -nlpt
ERROR

解决如下:
不用131了,直接改成135
[root@localhost ~]# cat /etc/zabbix/zabbix_agentd.conf
Server=192.168.194.135
ServerActive=192.168.194.135
Hostname=linux-node2.example.com

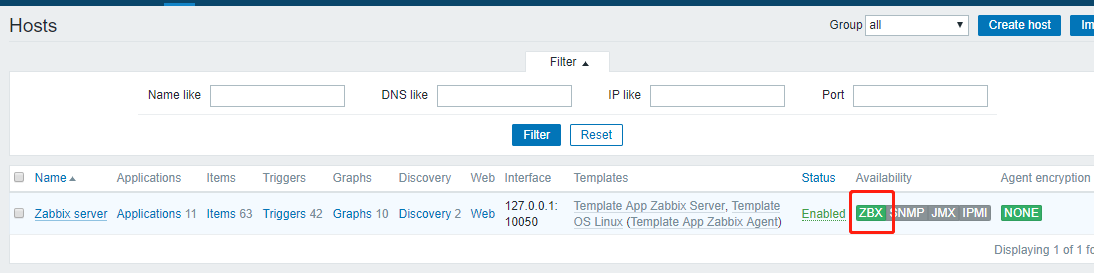
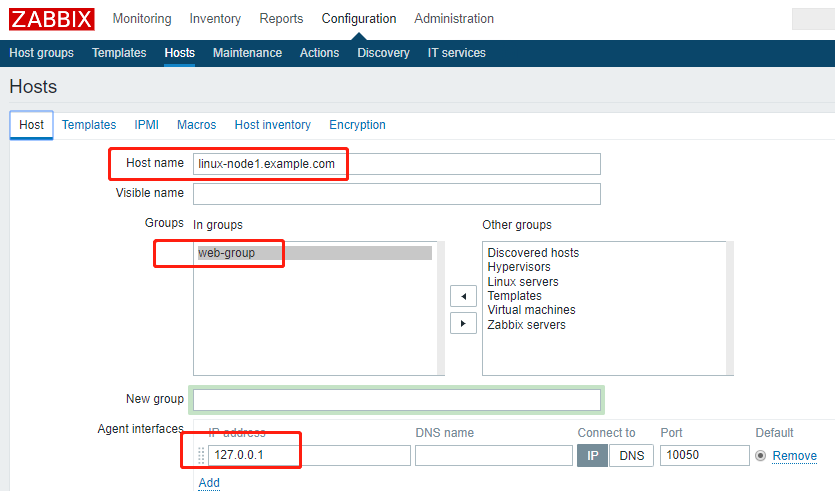
3、web界面,创建host

(1)创建hostgroups

(2)创建host2
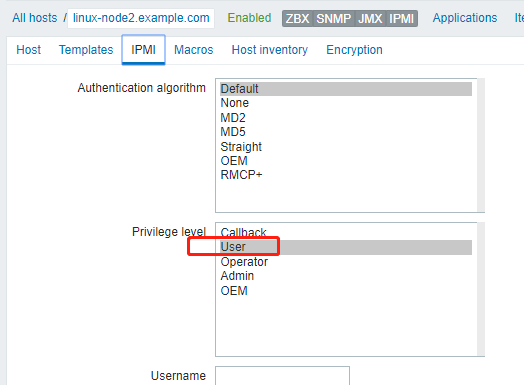
host、Templates、IPMI
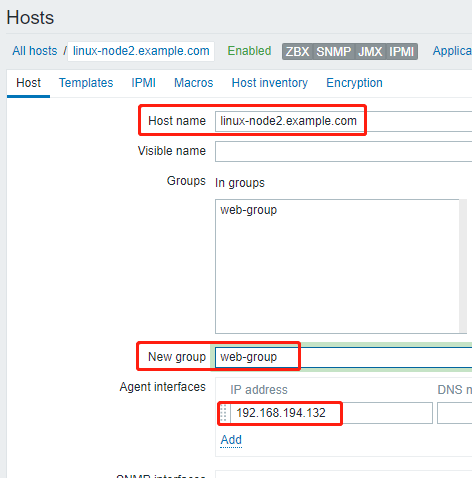

(3)创建host2
5、总结
1、问题
Question 参考blog
https://blog.51cto.com/fengzhige/1034485
(1)Question 1
--> Finished Dependency Resolution
Error: Package: zabbix-server-mysql-3.0.28-1.el7.x86_64 (zabbix)
Requires: libiksemel.so.3()(64bit)
You could try using --skip-broken to work around the problem
You could try running: rpm -Va --nofiles --nodigest
解决:重置yum.repo.d 文件夹,删除重新找
(2)Question2

解决:
好像是网络配置那边的问题
不能 删除DHCP ,其他的随意

(3)Question3
Received empty response from Zabbix Agent at [127.0.0.1]. Assuming that agen
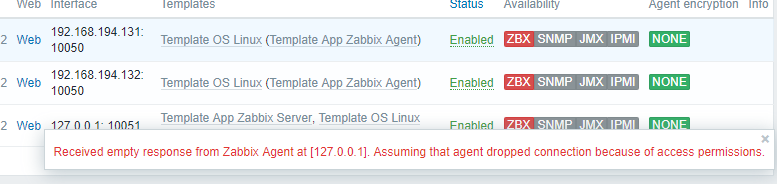
问题比较大
第1点:agent对应的 server ip问题
Agent配置文件中的ip
Node1的为127.0.0.1
Node2 的为 192.168.194.131
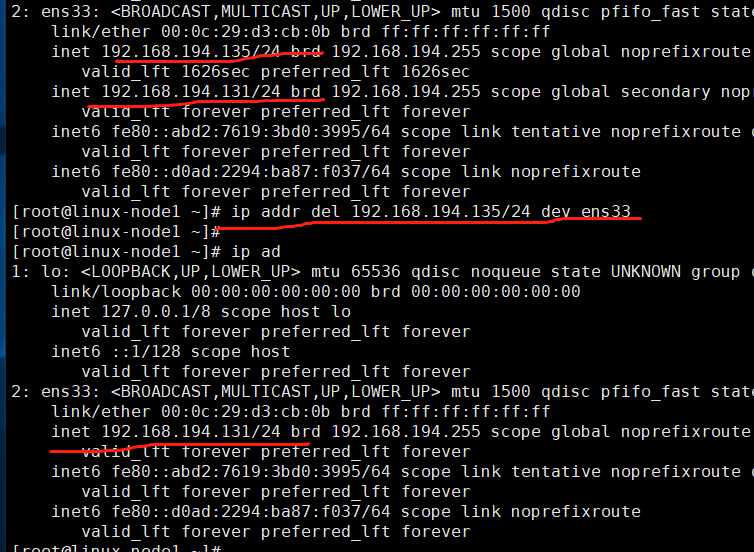
第2点:多个ip问题


解决:删除多余的ip
[root@linux-node1 ~]# ip addr del 192.168.194.135/ dev ens33
第3点:zabbix server的问题
Web页面
必须是10050端口吗?不是server端吗

(4)Question4

原因:多个ip

删除另一个ip
2、日志排错
[root@linux-node1 ~]# tail -f /var/log/zabbix/zabbix_agentd.log

[root@linux-node1 ~]# tail -f /var/log/zabbix/zabbix_server.log


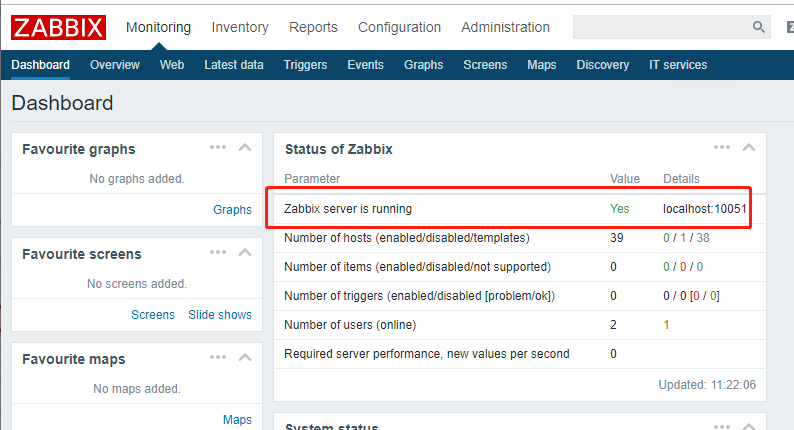
3、总结
麻痹,终于调试成功了,现在看下配置

Server
httpd服务 这个配置无关紧要
[root@linux-node1 ~]# vim /etc/httpd/conf/httpd.conf
Web页面
必须是10050端口吗?不是server端吗

Agent1
[root@linux-node1 ~]# vim /etc/zabbix/zabbix_agentd.conf

为啥不配 192.168.194.131呢? 反正配上就不通。
有可能是之前web界面安装的时候默认localhost
Agent2
[root@linux-node1 ~]# vim /etc/zabbix/zabbix_agentd.conf

配置server的ip地址,这点没问题
多个ip的时候,会影响

[root@linux-node1 ~]# ip addr del 192.168.194.135/24 dev ens33
2 zabbix安装与部署的更多相关文章
- centos7下zabbix安装与部署
1.Zabbix介绍 zabbix是一个基于WEB界面的提供分布式系统监视以及网络监视功能的企业级的开源解决方案. zabbix能监视各种网络参数,保证服务器系统的安全运营:并提供灵活的通知机制以让系 ...
- Centos7下的zabbix安装与部署
目录: 1.Zabbix介绍 2.LAMP/LNMP介绍 3.Zabbix安装与部署 1.Zabbix介绍 zabbix是一个基于WEB界面的提供分布式系统监视以及网络监视功能的企业级的开源解决方案. ...
- zabbix安装、部署、lnmp(一)
最近入手zabbix,准备好好的研究,好好的弄. 环境准备: mysql:5.6.29 PHP:5.6.12 Nginx:1.8.0 zabbix:3.2.6 操作系统:Centos6 用户:普通 ...
- zabbix监控实战<2>----zabbix-server的安装与部署
第一章 zabbix-server的安装与部署 1.1 环境部署 eth0 eth1 master 10.0.0.71 ...
- Zabbix监控系统部署:源码安装
1. 概述1.1 基础环境2. 部署过程2.1 创建用户组2.2 下载源码解压编译安装2.2.1 下载源码解压2.2.2 YUM安装依赖环境2.2.3 编译安装最新版curl2.2.4 更新GNU构建 ...
- LNMP+Zabbix的安装与部署
LNMP+Zabbix的安装与部署 一.Zabbix简介 1.zabbix是一个基于WEB界面的,并提供分布式系统监视以及网络监视功能的企业级的开源解决方案. zabbix能监视各种网络参数,保证服务 ...
- Zabbix安装部署实践
操作系统: [root@mysql ~]# cat /etc/redhat-release CentOS Linux release 7.5.1804 (Core) Mysql : 版本5.7 ...
- CentOS下Zabbix安装部署及汉化
搭建环境:Centos6.5_x86_64,Zabbix2.4.5,epel 源 服务端: 1.安装开发软件包yum -y groupinstall "Development Tools&q ...
- 详解zabbix安装部署(Server端篇)
原文:http://blog.chinaunix.net/uid-25266990-id-3380929.html Linux下常用的系统监控软件有Nagios.Cacti.Zabbix.Monit等 ...
随机推荐
- delphicbuilder10_2_1 安装破解注册
安装程序 1.解压delphicbuilder10_2_1.iso,以管理员身份运行..\delphicbuilder10_2_1\Install\Setup.exe——选择安装语言——点击OK(推荐 ...
- 洛谷 P2018 消息传递 题解
题面 总体来说是一道从下往上的DP+贪心: 设f[i]表示将消息传给i,i的子树全部接收到所能消耗的最小时间: 那么对于i的所有亲儿子节点j,我们会贪心地先给f[j]大的人传递,然后次大..... 可 ...
- Mathematically Hard LightOJ-1007(欧拉定理+前缀和)
Description Mathematically some problems look hard. But with the help of the computer, some problems ...
- Spring MVC(一)Spring MVC的原理
1.Spring MVC的目的 构建像Spring框架那样灵活和松耦合的Web应用程序. 2.Spring MVC中如何处理Request? 每当用户在Web浏览器中点击链接或者提交表单时,Reque ...
- hdfs架构详解(防脑裂fencing机制值得学习)
HDFS(Hadoop Distributed File System)是一个分布式文件存储系统,几乎是离线存储领域的标准解决方案(有能力自研的大厂列外),业内应用非常广泛.近段抽时间,看一下 HDF ...
- mybatis 延迟加载学习
一.什么是延迟加载 resultMap可实现高级映射(使用association.collection实现一对一及一对多映射),association.collection具备延迟加载功能. 需求: ...
- 发明专利定稿&递交申请啦,开心
也不想写些什么,只是想简单的分享一下当前的心情! 第一版到最后一版中间因为各种事情耽误,一直弄到现在.5月中旬找的专利代理局中间连续修改很多次,从大改到小改,再到微调真的是学习到了! 下面就是搞定&l ...
- shiro学习(三,shiro加密)
shiro加密 使用MD5加密 认证 //自定义的Realm 域 public class CustomRealmSecret extends AuthorizingRealm { @Overrid ...
- O063、NFS Volume Provider(Part II)
参考https://www.cnblogs.com/CloudMan6/p/5693771.html 本节开始创建 NFS volume ,操作方法和 LVM volume一样,唯一的区别是在 v ...
- 利用Cmake 将最新版本OBS编译成windows版本。
准备工作: 1. VS2013 的最新更新版或者VS2015 2. QT Creater 5.7 https://www.qt.io/ 3. CMake (cmake-gui) 4. obs 依 ...