SpringBoot写第一个接口
服务可以理解为一个接口,一个controller,一个做业务请求的
新建一个HelloWorldController
import org.springframework.boot.SpringApplication;


import org.springframework.boot.autoconfigure.EnableAutoConfiguration;


import org.springframework.web.bind.annotation.RequestMapping;


import org.springframework.web.bind.annotation.RestController;


import java.util.HashMap;


import java.util.Map;
@EnableAutoConfiguration//做spring的注容器,创建tomcat,开spring的加载,然后类就都可以使用了
//@RestController 表示该接口全部返回json格式 相当于下面写了一个@ResponseBody
@RestController
public class HelloWorldController {
// @ResponseBody
@RequestMapping("/index")
public String index(){
return "success";
}
@RequestMapping("/getMap")
public Map<String , Object> getMap(){
Map<String , Object> result = new HashMap<String , Object>();
result.put("errorCode","200");
result.put("errorMsg","成功");
return result;
}
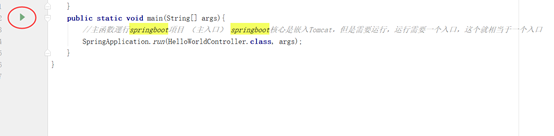
public static void main(String[] args){ //这个函数只运行这一个java文件,因为加入这个@EnableAutoConfiguration注解后默认只扫当前,其他的不访问
        //主函數運行springboot項目 (主入口)    springboot核心是嵌入Tomcat,但是需要运行,而运行需要一个入口,这个就相当于一个入口


        SpringApplication.run(HelloWorldController.class, args);


    }


}
然后点击左边的三角号运行
当出现这种情况就可以了

然后在浏览器输入http://localhost:8080/index

输入http://localhost:8080/getMap因为是map集合所以是一个json格式

Pom.xml文件,在这里我用的war
<?xml version="1.0" encoding="UTF-8"?>
<project xmlns="http://maven.apache.org/POM/4.0.0"
xmlns:xsi="http://www.w3.org/2001/XMLSchema-instance"
xsi:schemaLocation="http://maven.apache.org/POM/4.0.0
http://maven.apache.org/xsd/maven-4.0.0.xsd">
<modelVersion>4.0.0</modelVersion>
<groupId>com.itmayiedu</groupId>
<artifactId>springboot1</artifactId>
<version>1.0-SNAPSHOT</version>
<packaging>war</packaging>
<name>springboot1 Maven Webapp</name>
<!-- FIXME change it to the project's website -->
<url>http://www.example.com</url>
<properties>
<project.build.sourceEncoding>UTF-8</project.build.sourceEncoding>
<maven.compiler.source>1.7</maven.compiler.source>
<maven.compiler.target>1.7</maven.compiler.target>
</properties>
<!—引入springboot父类依赖-->
<parent>
<groupId>org.springframework.boot</groupId>
<artifactId>spring-boot-starter-parent</artifactId>
<version>1.3.3.RELEASE</version>
</parent>
<!—springboot-web组件 springmvc+spring+mybatis-->
<dependencies>
<dependency>
<groupId>junit</groupId>
<artifactId>junit</artifactId>
<version>4.11</version>
<scope>test</scope>
</dependency>
<dependency>
<groupId>org.springframework.boot</groupId>
<artifactId>spring-boot-starter-web</artifactId>
</dependency>
</dependencies>
<!—这个build中的东西一件出来就有了,具体不大清楚,希望哪位大佬看到帮忙解释下,万分感谢!!!-->
<build>
<finalName>springboot1</finalName>
<pluginManagement><!-- lock down plugins versions to avoid
using Maven defaults (may be moved to parent pom) -->
<plugins>
<plugin>
<artifactId>maven-clean-plugin</artifactId>
<version>3.0.0</version>
</plugin>
<!-- see
http://maven.apache.org/ref/current/maven-core/default-bindings.html#Plugin_bindings_for_war_packaging
-->
<plugin>
<artifactId>maven-resources-plugin</artifactId>
<version>3.0.2</version>
</plugin>
<plugin>
<artifactId>maven-compiler-plugin</artifactId>
<version>3.7.0</version>
</plugin>
<plugin>
<artifactId>maven-surefire-plugin</artifactId>
<version>2.20.1</version>
</plugin>
<plugin>
<artifactId>maven-war-plugin</artifactId>
<version>3.2.0</version>
</plugin>
<plugin>
<artifactId>maven-install-plugin</artifactId>
<version>2.5.2</version>
</plugin>
<plugin>
<artifactId>maven-deploy-plugin</artifactId>
<version>2.8.2</version>
</plugin>
</plugins>
</pluginManagement>
</build>
</project>
SpringBoot写第一个接口的更多相关文章
- SpringBoot写后端接口,看这一篇就够了!
摘要:本文演示如何构建起一个优秀的后端接口体系,体系构建好了自然就有了规范,同时再构建新的后端接口也会十分轻松. 一个后端接口大致分为四个部分组成:接口地址(url).接口请求方式(get.post等 ...
- SpringBoot写一个登陆注册功能,和期间走的坑
文章目录 前言 1. 首先介绍项目的相关技术和工具: 2. 首先创建项目 3. 项目的结构 3.1实体类: 3.2 Mapper.xml 3.3 mapper.inteface 3.4 Service ...
- 接口_简单get接口_第一个接口
import flask,json # print(__name__) ##__name__代表当前这个python文件 server = flask.Flask(__name__) #把咱们当前的这 ...
- Spring写第一个应用程序
ref:http://www.importnew.com/13246.html 让我们用Spring来写第一个应用程序吧. 完成这一章要求: 熟悉Java语言 设置好Spring的环境 熟悉简单的Ec ...
- Django使用AJAX调用自己写的API接口
Django使用AJAX调用自己写的API接口 *** 具体代码和数据已上传到github https://github.com/PythonerKK/eleme-api-by-django-rest ...
- 编写高质量代码改善C#程序的157个建议——建议157:从写第一个界面开始,就进行自动化测试
建议157:从写第一个界面开始,就进行自动化测试 如果说单元测试是白盒测试,那么自动化测试就是黑盒测试.黑盒测试要求捕捉界面上的控件句柄,并对其进行编码,以达到模拟人工操作的目的.具体的自动化测试请学 ...
- 使用springboot写一个简单的测试用例
使用springboot写一个简单的测试用例 目录结构 pom <?xml version="1.0" encoding="UTF-8"?> < ...
- Springboot整合elasticsearch以及接口开发
Springboot整合elasticsearch以及接口开发 搭建elasticsearch集群 搭建过程略(我这里用的是elasticsearch5.5.2版本) 写入测试数据 新建索引book( ...
- 用vetr.x写一个HTTP接口适配器, 对接各种形式接口
用vetr.x写一个HTTP接口适配器, 对接各种形式接口 项目地址:https://github.com/hjx601496320/transmit 业务说明 在日常开发工作中,我们经常会遇到要和各 ...
- Python接口测试(第一个接口返回的数据作为第二个参数的入参)
python代码如下 import requests url1="http://localhost:8080/pinter/com/getSku?id=1" respon=requ ...
随机推荐
- uni-app初使用
关于样式 rpx(responsive pixel): 可以根据屏幕宽度进行自适应.规定屏幕宽为750rpx.如在 iPhone6 上,屏幕宽度为375px,共有750个物理像素,则750rpx = ...
- openssl常用操作
参考:https://www.golinuxcloud.com/openssl-view-certificate/ 查看证书信息 openssl x509 -in server.crt -text - ...
- BP神经网络及手工搭建神经网络
import pandas as pd import numpy as np import matplotlib.pyplot as plt def sigmoid(x): # 定义网络激活函数 re ...
- Mybatis开发之mapper代理实现自定义接口(常用)
Mybatis开发之mapper代理实现自定义接口(常用) 通过mapper代理实现自定义接口 自定义接口,接口里面定义定义相关的业务方法 编写方法相对应的Mapper.xml. 定义完接口后,Map ...
- uniapp 中获取微信小程序的原生导航栏高度
const custom = wx.getMenuButtonBoundingClientRect() // console.log(custom) that.yuansheng= custom.he ...
- AndroidStudio 集成kotlin,以及Kotlin-gradle-plugin-1.5.0.jar 下载失败
配置Kotlin buildscript { ext.kotlin_version = '1.5.0' repositories { maven{url 'http://maven.aliyun.co ...
- vue中v-if控制的可编辑div(contenteditable='true')无法绑定@input事件
<div class="content-container" ref="contentContainer"> <div v-if=" ...
- Flutter statecontroller.update(MaterialState.disabled,false)无效
因为中间会调用 void initStatesController() { if (widget.statesController == null) { internalStatesControlle ...
- 【转】BIO,NIO和AIO
本文转自:https://blog.csdn.net/qxy_1218/article/details/123941039 BIO,NIO和AIO是Java网络编程的三种模型 BIO:同步并阻塞,服务 ...
- under display camera
https://yzhouas.github.io/projects/UDC/udc.html https://zhuanlan.zhihu.com/p/389863230 MIPI 2022 Cha ...