全栈的自我修养: 002使用@vue/cli进行vue.js环境搭建 (使用Vue,Spring Boot,Flask,Django 完成Vue前后端分离开发)
全栈的自我修养: 使用@vue/cli进行vue.js环境搭建
Success, real success, is being willing to do the things that other people are not.
成功,真正的成功,是愿意做别人不愿意做的事情。
Table of Contents
当你看到这篇文章的时候,暂且认为你对如何做一个网站有了兴趣.
前言
上一篇讲述了使用 vue-cli 搭建 epimetheus-frontend, 在一些老项目中确实是这样的, 不过前端框架发版就和坐火箭一样, 你方唱罢我登场, 一代新人换旧人, 今天来介绍下 @vue/cli 的使用
Vue CLI 是一个基于 Vue.js 进行快速开发的完整系统,提供:
- 通过 @vue/cli 实现的交互式的项目脚手架。
- 通过 @vue/cli + @vue/cli-service-global 实现的零配置原型开发。
- 一个运行时依赖 (@vue/cli-service),该依赖:
- 可升级;
- 基于 webpack 构建,并带有合理的默认配置;
- 可以通过项目内的配置文件进行配置;
- 可以通过插件进行扩展。
- 一个丰富的官方插件集合,集成了前端生态中最好的工具。
- 一套完全图形化的创建和管理 Vue.js 项目的用户界面。
Vue CLI 致力于将 Vue 生态中的工具基础标准化。它确保了各种构建工具能够基于智能的默认配置即可平稳衔接,这样你可以专注在撰写应用上,而不必花好几天去纠结配置的问题。与此同时,它也为每个工具提供了调整配置的灵活性,无需 eject。
Vue CLI 的介绍来自于官网,文末有对应的参考地址
删代码,不用跑路
删代码,作为程序员来说应该是一件非常身心愉悦的事情
在上一篇文档我们已经使用老版的 vue-cli 创建了 epimetheus-frontend, 首先第一步我们先删除了他
epimetheus$ rm -rf epimetheus-frontend
因为新老版本的 vue cli 都是使用的 vue 命令,此时需要把上次安装的 vue-cli 卸载
epimetheus$ npm uninstall vue-cli -g
这样我们又有一个干净的环境了
Node 版本要求
Vue CLI 需要 Node.js 8.9 或更高版本 (推荐 8.11.0+)。
安装@vue/cli
在上篇中,我们使用了 npm install -g vue-cli 完成 vue-cli 的安装
作为新版本,Vue CLI 的包名称由 vue-cli 改成了 @vue/cli. 我们需要执行以下命令安装
epimetheus$ npm install -g @vue/cli
安装速度还是比较慢的,大家可以喝杯水
安装完成后可以 vue --version 看下版本号
epimetheus$ vue --version

@vue/cli 4.4.6
创建 Vue 项目
这里我们继续创建一遍 epimetheus-frontend
- 我们还是进入上次创建的
epimetheus目录 - 执行
vue create epimetheus-frontend创建项目
第一步会提示选择一个preset, 这里选择默认的 Babel + ESLint
第二步会提示选择package manager, 这里我们还是选择 Yarn
安装过程可能有点慢,安装完成后,如下
epimetheus$ vue create epimetheus-frontend

Vue CLI v4.4.6

? Please pick a preset: default (babel, eslint)

? Pick the package manager to use when installing dependencies: Yarn

Vue CLI v4.4.6

  Creating project in /Users/zhangyunan/project/scoding/epimetheus/epimetheus-frontend.

  Initializing git repository...

⚙️  Installing CLI plugins. This might take a while...

yarn install v1.15.2

info No lockfile found.

[1/4]   Resolving packages...

success Saved lockfile.

info To upgrade, run the following command:

$ curl --compressed -o- -L https://yarnpkg.com/install.sh | bash

  Done in 30.95s.

  Invoking generators...

  Installing additional dependencies...

yarn install v1.15.2

[1/4]   Resolving packages...

[2/4]   Fetching packages...

[3/4]   Linking dependencies...

[4/4]   Building fresh packages...

success Saved lockfile.

  Done in 5.79s.

  Running completion hooks...

  Generating README.md...

  Successfully created project epimetheus-frontend.

  Get started with the following commands:

 $ cd epimetheus-frontend

 $ yarn serve
从上面的提示中,我们看到默认创建了一个 git 项目.
根据最后提示,我们可以进入 epimetheus-frontend, 并在控制台运行 yarn serve,即可开始运行我们的项目
epimetheus$ cd epimetheus-frontend

epimetheus/epimetheus-frontend$ (master) yarn serve

yarn run v1.15.2

$ vue-cli-service serve

 INFO  Starting development server...

98% after emitting CopyPlugin

 DONE  Compiled successfully in 2275ms                                                         下午10:13:29

  App running at:

  - Local:   http://localhost:8080/

  - Network: http://192.168.1.4:8080/

  Note that the development build is not optimized.

  To create a production build, run yarn build.
从控制台信息可以看出,访问路径为:http://localhost:8080
这样准备工作基本就完成了
项目结构
相信开发上篇文档,已经可以使用 code 命令,如果还是不能使用,可以根据下面的提示进行安装,这里我们直接使用 code . 打开当前目录
例如:
epimetheus/epimetheus-frontend$ code .
则会将当前文件夹 epimetheus/epimetheus-frontend 在 VSCode 中打开,
如何你安装
VSCode后,使用code命令时,提示 not fund, 可以通过 查看 -> 命令面板 输入code进行安装
[外链图片转存失败,源站可能有防盗链机制,建议将图片保存下来直接上传(img-jvkCJ2Uz-1593393770883)(img/vscode_install_code.png)]
这里使用了 VSCode,打开项目后如图:
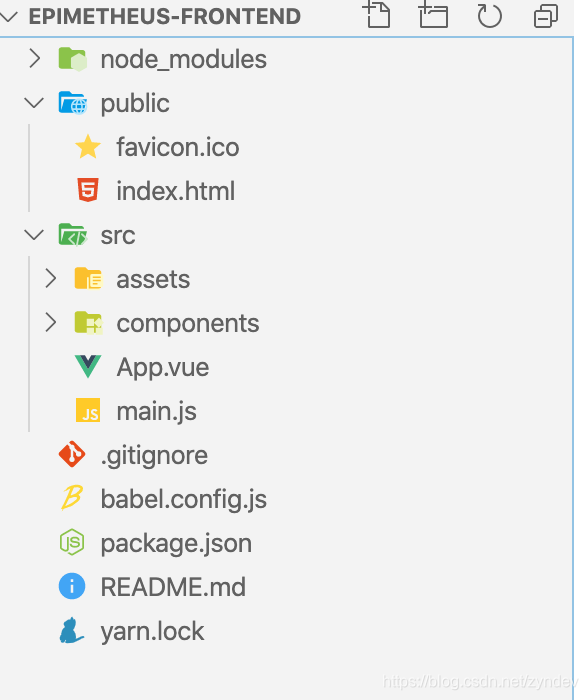
├── README.md                 # Default README file

├── babel.config.js

├── package.json              # build scripts and dependencies

├── public

│   ├── favicon.ico

│   └── index.html            # index.html template

├── src

│   ├── App.vue               # main app component

│   ├── assets                # module assets

│   │   └── logo.png

│   ├── components

│   │   └── HelloWorld.vue

│   └── main.js               # app entry file

└── yarn.lock
vue-cli3.0修改端口号
其中,我们主要修改 src 下文件,上面提到项目访问端口为:8080, 为了防止与其他项目造成冲突,这里将端口改为:7000, 提供两种方式:
- package.json文件下修改 --port
"scripts": {

   "serve": "vue-cli-service serve --port 7000",

}
- 在
package.json同级目下创建vue.config.js, 并添加以下内容
module.exports = {

  devServer: {

    port: 7000

  }

}
两种方式均可
使用 elementUI
这里使用了
官网:http://element-cn.eleme.io/#/zh-CN/component/installation
这里我们进入刚才的项目目录:并执行 yarn add element-ui
并配置 main.js
import Vue from 'vue'

import ElementUI from 'element-ui';

import 'element-ui/lib/theme-chalk/index.css';

import App from './App.vue'

Vue.use(ElementUI);

Vue.config.productionTip = false

new Vue({

  render: h => h(App),

}).$mount('#app')
安装 Vuex
Vuex 是一个专为 Vue.js 应用程序开发的状态管理模式。它采用集中式存储管理应用的所有组件的状态,并以相应的规则保证状态以一种可预测的方式发生变化。Vuex 也集成到 Vue 的官方调试工具 devtools extension,提供了诸如零配置的 time-travel 调试、状态快照导入导出等高级调试功能。
也就是通过 Vuex ,各个组件可以实时的共享状态
官网:https://vuex.vuejs.org/zh-cn/intro.html
安装
首先我们先安装它 yarn add vuex
配置
首先在 src 下创建 store 文件夹并在其下创建 store.js 文件
即 src/store/store.js, 同时创建 src/assets/util/cookie.js
src/assets/utils/cookie.js 文件内容
该文件主要用于操作cookie
let cookie = {

  setCookie (cname, value, expiredays) {

    let exdate = new Date()

    exdate.setTime(exdate.getTime() + expiredays)

    exdate.setDate(exdate.getDate() + expiredays)

    document.cookie = cname + '=' + escape(value) + ((expiredays == null) ? '' : ';expires=' + exdate.toGMTString())

  },

  getCookie (name) {

    let reg = new RegExp('(^| )' + name + '=([^;]*)(;|$)')

    let arr = document.cookie.match(reg)

    if (arr) {

      return (arr[2])

    } else {

      return null

    }

  },

  delCookie (name) {

    let exp = new Date()

    exp.setTime(exp.getTime() - 1)

    let cval = cookie.getCookie(name)

    if (cval != null) {

      document.cookie = name + '=; expires=Thu, 01 Jan 1970 00:00:01 GMT;'

    }

  }

}

export default cookie
src/store/store.js 内容
这里定义了 userInfo 用来保存当前的用户信息,包含一个 name 和 token
import Vue from 'vue'

import Vuex from 'vuex'

import cookie from '../assets/utils/cookie'

Vue.use(Vuex)

const userInfo = {

  name: cookie.getCookie('name') || '',

  token: cookie.getCookie('token') || ''

}

const store = new Vuex.Store({

  state: {

    userInfo: userInfo

  },

  mutations: {

    setUserInfo (state) {

      state.userInfo = {

        name: cookie.getCookie('name'),

        token: cookie.getCookie('token'),

      }

    }

  }

})

export default store
在 main.js 添加Vuex配置,
import Vue from 'vue'

import ElementUI from 'element-ui';

import 'element-ui/lib/theme-chalk/index.css';

import store from './store/store'

import App from './App.vue'

Vue.use(ElementUI);

Vue.config.productionTip = false

new Vue({

  store,

  render: h => h(App),

}).$mount('#app')
安装 axios
Promise based HTTP client for the browser and node.js
axios 是一个基于 Promise 的 http client, 通过他,我们向后端进行数据交互,如果你不喜欢它,可以使用jquery的 ajax 代替.
我们来安装一下 yarn add axios
最终 main.js
import Vue from 'vue'

import ElementUI from 'element-ui';

import 'element-ui/lib/theme-chalk/index.css';

import store from './store/store'

import App from './App.vue'

Vue.use(ElementUI);

Vue.config.productionTip = false

new Vue({

  store,

  render: h => h(App),

}).$mount('#app')
github
参考
- @vue/cli : https://cli.vuejs.org/zh/guide/

全栈的自我修养: 002使用@vue/cli进行vue.js环境搭建 (使用Vue,Spring Boot,Flask,Django 完成Vue前后端分离开发)的更多相关文章
- 全栈的自我修养: 001环境搭建 (使用Vue,Spring Boot,Flask,Django 完成Vue前后端分离开发)
全栈的自我修养: 环境搭建 Not all those who wander are lost. 彷徨者并非都迷失方向. Table of Contents @ 目录 前言 环境准备 nodejs v ...
- SpringBoot,Vue前后端分离开发首秀
需求:读取数据库的数据展现到前端页面 技术栈:后端有主要有SpringBoot,lombok,SpringData JPA,Swagger,跨域,前端有Vue和axios 不了解这些技术的可以去入门一 ...
- 全栈的自我修养: 003Axios 的简单使用
全栈的自我修养: Axios 的简单使用 You should never judge something you don't understand. 你不应该去评判你不了解的事物. 全栈的自我修养: ...
- 全栈的自我修养: 0005 Java 包扫描实现和应用(Jar篇)
全栈的自我修养: 0005 Java 包扫描实现和应用(Jar篇) It's not the altitude, it's the attitude. 决定一切的不是高度而是态度. Table of ...
- vue+mockjs 模拟数据,实现前后端分离开发
在项目中尝试了mockjs,mock数据,实现前后端分离开发. 关于mockjs,官网描述的是 1.前后端分离 2.不需要修改既有代码,就可以拦截 Ajax 请求,返回模拟的响应数据. 3.数据类型丰 ...
- 如何利用vue和php做前后端分离开发?
新手上路,前端工程师,刚毕业参加工作两个月,上面让我用vue搭建环境和php工程师一起开发,做前后端分离,然而我只用过简单的vue做一些小组件的经验,完全不知道怎样和php工程师配合,ps: php那 ...
- beego-vue URL重定向(beego和vue前后端分离开发,beego承载vue前端分离页面部署)
具体过程就不说,是搞这个的自然会动,只把关键代码贴出来. beego和vue前后端分离开发,beego承载vue前端分离页面部署 // landv.cnblogs.com //没有授权转载我的内容,再 ...
- 一套基于SpringBoot+Vue+Shiro 前后端分离 开发的代码生成器
一.前言 最近花了一个月时间完成了一套基于Spring Boot+Vue+Shiro前后端分离的代码生成器,目前项目代码已基本完成 止步传统CRUD,进阶代码优化: 该项目可根据数据库字段动态生成 c ...
- Spring Boot + Vue 前后端分离开发,前端网络请求封装与配置
前端网络访问,主流方案就是 Ajax,Vue 也不例外,在 Vue2.0 之前,网络访问较多的采用 vue-resources,Vue2.0 之后,官方不再建议使用 vue-resources ,这个 ...
- Spring Boot + Vue 前后端分离开发,权限管理的一点思路
在传统的前后端不分的开发中,权限管理主要通过过滤器或者拦截器来进行(权限管理框架本身也是通过过滤器来实现功能),如果用户不具备某一个角色或者某一个权限,则无法访问某一个页面. 但是在前后端分离中,页面 ...
随机推荐
- spark读取空orc文件时报错java.lang.RuntimeException: serious problem at OrcInputFormat.generateSplitsInfo
问题复现: G:\bigdata\spark-2.3.3-bin-hadoop2.7\bin>spark-shell 2020-12-26 10:20:48 WARN NativeCodeLoa ...
- Mysql切割字符串
我们常常会遇到需要处理字段中字符串的需求,包括切割.拼接以及搜索等等,在这里介绍几个常用的切割字符串的函数,首先我们在表格中加入我们的实验字段值:https://www.cnblogs.com/Yao ...
- Winows11-hosts文件无法修改保存
Win11系统hosts文件无法修改保存 新近使用win11新电脑修改hosts,添加IP和主机名映射,保存时提示host无法修改. 解决办法: 1.将hosts文件的权限"只读" ...
- NC16697 [NOIP2001]Car的旅行路线
题目链接 题目 题目描述 又到暑假了,住在城市A的Car想和朋友一起去城市B旅游.她知道每个城市都有四个飞机场,分别位于一个矩形的四个顶点上,同一个城市中两个机场之间有一条笔直的高速铁路,第I个城市中 ...
- NC24953 [USACO 2008 Jan G]Cell Phone Network
题目链接 题目 题目描述 Farmer John has decided to give each of his cows a cell phone in hopes to encourage the ...
- Redis+Lua实现简易的秒杀抢购
1 商品抢购 主要逻辑是:减库存,记录抢购成功的用户 @RestController public class DemoController { @Resource private StringRe ...
- 【leetcode】合并 k 个有序链表,我给了面试官这 5 种解法
开胃菜 在进入本节的正题之前,我们先来看一道开胃菜. 题目 21. 合并两个有序链表 将两个升序链表合并为一个新的 升序 链表并返回.新链表是通过拼接给定的两个链表的所有节点组成的. 示例: 输入:1 ...
- STM32的串口通信UART/TTL
常用的串口pin STM32的串口是基础通信方式, 每个型号都带多组串口, 一般都使用默认的组, 可以参考芯片的datasheet, 去看pinout and pin definitions, stm ...
- 【Unity3D】UGUI之Toggle
1 Toggle属性面板 在 Hierarchy 窗口右键,选择 UI 列表里的 Toggle 控件,即可创建 Toggle 控件,选中创建的 Toggle 控件,按键盘[T]键,可以调整 Tog ...
- dllimport 和 dllexport
Dll 在需要暴露接口的头文件里添加 dllexport 声明,比如, #define DllExport __declspec( dllexport ) class DllExport C { in ...