win10环境下搭建zookeeper伪集群
一、下载zookeeper
https://mirrors.tuna.tsinghua.edu.cn/apache/zookeeper/
这里笔者下载的是zookeeper-3.3.6
二、配置zookeeper
1.解压到三个目录
2.创建配置文件(cfg文件)
解压之后,分别进入conf目录,可以看到zoo_sample.cfg,log4j.properties和configuration.xsl三个文件。
在该目录下创建一个zoo.cfg文件(也可以直接使用zoo_sample.cfg),配置如下:
- <span style="font-size:14px;"># The number of milliseconds of each tick
- tickTime=2000(2000ms,心跳间隔,也是zookeeper的时间单位)
- # The number of ticks that the initial synchronization phase can take
- initLimit=10(10*tickTime = 20s,定义初始化的时间限制)
- # The number of ticks that can pass between sending a request and getting an acknowledgement
- syncLimit=5 (5*tickTime = 10s,定义同步的时间限制)
- # the directory where the snapshot is stored.
- dataDir=F:\paths\zookeeper\server1\zookeeper-3.3.6\data (自定义数据快照的存放目录,data目录需要自行创建)
- dataLogDir=F:\paths\zookeeper\server1\zookeeper-3.3.6\log (自定义日志存放目录,log目录需要自行创建)
- # the port at which the clients will connect
- clientPort=2181 (zookeeper服务端口)
- server.1=localhost:2887:3887 (伪集群zookeeper的server1标识)
- server.2=localhost:2888:3888 (伪集群zookeeper的server2标识)
- server.3=localhost:2889:3889 (伪集群zookeeper的server3标识)</span>
以上就是zookeeper伪集群中server1的配置文件。同理在其他两个解压路径的conf目录下创建server2和server3的配置文件zoo.cfg。参数区别仅在于dataDir、dataLogDir和clientPort
server2的zoo.cfg
- <span style="font-size:14px;"># The number of milliseconds of each tick
- tickTime=2000
- # The number of ticks that the initial synchronization phase can take
- initLimit=10
- # The number of ticks that can pass between sending a request and getting an acknowledgement
- syncLimit=5
- # the directory where the snapshot is stored.
- dataDir=F:\paths\zookeeper\server2\zookeeper-3.3.6\data
- dataLogDir=F:\paths\zookeeper\server2\zookeeper-3.3.6\log
- # the port at which the clients will connect
- clientPort=2182
- server.1=localhost:2887:3887
- server.2=localhost:2888:3888
- server.3=localhost:2889:3889</span>
server3的zoo.cfg
- <span style="font-size:14px;"># The number of milliseconds of each tick
- tickTime=2000
- # The number of ticks that the initial synchronization phase can take
- initLimit=10
- # The number of ticks that can pass between sending a request and getting an acknowledgement
- syncLimit=5
- # the directory where the snapshot is stored.
- dataDir=F:\paths\zookeeper\server3\zookeeper-3.3.6\data
- dataLogDir=F:\paths\zookeeper\server3\zookeeper-3.3.6\log
- # the port at which the clients will connect
- clientPort=2183
- server.1=localhost:2887:3887
- server.2=localhost:2888:3888
- server.3=localhost:2889:3889</span>
3.创建myid文件
在上个步骤中,我们在dataDir中指定了快照存放目录,切换到各目录下,分别创建一个文件名为myid的文件(没有后缀名)。文件内容为一个整型数。
在server1的data目录下的myid文件,其内容为1。
在server2的data目录下的myid文件,其内容为2。
在server3的data目录下的myid文件,其内容为3。
三、启动zookeeper
分别切换到三个解压路径下的bin目录,在cmd上输入zkServer.cmd启动服务,可以同时用三个cmd窗口分别启动三个server,笔者的启动顺序是server1 -> server2 -> server3。启动的过程中是会报错的,信息如下:
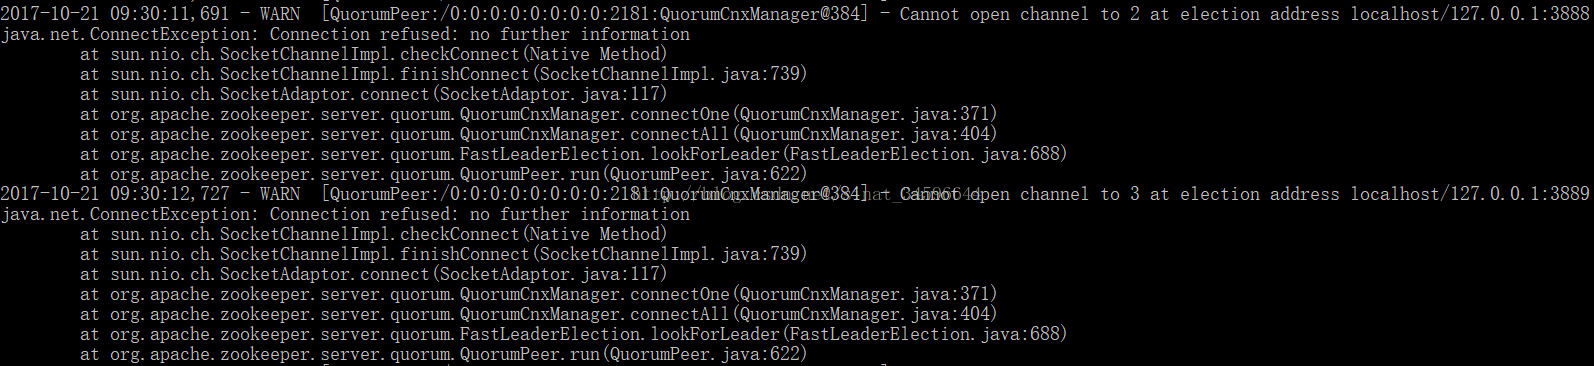
这是zookeeper的Leader选举算法的异常信息,当节点没有启动完毕的时候,Leader无法正常进行工作,这种错误信息是可以忽略的,等其他节点启动之后就正常了。
四、验证zookeeper服务是否启动

win10环境下搭建zookeeper伪集群的更多相关文章
- CentOS6.3搭建ZooKeeper伪集群
1. 将zookeeper安装包移动至/home, 解压后改名为zookeeper 相关命令 # 解压 .tar.gz # 重命名 zookeeper 2. 进入zookeeper/conf/目录下, ...
- (转)CentOS7.4环境下搭建--Gluster分布式集群存储
原文:https://blog.csdn.net/qq_39591494/article/details/79853038 环境如下:OS:Centos7.4x86_64IP地址如下: Daasban ...
- ZooKeeper伪集群环境搭建
1.从官网下载程序包. 2.解压. [dev@localhost software]$ tar xzvf zookeeper-3.4.6.tar.gz 3.进入zookeeper文件夹后创建data文 ...
- zookeeper伪集群的搭建
由于公司服务器数量的限制,我们往往没有那么多的服务器用来搭建zookeeper的集群,所以产生了伪集群的搭建,也就是将多个zookeeper搭建在同一台机器上. 准备工作: 1,一台服务器,我们这里用 ...
- 分享知识-快乐自己:zookeeper 伪集群搭建
1):单一 zookeeper 搭建步骤 2):zookeeper 伪集群搭建 1):新建一个集群目录 [root@zoodubbo opt]# mkdir zookeeper_cluster 2) ...
- zookeeper伪集群搭建
zookeeper伪集群搭建 1. 下载zookeeper: https://zookeeper.apache.org/ 2. 解压: tar -zxvf zookeeper-3.4.14.tar.g ...
- 【分布式】Zookeeper伪集群安装部署
zookeeper:伪集群安装部署 只有一台linux主机,但却想要模拟搭建一套zookeeper集群的环境.可以使用伪集群模式来搭建.伪集群模式本质上就是在一个linux操作系统里面启动多个zook ...
- 虚拟机搭建Zookeeper服务器集群完整笔记
虚拟机搭建Zookeeper服务器集群完整笔记 本笔记主要记录自己搭建Zookeeper服务器的全过程,默认已经安装部署好Centos7. 一.虚拟机下Centos无法联网解决方案 1.首先调整虚拟机 ...
- 搭建zookeeper+kafka集群
搭建zookeeper+kafka集群 一.环境及准备 集群环境: 软件版本: 部署前操作: 关闭防火墙,关闭selinux(生产环境按需关闭或打开) 同步服务器时间,选择公网ntpd服务器或 ...
随机推荐
- 安装SQL Server For Linux(Install SQL Server)
SQL Server on Ubuntu——Ubuntu上的SQL Server(全截图) 1. 安装SQL Server 官网安装指南:https://docs.microsoft.com ...
- 使用ExpandableListView以及如何优化view的显示减少内存占用
上篇博客讲到如何获取手机中所有歌曲的信息.本文就把上篇获取到的歌曲按照歌手名字分类.用一个ExpandableListView显示出来. MainActivity .java public cla ...
- SNFAutoupdater通用自动升级组件V2.0
1.组件介绍 C/S构的特点是能充分发挥客户端的处理能力,很多工作可以由客户端处理后再提交给服务器,对应的优点就是客户端响应速度快模式客户端以其强大的功能,丰富的表现力受到相当大部分用户的青睐,但是客 ...
- Android Error:Execution failed for task ':app:compileDebugJavaWithJavac' 解决方案
今天使用 Android Studio 构建项目的时候出现了这个错误 compileDebugJavaWithJavac 通过搜索发现造成该问题的原因有很多需要结合具体的项目进行排查 通过 Andro ...
- Atitit phpstorm配置attilax总结
Atitit phpstorm配置attilax总结 1. 前期准备 1 1.1. 配置interpreter 1 1.2. debug需要xdebug的支持,不管是script模式还是web模式 3 ...
- Atitit 计算word ppt文档的页数
Atitit 计算word ppt文档的页数 http://localhost:8888/ http://git.oschina.net/attilax/ati_wordutil private vo ...
- CAD技巧之002——如何用Cass内插高程点或者说加密高程点
CAD技巧之002——如何用Cass内插高程点或者说加密高程点 很多同志如果遇到奇葩的Cass内插高程点或者说加密高程点,怎么办,一个个编辑?如果工作量很大,怎么办呢. 今天九天就教您一个好方法! 废 ...
- 【Unity】EasyTouch5触屏检测
Unity AssetStore地址 https://assetstore.unity.com/packages/tools/input-management/easy-touch-5-touc ...
- 自定义progressdialog,改善用户体验
自定义progressdialog,改善用户体验
- OAuth 2.0 C# 版
using System; using System.Collections.Generic; using System.Dynamic; using System.Linq; using Syste ...