【Android】Binder的Oneway拦截
在某些虚拟化,免安装,打点,环境检测,拦截器等场景,针对
Android系统服务接口的拦截是常用的技术方案。通常只是针对正向的接口调用,如果涉及被动的服务回调拦截,则实现起来就有些许麻烦。

说明
由于我们容器产品的特性,需要将应用完整的运行起来,所以必须要对各系统服务(超过100+系统服务)通信进行拦截过滤,修正和还原接口通信的数据。让系统和应用可以无感知运行,实现免安装运行的效果。
整个方案基本上都聚焦在服务模块主动调用的拦截上,系统回调的拦截涉及较少,但随着功能的深入,越来越需要对服务回调的接口(Binder for Oneway)进行拦截。在这里将整个通用的拦截方案和实现过程分享出来,希望对大家有益。
原理
Binder的Oneway回调机制,即应用进程向系统服务注册回调(通常注册和取消注册成对出现),当服务端有相应时间时,可以直接回调给改Binder对象实例。
如常见的AMS服务接口:
// source code: /frameworks/base/core/java/android/app/IActivityManager.aidl

interface IActivityManager {

	// ...

	Intent registerReceiver(IApplicationThread caller,

                          String callerPackage,

                          IIntentReceiver receiver,

                          IntentFilter filter,

                          String requiredPermission,

                          int userId,

                          int flags

                         );

  void unregisterReceiver(in IIntentReceiver receiver);

  // ...

}
我们的目标:
- 拦截
AMS的registerReceiver方法,将参数receiver通过Proxy创建一个新的扩展类对象传递出去。 - 为了参数校验通过,所以对象的类名是合法的(如:
android.content.IIntentReceiver) - 服务端实际拿到的是我们扩展的接口对象,因此当服务端,通过Binder数据还原成服务端的同名对象。
- 当服务端有事件回调时,则我们扩展的接口对象优先处理,然后再像原对象调用传递。
- 当应用注销回调时,同样需要将我们扩展的对象通知服务端解除。
1.0 方案:源码导入
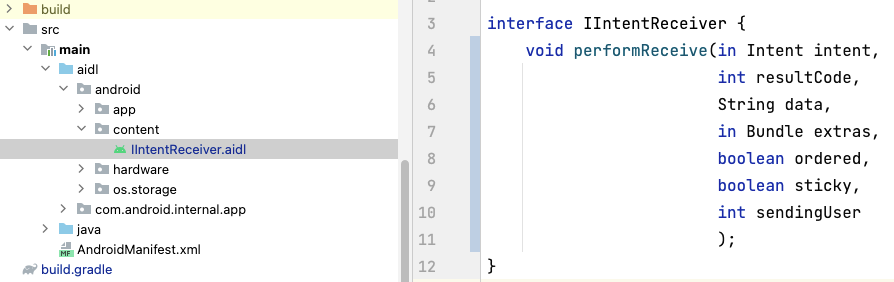
由于通常系统接口类(如:IActivityManager.aidl,IPackageManager.aidl等)均为隐藏类,因此很自然的想法是将系统的aidl源文件导入到工程中。
配置好目录:
    sourceSets {

        main {

            aidl.srcDirs = ['src/main/aidl']

        }

    }
编译后我们就可以连接该类,并进行继承扩展了,如:
public class StubIntentReceiver extends IIntentReceiver.Stub {

    Object mOrigin;

    protected StubIntentReceiver(Object org) {

        this.mOrigin = org;

    }

    private static Method sMethod_performReceive;

    public void performReceive(Intent intent, int resultCode, String data, Bundle extras, boolean ordered, boolean sticky, int sendingUser) throws RemoteException {

        // TODO something here ...

        if (null == sMethod_performReceive) {

            sMethod_performReceive = ReflectUtils.getDeclaredMethod(

                    mOrigin, "performReceive",

                    Intent.class, int.class, String.class, Bundle.class, boolean.class, boolean.class, int.class

            );

        }

        sMethod_performReceive.invoke(mOrigin, intent, resultCode, data, extras, ordered, sticky, sendingUser);

    }

}
对于IIntentReceiver.aidl的回调接口来说,这样就可以解决了,因为他满足了几个特性:
- 足够简单,就只有一个函数。
- 足够稳定,从
9.0~14.0接口名和参数都一致。
然而更多的接口并非如此,接口类函数不仅仅是多个,而且不同版本类方法各异,同函数参数也都不相同,这才是常态,所以我们自然的解决方案就是:flavor。
2.0 方案:Flavor
既然每个版本可能不一致,那就编译多版本就可以解决了,如:

这样确实能解决多版本系统接口变化的问题,但同时带来了新的问题:
- 多版本的编译,维护,加载运行导致工作量成倍增加,是个灾难。
- 通常接口中我们感兴趣的只是其中一部分,其他的接口则是直接放过。
- 很多系统接口参数又是继承于
Parcelable的对象,而该对象又为隐藏类,因此又需要继续导入关联的类确保编译运行正常,导致越来越臃肿。 - 某些接口厂商还会在该类定制新的接口,无法做到默认兼容。
3.0 方案:接口模板
我们对于复杂的方案生来恐惧,越复杂越做不稳定,所以我们的目标:
- 无需多版本编译,一套代码适配所有版本。
- 仅需处理我们关心的接口,对于其他接口默认可放过。
于是我们通过编译后的源码我们目标锁定在Binder的onTransact函数,如:
public interface IIntentReceiver extends android.os.IInterface

{

  /** Local-side IPC implementation stub class. */

  public static abstract class Stub extends android.os.Binder implements android.content.IIntentReceiver

  {

    private static final java.lang.String DESCRIPTOR = "android.content.IIntentReceiver";

    /** Construct the stub at attach it to the interface. */

    @Override

    public boolean onTransact(int code,

                              android.os.Parcel data,

                              android.os.Parcel reply,

                              int flags

                             ) throws android.os.RemoteException

    {

      java.lang.String descriptor = DESCRIPTOR;

      switch (code)

      {

        case TRANSACTION_performReceive:

        {

            data.enforceInterface(DESCRIPTOR);

						Intent _arg0;

            if (0 != data.readInt()) {

                _arg0 = Intent.CREATOR.createFromParcel(data);

            } else {

                _arg0 = null;

            }

            int _arg1 = data.readInt();

            String _arg2 = data.readString();

            Bundle _arg3;

            if (0 != data.readInt()) {

                _arg3 = (Bundle)Bundle.CREATOR.createFromParcel(data);

            } else {

                _arg3 = null;

            }

            boolean _arg4 = 0 != data.readInt();

            boolean _arg5 = 0 != data.readInt();

            int _arg6 = data.readInt();

          	// call function here !!!

            this.performReceive(_arg0, _arg1, _arg2, _arg3, _arg4, _arg5, _arg6);

            reply.writeNoException();

            return true;

        }

        default:

        {

          return super.onTransact(code, data, reply, flags);

        }

      }

    }

  }
于是我们的方案:

- 定义目标接口类(如:
IIntentReceiver.aidl),该接口无方法,仅保持名字一致,目的只是为了编译出IIntentReceiver.class类。 - 定义扩展类继承于接口代理类。
- 重载实现
onTransact方法,仅处理感兴趣的code(aidl文件编译后函数对应的编号),其他的默认调用原对象方法。
于是我们扩展实现类为:
import android.content.IIntentReceiver;

import android.content.Intent;

import android.os.Bundle;

import android.os.IBinder;

import android.os.Parcel;

import android.text.TextUtils;

public class OnewayIIntentReceiver extends IIntentReceiver.Stub {

    private final Object mArgument;

    private static int TRANSACTION_performReceive = -1;

    public OnewayIIntentReceiver(Object org) {

        mArgument = org;

        if (TRANSACTION_performReceive < 0) {

            TRANSACTION_performReceive = ReflectUtils.getMethodCode(org, "TRANSACTION_performReceive");

        }

    }

    @Override

    public boolean onTransact(int code, Parcel data, Parcel reply, int flags) throws android.os.RemoteException {

        if (TRANSACTION_performReceive == code) {

            data.enforceInterface(getInterfaceDescriptor());

            Intent _arg0;

            if (0 != data.readInt()) {

                _arg0 = Intent.CREATOR.createFromParcel(data);

            } else {

                _arg0 = null;

            }

            int _arg1 = data.readInt();

            String _arg2 = data.readString();

            Bundle _arg3;

            if (0 != data.readInt()) {

                _arg3 = (Bundle)Bundle.CREATOR.createFromParcel(data);

            } else {

                _arg3 = null;

            }

            boolean _arg4 = 0 != data.readInt();

            boolean _arg5 = 0 != data.readInt();

            int _arg6 = data.readInt();

            // do call origin

            Method method = ReflectUtils.getDeclaredMethod(

                    mArgument.mOrigin, "performReceive",

                    Intent.class, int.class, String.class, Bundle.class, boolean.class, boolean.class, int.class

            );

            method.invoke(mOrigin, _arg0, _arg1, _arg2, _arg3, _arg4, _arg5, _arg6);

            reply.writeNoException();

            return true;

        }

        return doTransact(code, data, reply, flags);

    }

    public boolean doTransact(int code, Parcel data, Parcel reply, int flags) {

        Method method = ReflectUtils.getDeclaredMethod(

                mOrigin, "onTransact",

                int.class, Parcel.class, Parcel.class, int.class

            );

        }

        try {

            return (Boolean) method.invoke(mOrigin, code, data, reply, flags);

        } catch (Throwable e) {

            Logger.e(e);

        }

        return false;

    }

}
至此,我们找到了相对简单,兼容性好的系统接口回调的拦截方案。
如果该服务为Native实现,则需要参考我们的另一篇文章 ☞ 深入Binder拦截 ☜ 来解决。
【Android】Binder的Oneway拦截的更多相关文章
- [转]Android Binder设计与实现 - 设计篇
摘要 Binder是Android系统进程间通信(IPC)方式之一.Linux已经拥有管道,system V IPC,socket等IPC手段,却还要倚赖Binder来实现进程间通信,说明Binder ...
- (转)Android Binder设计与实现 – 设计篇
原文地址(貌似已打不开):Android Binder设计与实现 – 设计篇 ------------------------------------------------------------- ...
- 图解Android - Binder 和 Service
在 Zygote启动过程 一文中我们说道,Zygote一生中最重要的一件事就是生下了 System Server 这个大儿子,System Server 担负着提供系统 Service的重任,在深入了 ...
- Android Binder设计与实现 - 设计篇
要 Binder是Android系统进程间通信(IPC)方式之一.Linux已经拥有管道,system V IPC,socket等IPC手段,却还要倚赖Binder来实现进程间通信,说明Binder具 ...
- Android Binder机制详解:手写IPC通信
想要掌握一样东西,最好的方式就是阅读理解它的源码.想要掌握Android Binder,最好的方式就是写一个AIDL文件,然后查看其生成的代码.本文的思路也是来自于此. 简介 Binder是Andro ...
- Android开发之漫漫长途 Ⅷ——Android Binder(也许是最容易理解的)
该文章是一个系列文章,是本人在Android开发的漫漫长途上的一点感想和记录,我会尽量按照先易后难的顺序进行编写该系列.该系列引用了<Android开发艺术探索>以及<深入理解And ...
- Android Binder IPC详解-Android学习之旅(96)
linux内存空间与BInder Driver Android进程和linux进程一样,他们只运行在进程固有的虚拟空间中.一个4GB的虚拟地址空间,其中3GB是用户空间,1GB是内核空间 ,用户空间是 ...
- ANDROID BINDER机制浅析
Binder是Android上一种IPC机制,重要且较难理解.由于Linux上标准IPC在灵活和可靠性存在一定不足,Google基于OpenBinder的设计和构想实现了Binder. 本文只简单介绍 ...
- (原创)Android Binder设计与实现 - 实现篇(1)
本文属于原创作品,转载请注明出处并放于明显位置,原文地址:http://www.cnblogs.com/albert1017/p/3849585.html 前言 在学习Android的Binder机制 ...
- 图文详解 Android Binder跨进程通信机制 原理
图文详解 Android Binder跨进程通信机制 原理 目录 目录 1. Binder到底是什么? 中文即 粘合剂,意思为粘合了两个不同的进程 网上有很多对Binder的定义,但都说不清楚:Bin ...
随机推荐
- Scratch基础(一):安装和了解软件
Scratch基础(一):安装和了解软件 编写计算机程序代码的能力是当今社会读写能力的重要组成部分.当人们学习使用Scratch进行编码时,他们将学习解决问题,设计项目和交流思想的重要策略. 1.安装 ...
- Windows上部署spring boot jar项目
1.下载地址:https://github.com/winsw/winsw/releases 下载红色框内三个文件就够了. sample-allOptions.xml 所有配置参考 sample-mi ...
- module的定义及端口的作用
模型功能 module是verilog中层次划分的基本单元 通过module之间的调用,可以实现硬件描述层次的提高 端口列表则是module的输入输出,和数字电路的走线连接等效 基于module的不断 ...
- QT之数据显示
引言 目前,为了提高数据校对的效率,使用合理的显示工具完成具体的数据处理,可以加速设计中调试的速度,这也是自行设计上位机的意义所在.数据处理在LabVIEW中是比较简单的,直接调用即可.在QT中可能需 ...
- Java实现两种队列(数组和链表)
package algorithm; /** @author Administrator @date 2022-09-13 17:50 */ public class QueueLinked{ pri ...
- python爬虫等获取实时数据+Flume+Kafka+Spark Streaming+mysql+Echarts实现数据动态实时采集、分析、展示
使用爬虫等获取实时数据+Flume+Kafka+Spark Streaming+mysql+Echarts实现数据动态实时采集.分析.展示 [获取完整源码关注公众号:靠谱杨阅读人生 回复kafka获取 ...
- 第一个hello驱动
Linux驱动程序的分类 字符设备驱动.块设备驱动和网络设备驱动. Linux驱动程序运行方式 把驱动程序编译进内核里面,这样内核启动后就会自动运行驱动程序了: 把驱动程序编译成以.ko为后缀的模块文 ...
- java中DelayQueue的使用
目录 简介 DelayQueue DelayQueue的应用 总结 java中DelayQueue的使用 简介 今天给大家介绍一下DelayQueue,DelayQueue是BlockingQueue ...
- 本周四晚19:00知识赋能第六期第5课丨OpenHarmony WiFi子系统
OpenAtom OpenHarmony(以下简称"OpenHarmony")开源开发者成长计划项目自 2021 年 10 月 24 日上线以来,在开发者中引发高度关注. 成长计划 ...
- 格式化字符串走过的坑 pwn109
格式化字符串走过的坑 pwn109 今天做的一道题有一个坑我调试半天终于打通了,格式化字符串的坑,确实不少,东西也比较多容易忘记,怎么说呢,功夫在平时,经验少了 老规矩先看一下保护 Full RELR ...