【Hbase】1.3.1版本安装
环境:
1核4G内存128G磁盘,三台机器同一个配置
192.168.242.131

192.168.242.132

192.168.242.133
—— Linux Centos7 x64 系统平台
—— JDK,基于Java开发的组件的运行环境
—— Hadoop, Hbase数据的存储层依赖HDFS
—— Zookeeper,监控协调
其他各种依赖:
sudo yum install -y net-tools

sudo yum install -y vim

sudo yum install -y wget

sudo yum install -y lrzsz

sudo yum install -y pcre pcre-devel

sudo yum install -y zlib zlib-devel

sudo yum install -y openssl openssl-devel

sudo yum install -y unzip

sudo yum install -y libtool

sudo yum install -y gcc-c++

sudo yum install -y telnet

sudo yum install -y tree

sudo yum install -y nano

sudo yum install -y psmisc

sudo yum install -y rsync

sudo yum install -y ntp
JDK版本直接采用yum安装
sudo yum install -y java-1.8.0-openjdk-devel.x86_64
Zookeeper版本没有限制,任意就行,安装参考:
https://www.cnblogs.com/mindzone/p/15468883.html
Hadoop 3版本和2版本部署有差异,这里单独再写2版本Hadoop的集群部署
Hbase版本要和Hadoop匹配,这是一个部署坑
Hbase 1.3.1 匹配 Hadoop 2.7.2 没啥问题
Hadoop 2.7.2 安装
1号机131下载压缩包
wget https://archive.apache.org/dist/hadoop/common/hadoop-2.7.2/hadoop-2.7.2.tar.gz
解压到指定目录
mkdir -p /opt/module

tar -zxvf hadoop-2.7.2.tar.gz -C /opt/module/
配置Hadoop和JDK的环境变量
vim /etc/profile
在尾部追加变量信息(其他机器也添加)
# HADOOP_HOME

export HADOOP_HOME=/opt/module/hadoop-2.7.2

export PATH=$PATH:$HADOOP_HOME/bin

export PATH=$PATH:$HADOOP_HOME/sbin

# JAVA_HOME 这里看自己的具体jdk版本,不要直接cv , 用 find / -name java 查找一下

export JAVA_HOME=/usr/lib/jvm/java-1.8.0-openjdk-1.8.0.322.b06-1.el7_9.x86_64

export PATH=$PATH:$JAVA_HOME/bin
立即使变量生效:
source /etc/profile
然后测试变量设置是否有效
hadoop version
成功则会展示hadoop的信息
[root@localhost ~]# hadoop version

Hadoop 2.7.2

Subversion https://git-wip-us.apache.org/repos/asf/hadoop.git -r b165c4fe8a74265c792ce23f546c64604acf0e41

Compiled by jenkins on 2016-01-26T00:08Z

Compiled with protoc 2.5.0

From source with checksum d0fda26633fa762bff87ec759ebe689c

This command was run using /opt/module/hadoop-2.7.2/share/hadoop/common/hadoop-common-2.7.2.jar
备份配置文件:
# 配置文件备份

cd /opt/module/hadoop-2.7.2/etc/hadoop/

cp -r core-site.xml core-site.xml.bak

cp -r hadoop-env.sh hadoop-env.sh.bak

cp -r hdfs-site.xml hdfs-site.xml.bak

cp -r mapred-env.sh mapred-env.sh.bak

cp -r mapred-site.xml mapred-site.xml.bak

cp -r yarn-env.sh yarn-env.sh.bak

cp -r yarn-site.xml yarn-site.xml.bak
core-site.xml
声明主节点的地址
<?xml version="1.0" encoding="UTF-8"?>

<?xml-stylesheet type="text/xsl" href="configuration.xsl"?>

<!--

  Licensed under the Apache License, Version 2.0 (the "License");

  you may not use this file except in compliance with the License.

  You may obtain a copy of the License at

    http://www.apache.org/licenses/LICENSE-2.0

  Unless required by applicable law or agreed to in writing, software

  distributed under the License is distributed on an "AS IS" BASIS,

  WITHOUT WARRANTIES OR CONDITIONS OF ANY KIND, either express or implied.

  See the License for the specific language governing permissions and

  limitations under the License. See accompanying LICENSE file.

-->

<!-- Put site-specific property overrides in this file. -->

<configuration>

<!-- 指定HDFS中NameNode的地址 -->

<property>

        <name>fs.defaultFS</name>

      <value>hdfs://192.168.242.131:9000</value>

</property>

<!-- 指定Hadoop运行时产生文件的存储目录 -->

<property>

        <name>hadoop.tmp.dir</name>

        <value>/opt/module/hadoop-2.7.2/data/tmp</value>

</property>

</configuration>
hadoop-env.sh
只需要声明一下JDK位置
# The java implementation to use.

# export JAVA_HOME=${JAVA_HOME}

export JAVA_HOME=/usr/lib/jvm/java-1.8.0-openjdk-1.8.0.322.b06-1.el7_9.x86_64
hdfs-site.xml
定义副本数量和辅助节点地址
<?xml version="1.0" encoding="UTF-8"?>

<?xml-stylesheet type="text/xsl" href="configuration.xsl"?>

<!--

  Licensed under the Apache License, Version 2.0 (the "License");

  you may not use this file except in compliance with the License.

  You may obtain a copy of the License at

    http://www.apache.org/licenses/LICENSE-2.0

  Unless required by applicable law or agreed to in writing, software

  distributed under the License is distributed on an "AS IS" BASIS,

  WITHOUT WARRANTIES OR CONDITIONS OF ANY KIND, either express or implied.

  See the License for the specific language governing permissions and

  limitations under the License. See accompanying LICENSE file.

-->

<!-- Put site-specific property overrides in this file. -->

<configuration>

<property>

        <name>dfs.replication</name>

        <value>3</value>

</property>

<!-- 指定Hadoop辅助名称节点主机配置 -->

<property>

      <name>dfs.namenode.secondary.http-address</name>

      <value>192.168.242.133:50090</value>

</property>

</configuration>
mapred-env.sh
声明JDK路径
# export JAVA_HOME=/home/y/libexec/jdk1.6.0/

export JAVA_HOME=/usr/lib/jvm/java-1.8.0-openjdk-1.8.0.322.b06-1.el7_9.x86_64
marpred-site.xml
<?xml version="1.0"?>

<?xml-stylesheet type="text/xsl" href="configuration.xsl"?>

<!--

  Licensed under the Apache License, Version 2.0 (the "License");

  you may not use this file except in compliance with the License.

  You may obtain a copy of the License at

    http://www.apache.org/licenses/LICENSE-2.0

  Unless required by applicable law or agreed to in writing, software

  distributed under the License is distributed on an "AS IS" BASIS,

  WITHOUT WARRANTIES OR CONDITIONS OF ANY KIND, either express or implied.

  See the License for the specific language governing permissions and

  limitations under the License. See accompanying LICENSE file.

-->

<!-- Put site-specific property overrides in this file. -->

<configuration>

<!-- 指定MR运行在Yarn上 -->

<property>

        <name>mapreduce.framework.name</name>

        <value>yarn</value>

</property>

</configuration>
yarn-env.sh可以不改,脚本直接获取了$JAVA_HOME
yarn-site.xml
指定资源管理器地址
<?xml version="1.0"?>

<!--

  Licensed under the Apache License, Version 2.0 (the "License");

  you may not use this file except in compliance with the License.

  You may obtain a copy of the License at

    http://www.apache.org/licenses/LICENSE-2.0

  Unless required by applicable law or agreed to in writing, software

  distributed under the License is distributed on an "AS IS" BASIS,

  WITHOUT WARRANTIES OR CONDITIONS OF ANY KIND, either express or implied.

  See the License for the specific language governing permissions and

  limitations under the License. See accompanying LICENSE file.

-->

<configuration>

<!-- Site specific YARN configuration properties -->

<!-- Reducer获取数据的方式 -->

<property>

        <name>yarn.nodemanager.aux-services</name>

        <value>mapreduce_shuffle</value>

</property>

<!-- 指定YARN的ResourceManager的地址 -->

<property>

        <name>yarn.resourcemanager.hostname</name>

        <value>192.168.242.132</value>

</property>

</configuration>
配置集群节点地址
vim /opt/module/hadoop-2.7.2/etc/hadoop/slaves
写上所有机器地址,但是不要多空格空行
192.168.242.131

192.168.242.132

192.168.242.133
然后把Hadoop分发到剩余的机器
# xsync脚本

xsync /opt/module/hadoop-2.7.2

# 没有xsync脚本, 用scp拷贝

scp /opt/module/hadoop-2.7.2 root@192.168.242.132:/opt/module/

scp /opt/module/hadoop-2.7.2 root@192.168.242.133:/opt/module/
首次启动需要对HDFS进行格式化操作
hdfs namenode -format
如果需要再次格式化,先清空data目录的数据
rm -rf /opt/module/hadoop-2.7.2/data

hdfs namenode -format
集群部署完成!
Hadoop集群启动:
# 1号机启动

$HADOOP_HOME/sbin/start-dfs.sh

# 2号机启动

$HADOOP_HOME/sbin/start-yarn.sh
1号机执行信息:
[root@192 ~]# $HADOOP_HOME/sbin/start-dfs.sh

Starting namenodes on [192.168.242.131]

192.168.242.131: starting namenode, logging to /opt/module/hadoop-2.7.2/logs/hadoop-root-namenode-192.168.242.131.out

192.168.242.131: starting datanode, logging to /opt/module/hadoop-2.7.2/logs/hadoop-root-datanode-192.168.242.131.out

192.168.242.133: starting datanode, logging to /opt/module/hadoop-2.7.2/logs/hadoop-root-datanode-192.168.242.133.out

192.168.242.132: starting datanode, logging to /opt/module/hadoop-2.7.2/logs/hadoop-root-datanode-192.168.242.132.out

Starting secondary namenodes [192.168.242.133]

192.168.242.133: starting secondarynamenode, logging to /opt/module/hadoop-2.7.2/logs/hadoop-root-secondarynamenode-192.168.242.133.out

[root@192 ~]#
2号机执行信息:
[root@192 ~]# $HADOOP_HOME/sbin/start-yarn.sh

starting yarn daemons

starting resourcemanager, logging to /opt/module/hadoop-2.7.2/logs/yarn-root-resourcemanager-192.168.242.132.out

192.168.242.133: starting nodemanager, logging to /opt/module/hadoop-2.7.2/logs/yarn-root-nodemanager-192.168.242.133.out

192.168.242.131: starting nodemanager, logging to /opt/module/hadoop-2.7.2/logs/yarn-root-nodemanager-192.168.242.131.out

192.168.242.132: starting nodemanager, logging to /opt/module/hadoop-2.7.2/logs/yarn-root-nodemanager-192.168.242.132.out

[root@192 ~]#
Zookeeper保持运行状态:
[root@192 ~]# zk-cluster status

---------- zookeeper 192.168.242.131 状态 ------------

/usr/bin/java

ZooKeeper JMX enabled by default

Using config: /opt/module/apache-zookeeper-3.7.0/bin/../conf/zoo.cfg

Client port found: 2181. Client address: localhost. Client SSL: false.

Mode: follower

---------- zookeeper 192.168.242.132 状态 ------------

/usr/bin/java

ZooKeeper JMX enabled by default

Using config: /opt/module/apache-zookeeper-3.7.0/bin/../conf/zoo.cfg

Client port found: 2181. Client address: localhost. Client SSL: false.

Mode: leader

---------- zookeeper 192.168.242.133 状态 ------------

/usr/bin/java

ZooKeeper JMX enabled by default

Using config: /opt/module/apache-zookeeper-3.7.0/bin/../conf/zoo.cfg

Client port found: 2181. Client address: localhost. Client SSL: false.

Mode: follower

[root@192 ~]#
Hbase集群安装:
1号机下载压缩包:
wget https://dlcdn.apache.org/hbase/stable/hbase-2.4.9-bin.tar.gz
解包到指定目录
tar -zxvf hbase-2.4.9-bin.tar.gz -C /opt/module/
备份配置文件
cp -r /opt/module/hbase-2.4.9/conf/hbase-env.sh /opt/module/hbase-2.4.9/conf/hbase-env.sh.bak

cp -r /opt/module/hbase-2.4.9/conf/hbase-site.xml /opt/module/hbase-2.4.9/conf/hbase-site.xml.bak

cp -r /opt/module/hbase-2.4.9/conf/regionservers /opt/module/hbase-2.4.9/conf/regionservers.bak
hbase-env.sh
追加环境变量
export JAVA_HOME=/usr/lib/jvm/java-1.8.0-openjdk-1.8.0.322.b06-1.el7_9.x86_64

export HBASE_MANAGES_ZK=false
hbase-site.xml
1、注意rootdir和hadoop的HDFS端口一致,(本文Ctrl + F查找9000)
2、Zookeeper的datadir写出自己设定的路径,否则Hbase的shell执行时找不到zk
<property>

<name>hbase.rootdir</name>

<value>hdfs://192.168.242.131:9000/HBase</value>

</property>

<property>

<name>hbase.cluster.distributed</name>

<value>true</value>

</property>

 <!-- 0.98 后的新变动,之前版本没有.port,默认端口为 60000 -->

<property>

<name>hbase.master.port</name>

<value>16000</value>

</property>

<property>

<name>hbase.zookeeper.quorum</name>

 <value>192.168.242.131,192.168.242.132,192.168.242.133</value>

</property>

<property>

<name>hbase.zookeeper.property.dataDir</name>

    <!-- 指定的zk目录 -->

 <value>/opt/module/apache-zookeeper-3.7.0/zk-data</value>

</property>
regionservers
不要空格和空行
192.168.242.131

192.168.242.132

192.168.242.133
软链接Hadoop的配置文件
ln -s /opt/module/hadoop-3.3.1/etc/hadoop/core-site.xml /opt/module/hbase-2.4.9/conf/core-site.xml

ln -s /opt/module/hadoop-3.3.1/etc/hadoop/hdfs-site.xml /opt/module/hbase-2.4.9/conf/hdfs-site.xml
Hbase到这,1号机的装完了,然后分发到剩下的机器中
# xsync脚本

xsync /opt/module/hbase-1.3.1

# 没有xsync脚本, 用scp拷贝

scp /opt/module/hbase-1.3.1 root@192.168.242.132:/opt/module/

scp /opt/module/hbase-1.3.1 root@192.168.242.133:/opt/module/
服务器时间同步处理:
这个问题在Hbase shell查看status状态时会报错
错误描述:主节点未初始化异常,不影响使用,但是原因是因为集群的时间不一致导致
参考:
https://blog.csdn.net/renzhewudi77/article/details/86301395
解决办法是同步时间一致
以1号机作为时间统一标准,做时间服务器
安装ntp服务(不管没有有都执行一次)
sudo yum install -y ntp
首先编辑1号机的ntp配置
vim /etc/ntp.conf
主要内容:
# 改成自己网段的,例如我的网段是242

# (授权192.168.1.0-192.168.1.255网段上的所有机器可以从这台机器上查询和同步时间)

# restrict 192.168.1.0 mask 255.255.255.0 nomodify notrap为

restrict 192.168.242.0 mask 255.255.255.0 nomodify notrap

#  注释下面的信息

(集群在局域网中,不使用其他互联网上的时间)

server 0.centos.pool.ntp.org iburst

server 1.centos.pool.ntp.org iburst

server 2.centos.pool.ntp.org iburst

server 3.centos.pool.ntp.org iburst

为这样:

# server 0.centos.pool.ntp.org iburst

# server 1.centos.pool.ntp.org iburst

# server 2.centos.pool.ntp.org iburst

# server 3.centos.pool.ntp.org iburst


# 备用本地时间提供同步

(当该节点丢失网络连接,依然可以采用本地时间作为时间服务器为集群中的其他节点提供时间同步)

# Enable writing of statistics records.

#statistics clockstats cryptostats loopstats peerstats

server 127.127.1.0

fudge 127.127.1.0 stratum 10
系统ntp配置修改
vim /etc/sysconfig/ntpd
追加配置项:
# 增加内容

#(让硬件时间与系统时间一起同步)

SYNC_HWCLOCK=yes
剩下是ntp的运行处理
# 查看ntp状态

service ntpd status

# 服务启动

service ntpd start

# 开机自启动

chkconfig ntpd on
其他机器只需要设定定时任务和时间服务器进行同步即可
# 编写定时任务(非1号机的机器执行,1号机作为时间服务器)

crontab -e


# 任务编辑脚本中写:

# (其他机器配置10分钟与时间服务器同步一次)

*/10 * * * * /usr/sbin/ntpdate 192.168.242.131
启动与停止Hbase集群
/opt/module/hbase-2.4.9/bin/start-hbase.sh

/opt/module/hbase-2.4.9/bin/stop-hbase.sh
启动
[root@192 ~]# /opt/module/hbase-1.3.1/bin/start-hbase.sh

OpenJDK 64-Bit Server VM warning: If the number of processors is expected to increase from one, then you should configure the number of parallel GC threads appropriately using -XX:ParallelGCThreads=N

starting master, logging to /opt/module/hbase-1.3.1/bin/../logs/hbase-root-master-192.168.242.131.out

OpenJDK 64-Bit Server VM warning: ignoring option PermSize=128m; support was removed in 8.0

OpenJDK 64-Bit Server VM warning: ignoring option MaxPermSize=128m; support was removed in 8.0

OpenJDK 64-Bit Server VM warning: If the number of processors is expected to increase from one, then you should configure the number of parallel GC threads appropriately using -XX:ParallelGCThreads=N

192.168.242.133: starting regionserver, logging to /opt/module/hbase-1.3.1/bin/../logs/hbase-root-regionserver-192.168.242.133.out

192.168.242.132: starting regionserver, logging to /opt/module/hbase-1.3.1/bin/../logs/hbase-root-regionserver-192.168.242.132.out

192.168.242.131: starting regionserver, logging to /opt/module/hbase-1.3.1/bin/../logs/hbase-root-regionserver-192.168.242.131.out

192.168.242.133: OpenJDK 64-Bit Server VM warning: ignoring option PermSize=128m; support was removed in 8.0

192.168.242.133: OpenJDK 64-Bit Server VM warning: ignoring option MaxPermSize=128m; support was removed in 8.0

192.168.242.133: OpenJDK 64-Bit Server VM warning: If the number of processors is expected to increase from one, then you should configure the number of parallel GC threads appropriately using -XX:ParallelGCThreads=N

192.168.242.132: OpenJDK 64-Bit Server VM warning: ignoring option PermSize=128m; support was removed in 8.0

192.168.242.132: OpenJDK 64-Bit Server VM warning: ignoring option MaxPermSize=128m; support was removed in 8.0

192.168.242.132: OpenJDK 64-Bit Server VM warning: If the number of processors is expected to increase from one, then you should configure the number of parallel GC threads appropriately using -XX:ParallelGCThreads=N

192.168.242.131: OpenJDK 64-Bit Server VM warning: ignoring option PermSize=128m; support was removed in 8.0

192.168.242.131: OpenJDK 64-Bit Server VM warning: ignoring option MaxPermSize=128m; support was removed in 8.0

192.168.242.131: OpenJDK 64-Bit Server VM warning: If the number of processors is expected to increase from one, then you should configure the number of parallel GC threads appropriately using -XX:ParallelGCThreads=N

[root@192 ~]#
访问Hbase的Shell检查是否正常运行
# 访问

/opt/module/hbase-2.4.9/bin/hbase shell
查看状态
status
输出信息:
hbase(main):002:0> status
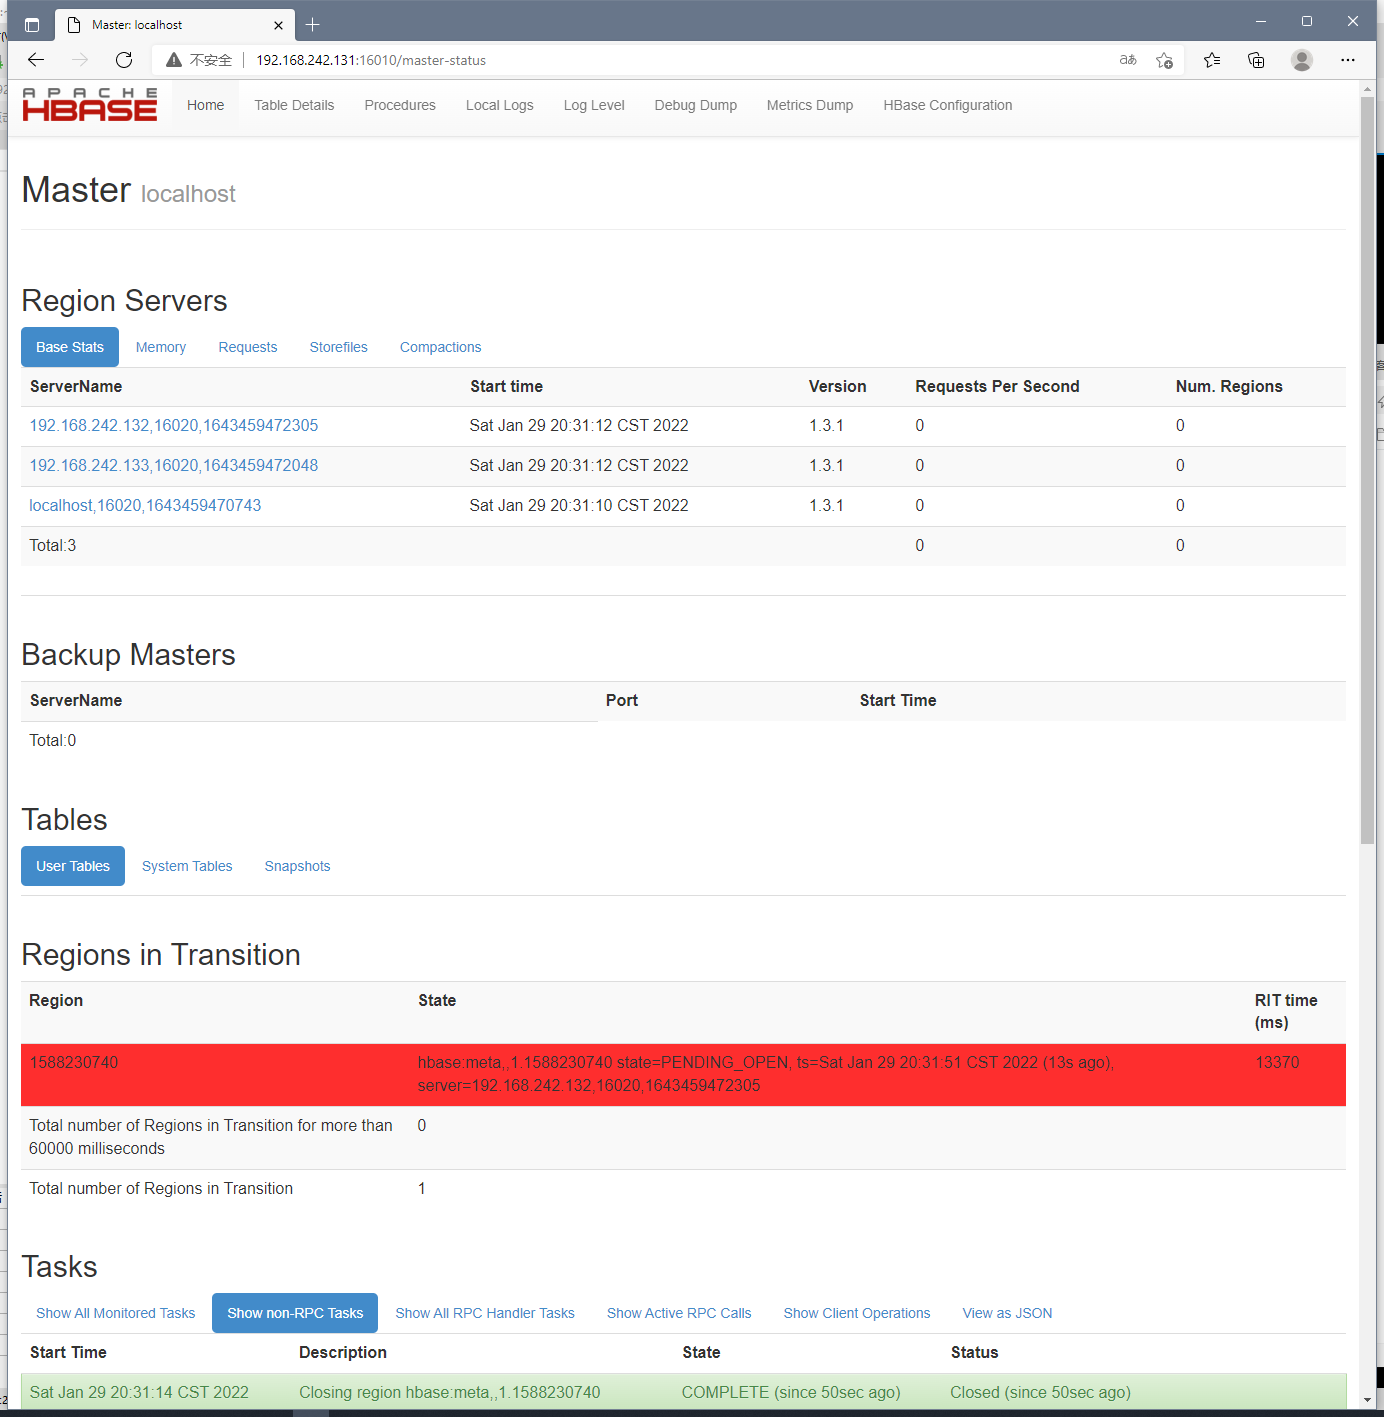
1 active master, 0 backup masters, 3 servers, 1 dead, 1.0000 average load
访问地址查看:
http://192.168.242.131:16010
Hbase踩坑:
更换了主机名称时,一定要记得在host做相应的映射配置
每台机器设置了映射

# 1号机

hostnamectl set-hostname centos7-01

# 2号机

hostnamectl set-hostname centos7-02

# 3号机

hostnamectl set-hostname centos7-03
每台机器都要在hosts文件配置映射
vim /etc/hosts

127.0.0.1   localhost localhost.localdomain localhost4 localhost4.localdomain4

::1         localhost localhost.localdomain localhost6 localhost6.localdomain6

192.168.242.131 centos7-01

192.168.242.132 centos7-02

192.168.242.133 centos7-03
否则Hbase集群会因为ZK找不到节点,通信失败而挂掉集群下的所有服务
【Hbase】1.3.1版本安装的更多相关文章
- HBase 系列(二)安装部署
HBase 系列(二)安装部署 本节以 Hadoop-2.7.6,HBase-1.4.5 为例安装 HBase 环境.HBase 也有三种模式:本地模式.伪分布模式.分布模式. 一.环境准备 (1) ...
- hbase单机及集群安装配置,整合到hadoop
问题导读:1.配置的是谁的目录conf/hbase-site.xml,如何配置hbase.rootdir2.如何启动hbase?3.如何进入hbase shell?4.ssh如何达到互通?5.不安装N ...
- Atitti.dw cc 2015 绿色版本安装总结
Atitti.dw cc 2015 绿色版本安装总结 1.1. 安装程序无法初始化.请下载adobe Support Advisor检测该问题.1 1.1.1. Adobe Application M ...
- centos7最小版本安装nginx+tomcat+java+mysql运行环境
最近项目从windows搬到linux,由于项目组成员有限并且有其它紧急的任务需要处理,因而这个任务就落到我的头上了.下面记录下centos最小版本安装nginx+tomcat+mysql+java的 ...
- Robot Framework-Windows版本安装
Robot Framework-Mac版本安装 Robot Framework-Windows版本安装 Robot Framework-工具简介及入门使用 Robot Framework-Databa ...
- Robot Framework-Mac版本安装
Robot Framework-Mac版本安装 Robot Framework-Windows版本安装 Robot Framework-工具简介及入门使用 Robot Framework-Databa ...
- centOS 6.x 版本安装 node.js 4.x 以上版本的方法
由于 node 4.x 以上版本,通过编译源代码来安装,对 GCC 的版本有要求,而 centos 的 GCC 版本不够,更新 GCC 也很麻烦,所以只能通过别的方式解决. 这里主要介绍直接下载编译后 ...
- 如何为ubuntu server 版本 安装图形界面
强烈建议使用命令行的交互方式,就算你在server上装了图形界面,但是在Linux上,大部分重要的操作还是要通过命令行的方式进行操作. 如何为ubuntu server 版本 安装图形界面 Ubunt ...
- (新)elasticsearch6.0版本安装head插件
ES6.0版本安装head插件 1.1 前言 不知道是我电脑问题还是最近的开源软件都比较**,mysql和elasticsearch新版本变动都比较大. elasticsearch6.0貌似已经不支持 ...
- Node.js 多版本安装
Node.js 多版本安装 Node.js® is a JavaScript runtime built on Chrome's V8 JavaScript engine(Node.js 是一个基于 ...
随机推荐
- scala怎么退出
scala怎么退出 scala> :help //查看帮助 All commands can be abbreviated, e.g., :he instead of :help. :edit ...
- python获取豆瓣电影TOP250的所有电影的相关信息
参考文档:https://weread.qq.com/web/reader/37132a705e2b2f37196c138k98f3284021498f137082c2e 说明:我才接触网络爬虫,在看 ...
- numpy基础--利用数组进行数据处理
以下代码的前提:import numpy as np numpy数组可以将许多种数据处理任务表述为简洁的数组表达式,用数组表达式替换循环的做法,通常被称为矢量化. 官方说明文档:Array creat ...
- CF1900D - Small GCD 题解
1900D - Small GCD 给定序列 \(A\),定义 \(f(a, b, c)\) 为 \(a, b, c\) 中最小的次小的数的 \(\gcd\),求: \[\sum_{i = 1}^n ...
- Vue Router 4与路由管理实战
title: Vue Router 4与路由管理实战 date: 2024/6/7 updated: 2024/6/7 excerpt: 这篇文章介绍了如何在Vue.js应用中利用Vue Router ...
- gitlab私有仓库搭建
1.Gitlab介绍 我们了解了git是以个人为中心,但是人人都得数据交互呀..python程序员每天都忙着进行py交易 交互数据的方式 使用github或者码云等公有代码仓库,托管代码的地方,谁都可 ...
- (六)基于Scrapy爬取网易新闻中的新闻数据
需求:爬取这国内.国际.军事.航空.无人机模块下的新闻信息 1.找到这五个板块对应的url 2.进入每个模块请求新闻信息 我们可以明显发现''加载中'',因此我们判断新闻数据是动态加载出来的. 3. ...
- Vue学习:17.组件通信案例-记事本
通过上一节的学习,我们了解并掌握了组件通信的定义及一般使用.那么接下来,我们将之前练习过的案例使用组件化思想来实现一下吧. 实例:记事本(组件化) 实现功能 运用组件化思想,实现Vue学习:3.V标签 ...
- javascript class 方法的this指向问题
踩坑记录 JavaScript 的 class 里面有两种定义方法的方式 普通函数(fun1) 箭头函数(fun2) class Obj { func1() { // write some code. ...
- 深入了解 C# Span:高性能内存操作的利器
深入了解 C# Span:高性能内存操作的利器 在 C# 7.2 中引入的 Span<T> 类型为我们提供了一种高效且安全地对内存进行操作的方式.Span<T> 是一个轻量级的 ...