centos8平台编译安装nginx1.18.0
一,nginx的官网:
http://nginx.org/
说明:刘宏缔的架构森林是一个专注架构的博客,地址:https://www.cnblogs.com/architectforest
对应的源码可以访问这里获取: https://github.com/liuhongdi/
说明:作者:刘宏缔 邮箱: 371125307@qq.com
二,下载与解压nginx
1,下载
[root@centos8 source]# wget http://nginx.org/download/nginx-1.18.0.tar.gz
2, 解压缩
[root@centos8 source]# tar -zxvf nginx-1.18.0.tar.gz
三,编译与安装nginx
1,configure
#--prefix 指定安装路径
#--with-http_stub_status_module 允许查看nginx状态的模块
# --with-http_ssl_module 支持https的模块
[root@centos8 nginx-1.18.0]# ./configure --prefix=/usr/local/soft/nginx-1.18.0 --with-http_stub_status_module --with-http_ssl_module
2,编译并安装
[root@centos8 nginx-1.18.0]# make && make install
四, configure报错的解决
说明:如果相应的软件包已安装不会报错,写在这里供参考
1,问题1,configure提示:
./configure: error: the HTTP rewrite module requires the PCRE library.

You can either disable the module by using --without-http_rewrite_module

option, or install the PCRE library into the system, or build the PCRE library

statically from the source with nginx by using --with-pcre=<path> option.
解决:
[root@os3 nginx-1.18.0]# yum install pcre-devel
2,问题2,configure提示:
./configure: error: SSL modules require the OpenSSL library.

You can either do not enable the modules, or install the OpenSSL library

into the system, or build the OpenSSL library statically from the source

with nginx by using --with-openssl=<path> option.
解决:
[root@os3 nginx-1.18.0]# yum install openssl openssl-devel
五,测试编译安装的效果:查看nginx的版本
[root@centos8 nginx-1.18.0]# /usr/local/soft/nginx-1.18.0/sbin/nginx -v

nginx version: nginx/1.18.0
六,如何查看nginx的配置编译参数?
[root@centos8 nginx-1.18.0]# /usr/local/soft/nginx-1.18.0/sbin/nginx -V

nginx version: nginx/1.18.0

built by gcc 8.3.1 20190507 (Red Hat 8.3.1-4) (GCC)

built with OpenSSL 1.1.1c FIPS  28 May 2019

TLS SNI support enabled

configure arguments: --prefix=/usr/local/soft/nginx-1.18.0 --with-http_stub_status_module --with-http_ssl_module
注意区分和上一条查看版本命令的区别: -v参数分别是小写和大写
七,使systemctl能管理运行nginx服务
1,运行的准备工作:配置日志目录
[root@centos8 conf]# mkdir /data/nginx

[root@centos8 conf]# mkdir /data/nginx/logs
2,运行的准备工作:创建nginx用户
[root@centos8 conf]# groupadd nginx
#-g:指定所属的group
#-s:指定shell,因为它不需要登录,所以用/sbin/nologin
#-M:不创建home目录,因为它不需要登录
[root@centos8 conf]# useradd -g nginx -s /sbin/nologin -M nginx
3,简单配置nginx
[root@centos8 conf]# vi nginx.conf
内容:
指定运行nginx的用户和组是:nginx
user nginx nginx;
发生错误时要写入到错误日志(目录用上面创建好的)
error_log /data/nginx/logs/error.log;
指定pid的路径
pid logs/nginx.pid;
日志格式(取消注释即可)
   log_format  main  '$remote_addr - $remote_user [$time_local] "$request" '

                      '$status $body_bytes_sent "$http_referer" '

                      '"$http_user_agent" "$http_x_forwarded_for"';
指定访问日志的路径和格式(目录用上面创建好的)
access_log /data/nginx/logs/access.log main;
4,生成service文件:
[root@centos8 ~]# vi /usr/lib/systemd/system/nginx.service
内容:
[Unit]

Description=nginx-The High-performance HTTP Server

After=network.target

[Service]

Type=forking

PIDFile=/usr/local/soft/nginx-1.18.0/logs/nginx.pid

ExecStartPre=/usr/local/soft/nginx-1.18.0/sbin/nginx -t -c /usr/local/soft/nginx-1.18.0/conf/nginx.conf

ExecStart=/usr/local/soft/nginx-1.18.0/sbin/nginx -c /usr/local/soft/nginx-1.18.0/conf/nginx.conf

ExecReload=/usr/local/soft/nginx-1.18.0/sbin/nginx -s reload

ExecStop=/usr/local/soft/nginx-1.18.0/sbin/nginx -s stop

PrivateTmp=true

[Install]

WantedBy=multi-user.target
5,启动服务
重新加载服务文件
[root@centos8 ~]# systemctl daemon-reload
启动:
[root@centos8 ~]# systemctl start nginx
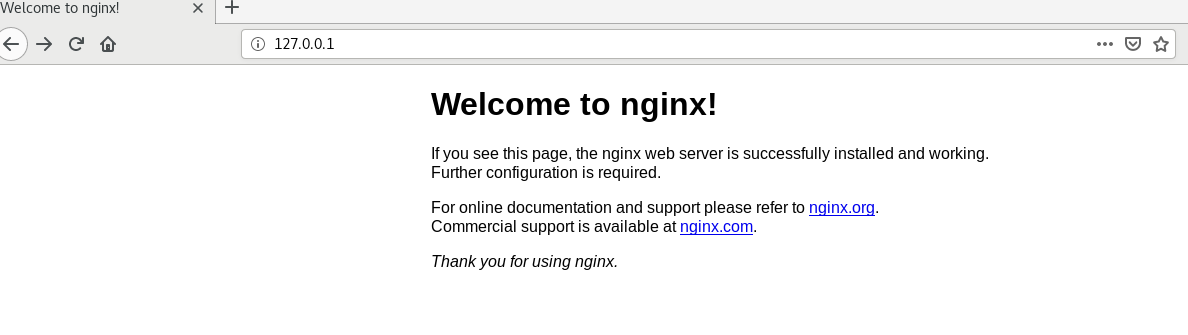
6,查看效果:
从浏览器访问安装机器的ip的80端口即可:
看例子截图:
7,查看日志目录
[root@centos8 conf]# ll /data/nginx/logs/

总用量 8

-rw-r--r-- 1 root root 1477 4月  22 18:49 access.log

-rw-r--r-- 1 root root 1195 4月  22 18:32 error.log
日志已成功写入
八,查看centos版本
[root@centos8 ~]# cat /etc/redhat-release

CentOS Linux release 8.1.1911 (Core)
centos8平台编译安装nginx1.18.0的更多相关文章
- CentOS 6.2编译安装Nginx1.2.0+MySQL5.5.25+PHP5.3.13
CentOS 6.2编译安装Nginx1.2.0+MySQL5.5.25+PHP5.3.132013-10-24 15:31:12标签:服务器 防火墙 file 配置文件 written 一.配置好I ...
- CentOS 7.0编译安装Nginx1.6.0+MySQL5.6.19+PHP5.5.14
准备篇: CentOS 7.0系统安装配置图解教程 http://www.osyunwei.com/archives/7829.html 一.配置防火墙,开启80端口.3306端口 CentOS 7. ...
- CentOS7 编译安装 nginx-1.10.0
对于NGINX 支持epoll模型 epoll模型的优点 定义: epoll是Linux内核为处理大批句柄而作改进的poll,是Linux下多路复用IO接口select/poll的增强版本,它能显著的 ...
- CentOS 6.2编译安装Nginx1.2.0+MySQL5.5.25+PHP5.3.13+博客系统WordPress3.3.2
说明: 操作系统:CentOS 6.2 32位 系统安装教程:CentOS 6.2安装(超级详细图解教程): http://www.osyunwei.com/archives/1537.html 准备 ...
- CentOS 7.0编译安装Nginx1.6.0+MySQL5.6.19+PHP5.5.14方法分享
一.配置防火墙,开启80端口.3306端口 CentOS 7.0默认使用的是firewall作为防火墙,这里改为iptables防火墙. 1.关闭firewall: systemctl stop fi ...
- ansible:安装nginx1.18.0(使用role功能)
一,ansible使用role的用途? roles分别将变量/文件/任务/模板/handler等放置于单独的目录中, 并可以方便的include各目录下的功能 roles使playbook能实现代码被 ...
- centos7 安装 nginx-1.18.0 并设置开机自启动
一.到官网下载nginx Mainline version: nginx主力版本,为开发版 Stable version: 稳定版,在生产环境中选择此版本进行安装 Legacy versions: ...
- centos7下编译安装nginx-1.16.0
一.下载nginx源码 http://nginx.org/en/download.html 如:nginx-1.16.0.tar.gz 二.创建用户和组,并解压 groupadd www userad ...
- centos7 编译安装nginx1.16.0( 完整版 )
一.安装依赖包 yum install -y gcc gcc-c++ pcre pcre-devel zlib zlib-devel openssl openssl-devel 依赖包说明: 1.编译 ...
随机推荐
- 图解 Await 和 Async
原文链接:Await and Async Explained with Diagrams and Examples 文章目录 简介 Promise 问题:组合 Promise Async 函数 Awa ...
- python模块之----subprocess
例子 >>> subprocess.getstatusoutput('pwd')(0, '/home/ronny')>>> subprocess.getoutput ...
- 吴恩达《深度学习》-第五门课 序列模型(Sequence Models)-第二周 自然语言处理与词嵌入(Natural Language Processing and Word Embeddings)-课程笔记
第二周 自然语言处理与词嵌入(Natural Language Processing and Word Embeddings) 2.1 词汇表征(Word Representation) 词汇表示,目 ...
- [PyTorch 学习笔记] 7.1 模型保存与加载
本章代码: https://github.com/zhangxiann/PyTorch_Practice/blob/master/lesson7/model_save.py https://githu ...
- 云计算openstack核心组件——neutron网络服务(8)
一.neutron 介绍: Neutron 概述 传统的网络管理方式很大程度上依赖于管理员手工配置和维护各种网络硬件设备:而云环境下的网络已经变得非常复杂,特别是在多租户场景里,用户随时都可能需要 ...
- git代码管理——克隆项目到本地仓库及上传本地项目到仓库
一.克隆项目到本地仓库 1.github网站操作 1.1 登录github 首先创建一个仓库,点击“New” 1.2 输入仓库信息 1.3 创建完成后,会多出一个仓库 2.安装git客户端 2.1 安 ...
- 【机器学习】梯度下降 II
Gradient Descent 梯度下降 II 关于 Gradient Descent 的直观解释,参考上一篇博客[机器学习]梯度下降 I 本模块介绍几种梯度下降模型.定义符号标记如下: \(\th ...
- 5.Storm-集群配置及任务提交
- Class对象、反射、动态代理
Class对象是所有类的根源,Object是所有对象的根源. 编译后的新类会产生一个Class对象,保存在同名的.class文件中.每个类都有一个Class对象,它包含了所有的与类有关的信息.所有的C ...
- JVM学习目录
JVM学习目录 JVM的整体结构 1.类加载子系统 类加载子系统 2.运行时数据区 运行时数据区总览 堆.栈.方法区的详细图解 2.1.程序计数器 程序计数器 2.2.本地方法栈 本地方法栈 2.3. ...