ubuntu14.04 LEMP(linux+nginx+mysql+php5)构建环境
Install LEMP (Linux, Nginx, MySQL and PHP) Stack on Ubuntu Linux 14.04 LTS
I'm a new Ubuntu Linux user. How do I install the LEMP stack on an Ubuntu Linux 14.04 LTS server using command line options to serve dynamic web apps?
As one of the most popular Linux distribution in the world, Ubuntu has released the latest version on April 17, 2014. The latest version is 14.04 with code name Trusty Tahr. Ubunt 14.04 is a LTS (Long Term Support) version. This means that Ubuntu 14.04 will be supported for the next 5 years from the release date. In this tutorial we will cover Nginx, MySQL and PHP installation on Ubuntu Linux v14.04.
| Tutorial details | |
|---|---|
| Difficulty | Easy (rss) |
| Root privileges | Yes |
| Requirements | Ubuntu |
| Estimated completion time | 15m |
What is new in Ubuntu 14.04 (Trusty Tahr) version?
You may see it on cyberciti.biz or visit the Ubuntu home page at ubuntu.com.
Nginx Installation
Nginx is one of the robust web server in Linux world. Nginx is a free, open source, high performance HTTP server and reverse proxy, as weell as an IMAP/POP3 proxy server. Now, we are going to install Nginx web server.
First, make sure system is upto date:
$ sudo apt-get update


$ sudo apt-get upgrade
#1 - Download and Install Nginx
The easiest way to download and install Nginx is using apt-get command. Here is the command:
$ sudo apt-get install nginx
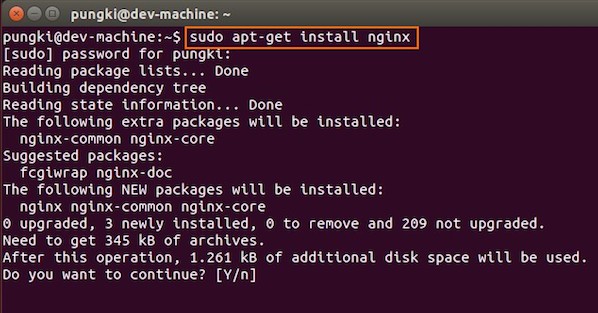
Fig.01: Download and Install Nginx on Ubuntu Linux
Just wait until installation is get done on the system.
#2 - Test Nginx
Once it get done, you can open your browser and type url http://localhost or http://your_ip_address to test it. If everything goes normal, you will see Nginx welcome page:
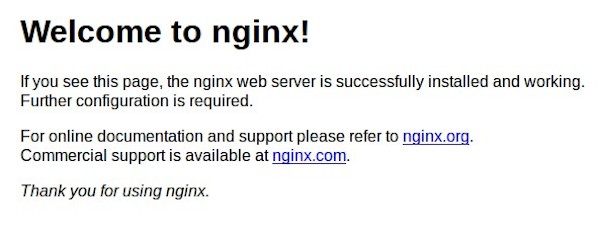
Fig.02: Welcome nginx page on Ubuntu Linux
MySQL Installation On Ubuntu
MySQL is one of the most powerful database management system in Linux world. Next, we are going to install it with PHP support.
#1 - Install MySQL and PHP support
Type the following command:
$ sudo apt-get install mysql-server php5-mysql
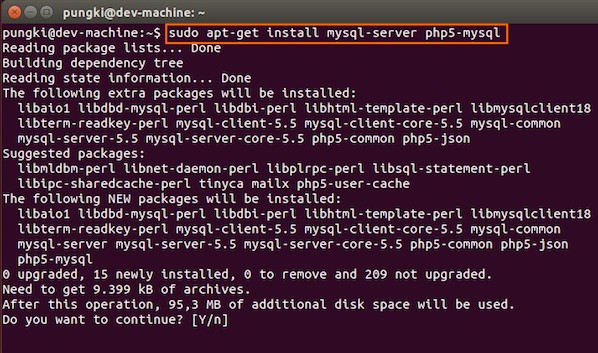
Fig.03: Ubuntu Linux Install MySQL to Manage Site Data with PHP
During the installation, MySQL will ask you to enter MySQL root password, other wise the installation will not continue. Type the password you want, then press OK to continue the installation.
#2 - Test MySQL
Once mysql installation finished, we can test it. Open your console and type the following command:
$ mysql -u root -p
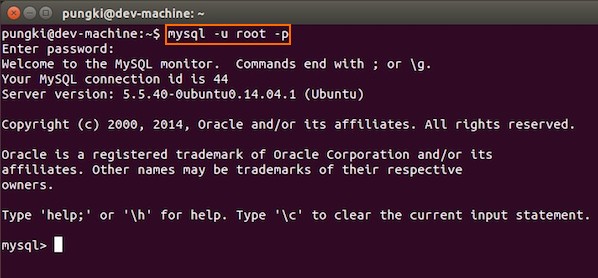
Fig.04: Ubuntu test Mysql installation
If you type your password correctly, the you will see the mysql prompt.
#3 - Securing access to MySQL
If we are going to use MySQL as a production database, we may want to secure it. MySQL provides a shell script to help us securing it. Just type the following command on your console:
$ sudo mysql_secure_installation
Here are the steps to do it.
1. Enter your root password
Enter your current root password to continue to the next step.
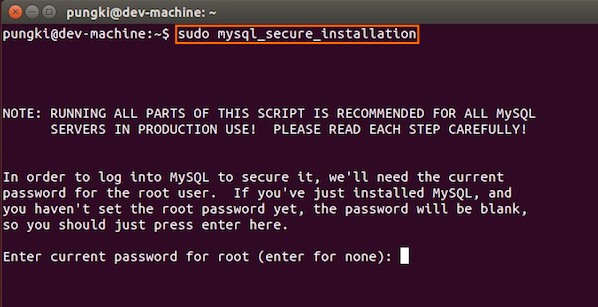
Fig.05: MySQL enter your root db password
2.Change the root password
If you want to change it, press Y. Otherwise, press N.
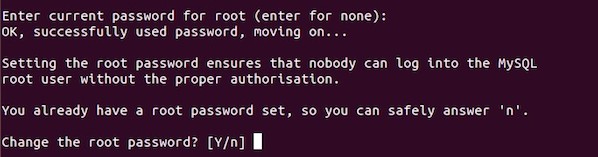
Fig.06: MySQL security
3.Remove anonymous user
It is recommended to remove anonymous user to mitigate risk who can log in into your database.

Fig.07: MySQL security
4.Disallow root login remotely
To make sure that no one remote your database as root from another machines, we need to disallow root login remotely.

Fig.08: MySQL security
5.Remove test database
Sometimes some MySQL installation will create a database named ëtestí for testing purpose. We can remove it if we donít use it.

Fig.09: MySQL security
6.Reload privilege tables
Then we need to reloading the privilege tables to ensure all changes made so far will take effect immediately.
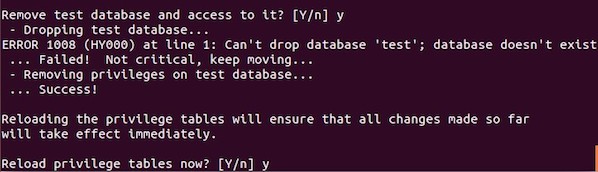
Fig.10: MySQL security
7.Done
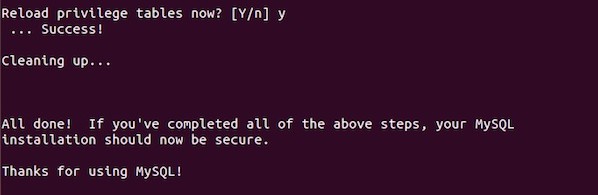
Fig.11: MySQL security
PHP Installation For Server Side Scripting
Since PHP is popular, a lot of websites is built using PHP language. As of January 2013, PHP was installed on more than 240 millions websites. Now we are going to install PHP on Ubuntu 14.04
#1 - Download and install PHP
As usual, we can download and install PHP using apt-get command. Just type the following command on your Ubuntu console or over the ssh based session:
$ sudo apt-get install php5-fpm
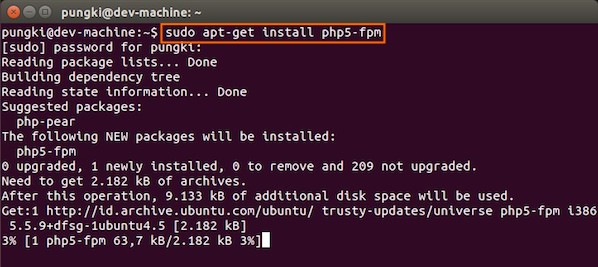
Fig.12: Install PHP for Server Side Processing on Ubuntu
And wait for the installation to complete.
Configure Nginx to work with PHP and MySQL Server on Ubuntu
Now we have all components installed. The next step is we need to configure Nginx with PHP and MySQL. Let's start to configure them.
#1 - Configure PHP5-FPM
PHP5-FPM configuration file is located at /etc/php5/fpm/php.ini. Open it with your text editor
$ sudo vi /etc/php5/fpm/php.ini
Change this parameter, from:
cgi.fix_pathinfo=1
to:
cgi.fix_pathinfo=0
Save and close the file and then restart php5-fpm service, type:
$ sudo service php5-fpm restart
#2 - Configure Nginx
Nginx configuration file is located at /etc/nginx/nginx.conf. But basically, we don't need to touch it. The configuration of nginx website is located in /etc/nginx/sites-available/default file.
Open it, and uncomment lines:
 location ~ \.php$ {

         fastcgi_split_path_info ^(.+\.php)(/.+)$;

 #       # NOTE: You should have "cgi.fix_pathinfo = 0;" in php.ini

 #

 #       # With php5-cgi alone:

 #        fastcgi_pass 127.0.0.1:9000;

 #       # With php5-fpm:

         fastcgi_pass unix:/var/run/php5-fpm.sock;

         fastcgi_index index.php;

         include fastcgi_params;

 }
Then restart the services.
$ sudo service nginx restart
Please make sure, on Ubuntu 14.04, we cannot use fastcgi_pass 127.0.0.1:9000. So make sure that the line is commented. Otherwise, on my machine, I got this error :
$ tail /var/log/nginx/error.log


2014/11/04 16:57:04 [emerg] 3216#0: "fastcgi_pass" directive is not allowed here in /etc/nginx/sites-enabled/default:59


2014/11/04 16:58:21 [emerg] 3256#0: "fastcgi_pass" directive is not allowed here in /etc/nginx/sites-enabled/default:59
On Ubuntu 14.04, I use the following line:
fastcgi_pass unix:/var/run/php5-fpm.sock
When I restart the Nginx and I still got the following error message:
2014/11/04 17:02:05 [emerg] 3295#0: "fastcgi_pass" directive is not allowed here in /etc/nginx/sites-enabled/default:61


2014/11/04 17:04:58 [emerg] 3410#0: "fastcgi_pass" directive is not allowed here in /etc/nginx/sites-enabled/default:61
Please make sure that you already uncomment this line:
location ~ \.php$ {
#3 - Configure MySQL
After the configuration section is done, now we need to test them to make sure that our configuration is working as required. On Ubuntu 14.04 the root document folder is located in /usr/share/nginx/html. So create a file called /usr/share/nginx/html/phpinfo.php with the following code:
- <span style="margin:0px; padding:0px; word-wrap:break-word; color:rgb(0,0,0)"><strong><?</strong></span> <a target="_blank" href="http://www.php.net/phpinfo" style="margin:0px; padding:0px; word-wrap:break-word; color:rgb(128,128,128); text-decoration:none"><span style="margin:0px; padding:0px; word-wrap:break-word; color:rgb(0,0,102)">phpinfo</span></a><span style="margin:0px; padding:0px; word-wrap:break-word; color:rgb(102,204,102)">(</span><span style="margin:0px; padding:0px; word-wrap:break-word; color:rgb(102,204,102)">)</span>; <span style="margin:0px; padding:0px; word-wrap:break-word; color:rgb(0,0,0)"><strong>?></strong></span>
After restarting PHP-FPM and Nginx, open the browser and browse to the php file, we got only a blank screen. No error message on the screen. No error message on PHP-FPM and Nginx log file.
![]()
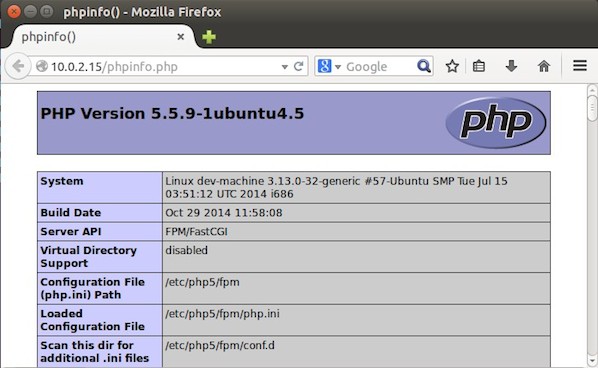
Then we changed /usr/share/nginx/html/phpinfo.php file code on the root document of Nginx, as follows:
- <span style="margin:0px; padding:0px; word-wrap:break-word; color:rgb(0,0,0)"><strong><?php</strong></span> <a target="_blank" href="http://www.php.net/phpinfo" style="margin:0px; padding:0px; word-wrap:break-word; color:rgb(128,128,128); text-decoration:none"><span style="margin:0px; padding:0px; word-wrap:break-word; color:rgb(0,0,102)">phpinfo</span></a><span style="margin:0px; padding:0px; word-wrap:break-word; color:rgb(102,204,102)">(</span><span style="margin:0px; padding:0px; word-wrap:break-word; color:rgb(102,204,102)">)</span>; <span style="margin:0px; padding:0px; word-wrap:break-word; color:rgb(0,0,0)"><strong>?></strong></span>
And then open the browser again and type url http://your_ip_address/phpinfo.php
It seem that by default, we can not use short php-tag like this:
- <span style="margin:0px; padding:0px; word-wrap:break-word; color:rgb(0,0,0)"><strong><?</strong></span> ... your code ... <span style="margin:0px; padding:0px; word-wrap:break-word; color:rgb(0,0,0)"><strong>?></strong></span>
To enable short php tag, we need to change the value of short_open_tag parameter on php.ini file:
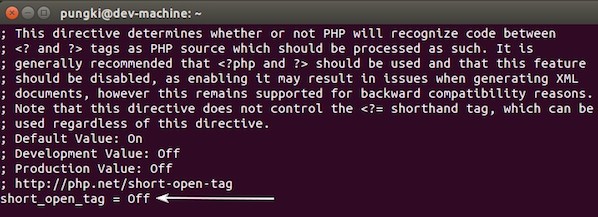
Change the value from Off to On. Then restart your php5-fpm :
sudo service php5-fpm restart
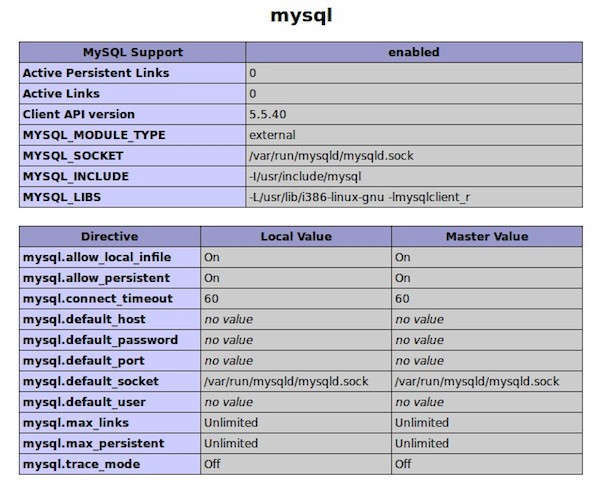
Then try again to test your phpinfo file. Next, we will see if the MySQL support is enabled or not. Scroll down the php configuration screen on your browser, if you see MySQL block there, then MySQL support already enabled.
You are now ready to use Nginx, PHP5 and MySQL on Ubuntu server. I hope this quick article help anyone who wish to install Linux, Nginx, PHP and MySQL on Ubuntu 14.04.
ubuntu14.04 LEMP(linux+nginx+mysql+php5)构建环境的更多相关文章
- LNMP(linux+nginx+mysql+php)服务器环境配置【转载】
本文转载自 园友David_Tang的博客,如有侵权请联系本人及时删除,原文地址: http://www.cnblogs.com/mchina/archive/2012/05/17/2507102.h ...
- LNMP(linux+nginx+mysql+php)服务器环境配置
一.简介 Nginx是俄罗斯人编写的十分轻量级的HTTP服务器,Nginx,它的发音为 “engine X”, 是一个高性能的HTTP和反向代理服务器,同时也是一个IMAP/POP3/SMTP 代理服 ...
- 5.LNMP(Linux + Nginx + MySQL + PHP)环境安装
1.安装Nginx: yum install yum-priorities -y wget http://nginx.org/packages/centos/7/noarch/RPMS/nginx-r ...
- CentOS下安装LNMP(LINUX+NGINX+MYSQL+PHP)环境
一.安装Nginx最新版 首先查看是否有安装源包 yum list nginx (或yum info nginx) 如果没有则 vi /etc/yum.repos.d/nginx.repo #添加如 ...
- linux+nginx+mysql+php
LNMP(linux+nginx+mysql+php)服务器环境配置 一.简介 Nginx是俄罗斯人编写的十分轻量级的HTTP服务器,Nginx,它的发音为 “engine X”, 是一个高性能的 ...
- How To Install Linux & Nginx & MySQL & PHP (LEMP) stack on Raspberry Pi 3,Raspberry Pi 3,LEMP,Nginx,PHP, LEMP (not LNMP)
1. How To Install Linux & Nginx & MySQL & PHP (LEMP) stack on Raspberry Pi 3 R ...
- Linux Debian 7部署LEMP(Linux+Nginx+MySQL+PHP)网站环境
我们在玩VPS搭建网站环境的时候,都经常看到所谓的LAMP.LNMP.LEMP,LAMP, 其中的A代表APECHE WEB驱动环境,LNMP中的N代表NGINX驱动环境,只不过海外的叫法NGINX ...
- 阿里云服务器部署php的laravel项目,在阿里云买ECS 搭建 Linux+Nginx+Mysql+PHP环境的
在阿里云买ECS的时候选择自己习惯的镜像系统,我一般都是使用Linux Ubuntu,所以,以下的配置都是在Ubuntu 14.04稳定支持版的环境中搭建Linux+Nginx+Mysql+PHP环境 ...
- LNMP(Linux+Nginx+Mysql+PHP---源码)环境搭建
LNMP(Linux+Nginx+Mysql+PHP(Perl)) Linux:[root@dep5 mysql]# cat /etc/issueRed Hat Enterprise Linux Se ...
随机推荐
- Liunx运维(六)-文件备份与压缩命令
文档目录: 一.tar:打包备份 二.gzip:压缩或解压文件 三.zip:打包和压缩文件 四.unzip:解压zip文件 五.scp:远程文件复制 六.rsync:文件同步工具 ---------- ...
- 使用 dotnet-monitor 分析.NET 应用程序
dotnet-monitor 是 .NET Core 命令行接口 (CLI) 工具, 可以很方便的在dotnet环境中分析我们的应用程序,需要注意的是,目前它还只是一个实验性的工具 在这之前,我们使用 ...
- Javascript 获得数组中相同或不同的数组元素
Javascript 获得数组中相同或不同的数组元素 在Javascript中,偶尔会用到获取数组中相同或不同的元素值的情况,以下提供了获得数组中相同或不同的 元素函数供参考学习使用. // 数字类型 ...
- C++模板元编程----堆排序
目录 目录 前言 实现的一些小细节 Debug 惰性求值 总结 Ref 前言 经过前两次经验的积累,终于来到了麻烦的堆排序.在一开始接触模板元编程的时候,我就期望有一天能够写出元编程堆排序的代码.原因 ...
- TurtleBot3 Waffle (tx2版华夫)(6)
重要提示:请在配网通信成功后进行操作,配网后再次开机需要重新验证通信: 重要提示:[Remote PC]代表PC端.[TurtelBot]代表树莓派端: 操作步骤如下: 1)[Remote PC] 启 ...
- 解决Github下载仓库慢的正确姿势
上个月刚安装了 Manjaro ,然后最近在Manjaro下载Github的项目竟然只有几十b/s,这能忍?对于下载Github上的代码是硬需求,没办法直接探索一下突破的方法了. 方法一:安装chro ...
- SICP 课程总结 & 复习
SICP 课程总结 & 复习 小作文 有赖于那个终极的.伟大的.命定的教务系统,我选上了这门课:SICP,Structure and Interpret of Computer Program ...
- 20210105 - python自动化办公简介
新的一年开始了, 计划每周至少更新三篇博客. 人生苦短,如果不做改变,人生很快会过去!2021年寻求改变,加油! python自动化办公: 1.相关工具与环境的安装概要: 需要用到python(一种开 ...
- Spark学习进度7-综合案例
综合案例 文件排序 解法: 1.读取数据 2.数据清洗,变换数据格式 3.从新分区成一个分区 4.按照key排序,返还带有位次的元组 5.输出 @Test def filesort(): Unit = ...
- dhcp分发地址以及静态路由设置
路由器R1配置: system-view [Huawei]sysname R1 [R1]user-interface console 0 [R1-ui-console0]idle-timeout 0 ...