KingbaseES R6 集群物理copy方式手工添加新备库节点
案例说明: 对于主库数据量比较大的环境,在添加新节点是可以采用在线clone方式创建新的备库节点,也可以在离线的状态下,直接拷贝其中一个备库的所有集群相关目录来创建新的备库节点。本案例介绍了通过离线物理copy目录的方式创建新的备库节点,包括详细的操作步骤。
一、案例环境
操作系统:
[root@node1 ~]# cat /etc/centos-release

CentOS Linux release 7.2.1511 (Core)

  数据库:

test=# select version();

                                                       version

------------------------------------------------------------------------------

 KingbaseES V008R006C003B0010 on x86_64-pc-linux-gnu, compiled by gcc (GCC) 4.1.2 20080704 (Red Hat 4.1.2-46), 64-bit

(1 row)
集群架构:

一、配置新节点系统环境(和集群其他节点相同)
1、配置资源访问限制策略
cat /etc/security/limits.conf
# End of file
* soft nofile 655360
root soft nofile 655360
* hard nofile 655360
root hard nofile 655360
* soft nproc 655360
root soft nproc 655360
* hard nproc 655360
root hard nproc 655360
* soft core unlimited
root soft core unlimited
* hard core unlimited
root hard core unlimited
* soft memlock 50000000
root soft memlock 50000000
* hard memlock 50000000
root hard memlock 50000000
2、配置sysctl.conf文件
[root@node2 ~]# cat /etc/sysctl.conf
# System default settings live in /usr/lib/sysctl.d/00-system.conf.
# To override those settings, enter new settings here, or in an /etc/sysctl.d/<name>.conf file
#
# For more information, see sysctl.conf(5) and sysctl.d(5).
kernel.sem= 5010 641280 5010 256
fs.file-max=7672460
fs.aio-max-nr=1048576
net.core.rmem_default=262144
net.core.rmem_max=4194304
net.core.wmem_default=262144
net.core.wmem_max=4194304
net.ipv4.ip_local_port_range=9000 65500
net.ipv4.tcp_wmem=8192 65536 16777216
net.ipv4.tcp_rmem=8192 87380 16777216
vm.min_free_kbytes=512000
vm.vfs_cache_pressure=200
vm.swappiness=20
net.ipv4.tcp_max_syn_backlog=4096
net.core.somaxconn=4096
3、关闭新节点防火墙
[root@node3 .ssh]# systemctl status firewalld
● firewalld.service - firewalld - dynamic firewall daemon
Loaded: loaded (/usr/lib/systemd/system/firewalld.service; enabled; vendor preset: enabled)
Active: active (running) since Thu 2021-06-24 13:59:09 CST; 23min ago
Main PID: 798 (firewalld)
CGroup: /system.slice/firewalld.service
└─798 /usr/bin/python -Es /usr/sbin/firewalld --nofork --nopid
Jun 24 13:59:06 localhost.localdomain systemd[1]: Starting firewalld - dynamic firewall daemon...
Jun 24 13:59:09 localhost.localdomain systemd[1]: Started firewalld - dynamic firewall daemon.
[root@node3 .ssh]# systemctl stop firewalld
[root@node3 .ssh]# systemctl disable firewalld
Removed symlink /etc/systemd/system/dbus-org.fedoraproject.FirewallD1.service.
Removed symlink /etc/systemd/system/basic.target.wants/firewalld.service.
[root@node3 .ssh]# systemctl status firewalld
● firewalld.service - firewalld - dynamic firewall daemon
Loaded: loaded (/usr/lib/systemd/system/firewalld.service; disabled; vendor preset: enabled)
Active: inactive (dead)
Jun 24 13:59:06 localhost.localdomain systemd[1]: Starting firewalld - dynamic firewall daemon...
Jun 24 13:59:09 localhost.localdomain systemd[1]: Started firewalld - dynamic firewall daemon.
Jun 24 14:22:46 node3 systemd[1]: Stopping firewalld - dynamic firewall daemon...
Jun 24 14:22:48 node3 systemd[1]: Stopped firewalld - dynamic firewall daemon.
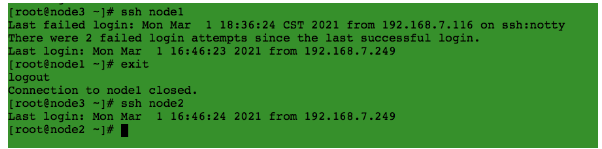
4、验证新节点和其他节点的ssh信任关系
kingbase用户:kingbase 用户能以 root 用户免密ssh 到 所有节点。
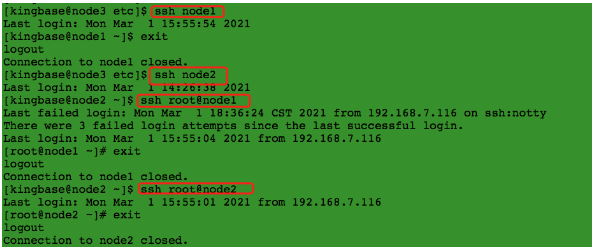
root用户:
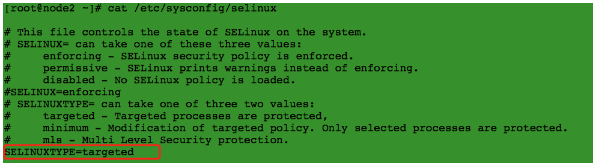
5、关闭selinux
三、查看当前集群状态现象
1、集群节点状态信息
[kingbase@node1 bin]$ ./repmgr cluster show

 ID | Name    | Role    | Status    | Upstream | Location | Priority | Timeline | Connection string

----+---------+---------+-----------+----------+----------+----------+----------+

 1  | node248 | primary | * running |          | default  | 100      | 5        | host=192.168.7.248 user=esrep dbname=esrep port=54321 connect_timeout=10 keepalives=1 keepalives_idle=10 keepalives_interval=1 keepalives_count=3

 2  | node249 | standby |   running | node248  | default  | 100      | 5        | host=192.168.7.249 user=esrep dbname=esrep port=54321 connect_timeout=10 keepalives=1 keepalives_idle=10 keepalives_interval=1 keepalives_count=3
2、主备流复制状态信息
test=# select * from sys_stat_replication;

  pid  | usesysid | usename | application_name |  client_addr  | client_hostname | client_port |         backend_start         | backend_xmin |   state   |  sent_lsn  | write_lsn  | flush_lsn  | replay_lsn | write_lag | flush_lag | replay_lag | sync_priority | sync_state |          reply_time

-------+----------+---------+------------------+---------------+-----------------+

 13347 |    16384 | esrep   | node249          | 192.168.7.249 |                 |       23228 | 2021-03-01 14:45:03.723296+08 |              | streaming | 1/F205BC90 | 1/F205BC90 | 1/F205BC90 | 1/F205BC90 |           |           |            |             1 | quorum     | 2021-03-01 14:54:58.127023+08

(1 row)
四、物理copy创建新备库节点
1、新备库创建目录(和集群其他节点一致)
[kingbase@node3 .ssh]$ mkdir -p /home/kingbase/cluster/R6HA/KHA/kingbase/data
2、从已有的主库节点拷贝集群相关目录和文件
[kingbase@node2 KHA]$ scp -r * node3:/home/kingbase/cluster/R6HA/KHA/
源库必须是正常关闭状态。
3、配置ip和arping可执行文件权限

===如果集群使用vip,需要对ip和arping可执行文件配置setuid权限。===
[root@node3 soft]# chmod 4755 /sbin/ip

[root@node3 soft]# chmod 4755 /sbin/arping

[root@node3 soft]# ls -lh /sbin/ip

-rwsr-xr-x. 1 root root 319K Nov 20  2015 /sbin/ip

[root@node3 soft]# ls -lh /sbin/arping

-rwsr-xr-x. 1 root root 24K Nov 21  2015 /sbin/arping
四、将新备库节点加入集群
1、编辑repmgr.conf文件
[kingbase@node3 etc]$ cat repmgr.conf

on_bmj=off

node_id=3

node_name=node243

promote_command='/home/kingbase/cluster/R6HA/KHA/kingbase/bin/repmgr  standby promote -f /home/kingbase/cluster/R6HA/KHA/kingbase/etc/repmgr.conf'

follow_command='/home/kingbase/cluster/R6HA/KHA/kingbase/bin/repmgr  standby follow  -f /home/kingbase/cluster/R6HA/KHA/kingbase/etc/repmgr.conf -W --upstream-node-id=%n'

conninfo='host=192.168.7.243 user=esrep dbname=esrep port=54321 connect_timeout=10 keepalives=1 keepalives_idle=10 keepalives_interval=1 keepalives_count=3'

log_file='/home/kingbase/cluster/R6HA/KHA/kingbase/hamgr.log'

data_directory='/home/kingbase/cluster/R6HA/KHA/kingbase/data'

sys_bindir='/home/kingbase/cluster/R6HA/KHA/kingbase/bin'

ssh_options='-q -o ConnectTimeout=10 -o StrictHostKeyChecking=no -o ServerAliveInterval=2 -o ServerAliveCountMax=5 -p 22'

reconnect_attempts=3

reconnect_interval=5

failover='automatic'

recovery='manual'

monitoring_history='no'

trusted_servers='192.168.7.1'

virtual_ip='192.168.7.240/24'

net_device='enp0s3'

ipaddr_path='/sbin'

arping_path='/sbin'

synchronous='quorum'

repmgrd_pid_file='/home/kingbase/cluster/R6HA/KHA/kingbase/hamgrd.pid'

ping_path='/usr/bin'

[kingbase@node3 bin]$ ./repmgr node rejoin -h 192.168.7.248 -U esrep -d esrep --force
ERROR: database is still running in state "shut down in recovery"
HINT: "repmgr node rejoin" cannot be executed on a running node
2、启动备库数据库服务
启动数据库:
[kingbase@node3 bin]$ chmod 700 ../data

[kingbase@node3 bin]$ ./sys_ctl start -D ../data

waiting for server to start....2021-03-01 13:59:02.770 CST [20835] LOG:  sepapower extension initialized

2021-03-01 13:59:02.813 CST [20835] LOG:  starting KingbaseES V008R006C003B0010 on x86_64-pc-linux-gnu, compiled by gcc (GCC) 4.1.2 20080704 (Red Hat 4.1.2-46), 64-bit

2021-03-01 13:59:02.814 CST [20835] LOG:  listening on IPv4 address "0.0.0.0", port 54321

2021-03-01 13:59:02.814 CST [20835] LOG:  listening on IPv6 address "::", port 54321

2021-03-01 13:59:02.859 CST [20835] LOG:  listening on Unix socket "/tmp/.s.KINGBASE.54321"

2021-03-01 13:59:02.902 CST [20835] LOG:  redirecting log output to logging collector process

2021-03-01 13:59:02.902 CST [20835] HINT:  Future log output will appear in directory "sys_log".

 done

server started
3、将节点作为standby注册到集群
[kingbase@node3 bin]$ ./repmgr standby register --force

INFO: connecting to local node "node243" (ID: 3)

INFO: connecting to primary database

WARNING: --upstream-node-id not supplied, assuming upstream node is primary (node ID 1)

WARNING: local node not attached to primary node 1

NOTICE: -F/--force supplied, continuing anyway

INFO: standby registration complete

NOTICE: standby node "node243" (ID: 3) successfully registered
4、将节点加入到集群
[kingbase@node3 bin]$ ./repmgr node rejoin -h 192.168.7.248 -U esrep -d esrep

ERROR: connection to database failed

DETAIL:

fe_sendauth: no password supplied
=== 由以上获知,加入节点无法访问主库数据库,认证失败。===
5、将集群其他节点的认证文件拷贝到新节点的宿主目录下
[kingbase@node3 ~]$ ls -lha .encpwd

-rw-------. 1 kingbase kingbase 55 Mar  1 14:33 .encpwd

[kingbase@node3 ~]$ cat .encpwd

*:*:*:system:MTIzNDU2

*:*:*:esrep:S2luZ2Jhc2VoYTExMA==
=== 对于R6集群使用了.encpwd的隐藏文件,用于系统用户免密登录数据库===
6、新节点加入到集群
[kingbase@node3 bin]$ ./repmgr node rejoin -h 192.168.7.248 -U esrep -d esrep

INFO: timelines are same, this server is not ahead

DETAIL: local node lsn is 1/F2055920, rejoin target lsn is 1/F2062AB0

NOTICE: setting node 3's upstream to node 1

WARNING: unable to ping "host=192.168.7.243 user=esrep dbname=esrep port=54321 connect_timeout=10 keepalives=1 keepalives_idle=10 keepalives_interval=1 keepalives_count=3"

DETAIL: PQping() returned "PQPING_NO_RESPONSE"

NOTICE: begin to start server at 2021-03-01 14:34:19.973116

NOTICE: starting server using "/home/kingbase/cluster/R6HA/KHA/kingbase/bin/sys_ctl  -w -t 90 -D '/home/kingbase/cluster/R6HA/KHA/kingbase/data' -l /home/kingbase/cluster/R6HA/KHA/kingbase/bin/logfile start"

NOTICE: start server finish at 2021-03-01 14:34:20.187969

NOTICE: NODE REJOIN successful

DETAIL: node 3 is now attached to node 1
=== 从以上获知,新节点node243作为备库加入到集群中===
7、查看集群节点状态
[kingbase@node3 bin]$ ./repmgr cluster show

 ID | Name    | Role    | Status    | Upstream | Location | Priority | Timeline | Connection string

----+---------+---------+-----------+----------+----------+----------+----------+--------

 1  | node248 | primary | * running |          | default  | 100      | 5        | host=192.168.7.248 user=esrep dbname=esrep port=54321 connect_timeout=10 keepalives=1 keepalives_idle=10 keepalives_interval=1 keepalives_count=3

 2  | node249 | standby |   running | node248  | default  | 100      | 5        | host=192.168.7.249 user=esrep dbname=esrep port=54321 connect_timeout=10 keepalives=1 keepalives_idle=10 keepalives_interval=1 keepalives_count=3

 3  | node243 | standby |   running | node248  | default  | 100      | 5        | host=192.168.7.243 user=esrep dbname=esrep port=54321 connect_timeout=10 keepalives=1 keepalives_idle=10 keepalives_interval=1 keepalives_count=3
8、查看主备流复制状态
test=# select * from sys_stat_replication;

  pid  | usesysid | usename | application_name |  client_addr  | client_hostname | client_port |         backend_start         | backend_xmin |   state   |  sent_lsn  | write_lsn  | flush_lsn  | replay_lsn | write_lag | flush_lag | replay_lag | sync_priority | sync_state |          reply_time

-------+----------+---------+------------------+---------------+-----------------+-------------+

 13347 |    16384 | esrep   | node249          | 192.168.7.249 |                 |       23228 | 2021-03-01 14:45:03.723296+08 |              | streaming | 1/F20659C8 | 1/F20659C8 | 1/F20659C8 | 1/F20659C8 |           |           |            |             1 | quorum     | 2021-03-01 15:35:31.027066+08

 25123 |    16384 | esrep   | node243          | 192.168.7.243 |                 |       49130 | 2021-03-01 15:33:59.607489+08 |              | streaming | 1/F20659C8 | 1/F20659C8 | 1/F20659C8 | 1/F20659C8 |           |           |            |             1 | quorum     | 2021-03-01 14:36:01.384836+08
9、数据同步测试
1) Primary DML操作
test=# \c prod
You are now connected to database "prod" as user "system".
prod=# create table t8 (like t7);
CREATE TABLE
prod=# \d
List of relations
Schema | Name | Type | Owner
--------+---------------------+-------------------+--------
......
public | t8 | table | system
(16 rows)
2) standby 查看同步数据
You are now connected to database "prod" as user "system".

prod=# \d

                     List of relations

 Schema |        Name         |       Type        | Owner

--------+---------------------+-------------------+--------

 .......

 public | t8                  | table             | system

(16 rows)
五、重新启动集群测试
1、重新启动集群
[kingbase@node1 bin]$ ./sys_monitor.sh restart
2021-03-01 15:37:28 Ready to stop all DB ...
Service process "node_export" was killed at process 14434
Service process "postgres_ex" was killed at process 14435
Service process "node_export" was killed at process 14008
Service process "postgres_ex" was killed at process 14009
There is no service "node_export" running currently.
There is no service "postgres_ex" running currently.
2021-03-01 15:37:37 begin to stop repmgrd on "[192.168.7.248]".
2021-03-01 15:37:38 repmgrd on "[192.168.7.248]" stop success.
2021-03-01 15:37:38 begin to stop repmgrd on "[192.168.7.249]".
2021-03-01 15:37:39 repmgrd on "[192.168.7.249]" stop success.
2021-03-01 15:37:39 begin to stop repmgrd on "[192.168.7.243]".
2021-03-01 15:37:40 repmgrd on "[192.168.7.243]" already stopped.
2021-03-01 15:37:40 begin to stop DB on "[192.168.7.249]".
waiting for server to shut down.... done
server stopped
2021-03-01 15:37:41 DB on "[192.168.7.249]" stop success.
2021-03-01 15:37:41 begin to stop DB on "[192.168.7.243]".
waiting for server to shut down.... done
server stopped
2021-03-01 15:37:43 DB on "[192.168.7.243]" stop success.
2021-03-01 15:37:43 begin to stop DB on "[192.168.7.248]".
waiting for server to shut down...... done
server stopped
2021-03-01 15:37:46 DB on "[192.168.7.248]" stop success.
2021-03-01 15:37:46 Done.
2021-03-01 15:37:46 Ready to start all DB ...
2021-03-01 15:37:46 begin to start DB on "[192.168.7.248]".
waiting for server to start.... done
server started
2021-03-01 15:37:48 execute to start DB on "[192.168.7.248]" success, connect to check it.
2021-03-01 15:37:49 DB on "[192.168.7.248]" start success.
2021-03-01 15:37:49 Try to ping trusted_servers on host 192.168.7.248 ...
2021-03-01 15:37:52 Try to ping trusted_servers on host 192.168.7.249 ...
2021-03-01 15:37:54 Try to ping trusted_servers on host 192.168.7.243 ...
2021-03-01 15:37:57 begin to start DB on "[192.168.7.249]".
waiting for server to start.... done
server started
2021-03-01 15:37:59 execute to start DB on "[192.168.7.249]" success, connect to check it.
2021-03-01 15:38:00 DB on "[192.168.7.249]" start success.
2021-03-01 15:38:00 begin to start DB on "[192.168.7.243]".
waiting for server to start.... done
server started
2021-03-01 15:38:02 execute to start DB on "[192.168.7.243]" success, connect to check it.
2021-03-01 15:38:03 DB on "[192.168.7.243]" start success.
ID | Name | Role | Status | Upstream | Location | Priority | Timeline | Connection string
----+---------+---------+-----------+----------+----------+----------+----------+---------------------------------------------------------------------------------------------------------------------------------------------------
1 | node248 | primary | * running | | default | 100 | 5 | host=192.168.7.248 user=esrep dbname=esrep port=54321 connect_timeout=10 keepalives=1 keepalives_idle=10 keepalives_interval=1 keepalives_count=3
2 | node249 | standby | running | node248 | default | 100 | 5 | host=192.168.7.249 user=esrep dbname=esrep port=54321 connect_timeout=10 keepalives=1 keepalives_idle=10 keepalives_interval=1 keepalives_count=3
3 | node243 | standby | running | node248 | default | 100 | 5 | host=192.168.7.243 user=esrep dbname=esrep port=54321 connect_timeout=10 keepalives=1 keepalives_idle=10 keepalives_interval=1 keepalives_count=3
2021-03-01 15:38:03 The primary DB is started.
2021-03-01 15:38:07 Success to load virtual ip [192.168.7.240/24] on primary host [192.168.7.248].
2021-03-01 15:38:07 Try to ping vip on host 192.168.7.248 ...
2021-03-01 15:38:10 Try to ping vip on host 192.168.7.249 ...
2021-03-01 15:38:13 Try to ping vip on host 192.168.7.243 ...
2021-03-01 15:38:16 begin to start repmgrd on "[192.168.7.248]".
[2021-03-01 15:38:17] [NOTICE] using provided configuration file "/home/kingbase/cluster/R6HA/KHA/kingbase/bin/../etc/repmgr.conf"
[2021-03-01 15:38:17] [NOTICE] redirecting logging output to "/home/kingbase/cluster/R6HA/KHA/kingbase/hamgr.log"
2021-03-01 15:38:17 repmgrd on "[192.168.7.248]" start success.
2021-03-01 15:38:17 begin to start repmgrd on "[192.168.7.249]".
[2021-03-01 15:38:08] [NOTICE] using provided configuration file "/home/kingbase/cluster/R6HA/KHA/kingbase/bin/../etc/repmgr.conf"
[2021-03-01 15:38:08] [NOTICE] redirecting logging output to "/home/kingbase/cluster/R6HA/KHA/kingbase/hamgr.log"
2021-03-01 15:38:18 repmgrd on "[192.168.7.249]" start success.
2021-03-01 15:38:18 begin to start repmgrd on "[192.168.7.243]".
[2021-03-01 14:38:40] [NOTICE] using provided configuration file "/home/kingbase/cluster/R6HA/KHA/kingbase/bin/../etc/repmgr.conf"
[2021-03-01 14:38:40] [NOTICE] redirecting logging output to "/home/kingbase/cluster/R6HA/KHA/kingbase/hamgr.log"
2021-03-01 15:38:19 repmgrd on "[192.168.7.243]" start success.
ID | Name | Role | Status | Upstream | repmgrd | PID | Paused? | Upstream last seen
----+---------+---------+-----------+----------+---------+-------+---------+--------------------
1 | node248 | primary | * running | | running | 27678 | no | n/a
2 | node249 | standby | running | node248 | running | 25551 | no | 1 second(s) ago
3 | node243 | standby | running | node248 | running | 20067 | no | n/a
2021-03-01 15:38:31 Done.
=== 从以上获知,新的节点已经可以通过sys_monitor.sh进行管理。===
2、查看集群节点状态
[kingbase@node1 bin]$ ./repmgr cluster show

 ID | Name    | Role    | Status    | Upstream | Location | Priority | Timeline | Connection string

----+---------+---------+-----------+----------+----------+----------+----------+--------

 1  | node248 | primary | * running |          | default  | 100      | 5        | host=192.168.7.248 user=esrep dbname=esrep port=54321 connect_timeout=10 keepalives=1 keepalives_idle=10 keepalives_interval=1 keepalives_count=3

 2  | node249 | standby |   running | node248  | default  | 100      | 5        | host=192.168.7.249 user=esrep dbname=esrep port=54321 connect_timeout=10 keepalives=1 keepalives_idle=10 keepalives_interval=1 keepalives_count=3

 3  | node243 | standby |   running | node248  | default  | 100      | 5        | host=192.168.7.243 user=esrep dbname=esrep port=54321 connect_timeout=10 keepalives=1 keepalives_idle=10 keepalives_interval=1 keepalives_count=3
3、在通过sys_monitor.sh启动集群时自动在新节点创建crond服务
[root@node3 cron.d]# cat KINGBASECRON
*/1 * * * * kingbase . /etc/profile;/home/kingbase/cluster/R6HA/KHA/kingbase/bin/kbha -A daemon -f /home/kingbase/cluster/R6HA/KHA/kingbase/bin/../etc/repmgr.conf >> /home/kingbase/cluster/R6HA/KHA/kingbase/bin/../kbha.log 2>&
六、操作步骤总结:
1)配置新节点系统环境和集群其他节点保持一致。
2)手工配置新节点和集群其他节点:root----root,kingbase----kingbase,kingbase----root用户之间的信任关系。
3)关闭新节点防火墙和selinux。
4)关闭集群,从主库拷贝集群目录和相关文件到新节点(包括数据库)。
5)配置ip和arping可执行文件的setuid权限。
6)配置新备库repmgr.conf文件。
7)启动集群,启动新备库数据库服务,将新备库注册到集群。
8)拷贝.encpw文件到新备库,关闭新备库数据库服务,将新备库节点加入到集群。
9)验证集群所有节点状态信息和流复制信息。
10)重新启动集群验证。
KingbaseES R6 集群物理copy方式手工添加新备库节点的更多相关文章
- KingbaseES R6 集群主机锁冲突导致的主备切换案例
案例说明: 主库在业务高峰期间,客户执行建表等DDL操作,主库产生"AccessExclusiveLock "锁,导致大量的事务产生锁冲突,大量的会话堆积,客户端session ...
- KingbaseES R6 集群修改物理IP和VIP案例
在用户的实际环境里,可能有时需要修改主机的IP,这就涉及到集群的配置修改.以下以例子的方式,介绍下KingbaseES R6集群如何修改IP. 一.案例测试环境 操作系统: [KINGBASE@nod ...
- KingbaseES R6 集群通过备库clone在线添加新节点
案例说明: KingbaseES R6集群可以通过图形化方式在线添加新节点,但是在添加新节点clone环节时,是从主库copy数据到新的节点,这样在生产环境,如果数据量大,将会对主库的网络I/O造成压 ...
- KingbaseES R6 集群修改data目录
案例说明: 本案例是在部署完成KingbaseES R6集群后,由于业务的需求,集群需要修改data(数据存储)目录的测试.本案例分两种修改方式,第一种是离线修改data目录,即关闭整个集群后,修改数 ...
- KingbaseES R6 集群 recovery 参数对切换的影响
案例说明:在KingbaseES R6集群中,主库节点出现宕机(如重启或关机),会产生主备切换,但是当主库节点系统恢复正常后,如何对原主库节点进行处理,保证集群数据的一致性和安全,可以通过对repmg ...
- KingbaseES R6 集群sys_monitor.sh change_password一键修改集群用户密码
案例说明: kingbaseES R6集群用户密码修改,需要修改两处: 1)修改数据库用户密码(alter user): 2)修改.encpwd文件中用户密码: 可以通过sys_monitor.sh ...
- KingbaseES R6 集群创建流复制只读副本库案例
一.环境概述 [kingbase@node2 bin]$ ./ksql -U system test ksql (V8.0) Type "help" for help. test= ...
- KingbaseES R6 集群repmgr.conf参数'recovery'测试案例(一)
KingbaseES R6集群repmgr.conf参数'recovery'测试案例(一) 案例说明: 在KingbaseES R6集群中,主库节点出现宕机(如重启或关机),会产生主备切换,但是当主库 ...
- KingbaseES R6 集群启动‘incorrect command permissions for the virtual ip’故障案例
案例说明: KingbaseES R6集群启动时,出现"incorrect command permissions for the virtual ip"故障,本案例介绍了如何分析 ...
随机推荐
- SpringBoot项目集成Swagger启动报错: Failed to start bean 'documentationPluginsBootstrapper'; nested exception is
使用的Swagger版本是2.9.2.knife4j版本是2.0.4. SpringBoot 版本是2.6.2将SpringBoot版本回退到2.5.6就可以正常启动
- Unsupported major.minor version 52.0 (unable to load class org.apache.kafka.clients.producer.Produce异常解决方法
在控制台输入java -version,查看自己的版本是多少,我的查出来是1.8的.随后将服务器上的改为1.8的就可以了.
- shell 同时执行多任务下载视频
本文为博主原创,转载请注明出处: shell 脚本不支持多线程,但我们需要用shell 脚本同时跑多个任务时怎么让这些任务并发同时进行,可以采用在每个任务 后面 添加一个 & ,让其在后台运 ...
- Codeforces Round #792 (Div. 1 + Div. 2) A-E
Codeforces Round #792 (Div. 1 + Div. 2) A-E A 题目 https://codeforces.com/contest/1684/problem/A 题解 思路 ...
- 详解HashMap源码解析(下)
上文详解HashMap源码解析(上)介绍了HashMap整体介绍了一下数据结构,主要属性字段,获取数组的索引下标,以及几个构造方法.本文重点讲解元素的添加.查找.扩容等主要方法. 添加元素 put(K ...
- Unsupervised Person Re-identification by Soft Multilabel Learning
简介: 这是一篇19年CVPR的跨域无监督Re-ID论文,在Market1501和DukeMTMC-reID上分别达到了67.7%和67.1%的rank-1精度,算是一篇将准确度刷得比较高的论文了,在 ...
- Java开发学习(九)----IOC之核心容器
这里所说的核心容器,大家可以把它简单的理解为ApplicationContext,前面虽然已经用到过,但是并没有系统的介绍过,接下来咱们从以下几个问题入手来下容器的相关知识: 如何创建容器? 创建好容 ...
- Linux-Day01
Linux-Day01 课程内容 Linux简介 Linux安装 Linux常用命令 1. 前言 1.1 什么是Linux Linux是一套免费使用和自由传播的操作系统.说到操作系统,大家比较熟知的应 ...
- Python动态属性有什么用
Python 动态属性的概念可能会被面试问到,在项目当中也非常实用,但是在一般的编程教程中不会提到,可以进修一下. 先看一个简单的例子.创建一个 Student 类,我希望通过实例来获取每个学生的一些 ...
- 如何在CentOS上找出逐渐耗尽磁盘空间的目录和文件
起因 随着系统运行,CentOS空间不断减少,对此非常焦虑,到底磁盘空间被哪些新增文件占用了呢? 分析过程,主要使用du命令,逐层找出消耗空间的目录 1.在根目录下检索一下文件的占用情况,执行du命令 ...