基于Nginx+nginx-rtmp-module+ffmpeg搭建rtmp、hls流媒体服务器
上篇文章是基于Red5与ffmpeg实现rtmp处理NVR或摄像头的监控视频处理方案,有兴趣的朋友可以查看。
Nginx及nginx-rtmp-module安装
新建目录
mkdir /usr/local/mginx下载
cd /usr/local/nginx

wget http://nginx.org/download/nginx-1.12.2.tar.gz

wget https://codeload.github.com/arut/nginx-rtmp-module/zip/master
解压
tar -zxvf nginx-1.12.2.tar.gz

unzip nginx-rtmp-module-master.zip
安装
nginx的一些模块依赖一些lib库,在安装nginx之前,须先安装这些lib库,
依赖库主要有g++、gcc、openssl-devel、pcre-devel和zlib-devel 视情况执行如下命令安装
yum install gcc-c++

yum install pcre pcre-devel

yum install zlib zlib-devel

yum install openssl openssl--devel
nginx-rtmp-module模块安装
cd /usr/local/nginx/nginx-1.12.2

#完成rtmp模块安装

./configure --add-module=/usr/local/nginx/nginx-rtmp-module-master

make

make install
至此nginx及相关模块安装完毕
配置及启动服务支持rtmp
修改配置
cd /usr/local/nginx/conf

vim nginx.conf
#user nobody;
worker_processes 1;
#error_log logs/error.log;
#error_log logs/error.log notice;
#error_log logs/error.log info;
#pid logs/nginx.pid;
events {
worker_connections 1024;
}
rtmp {
server {
listen 1935;
chunk_size 4096;
application vod {
play /usr/local/nginx/html/hls;
}
application live {
live on;
}
}
}
http {
include mime.types;
default_type application/octet-stream;
#log_format main '$remote_addr - $remote_user [$time_local] "$request" '
# '$status $body_bytes_sent "$http_referer" '
# '"$http_user_agent" "$http_x_forwarded_for"';
#access_log logs/access.log main;
sendfile on;
#tcp_nopush on;
#keepalive_timeout 0;
keepalive_timeout 65;
#gzip on;
server {
listen 80;
server_name localhost;
#charset koi8-r;
#access_log logs/host.access.log main;
location / {
root html;
index index.html index.htm;
}
#error_page 404 /404.html;
# redirect server error pages to the static page /50x.html
#
error_page 500 502 503 504 /50x.html;
location = /50x.html {
root html;
}
#fastdfs 将 /group1/M00 映射到 /usr/local/fastdfs/file/data
location /group1/M00 {
alias /usr/local/fastdfs/file/data;
}
# proxy the PHP scripts to Apache listening on 127.0.0.1:80
#
#location ~ \.php$ {
# proxy_pass http://127.0.0.1;
#}
# pass the PHP scripts to FastCGI server listening on 127.0.0.1:9000
#
#location ~ \.php$ {
# root html;
# fastcgi_pass 127.0.0.1:9000;
# fastcgi_index index.php;
# fastcgi_param SCRIPT_FILENAME /scripts$fastcgi_script_name;
# include fastcgi_params;
#}
# deny access to .htaccess files, if Apache's document root
# concurs with nginx's one
#
#location ~ /\.ht {
# deny all;
#}
}
# another virtual host using mix of IP-, name-, and port-based configuration
#
#server {
# listen 8000;
# listen somename:8080;
# server_name somename alias another.alias;
# location / {
# root html;
# index index.html index.htm;
# }
#}
# HTTPS server
#
#server {
# listen 443 ssl;
# server_name localhost;
# ssl_certificate cert.pem;
# ssl_certificate_key cert.key;
# ssl_session_cache shared:SSL:1m;
# ssl_session_timeout 5m;
# ssl_ciphers HIGH:!aNULL:!MD5;
# ssl_prefer_server_ciphers on;
# location / {
# root html;
# index index.html index.htm;
# }
#}
}服务管理
cd /usr/local/nginx/sbin

nginx #启动服务

nginx -s stop #管理服务
直播
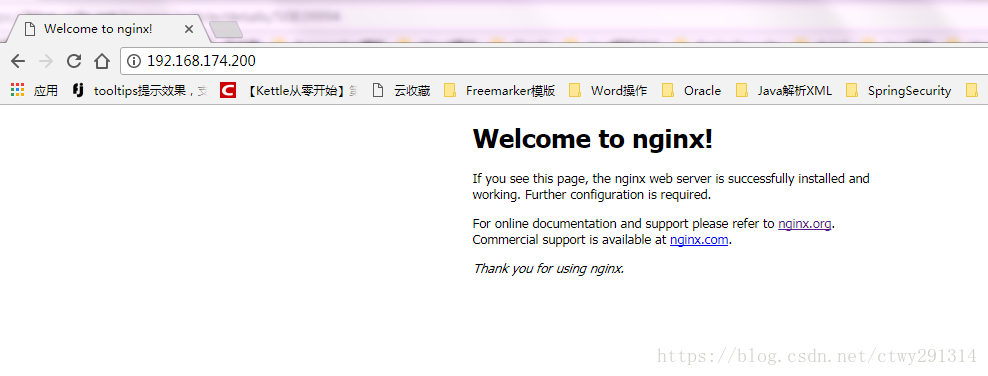
http服务测试 http://127.0.0.1/
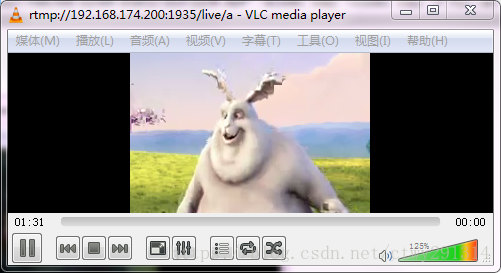
利用ffmpeg进行推流直播
ffmpeg -re -i "E:\ffmpeg-20180227-fa0c9d6-win64-static\bin\1234.mp4" -acodec copy -vcodec copy -f flv -an rtmp://192.168.174.200:1935/live/a 利用vlc测试,地址:rtmp://192.168.174.200:1935/live/a
点播
将本地mp4文件复制到/usr/local/nginx/html/hls
利用vlc测试:rtmp://192.168.174.200:1935/vod/1234.mp4
配置支持hls
工作流程
点播:准备好视频文件MP4,使用ffmpeg将其转成TS格式文件,然后继续使用ffmpeg将其切片并生成播放列表M3U8文件,将所得TS分片与M3U8文件放到nginx服务器目录下,开启http服务器后,同一局域网内用手机输入网络地址可查看点播视频。
直播:使用VLC软件将视频以rtsp流的形式发出,使用ffmpeg接收这个rtsp流并实时切割到http服务器下,开启服务器后,同一局域网内用手机输入网络地址可查看直播视频。
修改配置文件
cd /usr/local/nginx/conf

vim mime.types

#在 application/zip zip; 这一行后面增加2行:

application/x-mpegURL m3u8;

application/vnd.apple.mpegurl m3u8;

vim video/x-msvideo

#avi;行后,增加1行:

video/MP2T ts;
点播
使用ffmpeg将mp4格式文件转成TS格式文件
ffmpeg -y -i 1234.mp4 -vcodec copy -acodec copy -vbsf h264_mp4toannexb test.ts使用ffmpeg将TS文件切成ts分片并产生m3u8文件
ffmpeg -i test.ts -c copy -map 0 -f segment -segment_list playlist.m3u8 -segment_time 2 test%03d.ts将所得的ts分片和m3u8文件放到nginx\html目录下
vlc输入[ http://192.168.174.200:80/playlist.m3u8 ]即可看到点播视频
注:192.168.174.200是本机的局域网ip,也即http服务器的ip
直播
将视频以rtsp流的形式从vlc上发出来(具体方法请自查)
使用ffmpeg接收rtsp流并自动实时切片到http服务器下
ffmpeg -i rtsp://admin:admin@172.19.12.192/cam/realmonitor?channel=1&subtype=1 -c copy -vcodec h264 -f hls -hls_time 2.0 -hls_list_size 5 -hls_wrap 5 /usr/local/nginx/html/test.m3u8
vlc输入[ http://172.19.12.240/test.m3u8 ]即可看到直播视频
录制
通过ffmpeg向服务器推流,在服务器进行视频录制
ffmpeg -re -i "E:\ffmpeg-20180227-fa0c9d6-win64-static\bin\1234.mp4" -acodec copy -vcodec copy -f flv -an rtmp://192.168.174.200:1935/live/ahttp://192.168.174.200/hls/a/index.m3u8修改nginx.conf配置
rtmp {

    server {

	listen 1935;

	chunk_size 4096;

	application vod {

		play /usr/local/nginx/html/hls;

     	}

    	application live {

                live on;

	        hls on; #这个参数把直播服务器改造成实时回放服务器。

                wait_key on; #对视频切片进行保护,这样就不会产生马赛克了。

                hls_path /usr/local/nginx/html/hls; #切片视频文件存放位置。

                hls_fragment 10s;     #每个视频切片的时长。

                hls_playlist_length 60s;  #总共可以回看的事件,这里设置的是1分钟。

                hls_continuous on; #连续模式。

                hls_cleanup on;    #对多余的切片进行删除。

                hls_nested on;     #嵌套模式。

        }

    }

}
查看已经产生切片视频文件了。其中还有一个index.m3u8。
cd /usr/local/nginx/html/hls/a/

ls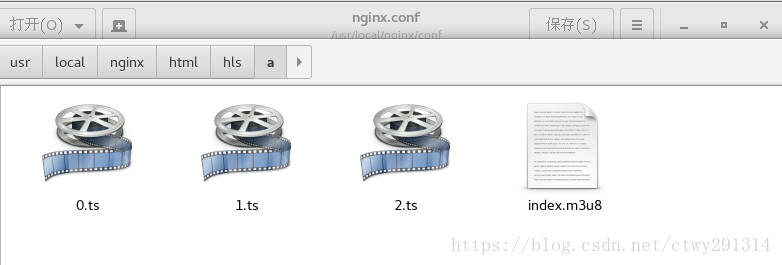
vlc输入[ http://192.168.174.200/hls/a/index.m3u8 ]即可看到视频
基于Nginx+nginx-rtmp-module+ffmpeg搭建rtmp、hls流媒体服务器的更多相关文章
- Ubuntu 14.10下基于Nginx搭建mp4/flv流媒体服务器(可随意拖动)并支持RTMP/HLS协议(含转码工具)
Ubuntu 14.10下基于Nginx搭建mp4/flv流媒体服务器(可随意拖动)并支持RTMP/HLS协议(含转码工具) 最近因为项目关系,收朋友之托,想制作秀场网站,但是因为之前一直没有涉及到这 ...
- nginx+ffmpeg搭建rtmp转播rtsp流的flash服务器
本文概要: nginx是非常优秀的开源服务器,用它来做hls或者rtmp流媒体服务器是非常不错的选择.本文介绍了一种简易方法快速搭建rtmp流媒体服务器,也叫rtsp转播,数据源不是读取文件,而是采用 ...
- CentOS6下基于Nginx搭建mp4/flv流媒体服务器
CentOS6下基于Nginx搭建mp4/flv流媒体服务器(可随意拖动)并支持RTMP/HLS协议(含转码工具) 1.先添加几个RPM下载源 1.1)安装RPMforge的CentOS6源 [roo ...
- Nginx搭建flv mp4流媒体服务器[转]
Nginx搭建flv mp4流媒体服务器 作者:二蛋 时间:December 1, 2014 分类:Note 环境:Centos 6.4 32bit 一.安装依赖包 1.安装zlib wget htt ...
- 用VLC Media Player搭建简单的流媒体服务器
VLC可以作为播放器使用,也可以搭建服务器. 在经历了Helix Server和Darwin Streaming Server+Perl的失败之后,终于找到了一个搭建流媒体简单好用的方法. 这个网址中 ...
- CentOS6下基于Nginx搭建mp4/flv流媒体服务器(可随意拖动)并支持RTMP/HLS协议(含转码工具)
1.先添加几个RPM下载源 1.1)安装RPMforge的CentOS6源 [root@AY130611215205Z ~]# wget -c http://pkgs.repoforge.or ...
- Windows使用Nginx+ffmpeg搭建RTMP服务器
简介Nginx是一款轻量级的Web 服务器/反向代理服务器及电子邮件(IMAP/POP3)代理服务器.nginx-rmtp-module是Nginx服务器的流媒体插件.nginx通过rtmp模块提供r ...
- rtmp与hls流媒体服务器搭建:ubuntu下Nginx搭建初探与rtmp-module的添加
关键词:Nignx(http服务器):rtmp,hls(流媒体服务) 前言:感谢开源,感谢战斗民族.现在在做流媒体服务的一些工作,流媒体服务器搭建的网上教程多入牛毛,但是细细查看,发现很多同志贴上来的 ...
- Nginx搭建hls流媒体服务器
第一种方案:ffmpeg+nginx 新的ffmpeg已经支持HLS.(本人也参与了代码供献,给自己做个广告:)) 点播: 生成hls分片: ffmpeg -i <媒体文件> ...
随机推荐
- HTML 和 CSS 画三角形和画多边行基本原理及实践
基本 HTML 标签 <div class = 'test'></div> 基本 CSS 代码 .test { width: 100px; height: 100px; bac ...
- mysql 时间差
SELECT TIMESTAMPDIFF(minute,'2019-01-01 00:00:00', '2019-01-01 01:30:00') 返回结果 90 类推,有 SELECT TIMEST ...
- matplotlib画图——条形图
一.单条 import numpy as np import matplotlib.pyplot as plt N = 5 y1 = [20, 10, 30, 25, 15] y2 = [15, 14 ...
- send()/ recv() 和 write()/ read()
Linux下数据的接收和发送write()/ read() Linux 不区分套接字文件和普通文件,使用 write() 可以向套接字中写入数据,使用 read() 可以从套接字中读取数据. 两台计算 ...
- fw: 专访许鹏:谈C程序员修养及大型项目源码阅读与学习
C家最近也有一篇关于如何阅读大型c项目源代码的文章,学习..融合.. -------------------- ref:http://www.csdn.net/article/2014-06-05 ...
- rtmp协议分析
最近需要做一个rtmp服务器,着手分析一下rtmp协议,开干. rtmp握手 这个推荐一篇文章讲解得比较透彻http://blog.sina.com.cn/s/blog_676e11660102v8b ...
- Go开发[八]goroutine和channel
进程和线程 进程是程序在操作系统中的一次执行过程,系统进行资源分配和调度的一个独立单位. 线程是进程的一个执行实体,是CPU调度和分派的基本单位,它是比进程更小的能独立运行的基本单位. 一个进程可以创 ...
- 使用xampp和HBuilder搭建php环境
1.首先你的电脑里面要有两个软件 xampp 和 HBuilder xampp: HBuilder: 这两个软件都是免费的,在安装过程中也无需费力,只要设置好路径就行了. 在xampp安装过程中,需 ...
- yarn.lock 是干什么的
概述 今天本地运行尤大的vue-hackernews-2.0,使用 yarn 命令安装,报错提示 node 版本必须大于7小于9,如下所示: error upath@1.0.4: The engine ...
- 设计模式(2): 响应store中数据的变化
概述 最近最近做项目的时候总会思考一些大的应用设计模式相关的问题,我把自己的思考记录下来,供以后开发时参考,相信对其他人也有用. store里面响应数据变化 通常情况下,我们会把数据存在store里面 ...