elementaryos5安装mysql5.7、php7.2、nginx1.14.0
一、mysql5.7
安装mysql5.7:
sudo apt-get install mysql-server-5.7
查看安装的mysql版本:
mysql -V
5.7版本mysql安装过程中以及安装完毕都不会提示设置密码
配置用户名密码:
su mysql
show databases;
use mysql;
update user set authentication_string=PASSWORD("123456") where user='root';
update user set plugin="mysql_native_password";
flush privileges;
quit;
修改完毕,重启mysql:
sudo /etc/init.d/mysql restart或者sudo systemctl restart mysql
二、安装nginx1.14.0:
sudo apt-get install nginx
访问下127.0.0.1看看有没有欢迎界面就行了
三、安装php7.2
sudo apt-get install php7.2-fpm php7.2-mysql
之后可能还需要gd之类的,可以sudo apt-get install php7.2然后按下tab会自动提示
四、配置nginx支持php,要不然访问php就变成了下载文件
备份一个先:
sudo cp /etc/nginx/sites-available/default /etc/nginx/sites-available/default.bak
编辑配置文件
sudo vim /etc/nginx/sites-available/default
##
# You should look at the following URL's in order to grasp a solid understanding
# of Nginx configuration files in order to fully unleash the power of Nginx.
# https://www.nginx.com/resources/wiki/start/
# https://www.nginx.com/resources/wiki/start/topics/tutorials/config_pitfalls/
# https://wiki.debian.org/Nginx/DirectoryStructure
#
# In most cases, administrators will remove this file from sites-enabled/ and
# leave it as reference inside of sites-available where it will continue to be
# updated by the nginx packaging team.
#
# This file will automatically load configuration files provided by other
# applications, such as Drupal or Wordpress. These applications will be made
# available underneath a path with that package name, such as /drupal8.
#
# Please see /usr/share/doc/nginx-doc/examples/ for more detailed examples.
##
# Default server configuration
#
server {
listen 80 default_server;
listen [::]:80 default_server;
# SSL configuration
#
# listen 443 ssl default_server;
# listen [::]:443 ssl default_server;
#
# Note: You should disable gzip for SSL traffic.
# See: https://bugs.debian.org/773332
#
# Read up on ssl_ciphers to ensure a secure configuration.
# See: https://bugs.debian.org/765782
#
# Self signed certs generated by the ssl-cert package
# Don't use them in a production server!
#
# include snippets/snakeoil.conf;
root /var/www/html;
# Add index.php to the list if you are using PHP
index index.html index.php index.htm index.nginx-debian.html;
server_name _;
location / {
# First attempt to serve request as file, then
# as directory, then fall back to displaying a 404.
try_files $uri $uri/ =404;
}
# pass PHP scripts to FastCGI server
#
location ~ \.php$ {
include snippets/fastcgi-php.conf;
# With php-fpm (or other unix sockets):
fastcgi_pass unix:/var/run/php/php7.2-fpm.sock;
# With php-cgi (or other tcp sockets):
# fastcgi_pass 127.0.0.1:9000;
# fastcgi_index index.php;
# include fastcgi_params;
}
# deny access to .htaccess files, if Apache's document root
# concurs with nginx's one
#
#location ~ /\.ht {
# deny all;
#}
}
# Virtual Host configuration for example.com
#
# You can move that to a different file under sites-available/ and symlink that
# to sites-enabled/ to enable it.
#
#server {
# listen 80;
# listen [::]:80;
#
# server_name example.com;
#
# root /var/www/example.com;
# index index.html;
#
# location / {
# try_files $uri $uri/ =404;
# }
#}
#
#虚拟主机
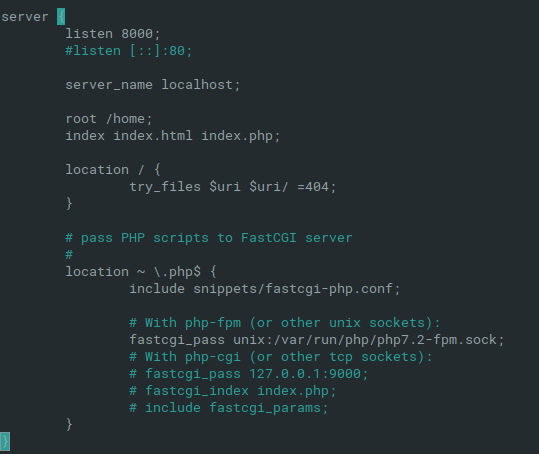
server {
listen 8000;
#listen [::]:80;
server_name localhost;
root /home;
index index.html index.php;
location / {
try_files $uri $uri/ =404;
}
# pass PHP scripts to FastCGI server
#
location ~ \.php$ {
include snippets/fastcgi-php.conf;
# With php-fpm (or other unix sockets):
fastcgi_pass unix:/var/run/php/php7.2-fpm.sock;
# With php-cgi (or other tcp sockets):
# fastcgi_pass 127.0.0.1:9000;
# fastcgi_index index.php;
# include fastcgi_params;
}
}
其中最重要的就是:如果需要虚拟主机,虚拟主机配置里面也要添加location ~ \.php$ {...
虚拟主机配置项:
sudo vim /etc/nginx/sites-available/default
文件底部添加就行了
elementaryos5安装mysql5.7、php7.2、nginx1.14.0的更多相关文章
- 2018.7.3 lnmp一键安装包无人值守版本 php7.2 + nginx1.14.0 + mariadb5.5 + centos7.1(1503) 环境搭建 + Thinkphp5.1.7 配置
给自己练习用的,整个过程追求一个简单粗暴,没有配置虚拟主机,现在记录一下过程. 1. 进入到lnmp解压缩后的文件夹conf/rewrite,把thinkphp.conf复制一份到/usr/local ...
- nginx1.14.0下载、安装、启动
nginx1.14.0下载及安装 wget http://nginx.org/download/nginx-1.14.0.tar.gztar -zxvf nginx-1.14.0.tar.gzcd n ...
- CentOS 安装Nginx1.14.0
原文地址:http://www.cnblogs.com/ascd-eg/p/9275441.html 一.安装所需环境 1.gcc 安装 yum install gcc-c++ ...
- 编译安装和apt安装Nginx1.14.0
安装依赖 yum -y install gcc gcc-c++yum -y install zlib zlib-devel openssl openssl-devel pcre-devel 在Ubun ...
- CentOS7 安装nginx-1.14.0
nginx源码包:http://nginx.org/en/download.html 1.安装gcc gcc是用来编译下载下来的nginx源码 yum install gcc-c++ 2.安装pcre ...
- Centos7安装Nginx1.14.0
一.官网下载 http://nginx.org/en/download.html 版本说明: Nginx官网提供了三个类型的版本 Mainline version:Mainline 是 Nginx 目 ...
- Nginx1.14.0+ModSecurity实现简单的WAF
一.编译安装Nginx 1.安装依赖环境 $ yum -y install gcc-c++ flex bison yajl yajl-devel curl-devel curl GeoIP-devel ...
- nginx1.14.0版本https加密配置
修改host文件,为最后访问域名准备 C:\Windows\System32\drivers\etc host文件目录192.168.10.140 www.joyce.com 在最后添加这个自定义域名 ...
- Scrapy安装报错 Microsoft Visual C++ 14.0 is required 解决办法
Scrapy安装报错 Microsoft Visual C++ 14.0 is required 解决办法原因:Scrapy需要的组 twisted 需要 C++环境编译. 方法一:根据错误提示去对应 ...
随机推荐
- 音视频开发-FFmpeg
音视频开发是个非常复杂的,庞大的开发话题,初涉其中,先看一下结合 OEIP(开源项目) 新增例子. 可以打开flv,mp4类型文件,以及rtmp协议音视频数据,声音的播放使用SDL. 把采集的麦/声卡 ...
- Python数据库之数据库基本操作
安装(基于centos) yum -y install mariadb mariadb-server # centos7版本 yum -y install mysql mysql-server #ce ...
- C - Monkey and Banana
文章目录 题意如下 思路如下 题解如下: A group of researchers are designing an experiment to test the IQ of a monkey. ...
- FarmCraft --(树形DP)
题目描述 In a village called Byteville, there are houses connected with N-1 roads. For each pair of hous ...
- 【tensorflow2.0】自动微分机制
神经网络通常依赖反向传播求梯度来更新网络参数,求梯度过程通常是一件非常复杂而容易出错的事情. 而深度学习框架可以帮助我们自动地完成这种求梯度运算. Tensorflow一般使用梯度磁带tf.Gradi ...
- 使用mpvue开发小程序如何定义全局变量
我们创建好mpvue项目之后,找到src/main.js打开在后面添加一行代码 (注意:不能在const app = new Vue(App) 之前添加) Vue.prototype.globalDa ...
- MTK Android Driver :Lcm
MTK Android Driver :lcm 1.怎样新建一个LCD驱动 LCD模组主要包括LCD显示屏和驱动IC.比如LF040DNYB16a模组的驱动IC型号为NT35510.要在MTK6577 ...
- 【网络编程01】socket的基础知识-简单网络通信程序
1.什么是socket socket(套接字),简单来说是IP地址与端口(port)的组合,可以与远程主机的应用程序进行通信.通过IP地址可以确定一台主机,而通过端口则可以确定某一个应用程序.IP+端 ...
- python3(四)list tuple
# !/usr/bin/env python3 # -*- coding: utf-8 -*- # list是一种有序的集合,可以随时添加和删除其中的元素. classmates = ['Michae ...
- 理解class.forName() ---使用jdbc方式链接数据库时会经常看到这句代码
目录(?)[-] 官方文档 类装载 两种装载方法的区别 不同的类装载器 是否实例化类 在jdbc链接数据库中的应用 资源 原文地址:http://yanwushu.sinaapp.com/clas ...