apache CXF quickstart
1下载
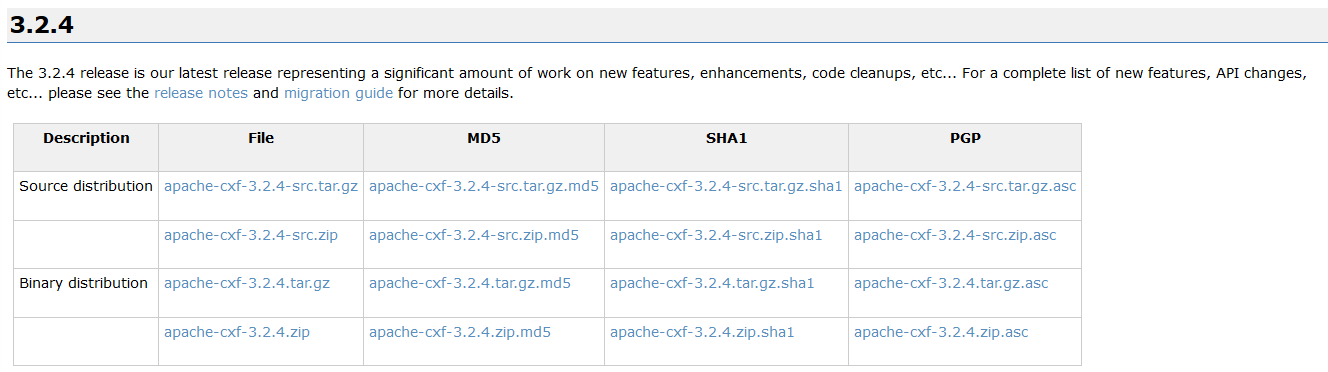
官网: cxf.apache.org
下载 CXF 的开发包:

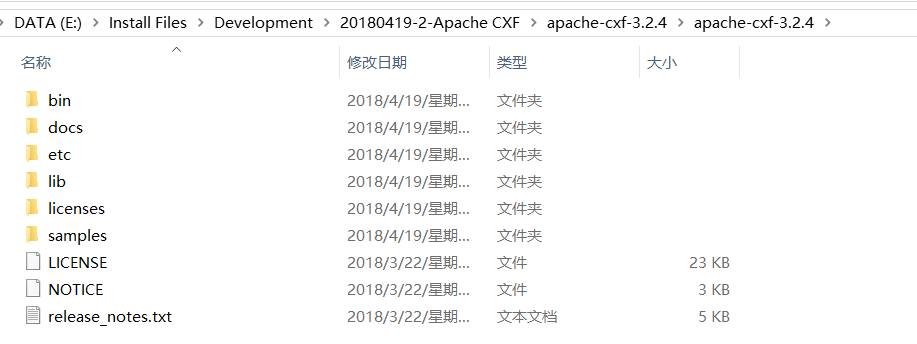
解压上面的 zip 文件 :
2介绍
1什么是cxf
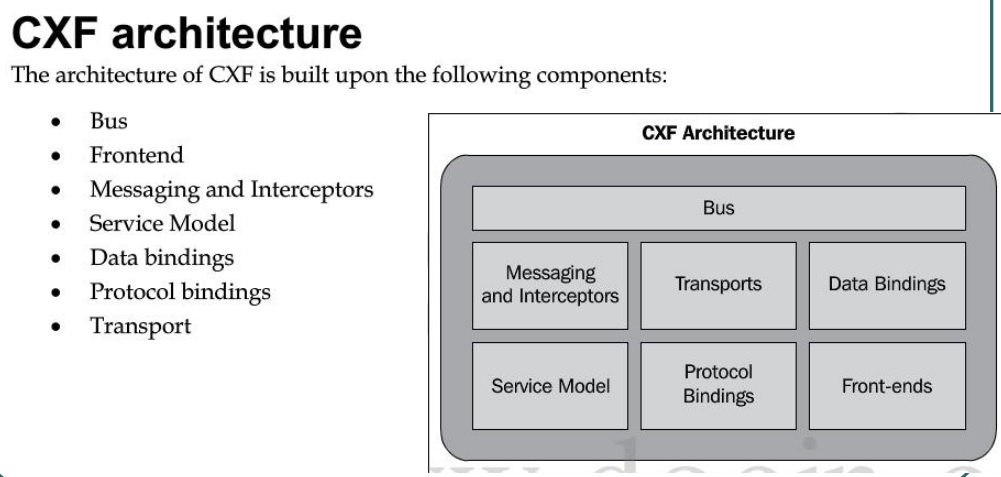
Apache CXF™ is an open source services framework. CXF helps you build and develop services using frontend programming APIs, like JAX-WS and JAX-RS. These services can speak a variety of protocols such as SOAP, XML/HTTP, RESTful HTTP, or CORBA and work over a variety of transports such as HTTP, JMS or JBI.

2cxf 结构
3 入门案例(服务端开发)
第一步: 创建动态 web 项目
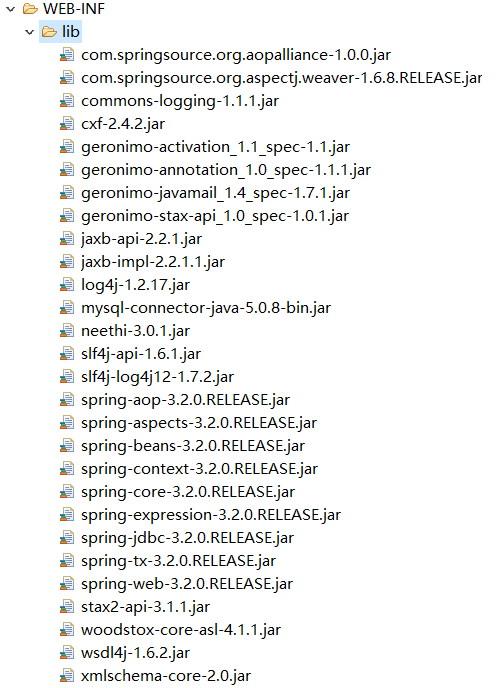
第二步: 导入 CXF 相关 jar 包
第三步: 在 web.xml 中配置 CXF 框架
配置cxf框架提供的一个servlet
<?xml version="1.0" encoding="UTF-8"?>

<web-app xmlns:xsi="http://www.w3.org/2001/XMLSchema-instance" xmlns="http://java.sun.com/xml/ns/javaee" xsi:schemaLocation="http://java.sun.com/xml/ns/javaee http://java.sun.com/xml/ns/javaee/web-app_2_5.xsd" id="WebApp_ID" version="2.5">

  <display-name>webservice_cxf_service</display-name>

  <!--配置 CXF 框架提供的 Servlet  -->

  <servlet>

      <servlet-name>cxf</servlet-name>

      <servlet-class>org.apache.cxf.transport.servlet.CXFServlet</servlet-class>

      <!-- 通过初始化参数指定 CXF 框架的配置文件位置 -->

      <init-param>

          <param-name>config-location</param-name>

          <param-value>classpath:cxf.xml</param-value>

      </init-param>

  </servlet>

  <servlet-mapping>

      <servlet-name>cxf</servlet-name>

      <url-pattern>/service/*</url-pattern>

  </servlet-mapping>

  <welcome-file-list>

    <welcome-file>index.html</welcome-file>

    <welcome-file>index.htm</welcome-file>

    <welcome-file>index.jsp</welcome-file>

    <welcome-file>default.html</welcome-file>

    <welcome-file>default.htm</welcome-file>

    <welcome-file>default.jsp</welcome-file>

  </welcome-file-list>

</web-app>
第四步: 在类路径下提供 cxf.xml
(其实就是一个 spring 配置文件)
<?xml version="1.0" encoding="UTF-8"?>

<beans xmlns="http://www.springframework.org/schema/beans"

xmlns:xsi="http://www.w3.org/2001/XMLSchema-instance"

xmlns:jaxws="http://cxf.apache.org/jaxws"

xmlns:soap="http://cxf.apache.org/bindings/soap"

xsi:schemaLocation="http://www.springframework.org/schema/beans

                    http://www.springframework.org/schema/beans/spring-beans.xsd

                    http://cxf.apache.org/bindings/soap

                    http://cxf.apache.org/schemas/configuration/soap.xsd

                    http://cxf.apache.org/jaxws

                    http://cxf.apache.org/schemas/jaxws.xsd">

    <!-- 引入CXF Bean定义如下,早期的版本中使用 -->

    <import resource="classpath:META-INF/cxf/cxf.xml" />

    <import resource="classpath:META-INF/cxf/cxf-extension-soap.xml" />

    <import resource="classpath:META-INF/cxf/cxf-servlet.xml" />

</beans>
第五步: 开发一个接口和实现类
注解必须放到接口上
package com.test.cxf;

import javax.jws.WebService;

@WebService

public interface IHelloService {

    public String sayHello(String name);

}
package com.test.cxf;

public class HelloServiceImpl implements IHelloService {

    @Override

    public String sayHello(String name) {

        System.out.println("基于CXF开发的服务端sayHello方法被调用了");

        return "hello:"+name;

    }

}
第六步: 在 cxf.xml 中注册服务
【最关键的一步】
<?xml version="1.0" encoding="UTF-8"?>

<beans xmlns="http://www.springframework.org/schema/beans"

xmlns:xsi="http://www.w3.org/2001/XMLSchema-instance"

xmlns:jaxws="http://cxf.apache.org/jaxws"

xmlns:soap="http://cxf.apache.org/bindings/soap"

xsi:schemaLocation="http://www.springframework.org/schema/beans

                    http://www.springframework.org/schema/beans/spring-beans.xsd

                    http://cxf.apache.org/bindings/soap

                    http://cxf.apache.org/schemas/configuration/soap.xsd

                    http://cxf.apache.org/jaxws

                    http://cxf.apache.org/schemas/jaxws.xsd">

    <!-- 引入CXF Bean定义如下,早期的版本中使用 -->

    <import resource="classpath:META-INF/cxf/cxf.xml" />

    <import resource="classpath:META-INF/cxf/cxf-extension-soap.xml" />

    <import resource="classpath:META-INF/cxf/cxf-servlet.xml" />

    <bean name="helloService" class="com.test.cxf.HelloServiceImpl"></bean>

    <!-- 注册服务 -->

    <jaxws:server id="myService" address="/cxfService">

        <jaxws:serviceBean>

            <ref bean="helloService"/>

        </jaxws:serviceBean>

    </jaxws:server>

</beans>
http://ip:port/projectName/service/address;上面配置的 address 只是这个路径的最后一部
分。
如果发布到 tomcat 上, 那访问地址就是:
http://localhost:8080/webservice_cxf_service/service/cxfService?wsdl;
第七步:发布项目到tomcat,查看效果
浏览器输入http://localhost:8080/webservice_cxf_service/service/cxfService?wsdl

4 入门案例(客户端开发)
方式一: 使用 jdk 提供的 wsimport 命令生成本地代码完成调用
方式二: 使用 CXF 提供的方式(重点)
第一步:创建项目导jar包
创建 Java 项目并导入 CXF 相关 jar 包
第二步:生成本地代码
使用 wsimport 或者 CXF 提供 wsdl2java 生成本地代码, 只需要生成接口文件
wsdl2java -d . -p com.test.cxf http://localhost:8080/webservice_cxf_service/service/cxfService?wsdl


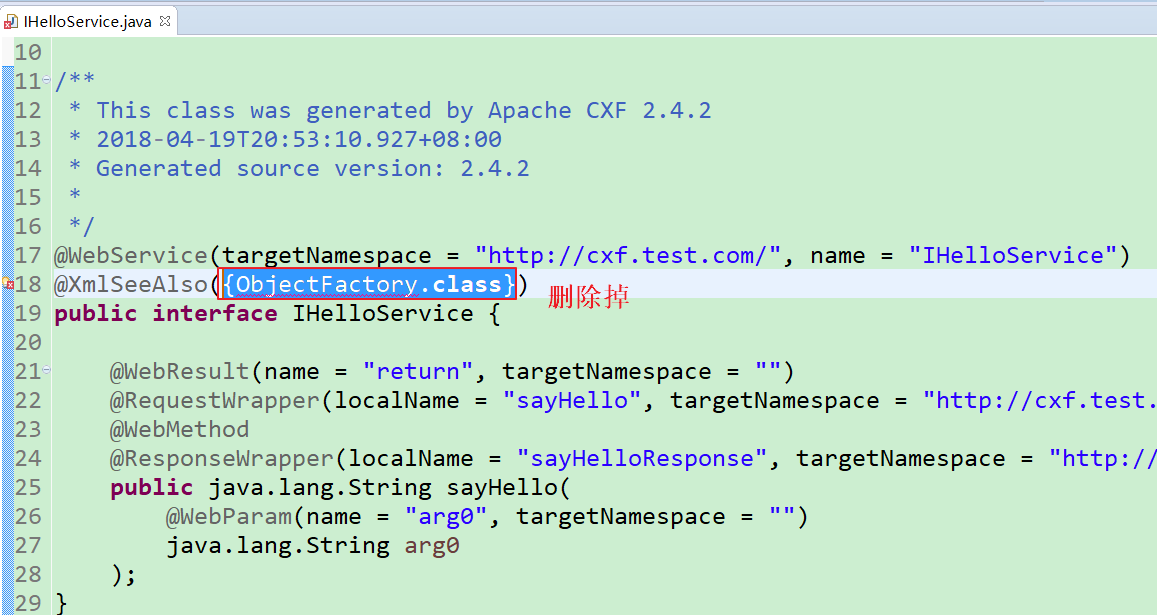
第三步: 将接口文件复制到项目中
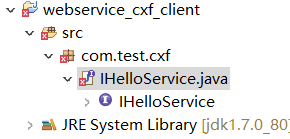
会报错,需要删除ObjectFactory.class

第四步:编写配置文件
提供 spring 配置文件, 注册客户端代理对象
xmlns:jaxws="http://cxf.apache.org/jaxws"

xmlns:soap="http://cxf.apache.org/bindings/soap"

xsi:schemaLocation="http://www.springframework.org/schema/beans

                    http://www.springframework.org/schema/beans/spring-beans.xsd

                    http://cxf.apache.org/bindings/soap

                    http://cxf.apache.org/schemas/configuration/soap.xsd

                    http://cxf.apache.org/jaxws

                    http://cxf.apache.org/schemas/jaxws.xsd">

    <!-- 引入CXF Bean定义如下,早期的版本中使用 -->

    <import resource="classpath:META-INF/cxf/cxf.xml" />

    <import resource="classpath:META-INF/cxf/cxf-extension-soap.xml" />

    <import resource="classpath:META-INF/cxf/cxf-servlet.xml" />

    <!-- 注册cxf客户端对象,通过spring框架创建这个代理对象,使用代理对象实现远程调用 -->

    <jaxws:client id="myClient"

            address="http://192.168.31.247:8080/webservice_cxf_service/service/cxfService"

            serviceClass="com.test.cxf.IHelloService">

    </jaxws:client>

</beans>
第五步:书写测试类
读取 spring 配置文件, 创建 spring 工厂, 从工厂中获取代理对象, 实现远程调用
package com.test.cxf; import org.springframework.context.ApplicationContext;
import org.springframework.context.support.ClassPathXmlApplicationContext; public class App { public static void main(String[] args) {
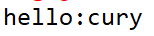
ApplicationContext ac = new ClassPathXmlApplicationContext("cxf.xml"); IHelloService proxy = (IHelloService) ac.getBean("myClient"); String s = proxy.sayHello("cury"); System.out.println(s);
}
}
第六步:运行查看结果
客户端:
tomcat端:

apache CXF quickstart的更多相关文章
- Spring 4 集成Apache CXF开发JAX-RS Web Service
什么是JAX-RS 在JSR-311规范中定义,即Java API for RESTful Web Services,一套Java API,用于开发 RESTful风格的Webservice. 工程概 ...
- Apache CXF实现WebService发布和调用
第一种方法:不用导入cxf jars 服务端: 1. 新建Web工程 2.新建接口和实现类.测试类 目录结构图如下: 接口代码: package com.cxf.spring.service; imp ...
- Apache CXF实现WebService入门教程(附完整源码)
Apache CXF实现WebService非常简单实用,只需要几步就可以实现一个简单的web service. 首先我们需要新建一个maven项目,在pom中添加依赖和jetty作为测试的web s ...
- Apache CXF Webservice入门
1.步骤一览 关于CXF的介绍请移步官网.百科,这里仅供初次使用者入门. 2.步骤详情 2.1.环境准备 apache-cxf-3.0.0.zip下载 jdk1.7.0_51 Eclipse4.3.0 ...
- Apache CXF自定义拦截器
为什么设计拦截器?1.为了在webservice请求过程中,能动态操作请求和响应数据,CXF设计了拦截器 拦截器分类: 1.按所处的位置分:服务器端拦截器,客户端拦截器. 2.按消息的方向分:入拦截器 ...
- apache CXF wsdl2java工具的使用
cxf的wsdl2java命令和JDK的wsimport命令的区别和使用 JDK提供了一个wsimport.exe的命令,主要是用于将WebService生成客户端代码,然后好调用WebService ...
- 解决Apache CXF 不支持传递java.sql.Timestamp和java.util.HashMap类型问题
在项目中使用Apache开源的Services Framework CXF来发布WebService,CXF能够很简洁与Spring Framework 集成在一起,在发布WebService的过程中 ...
- org.apache.cxf.transport.servlet.CXFServlet cannot be cast to javax.servlet.Servlet
java.lang.ClassCastException: org.apache.cxf.transport.servlet.CXFServlet cannot be cast to javax.se ...
- Apache CXF 103 CXF Basics - partial
本Spike记录中内容,如无特别指出,均引用[1]. 0 引言 0.1 基本的Web服务术语 XML 业界的结构化交换信息表示的事实上的标准. XML namespace是在XML文档中提供唯一的命名 ...
随机推荐
- HTML 5与CSS 3权威指南(第2版·上册) 中文pdf扫描版
HTML5与CSS3权威指南(第2版·上册)已经成为HTML 5与CSS 3图书领域的一个标杆,被读者誉为“系统学习HTML 5与CSS 3技术的最佳指导参考书之一”和“Web前端工程师案头必备图书之 ...
- asp.net 中input radio checked 无效
把Jq代码中的$(...).attr("checked",true) 换成$(...).prop("checked",true) ,
- 构建空Datatable
方法一 DT = new DataTable(); DataRow DR = DT.NewRow(); //构建列(名称,数据类型) DT.Columns.Add("代码", Ty ...
- ASP.NET MVC Controller 编程所涉及到的常用属性成员
Controller (System.Web.Mvc.Controller) 1.获取路由中的各个值 Request.RequestContext.RouteData.Values["id& ...
- 关于命名空间 namespace的总结
namespace 有作用的类型 类.函数.常量关键字namespace必须在所有代码之前 除用于编码的declare语句 namespace Myproject; const A = 1; cla ...
- 【BZOJ4555】[TJOI&HEOI2016]求和 斯特林数+NTT
Description 在2016年,佳媛姐姐刚刚学习了第二类斯特林数,非常开心. 现在他想计算这样一个函数的值: S(i, j)表示第二类斯特林数,递推公式为: S(i, j) = j ∗ S(i ...
- BZOJ2668:[CQOI2012]交换棋子(费用流)
题目描述 有一个n行m列的黑白棋盘,你每次可以交换两个相邻格子(相邻是指有公共边或公共顶点)中的棋子,最终达到目标状态.要求第i行第j列的格子只能参与mi,j次交换. 输入输出格式 输入格式: 第一行 ...
- PHP编码技巧
原则 正确实现功能 执行速度与快 占系统资源少 后期维护方便 编程注意 1.命名很重要 2.适当的使用注释 3.使用一个变量,需要初始化 4.优先使用单引号 $row['id']的效率是$row[id ...
- 蓝牙4.0BLE抓包(三) – 扫描请求和扫描响应
版权声明:本文为博主原创文章,转载请注明作者和出处. 作者:强光手电[艾克姆科技-无线事业部] 1. 扫描请求和扫描响应 广播包含扫描请求SCAN_REQ和扫描响应SCAN_RSP. 扫描请求: ...
- 利用CountDownLatch和Semaphore测试案例
package com.cxy; import java.util.HashMap; import java.util.Map; import java.util.concurrent.CountDo ...